Page 45 of 161

45
INDICATORS AND INSTRUMENTSINDIC INDICINDIC INDIC
INDIC
A AA A
A
T TT T
T
ORS ORSORS ORS
ORS
SRS SRSSRS SRS
SRS
Sedimenter
SERVICE SERVICESERVICE SERVICE
SERVICE
SRS Indic SRS IndicSRS Indic SRS Indic
SRS Indic
a aa a
a
t tt t
t
or or or or
or ( Where air bag is fitted)
SRS indicator light on instrument cluster illuminates
approx. for 5 sec. when the ignition key is turned to
‘ON’ position. This is normal and indicates the system is
performing a self check. If the light does not illuminate
when ignition is ON or remains illuminated after initial
self check and while driving or flashes, fault may exist in
the system, get the defect rectified by authorised
service outlet.
‘SERVICE’ Indicator ‘SERVICE’ Indicator‘SERVICE’ Indicator ‘SERVICE’ Indicator
‘SERVICE’ Indicator
This lamp indicates engine condition,when a
malfunctioning occurs in Engine/ Engine Management
System (EMS). This lamp indicates as below :
1. Comes ‘ON’ when key is in ‘IGN’ position and goes
‘OFF’ when engine is running.
2. remains ‘ON’ in engine running if malfunctioning
occurs.
3. When ‘SERVICE’ indicator is ‘ON’ during running,
engine performance (power) deteriorates marginally
in some cases and drastically. In few cases, please get
the malfunctioning rectified from nearest authorised
service outlet as soon as possible.W WW W
W
a aa a
a
t tt t
t
er in fuel sedimen er in fuel sedimener in fuel sedimen er in fuel sedimen
er in fuel sedimen
t tt t
t
er Indic er Indicer Indic er Indic
er Indic
a aa a
a
t tt t
t
or oror or
or
This light indicates excess water accumulation in
sedimenter which will come ‘ON’ when ignition is turned
‘ON’ and will go ‘OFF’ in 5 sec. When this lamp comes
‘ON’, water needs to be drained from sedimenter
immediately
. (Please refer page 109 for location and
procedure).
When the indication comes ‘ON’ the vehicle will run on
‘Limp home mode’ where there is a drastic reduction in the
performance of the vehicle.
CAUTION CAUTIONCAUTION CAUTION
CAUTION
If water is not drained from the sedimenter it can cause
serious damage to the fuel injection system.
ProCarManuals.com
Page 46 of 161

46
INDICATORS AND INSTRUMENTSINDIC INDICINDIC INDIC
INDIC
A AA A
A
T TT T
T
ORS ORSORS ORS
ORS
Malfunction Indicator Lamp - MIL (if Malfunction Indicator Lamp - MIL (ifMalfunction Indicator Lamp - MIL (if Malfunction Indicator Lamp - MIL (if
Malfunction Indicator Lamp - MIL (if
installed) installed)installed) installed)
installed)
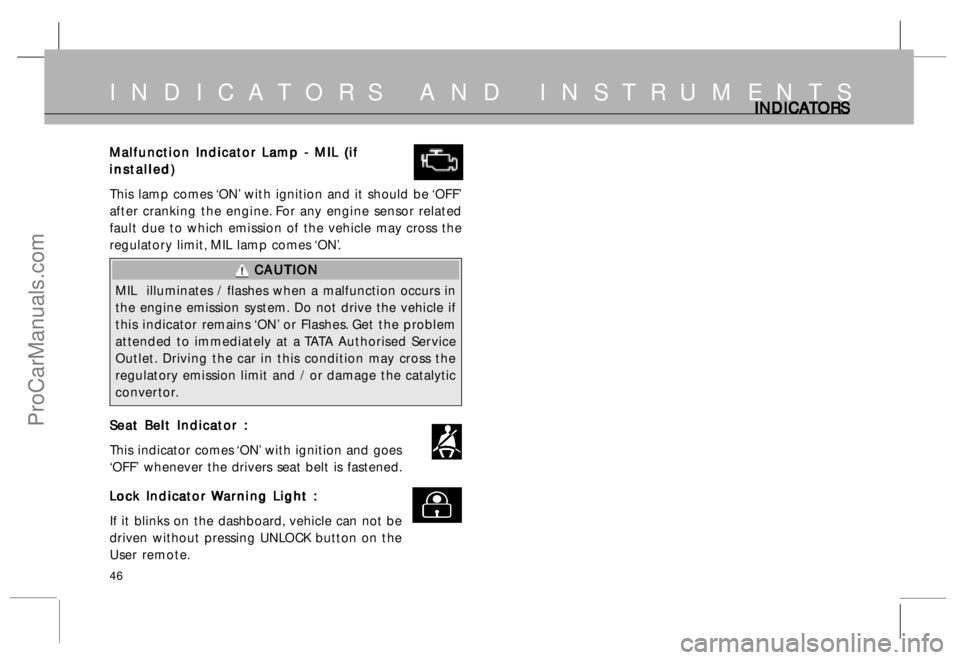
This lamp comes ‘ON’ with ignition and it should be ‘OFF’
after cranking the engine. For any engine sensor related
fault due to which emission of the vehicle may cross the
regulatory limit, MIL lamp comes ‘ON’.
CAUTION CAUTIONCAUTION CAUTION
CAUTION
MIL illuminates / flashes when a malfunction occurs in
the engine emission system. Do not drive the vehicle if
this indicator remains ‘ON’ or Flashes. Get the problem
attended to immediately at a TATA Authorised Service
Outlet. Driving the car in this condition may cross the
regulatory emission limit and / or damage the catalytic
convertor.
Seat Belt Indicator : Seat Belt Indicator :Seat Belt Indicator : Seat Belt Indicator :
Seat Belt Indicator :
This indicator comes ‘ON’ with ignition and goes
‘OFF’ whenever the drivers seat belt is fastened.
L LL L
L
o oo o
o
ck Indic ck Indicck Indic ck Indic
ck Indic
a aa a
a
t tt t
t
or or or or
or
W WW W
W
ar arar ar
ar
ning Ligh ning Lighning Ligh ning Ligh
ning Ligh
t : t :t : t :
t :
If it blinks on the dashboard, vehicle can not be
driven without pressing UNLOCK button on the
User remote.
ProCarManuals.com
Page 49 of 161

49
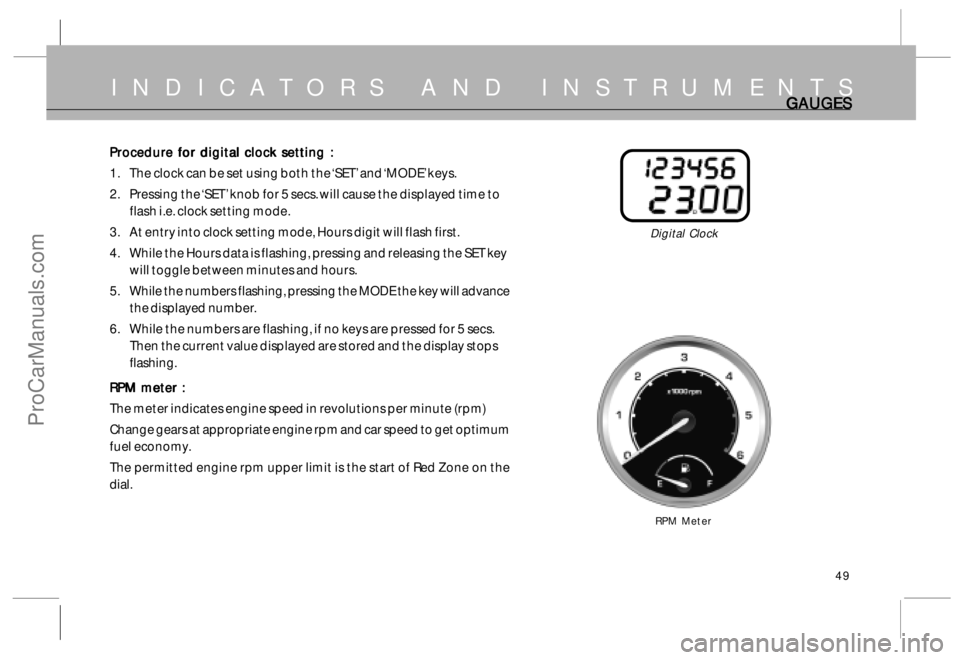
Procedure for digital clock setting : Procedure for digital clock setting :Procedure for digital clock setting : Procedure for digital clock setting :
Procedure for digital clock setting :
1. The clock can be set using both the ‘SET’ and ‘MODE’ keys.
2. Pressing the ‘SET’ knob for 5 secs. will cause the displayed time to
flash i.e. clock setting mode.
3. At entry into clock setting mode, Hours digit will flash first.
4. While the Hours data is flashing, pressing and releasing the SET key
will toggle between minutes and hours.
5. While the numbers flashing, pressing the MODE the key will advance
the displayed number.
6. While the numbers are flashing, if no keys are pressed for 5 secs.
Then the current value displayed are stored and the display stops
flashing.
RPM meter : RPM meter :RPM meter : RPM meter :
RPM meter :
The meter indicates engine speed in revolutions per minute (rpm)
Change gears at appropriate engine rpm and car speed to get optimum
fuel economy.
The permitted engine rpm upper limit is the start of Red Zone on the
dial.
INDICATORS AND INSTRUMENTSGA GAGA GA
GA
UGES UGESUGES UGES
UGES
RPM Meter
Digital Clock
ProCarManuals.com
Page 50 of 161

50
T TT T
T
emp empemp emp
emp
er erer er
er
a aa a
a
tur turtur tur
tur
e G e Ge G e G
e G
auge augeauge auge
auge
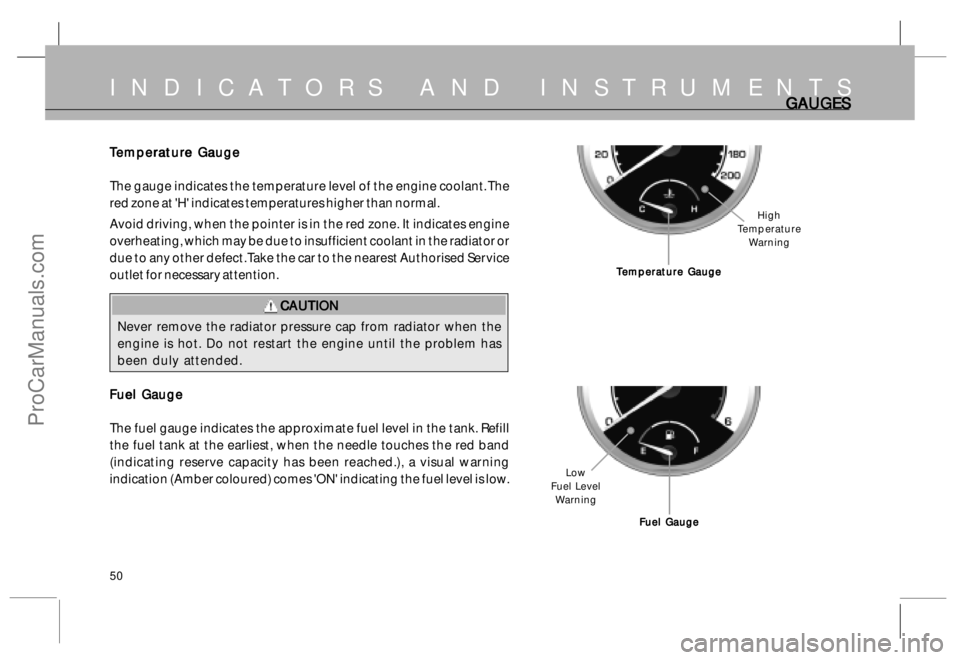
High
Temperature
Warning
T TT T
T
emp empemp emp
emp
er erer er
er
a aa a
a
tur turtur tur
tur
e G e Ge G e G
e G
auge augeauge auge
auge
The gauge indicates the temperature level of the engine coolant. The
red zone at 'H' indicates temperatures higher than normal.
Avoid driving, when the pointer is in the red zone. It indicates engine
overheating, which may be due to insufficient coolant in the radiator or
due to any other defect. Take the car to the nearest Authorised Service
outlet for necessary attention.
CAUTION CAUTIONCAUTION CAUTION
CAUTION
Never remove the radiator pressure cap from radiator when the
engine is hot. Do not restart the engine until the problem has
been duly attended.
Fuel Gauge Fuel GaugeFuel Gauge Fuel Gauge
Fuel Gauge
The fuel gauge indicates the approximate fuel level in the tank. Refill
the fuel tank at the earliest, when the needle touches the red band
(indicating reserve capacity has been reached.), a visual warning
indication (Amber coloured) comes 'ON' indicating the fuel level is low.
INDICATORS AND INSTRUMENTSGA GAGA GA
GA
UGES UGESUGES UGES
UGES
Fuel Gauge Fuel GaugeFuel Gauge Fuel Gauge
Fuel Gauge Low
Fuel Level
Warning
ProCarManuals.com
Page 53 of 161

53
COMFORT AND CONVENIENCER RR R
R
OOF MOUNTED A.C. OOF MOUNTED A.C.OOF MOUNTED A.C. OOF MOUNTED A.C.
OOF MOUNTED A.C.
UNIT UNIT UNIT UNIT
UNIT
The air mix control switch is on the LH side of the panel. By rotating
the control switch clockwise (towards red segment) the air temperature
from vents will increase. Rotate anticlockwise (towards blue segment)
to reduce the air temperature. The switch on the top centre is for the
4 speed blower. Any of the blower speed could be chosen as per
requirement. The 2 switches at the centre are for A.C. control as follows:
S SS S
S
wit witwit wit
wit
ch ch ch ch
ch
‘‘ ‘‘
‘
A AA A
A
’’ ’’
’
- Press for recirculation mode. Release for fresh air.
S SS S
S
wit witwit wit
wit
ch ch ch ch
ch
‘B ‘B‘B ‘B
‘B
’’ ’’
’
- For switching ‘ON’ or ‘OFF’ front cooling. It is marked by ‘F’
NOTICE NOTICENOTICE NOTICE
NOTICE
When the A.C. is switched ON the engine low idling RPM increases
marginally to adjust for A.C. compressor load. When the thermostat
cuts off A.C., engine idling RPM decreases to lower adjusted value.
A AA A
A
B BB B
B
A. A.A. A.
A. Air Recirculation Switch
B. B.B. B.
B. Front A.C. ON/OFF Switch
F
ProCarManuals.com
Page 54 of 161

54
ROOF MOUNTED A.C. ROOF MOUNTED A.C.ROOF MOUNTED A.C. ROOF MOUNTED A.C.
ROOF MOUNTED A.C.
AND FR AND FR AND FR AND FR
AND FR
ONT ONT ONT ONT
ONT
WINDSHIELD WINDSHIELDWINDSHIELD WINDSHIELD
WINDSHIELD
,, ,,
,
DOOR GL DOOR GL DOOR GL DOOR GL
DOOR GL
ASS DEMISTER ASS DEMISTERASS DEMISTER ASS DEMISTER
ASS DEMISTER
Roof Mounted A.C. Unit (if fitted) Roof Mounted A.C. Unit (if fitted)Roof Mounted A.C. Unit (if fitted) Roof Mounted A.C. Unit (if fitted)
Roof Mounted A.C. Unit (if fitted)
The roof mounted A.C. unit is installed on your vehicle. The blower
switch has 4 positions -
‘HIGH ‘HIGH‘HIGH ‘HIGH
‘HIGH
’’ ’’
’
,, ,,
,
‘‘ ‘‘
‘
MEDIUM MEDIUMMEDIUM MEDIUM
MEDIUM
’’ ’’
’
,, ,,
,
‘L ‘L‘L ‘L
‘L
O OO O
O
W WW W
W
’’ ’’
’
and
‘‘ ‘‘
‘
OFF’ OFF’OFF’ OFF’
OFF’
.. ..
. The
switch is located on LH side of roof A.C. console. Air flow direction
can be adjusted by adjusting the air vents.
The roof AC can be switched on provided the front AC is ‘ON’.
However, the blower of the roof AC unit can be operated
independently.
Front Windshield and Door Glass Demister Front Windshield and Door Glass DemisterFront Windshield and Door Glass Demister Front Windshield and Door Glass Demister
Front Windshield and Door Glass Demister
To remove frost or ice from the windshield and side windows, quickly.
1. Start the engine & accelerate to warm up.
2. Select defrost/demisit mode on air flow direction control.
3. Set blower and air mix temperature control to maximum hot.
These settings direct all air flow to the defroster vents at the base of
windshield and side window defroster vents. The hot air flow clear the
frost from windows.
Make sure you have clear view through all windows before driving.
You may turn back air mix and air flow control to desired position,
while driving.
COMFORT AND CONVENIENCE
Roof A.C. Blower Switch
HI HIHI HI
HI
LO LOLO LO
LO
OFF OFFOFF OFF
OFF
ProCarManuals.com
Page 69 of 161
69
PRIOR TO DRIVING
• •• •
•Opening bonnet Opening bonnetOpening bonnet Opening bonnet
Opening bonnet
• •• •
•Fuel level check Fuel level checkFuel level check Fuel level check
Fuel level check
• •• •
•Engine oil level check Engine oil level checkEngine oil level check Engine oil level check
Engine oil level check
• •• •
•Engine coolant check Engine coolant checkEngine coolant check Engine coolant check
Engine coolant check
Before you start driving you should carry out important checks on
your Safari. Please read this section carefully to know the procedure
for carrying out important checks.
ProCarManuals.com
Page 71 of 161
71
P R I O R T O D R I V I N GCHECKS CHECKSCHECKS CHECKS
CHECKS
CHECK CHECKCHECK CHECK
CHECK
•Fuel level (Refer page No. 72)
•Coolant level (Refer page No. 73)
•Engine oil level (Refer page No. 72)
•Tyre pressure (Refer page No. 124)
•Brake & clutch fluid level
(Refer page No. 115)
ENSURE ENSUREENSURE ENSURE
ENSURE
•Gear shift lever in neutral
position
•All switches & lamps working
•SRS, ABS , Brake fluidlevel indicator
and Engine lamp goes off
•Parking brake released
ADJUST ADJUSTADJUST ADJUST
ADJUST
•Driver Seat (Refer page No. 56)
•Rear view mirrors (Refer page No. 60 & 63)
•Steering column (Refer page No. 37)
ProCarManuals.com