Page 75 of 492
75
1-5. Refueling
1
Before driving
Closing the fuel tank capAfter refueling, turn the fuel tank
cap until you hear a click. Once
the cap is released, it will turn
slightly in the opposite direction.
Hang the fuel tank cap on the
back of the fuel filler lid.STEP 3
■Fuel types
Unleaded gasoline (93 AKI [Research Octane Number 98] or higher)
If unleaded gasoline with an octane rating of 93 AKI (98 RON) is not avail-
able, unleaded gasoline with an octane rating of 91 AKI (95 RON) may be
used with no detriment to engine durability or driveability.
Page 76 of 492

76
1-5. Refueling
WARNING
■Refueling the vehicle
Observe the following precautions while refueling the vehicle.
Failure to do so may result in death or serious injury.
●Do not handle fuel indoors.
●After exiting the vehicle and before opening the fuel door, touch an
unpainted metal surface to discharge any static electricity. It is important to
discharge static electricity before refueling because sparks resulting from
static electricity can cause fuel vapors to ignite while refueling.
●Always hold the grips on the fuel tank cap and turn it slowly to remove it.
A whooshing sound may be heard when the fuel tank cap is loosened.
Wait until the sound cannot be heard before fully removing the cap.
In hot weather, pressurized fuel may spray out of the filler neck and cause
injury.
●Do not allow anyone that has not discharged static electricity from their
body to come close to an open fuel tank.
●Do not allow others to approach the area of the vehicle near the fuel filler
pipe while refueling is in progress.
●Do not inhale vaporized fuel.
Fuel contains substances that are harmful if inhaled.
●Do not smoke while refueling the vehicle.
Doing so may cause the fuel to ignite and cause a fire.
●Do not return to the vehicle or touch any person or object that is statically
charged.
This may cause static electricity to build up, resulting in a possible ignition
hazard.
Page 77 of 492

77
1-5. Refueling
1
Before driving
WARNING
■When refueling
Observe the following precautions to prevent fuel overflowing from the fuel
tank:
●Securely insert the fuel nozzle into the fuel filler neck
●Stop filling the tank after the fuel nozzle automatically clicks off
●Do not top off the fuel tank
●Observe other precautions that are posted at the service station.
●Turn the cap to the right until it clicks to ensure that it is fully tightened. If
the cap is not securely tightened, fuel spillage could occur in the event of
an accident, creating a fire hazard.
■When replacing the fuel cap
Do not use anything but a genuine fuel tank cap designed for your vehicle.
Doing so may cause a fire or other incident which may result in death or seri-
ous injury.
CAUTION
■Refueling
●Do not spill fuel during refueling.
Doing so may damage the vehicle, such as causing the emission control
system to operate abnormally or damaging fuel system components or the
vehicle's painted surface.
●Never add any cleaning agents to the fuel tank. The addition of a cleaning
agent may cause damage to the fuel system.
●Immediately put fuel in the tank whenever the low fuel warning light illumi-
nates. Engine misfires as a result of an empty tank could cause damage tothe engine.
Page 152 of 492

152
2-1. Driving procedures
Parking brake liningDrive the vehicle at a speed of approximately 22 mph (35 km/h).
With the parking brake release button pushed in, pull the parking
brake lever SLOWLY and GENTLY (pulling with a force of approxi-
mately 33.7 lbf [150 N, 15.3 kgf]).
Drive the vehicle for approximately 220 yards (200 meters) in this
condition.
Wait 5 to 10 minutes for the parking brake to cool down. Repeat this
procedure.
Check the parking brake lever travel. If the parking brake lever
travel is out of the specified range, adjust it by turning the adjusting
nut located on the parking brake lever.
Parking brake lever travel: →P. 425
■Drum-in-disc type parking brake system
Your vehicle has a drum-in-disc type parking brake system. This type of
brake system needs bedding-down of t he brake shoes periodically or when-
ever the parking brake shoes and/or drum are replaced. Have your
SUBARU dealer perform the bedding down. ( →P. 151)
■After the engine starts
In order to secure a rich exhaust sound when starting the vehicle and envi-
ronmental performance, air intake and exhaust sounds become loud and
vibrations may increase for a little while after the engine starts. This is not a
malfunction.
■Operating your vehicle in a foreign country
Comply with the relevant vehicle registration laws and confirm the availability
of the correct fuel. ( →P. 419)
■REV indicator
STEP 1
STEP 2
STEP 3
STEP 4
STEP 5
When the set engine speed is reached
the REV indicator comes on and a buzzer
sounds to inform the driver. ( →P. 199)
(When the engine speed enters the red
zone, the REV indicator flashes regard-
less of settings.)
Page 187 of 492
187
2
When driving
2-2. Instrument cluster
Gauges and meters
Analog Speedometer
Displays the vehicle speed.
Tachometer
Displays the engine speed in revolutions per minute.
Digital Speedometer
Displays the vehicle speed.
Fuel gauge
Displays the quantity of fuel remaining in the tank.
Engine coolant temperature gauge
Displays the engine coolant temperature.
Odometer, trip meter and multi-information display
Odometer: Displays the total distance the vehicle has been driven.
Trip meter: Displays the distance the vehicle has been driven since the
meter was last reset. Trip meters A and B can be used to record and
display different distances independently.
Multi-information display: Presents the driver with a variety of driving-
related data. ( →P. 197)
Page 191 of 492

191
2-2. Instrument cluster
2
When driving
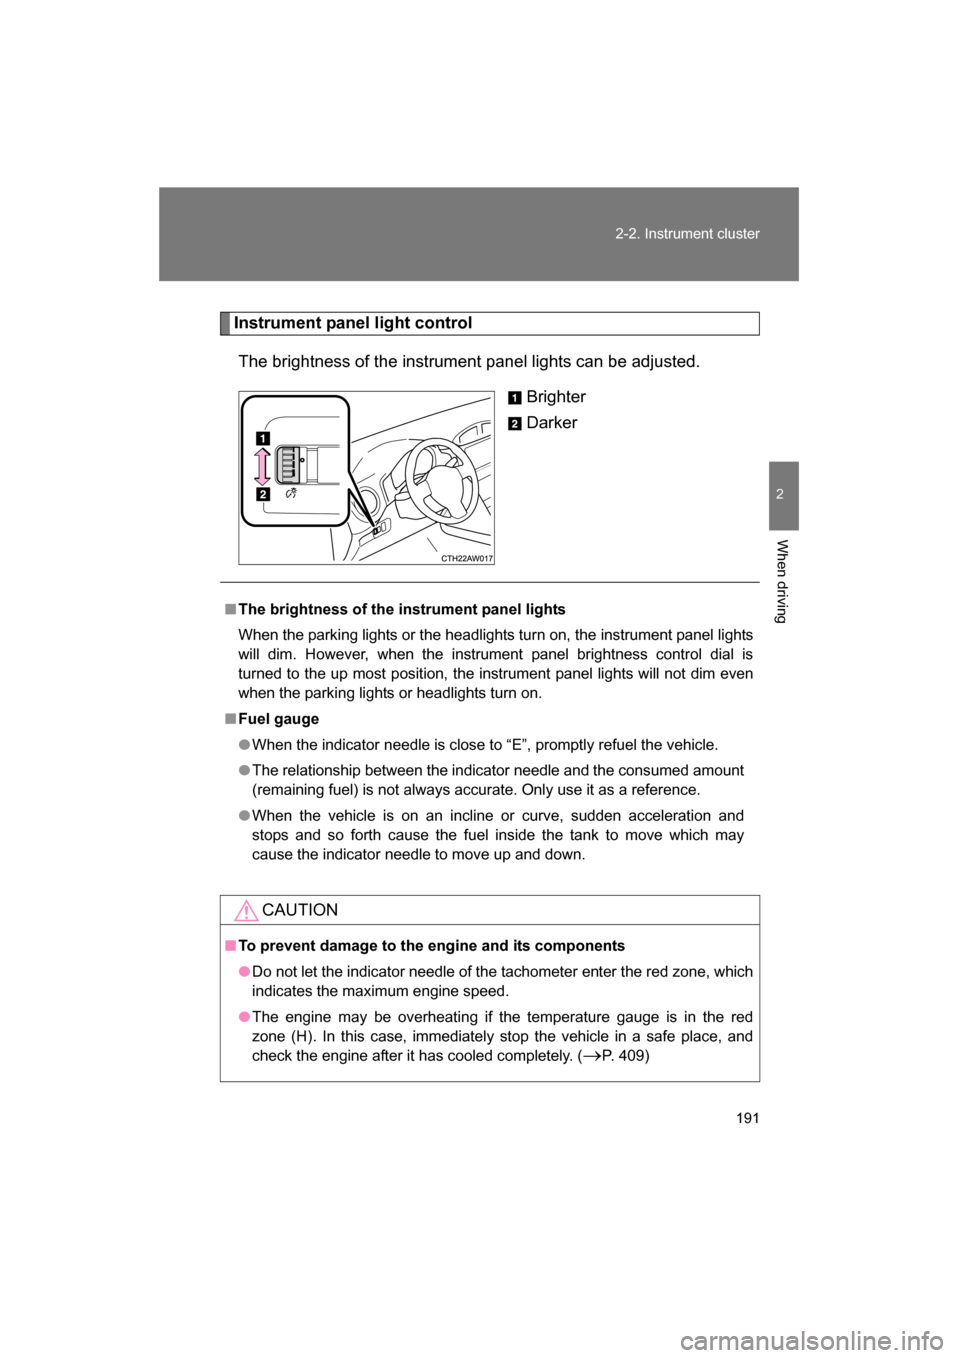
Instrument panel light controlThe brightness of the instrument panel lights can be adjusted. Brighter
Darker
■The brightness of the instrument panel lights
When the parking lights or the headlights turn on, the instrument panel lights
will dim. However, when the instrument panel brightness control dial is
turned to the up most position, the instrument panel lights will not dim even
when the parking lights or headlights turn on.
■Fuel gauge
●When the indicator needle is close to “E”, promptly refuel the vehicle.
●The relationship between the indicator needle and the consumed amount
(remaining fuel) is not always accurate. Only use it as a reference.
●When the vehicle is on an incline or curve, sudden acceleration and
stops and so forth cause the fuel inside the tank to move which may
cause the indicator needle to move up and down.
CAUTION
■To prevent damage to the engine and its components
●Do not let the indicator needle of the tachometer enter the red zone, which
indicates the maximum engine speed.
●The engine may be overheating if the temperature gauge is in the red
zone (H). In this case, immediately stop the vehicle in a safe place, and
check the engine after it has cooled completely. ( →P. 409)
Page 197 of 492
197
2-2. Instrument cluster
2
When driving
Multi-infor mation display
The multi-information display presents the driver with a variety of
driving-related data, including the current outside air temperature.
●Outside temperature
● Current fuel consumption
● Average fuel consumption
● Setting screen for the REV
indicator
Page 198 of 492
198
2-2. Instrument cluster
Switch the displayEach time the “DISP” switch is pressed, the display changes as fol-
lows.
Outside temperature
→P. 268
Current fuel consumption
Displays the current rate of fuel consumption.
Average fuel consumption
Displays the average fuel consumption since the function was
reset.