2015 SKODA SUPERB navigation
[x] Cancel search: navigationPage 17 of 100
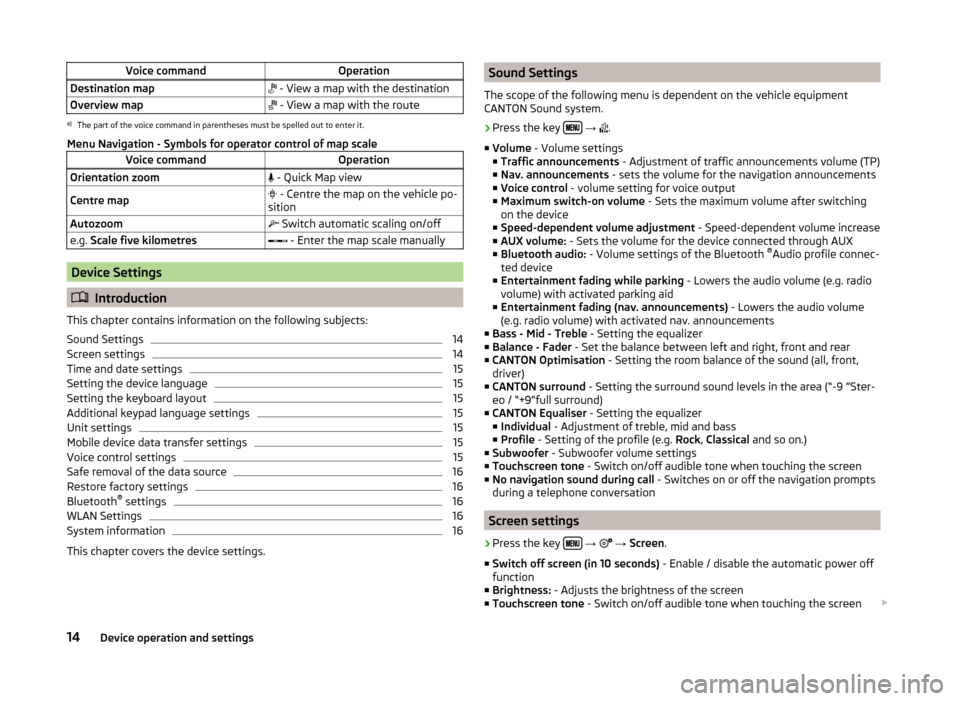
Voice commandOperationDestination map - View a map with the destinationOverview map - View a map with the routea)
The part of the voice command in parentheses must be spelled out to enter it.
Menu Navigation - Symbols for operator control of map scale
Voice commandOperationOrientation zoom - Quick Map viewCentre map - Centre the map on the vehicle po-
sitionAutozoom Switch automatic scaling on/offe.g. Scale five kilometres - Enter the map scale manually
Device Settings
Introduction
This chapter contains information on the following subjects:
Sound Settings
14
Screen settings
14
Time and date settings
15
Setting the device language
15
Setting the keyboard layout
15
Additional keypad language settings
15
Unit settings
15
Mobile device data transfer settings
15
Voice control settings
15
Safe removal of the data source
16
Restore factory settings
16
Bluetooth ®
settings
16
WLAN Settings
16
System information
16
This chapter covers the device settings.
Sound Settings
The scope of the following menu is dependent on the vehicle equipment
CANTON Sound system.›
Press the key
→
.
■ Volume - Volume settings
■ Traffic announcements - Adjustment of traffic announcements volume (TP)
■ Nav. announcements - sets the volume for the navigation announcements
■ Voice control - volume setting for voice output
■ Maximum switch-on volume - Sets the maximum volume after switching
on the device
■ Speed-dependent volume adjustment - Speed-dependent volume increase
■ AUX volume: - Sets the volume for the device connected through AUX
■ Bluetooth audio: - Volume settings of the Bluetooth ®
Audio profile connec-
ted device
■ Entertainment fading while parking - Lowers the audio volume (e.g. radio
volume) with activated parking aid
■ Entertainment fading (nav. announcements) - Lowers the audio volume
(e.g. radio volume) with activated nav. announcements
■ Bass - Mid - Treble - Setting the equalizer
■ Balance - Fader - Set the balance between left and right, front and rear
■ CANTON Optimisation - Setting the room balance of the sound (all, front,
driver)
■ CANTON surround - Setting the surround sound levels in the area (“-9 ”Ster-
eo / “+9”full surround)
■ CANTON Equaliser - Setting the equalizer
■ Individual - Adjustment of treble, mid and bass
■ Profile - Setting of the profile (e.g. Rock, Classical and so on.)
■ Subwoofer - Subwoofer volume settings
■ Touchscreen tone - Switch on/off audible tone when touching the screen
■ No navigation sound during call - Switches on or off the navigation prompts
during a telephone conversation
Screen settings
›
Press the key
→
→ Screen .
■ Switch off screen (in 10 seconds) - Enable / disable the automatic power off
function
■ Brightness: - Adjusts the brightness of the screen
■ Touchscreen tone - Switch on/off audible tone when touching the screen
14Device operation and settings
Page 19 of 100
■Voice control session end tone - Switch on/off the audible signal when voice
control ends
■ Input tone in voice dialogue - Switch on/off the audible signal for the voice
input
Safe removal of the data source
›
Press the key
→
→ Remove safely: Press and select the data source
to be removed.
Restore factory settings
›
Press the key
→
→ Factory settings .
In this menu, some or all settings can be restored.
Bluetooth ®
settings
›
Press the key
→
→ Bluetooth .
■ Bluetooth - Switch on/off Bluetooth ®
function
■ Visibility: - Switch on/off the visibility of the Bluetooth ®
device for other de-
vices
■ Name: - Change the device name
■ Paired devices - Display the list of coupled Bluetooth ®
Devices
■ Find devices - Searches for available devices
■ Bluetooth audio (A2DP/AVRCP) - Turn on/off the ability to connect an audio
device (e.g. MP3 player, tablet etc...)
WLAN Settings
›
Press the key
→
→ WLAN → Mobile hotspot .
The transfer all the settings is made only after pressing the function key
Store .
■ Mobile hotspot - WLAN hotspot switch on/off (if an external device is con-
nected to the device via a WLAN hotspot, then the symbol will appear in the
function key with the associated number of connected external devices)
■ Security level: - Setting the connection security with the WLAN hotspot
■ WPA2 - WPA2 security
■ WPA - WPA security
■ No security level - Without security (without access password for WLAN
hotspot)
■ Network key - Enter the access code to the WLAN hotspot
■ SSID: ... - Name of the WLAN hotspot device
■ Do not send network name (SSID) - WLAN hotspot security switch on/off
System information
›
Press the key
→
→ System information .
■ Device part number: ... - Part number of the unit
■ Hardware: ... - Version of the hardware used
■ Software: ... - Version of the software used
■ “Gracenote” database: ... - Multimedia database version Gracenote
■ Navigation database: ... - Version of the navigation data
■ Media Codec: ... - Media codec version
■ Update software - Software update (e.g. Bluetooth ®
or station logos)
The information on available software updates is to be obtained from a ŠKODA
partner or on the following ŠKODA Internet pages.
http://infotainment.skoda-auto.com
16Device operation and settings
Page 58 of 100
Some applications require that the data connection in the connected device is
turned on.
By establishing the Android Auto ™
connection all existing Bluetooth ®
connec-
tions are terminated to the device and a Bluetooth ®
connection using the
Android Auto ™
is established to the device.
A device connected using Android Auto ™
cannot be used as an audio source in
the menu Media.
If route guidance is active at this moment in the device, then this is terminated
by starting the route guidance in the Android Auto ™
application. This is also
true reciprocally.
A list of devices and applications that the Android Auto ™
connection supports
can be found on the Google website.
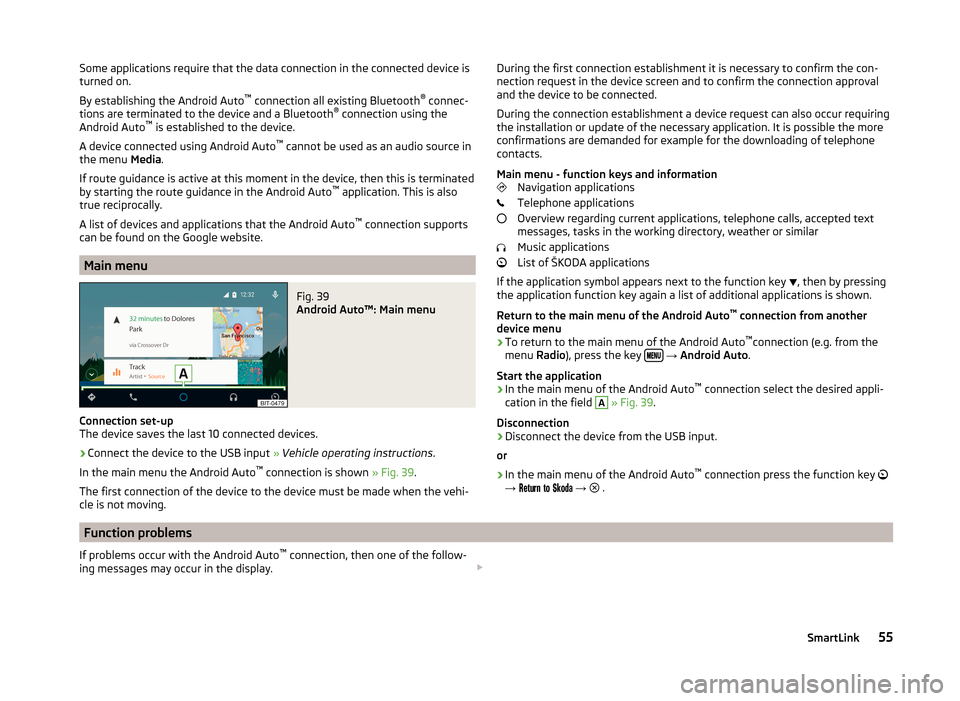
Main menu
Fig. 39
Android Auto™: Main menu
Connection set-up
The device saves the last 10 connected devices.
›
Connect the device to the USB input » Vehicle operating instructions .
In the main menu the Android Auto ™
connection is shown » Fig. 39.
The first connection of the device to the device must be made when the vehi- cle is not moving.
During the first connection establishment it is necessary to confirm the con-
nection request in the device screen and to confirm the connection approval
and the device to be connected.
During the connection establishment a device request can also occur requiring
the installation or update of the necessary application. It is possible the more
confirmations are demanded for example for the downloading of telephone
contacts.
Main menu - function keys and information Navigation applications
Telephone applications
Overview regarding current applications, telephone calls, accepted text
messages, tasks in the working directory, weather or similar
Music applications
List of ŠKODA applications
If the application symbol appears next to the function key , then by pressing
the application function key again a list of additional applications is shown.
Return to the main menu of the Android Auto ™
connection from another
device menu
› To return to the main menu of the Android Auto ™
connection (e.g. from the
menu Radio), press the key
→ Android Auto .
Start the application › In the main menu of the Android Auto ™
connection select the desired appli-
cation in the field
A
» Fig. 39 .
Disconnection
› Disconnect the device from the USB input.
or
› In the main menu of the Android Auto ™
connection press the function key
→
→
.
Function problems
If problems occur with the Android Auto ™
connection, then one of the follow-
ing messages may occur in the display. 55SmartLink
Page 63 of 100
Navigation
Navigation description
Introduction
This chapter contains information on the following subjects:
GPS satellite signal
60
Navigation data
60
Main menu
60
Pop-up windows
61
GPS satellite signal
The unit uses the GPS (Global Positioning System) satellite signal for route
guidance.
Outside the range of the GPS satellite signal (e.g. in dense vegetation, in tun-
nels, parking garages, etc.), the unit navigates only with restrictions using
some on-vehicle sensors (such as speed sensor or steering angle sensor).
The unit offers the possibility to show in the split screen display the following
Position » Fig. 44 on page 61 information about the current geographical po-
sition of the vehicle and the satellite signal.
Geographical longitude
Geographical latitude
Elevation
Number of received/available satellites
To view the information on the longitude and latitude of the current vehicle
position display requires the reception of GPS signals from at least three satel-
lites.
To view the elevation information of the current vehicle position display re-
quires the reception of GPS signals from at least five satellites.
Navigation data
Navigation data source
The navigation data is stored in the internal memory.
Finding out the version of the navigation data › Press in the
Navigation menu the function key
→ Version information .
Update navigation data
We recommend that you update the navigation data on a regular basis (e.g.
Due to newly developed roads and changed traffic signs etc.).
For information on how to update the navigation data ask a ŠKODA partner or
go to the following ŠKODA website.
http://infotainment.skoda-auto.com
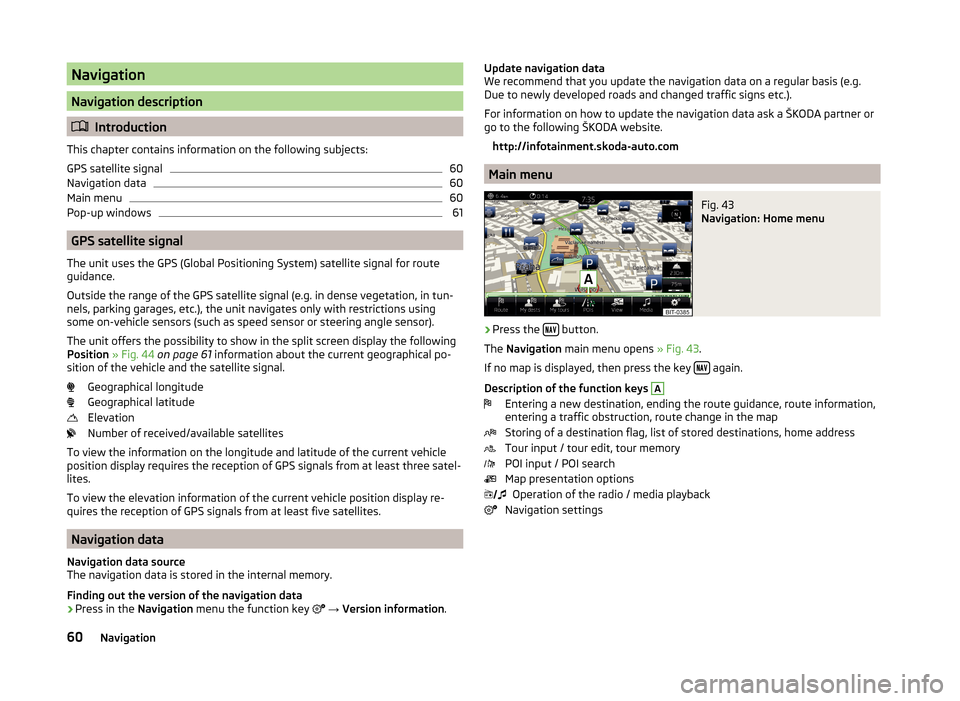
Main menu
Fig. 43
Navigation: Home menu
›
Press the button.
The Navigation main menu opens » Fig. 43.
If no map is displayed, then press the key
again.
Description of the function keys
A
Entering a new destination, ending the route guidance, route information,
entering a traffic obstruction, route change in the map
Storing of a destination flag, list of stored destinations, home address
Tour input / tour edit, tour memory
POI input / POI search
Map presentation options Operation of the radio / media playback
Navigation settings
60Navigation
Page 64 of 100
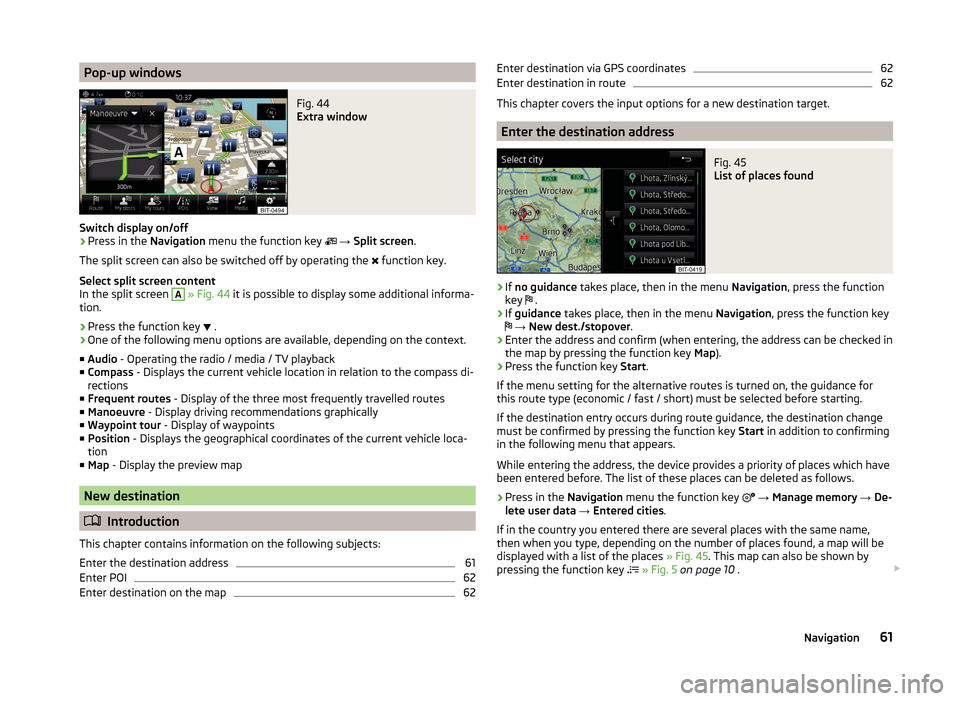
Pop-up windowsFig. 44
Extra window
Switch display on/off
›
Press in the Navigation menu the function key
→ Split screen .
The split screen can also be switched off by operating the function key.
Select split screen content
In the split screen
A
» Fig. 44 it is possible to display some additional informa-
tion.
› Press the function key
.
› One of the following menu options are available, depending on the context.
■ Audio - Operating the radio / media / TV playback
■ Compass - Displays the current vehicle location in relation to the compass di-
rections
■ Frequent routes - Display of the three most frequently travelled routes
■ Manoeuvre - Display driving recommendations graphically
■ Waypoint tour - Display of waypoints
■ Position - Displays the geographical coordinates of the current vehicle loca-
tion
■ Map - Display the preview map
New destination
Introduction
This chapter contains information on the following subjects:
Enter the destination address
61
Enter POI
62
Enter destination on the map
62Enter destination via GPS coordinates62Enter destination in route62
This chapter covers the input options for a new destination target.
Enter the destination address
Fig. 45
List of places found
›
If no guidance takes place, then in the menu Navigation, press the function
key .
›
If
guidance takes place, then in the menu Navigation, press the function key
→ New dest./stopover .
›
Enter the address and confirm (when entering, the address can be checked in
the map by pressing the function key Map).
›
Press the function key Start.
If the menu setting for the alternative routes is turned on, the guidance for
this route type (economic / fast / short) must be selected before starting.
If the destination entry occurs during route guidance, the destination change
must be confirmed by pressing the function key Start in addition to confirming
in the following menu that appears.
While entering the address, the device provides a priority of places which have
been entered before. The list of these places can be deleted as follows.
› Press in the
Navigation menu the function key
→ Manage memory → De-
lete user data → Entered cities .
If in the country you entered there are several places with the same name,
then when you type, depending on the number of places found, a map will be
displayed with a list of the places » Fig. 45. This map can also be shown by
pressing the function key
» Fig. 5 on page 10 .
61Navigation
Page 65 of 100

There is a maximum of 6 places shown in this list, each is identified with a let-
ter. Then these places are shown in the map with the icon and labelled with
a letter which corresponds with letter in the list.
If more than 6 places were found, then the list can be scrolled through by turn-
ing the knob
or sliding the slider.
Enter POI
›
If no guidance takes place, then in the menu Navigation, press the function
key
→ Options → POI .
›
If guidance takes place, then in the menu Navigation, press the function key
→ New dest./stopover → Options → POI .
›
Enter and confirm the destination » page 65.
›
Press the function key Start.
If the menu setting for the alternative routes is turned on, the guidance for
this route type (economic / fast / short) must be selected before starting.
If the destination entry occurs during route guidance, the destination change
must be confirmed by pressing the function key Start in addition to confirming
in the following menu that appears.
Enter destination on the map
Fig. 46
Enter destination on the map
›
If no guidance takes place, then in the menu Navigation, press the function
key
→ Options → On map .
›
If guidance takes place, then in the menu Navigation, press the function key
→ New dest./stopover → Options → On map .
›
Move the destination onto the cross line position on the map.
›
Press the function key
→ Start .
If the menu setting for the alternative routes is turned on, the guidance for
this route type (economic / fast / short) must be selected before starting.
If the destination entry occurs during route guidance, the destination change
must be confirmed by pressing the function key Start in addition to confirming
in the following menu that appears.
Map zoom in / out Map display with full screen display
Map display with small screen display
Enter destination via GPS coordinates
Fig. 47
Enter destination through GPS coordinates
›
If no guidance takes place, then in the menu Navigation, press the function
key
→ Options → On map .
›
If guidance takes place, then in the menu Navigation, press the function key
→ New dest./stopover → Options → On map .
›
Press the desired function key to set the latitude and longitude value.
›
Set the desired value using the function keys
/
.
›
Touch the screen outside of the function keys, the input of GPS coordinates
is ended.
›
Press the function key
→ Start .
If the menu setting for the alternative routes is turned on, the guidance for
this route type (economic / fast / short) must be selected before starting.
If the destination entry occurs during route guidance, the destination change
must be confirmed by pressing the function key Start in addition to confirming
in the following menu that appears.
Enter destination in route
›
If guidance takes place, then in the menu Navigation, press the function key
→ New dest./stopover .
62Navigation
Page 66 of 100

›Enter destination.›Press the function key
Start→ Stopover .
In the displayed menu of a new tour the order of the stopovers can be
changed by pressing the function key
and moving the stopover to a differ-
ent position.›
Press the function key Calculate.
A route is created by inserting the destination in the route. For more informa-
tion on the tour » page 73.
Note
Up to 20 destinations can be included in a tour.
My Destinations
Introduction
This chapter contains information on the following subjects:
List of registered destinations
63
Home address
63
Current vehicle position Store(flagged destination)
64
This chapter discusses the entry options and selecting the destinations stored
in the device memory.
List of registered destinations
Fig. 48
List of stored destinations
Display list of stored destinations
› Press in the
Navigation menu the function key
→ Destinations .
The last selected list of registered destinations are displayed.
The following functions can be performed from the displayed list. - Destination search by name (with more than 5 entries)
- Management of the stored destination
Display category of the stored destinations
› Press in the
Navigation menu the function key
→ Destinations →
.
The following menu is displayed with the categories of stored destinations
» Fig. 48 .
Last destinations to which the guidance was carried out (automatically
saved, max. 50)
Destination memory (manually saved):
›
Flagged destination (current vehicle position is saved)
›
Stored destination (stored in the destination details / imported in
vCard format)
›
Favourite (stored in the destination details)
Favourites (max. 50 entries). The favourite position is displayed in the map
by the symbol .
Telephone contacts of the connected telephone or the SIM card with the
address. If the address is in an unsupported format, then a menu for edit-
ing is displayed.
Route guidance to the stored destination
› Select the desired destination in the list of stored destinations.
› Press the function key
Start.
If the menu setting for the alternative routes is turned on, the guidance for
this route type (economic / fast / short) must be selected before starting.
If the destination entry occurs during route guidance, the destination change
must be confirmed by pressing the function key Start in addition to confirming
in the following menu that appears.
Home address
Define home address
When your home address is not entered, then proceed as follows.
›
Press in the Navigation menu the function key
→ Home address .
›
Defining the home address using the current vehicle position or by entering
the address.
Search63Navigation
Page 67 of 100

Route guidance to your home address
If your home address is entered, then proceed as follows.›
Press in the Navigation menu the function key
→ Home address .
If the navigation menu for setting the alternative routes is turned on, the guid-
ance for this route type (economic / fast / short) must be selected before start-
ing.
The position of the home address is displayed in the map by the symbol
.
Chang the home address
›
Press in the Navigation menu the function key
→ Manage memory → De-
fine home address .
›
With a stored home address, press the function key Edit.
With an unstored home address the device request the entry of an address.
›
Edit the home address or set one up using the current vehicle position or by
entering the address.
Delete home address
›
Press in the Navigation menu the function key
→ Manage memory → De-
lete user data → Home address .
›
Press the function key Delete and confirm the deletion.
Current vehicle position Store(flagged destination)
The current vehicle position can be stored as the so-called “Flagged destina-
tion”.
By storing the next flagged destination, the last flagged destination will be
overwritten.
The flagged destination can be stored in the device memory to prevent over-
writing.
Store
›
Press in the Navigation menu the function key
→ Store position .
Route guidance to flagged destination
›
Press in the Navigation menu the function key
→ Destinations →
→
.
›
Press the function key of the flagged destination to start the route guidance.
If the destination entry occurs during route guidance, the destination change
must be confirmed by pressing the function key Start in addition to confirming
in the following menu that appears.
Store the flagged destination as a stored destination›Press in the Navigation menu the function key → Destinations → →
.›
At the desired flagged destination, press the function key
→ Store .
POI
Introduction
This chapter contains information on the following subjects:
Quick selection of a POI
64
Other POIs
65
Search and selecting a POI
65
POI (e.g. restaurants, petrol stations etc.) can be selected directly on the map
or selected in another POI menu.
This chapter deals with the selection options for a POI using the function key
.
Quick selection of a POI
The device enables quick searching for a POI in the following categories. Petrol stations
Restaurants
Car parks
›
Press in the Navigation menu the function key
.
›
Select the desired POI category.
If no route guidance takes place, then a list of the nearest POIs will be dis-
played.
If a route guidance does take place, then a list of points of interest along the
route is displayed.
›
Select the desired POI.
›
Press the function key Start.
If the menu setting for the alternative routes is turned on, the guidance for
this route type (economic / fast / short) must be selected before starting.
If the destination entry occurs during route guidance, the destination change
must be confirmed by pressing the function key Start in addition to confirming
in the following menu that appears.
64Navigation