2015 SKODA SUPERB audio
[x] Cancel search: audioPage 29 of 100

Note■It is not possible to copy the contents of copyright protected CDs or DVDs to
the Jukebox.■
Files that have already been copied are recognized and cannot be copied
again (shown in grey).
■
It is not possible to copy files while simultaneously playing back audio or vid-
eo files in the CD/DVD drive.
CD / DVD
Fig. 14
CD/DVD case
Read and observe
and on page 25 first.
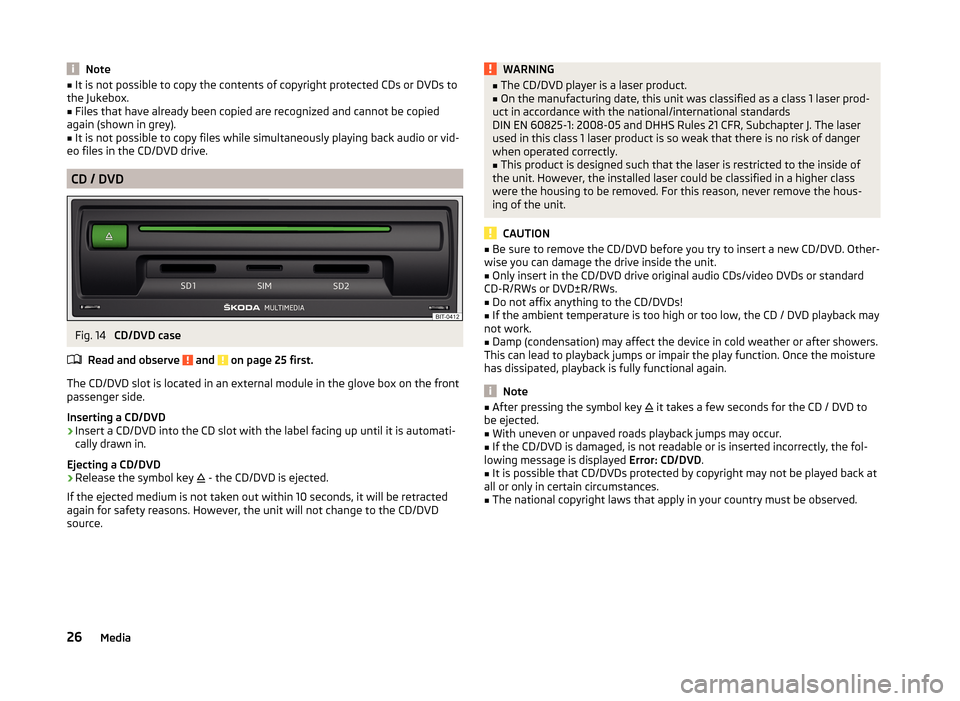
The CD/DVD slot is located in an external module in the glove box on the front
passenger side.
Inserting a CD/DVD
›
Insert a CD/DVD into the CD slot with the label facing up until it is automati-
cally drawn in.
Ejecting a CD/DVD
›
Release the symbol key
- the CD/DVD is ejected.
If the ejected medium is not taken out within 10 seconds, it will be retracted
again for safety reasons. However, the unit will not change to the CD/DVD
source.
WARNING■ The CD/DVD player is a laser product.■On the manufacturing date, this unit was classified as a class 1 laser prod-
uct in accordance with the national/international standards
DIN EN 60825-1: 2008-05 and DHHS Rules 21 CFR, Subchapter J. The laser
used in this class 1 laser product is so weak that there is no risk of danger
when operated correctly.■
This product is designed such that the laser is restricted to the inside of
the unit. However, the installed laser could be classified in a higher class
were the housing to be removed. For this reason, never remove the hous-
ing of the unit.
CAUTION
■ Be sure to remove the CD/DVD before you try to insert a new CD/DVD. Other-
wise you can damage the drive inside the unit.■
Only insert in the CD/DVD drive original audio CDs/video DVDs or standard
CD-R/RWs or DVD±R/RWs.
■
Do not affix anything to the CD/DVDs!
■
If the ambient temperature is too high or too low, the CD / DVD playback may
not work.
■
Damp (condensation) may affect the device in cold weather or after showers.
This can lead to playback jumps or impair the play function. Once the moisture
has dissipated, playback is fully functional again.
Note
■ After pressing the symbol key it takes a few seconds for the CD / DVD to
be ejected.■
With uneven or unpaved roads playback jumps may occur.
■
If the CD/DVD is damaged, is not readable or is inserted incorrectly, the fol-
lowing message is displayed Error: CD/DVD.
■
It is possible that CD/DVDs protected by copyright may not be played back at
all or only in certain circumstances.
■
The national copyright laws that apply in your country must be observed.
26Media
Page 30 of 100

SD cardFig. 15
SD card slots
Read and observe
and on page 25 first.
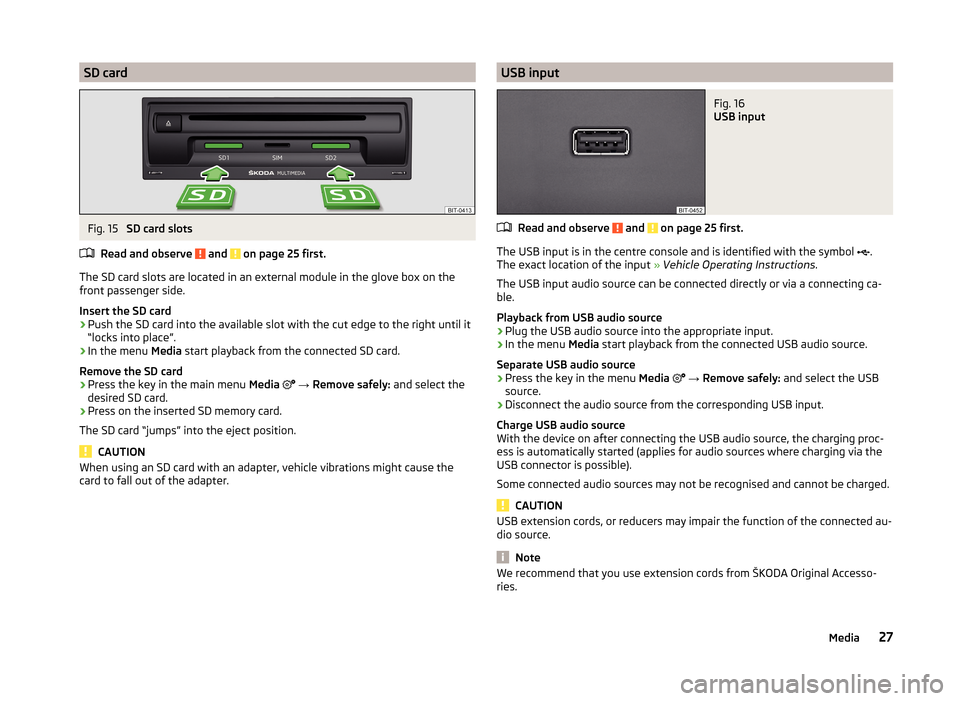
The SD card slots are located in an external module in the glove box on the
front passenger side.
Insert the SD card
›
Push the SD card into the available slot with the cut edge to the right until it
“locks into place”.
›
In the menu Media start playback from the connected SD card.
Remove the SD card
›
Press the key in the main menu Media
→ Remove safely: and select the
desired SD card.
›
Press on the inserted SD memory card.
The SD card “jumps” into the eject position.
CAUTION
When using an SD card with an adapter, vehicle vibrations might cause the
card to fall out of the adapter.USB inputFig. 16
USB input
Read and observe and on page 25 first.
The USB input is in the centre console and is identified with the symbol .
The exact location of the input » Vehicle Operating Instructions .
The USB input audio source can be connected directly or via a connecting ca-
ble.
Playback from USB audio source
›
Plug the USB audio source into the appropriate input.
›
In the menu Media start playback from the connected USB audio source.
Separate USB audio source
›
Press the key in the menu Media
→ Remove safely: and select the USB
source.
›
Disconnect the audio source from the corresponding USB input.
Charge USB audio source
With the device on after connecting the USB audio source, the charging proc-
ess is automatically started (applies for audio sources where charging via the
USB connector is possible).
Some connected audio sources may not be recognised and cannot be charged.
CAUTION
USB extension cords, or reducers may impair the function of the connected au-
dio source.
Note
We recommend that you use extension cords from ŠKODA Original Accesso-
ries.27Media
Page 31 of 100

Bluetooth®
player
Read and observe
and on page 25 first.
The unit allows audio files of a connected Bluetooth ®
player to play using the
A2DP and AVRCP audio profile.
Connect the Bluetooth ®
player
›
Connect the player to the device - follow the same instructions as for pairing
the device with a telephone » page 41.
›
Select the audio source
BT audio » page 22 , Select audio source and then
the desired player.
Separate the Bluetooth ®
player
›
Terminate the connection in the list of paired devices » page 43.
Automatic playback stop and disconnection
If an Apple device is connected as a Bluetooth ®
player and is it connected to
the USB input (for example, for the purpose of charging the connected device),
then playback via Bluetooth ®
stops and playback is then only possible via USB.
If the audio source is switched from Bluetooth ®
Players to USB, then there is
an automatic interruption of the Bluetooth ®
connection. The following warning
message appears in the screen Bluetooth audio (A2DP) … Connection cancel-
led.
If the Bluetooth ®
player audio source is connected to the AUX input, then the
audio output is switched from the AUX input of the connected device. For fur-
ther playback the audio source is to be switched to AUX.
Note
If a device is connected to the device using Apple CarPlay, then a connection
using Bluetooth ®
is possible.
WLAN
Read and observe
and on page 25 first.
The device allows you to play audio files connected from a WLAN device to the
device.
Play over WLAN
›
Connect the player to the device's WLAN » page 51, WLAN Hotspot - Con-
nection to the external device with the device WLAN .
›Start the UPnP application in the connected device or connect a device that
allows you to set up a DLNA server.›
Select the audio source
WLAN » page 22 , Select audio source .
AUX - input
Fig. 17
AUX input
Read and observe and on page 25 first.
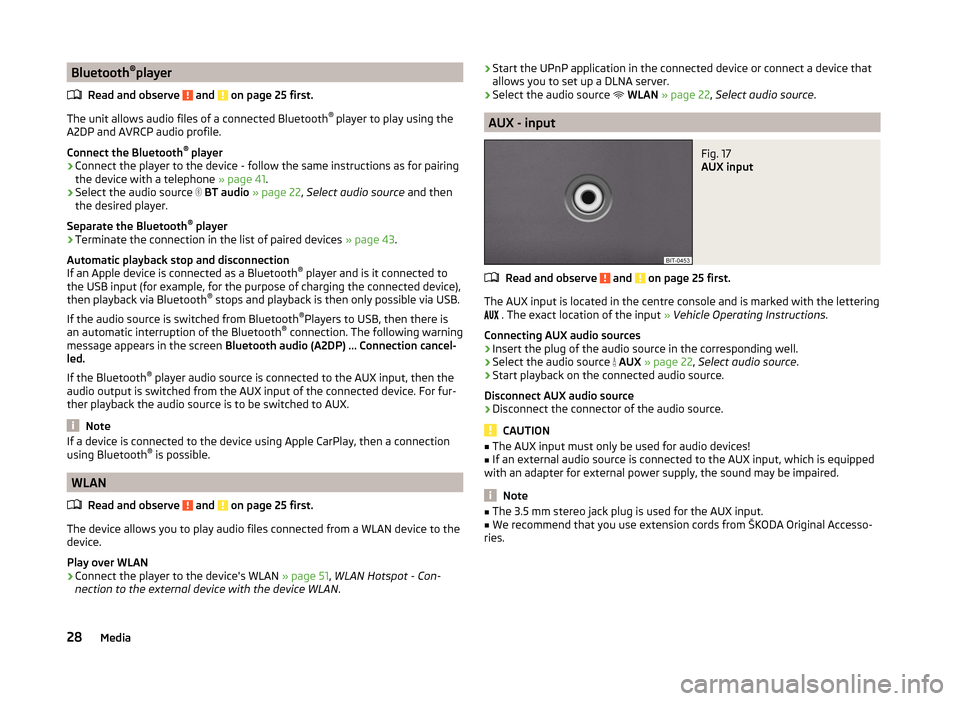
The AUX input is located in the centre console and is marked with the lettering
. The exact location of the input
» Vehicle Operating Instructions .
Connecting AUX audio sources
›
Insert the plug of the audio source in the corresponding well.
›
Select the audio source
AUX » page 22 , Select audio source .
›
Start playback on the connected audio source.
Disconnect AUX audio source
›
Disconnect the connector of the audio source.
CAUTION
■ The AUX input must only be used for audio devices!■If an external audio source is connected to the AUX input, which is equipped
with an adapter for external power supply, the sound may be impaired.
Note
■ The 3.5 mm stereo jack plug is used for the AUX input.■We recommend that you use extension cords from ŠKODA Original Accesso-
ries.28Media
Page 32 of 100

Supported audio sources and file formatsRead and observe
and on page 25 first.
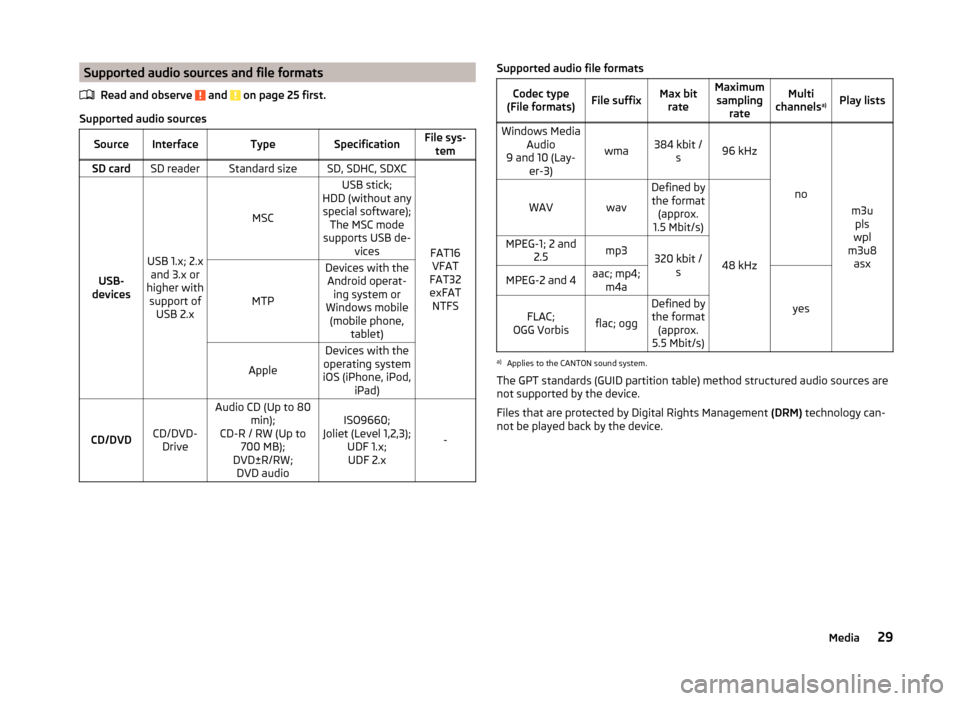
Supported audio sources
SourceInterfaceTypeSpecificationFile sys-temSD cardSD readerStandard sizeSD, SDHC, SDXC
FAT16VFAT
FAT32
exFAT NTFSUSB-
devices
USB 1.x; 2.x and 3.x or
higher with support of USB 2.x
MSC
USB stick;
HDD (without any special software); The MSC mode
supports USB de- vices
MTP
Devices with theAndroid operat- ing system or
Windows mobile (mobile phone, tablet)
Apple
Devices with the
operating system
iOS (iPhone, iPod, iPad)
CD/DVDCD/DVD-Drive
Audio CD (Up to 80 min);
CD-R / RW (Up to 700 MB);
DVD±R/RW; DVD audioISO9660;
Joliet (Level 1,2,3); UDF 1.x;UDF 2.x
-
Supported audio file formatsCodec type
(File formats)File suffixMax bit rateMaximumsampling rateMulti
channels a)Play listsWindows Media
Audio
9 and 10 (Lay- er-3)
wma384 kbit /s96 kHz
no
m3upls
wpl
m3u8 asx
WAVwav
Defined bythe format (approx.
1.5 Mbit/s)
48 kHz
MPEG-1; 2 and 2.5mp3320 kbit /sMPEG-2 and 4aac; mp4;m4a
yes
FLAC;
OGG Vorbisflac; ogg
Defined by the format (approx.
5.5 Mbit/s)a)
Applies to the CANTON sound system.
The GPT standards (GUID partition table) method structured audio sources are
not supported by the device.
Files that are protected by Digital Rights Management (DRM) technology can-
not be played back by the device.
29Media
Page 35 of 100

DVD video
Video player
Introduction
This chapter contains information on the following subjects:
Main menu
32
Select a video source
32
Video playback
32
DVD menu
33
Supported video sources and file formats
33
Settings
33
First and foremost, pay attention to the safety instructions » page 6 , Impor-
tant notes .
Main menu
Fig. 19
DVD video: Main menu
Display main menu
›
Insert a CD/DVD into the appropriate slot in the external module.
or
›
Press the key
→
1
» Fig. 10 on page 22 -
and select the desired video
source.
›
Start the video file stored on the selected video source.
Main Menu - Information and function keys Select a video source
Playback time axis (movement within the video is possible by touching the
desired location in the time axis)
ABInformation for the selected video file (e.g., video title, chapter)
Open the DVD menu
Video settings
Note
■ For safety reasons, the video display is switched off at speeds over 5 km/h
and the following message is displayed: The vehicle is in motion. The display
has been switched off for your safety. The unit continues to play the sound-
track.■
The regional code of the player corresponds to the location of sale. If the fol-
lowing is displayed: Unable to play disc. DVD region code is incompatible. No.
of changes: …. , consult a ŠKODA service partner.
Select a video source
›
Press the key
→
1
» Fig. 10 on page 22 -
and select the desired video
source.
or
›
In the folder/track list and in the multimedia database press the function key
and select the desired video source
» Fig. 10 on page 22 -
.
Video sources Jukebox - Internal device memory
CD/DVD - Inserted CD / DVD
SD card 1 - inserted SD card 1
SD card 2 - inserted SD card 2
USB 1 - Connected to the USB input video source in the front centre con-
sole
USB 2 - Connected to the USB input audio source in the front centre con-
sole
Video playback
Playback starts automatically when a CD/DVD is inserted into the slot in the
external module.
In other cases, the video source must be selected and the video file started
manually.
C32DVD video
Page 37 of 100

Depending on the DVD some of the following menu items are displayed.
■ Format: - Set the screen width/height ratio
■ Audio channel: - Audio channel selection
■ Subtitles: - Subtitle selection
■ Enter/change PIN for parental settings - Management of the PIN code for
parental control
■ Parental settings: - Parental settings selectionTV tuner
TV function
Introduction
This chapter contains information on the following subjects:
Main menu
34
Stations / Memory list
35
Find available stations and select
35
EPG and teletext
35
Settings
36
The unit has a TV tuner to receive digital TV channels (DVB-T and DVB-T2).
Note
■ For safety reasons, the image display is switched off at speeds over 5 km/h.
Only the sound continues. The screen displays the message: The vehicle is in
motion. The display has been switched off for your safety.■
When the signal is weak short audio drop-outs and noise may occur.
Main menu
Fig. 21
TV Tuner: Main menu
Display main menu
›
Press the key
→
.
Main Menu - Information and function keys Area with additional information on the station (e.g.
- The station is
stored in the memory list,
- The electronic program guide is available
and similar)
Station name
AB34TV tuner
Page 39 of 100

There EPG and the control surface » Fig. 23 - is displayed.
Show teletext›
In the main menu TV tuner press the function key
and select Teletext.
The teletext and the control surface » Fig. 23 -
are displayed.
By pressing the function key
the operating surface displays a numeric key-
pad » Fig. 23 -
.
Function keys in the control surfaces
SymbolOperation / Move the operating surface left / right / Show / hide full screen display of the control surfaceClose the control surfaceChange the text size (zoom)Return to start page (teletext) / Switching between numeric keypad and directional ar-
rows (teletext) / / / Movement in the EPG/teletextConfirmationSwitch to the station to watched according to the EPG
entryDisplay program information for the last 24 hours (EPG)Display program information for the next 24 hours (EPG) / / / Display the specified line in the lower teletext page (the
same colour field or number)
Settings
›
In the main menu TV tuner press the function key
.
■ Arrow buttons: - Set the station select function in the TV tuner menu
■ Preset list - Change between stations stored in the preset list
■ Station list - Switch between all available TV stations
■ Screen - Brightness, contrast and colour settings
■ Format: - Selection of image format
■ Audio channel: - Audio channel selection
■ TV standard: - Selection of TV region
■ Subtitles - Enable / disable the subtitle display
■
Sound - Sound settings
■ Automatic station tracking - Switch on / off the automatic station tracking
■ Preset list - Management of the storage list36TV tuner
Page 43 of 100

Pairing and connecting
Introduction
This chapter contains information on the following subjects:
conditions for coupling
40
Telephone search
40
Pairing - no telephone connected
41
Pairing - a telephone is connected
41
Pairing - two telephones connected
41
Connected SIM card in an external module, no telephone connected
42
Connected SIM card in an external module, a telephone - coupling
42
Pairing from the telephone
42
Pairing confirmation
42
Administering coupled devices
43
To connect a telephone with the device, the two devices must be paired via
Bluetooth ®
.
The pairing procedure is dependent on the number of telephones already con-
nected, whether using the inserted SIM card in the external module or via the
telephone using the profile rSAP » page 37, Possible connection types .
A connection with a telephone that is already paired does not require coupling. It is enough to find the telephone that has been coupled in the list of coupled
telephones and make the connection.
If a SIM card is located in the external module with activated telephone serv-
ices, then only one telephone can be connected with the device. Depending on
the telephone used only those telephone contact lists and text messages
(SMS) are available.
If a device is connected to the device using Apple CarPlay, then a connection
using Bluetooth ®
is possible.
Note
■ The range of the connection to the hands-free system is limited to the pas-
senger compartment.■
The maximum number of paired telephones is 20. Pairing a new telephone
after reaching the maximum number causes the telephone that has not been
paired for the longest time to be automatically replaced.
conditions for coupling
The telephone can be coupled with the device under the following conditions. The ignition is switched on.
The Bluetooth ®
function of the device » page 16 and the telephone is
switched on.
The visibility of the device » page 16 and the telephone is switched on.
The telephone is within range of the Bluetooth ®
signal of the device.
The telephone is compatible with the device.
There is no device connected to the device using Apple CarPlay.
The pairing can be initiated from the device or from the telephone.
During the pairing and connecting process the device can demand the confir-
mation by the Bluetooth ®
profile (e.g., enable contact import, enable the test
messaging or the connection of an audio player or similar). The telephone dis-
play should be monitored to acknowledge any possible request.
Please refer to the compatibility of telephones as well as updates which are
available for the Bluetooth ®
device, and are available on the following ŠKODA
Internet pages.
http://infotainment.skoda-auto.com
Telephone search
The telephone is not in the list of paired devices
The telephone can be searched for in one of the following ways.
›
If there is no connected telephone to the device, then press the key
→
Find telephone .
›
If there is
no telephone connected to the device, then press the key
→
→ Find telephone .
›
If a SIM card is inserted in the external module of the device, then press →
D
» Fig. 24 on page 37 → Find telephone .
A search for available devices starts. After about 30 seconds a list of found de-
vices appears, which is updated up to 1 minute after the start of the search ap-
pears.
›
If you do not want to wait for the display of the list press the function key
Results .
›
Select the desired select telephone.
40Telephone