2015 SKODA RAPID SPACEBACK Battery
[x] Cancel search: BatteryPage 4 of 208

Table of Contents
Board literature4
Notes
5
Structure and more information about the
Owner´s Manual
6
Abbreviations
Safety
Passive Safety
8
General information
8
Correct and safe seated position
8
Seat belts
11
Using seat belts
11
Inertia reels and belt tensioners
13
Airbag system
14
Description of the airbag system
14
Airbag overview
15
Deactivating airbags
18
Transporting children safely
19
Child seat
19
Fastening systems
22
Using the system
Cockpit
27
Overview
26
Instruments and Indicator Lights
28
Instrument cluster
28
Indicator lights
31
Information system
39
Driver information system
39
Driving data (Multifunction display)
40
MAXI DOT display
42Service interval display46SmartGate47
Unlocking and opening
49
Unlocking and locking
49
Anti-theft alarm system
54
Luggage compartment lid
55
Window operations
56
Lights and visibility
59
Lights
59
Interior lighting
63
Visibility
64
Windscreen wipers and washers
65
Rear mirror
67
Seats and head restraints
69
Seats and head restraints
69
Seat features
70
Transporting and practical equipment
73
Useful equipment
73
Tablet holder
80
Luggage compartment and transport of
cargo
81
Variable loading floor in the luggage
compartment (Estate)
86
Roof rack
89
Heating and ventilation
90
Heating, manual air conditioning system,
Climatronic
90
Driving
Starting-off and Driving
95
Starting and stopping the engine using the
key
95
Starting and stopping the engine at the push
of the button
97
START-STOPsystem
99
Brakes and parking
101Manual gear changing and pedals103Automatic gearbox104
Running-in and economical driving
106
Avoiding damage to your vehicle
108
Assist systems
109
General information
109
Braking and stabilisation systems
109
Parking assistance (ParkPilot)
112
Speed control system
114
Front Assist
116
Fatigue detection
119
Tyre pressure monitoring
119
Hitch and trailer
121
Hitch
121
Trailer
126
General Maintenance
Care and maintenance
130
Service work, adjustments and technical
alterations
130
Washing vehicle
133
Cleaning vehicle exterior
134
Interior care
138
Inspecting and replenishing
140
Fuel
140
Engine compartment
143
Engine oil
146
Coolant
148
Brake fluid
149
Vehicle battery
150
Wheels
154
Tyres and wheel rims
154
Winter operation
1582Table of Contents
Page 9 of 208

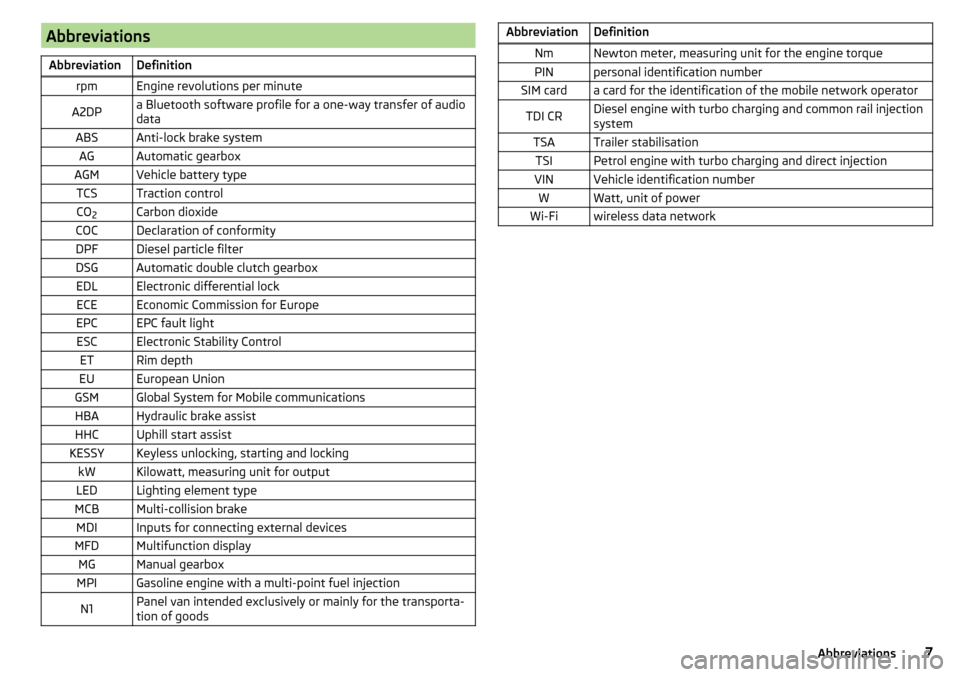
AbbreviationsAbbreviationDefinitionrpmEngine revolutions per minuteA2DPa Bluetooth software profile for a one-way transfer of audio
dataABSAnti-lock brake systemAGAutomatic gearboxAGMVehicle battery typeTCSTraction controlCO 2Carbon dioxideCOCDeclaration of conformityDPFDiesel particle filterDSGAutomatic double clutch gearboxEDLElectronic differential lockECEEconomic Commission for EuropeEPCEPC fault lightESCElectronic Stability ControlETRim depthEUEuropean UnionGSMGlobal System for Mobile communicationsHBAHydraulic brake assistHHCUphill start assistKESSYKeyless unlocking, starting and lockingkWKilowatt, measuring unit for outputLEDLighting element typeMCBMulti-collision brakeMDIInputs for connecting external devicesMFDMultifunction displayMGManual gearboxMPIGasoline engine with a multi-point fuel injectionN1Panel van intended exclusively or mainly for the transporta-
tion of goodsAbbreviationDefinitionNmNewton meter, measuring unit for the engine torquePINpersonal identification numberSIM carda card for the identification of the mobile network operatorTDI CRDiesel engine with turbo charging and common rail injection
systemTSATrailer stabilisationTSIPetrol engine with turbo charging and direct injectionVINVehicle identification numberWWatt, unit of powerWi-Fiwireless data network7Abbreviations
Page 35 of 208

flashes
Steering lock: Workshop!STEERING WORKSHOP
Seek help from a specialist garage.
Steering column lock not unlocked (System KESSY)
flashes
Move the steering wheel!MOVE STEERING WHEEL
▶ Move the steering wheel slightly back and forth, thereby facilitating unlock-
ing the steering lock.
If the steering does also not unlock then, the help of a specialist garage is re-
quired.
Disconnecting the vehicle battery
If the vehicle's battery has been disconnected and reconnected, the indicator
light can come on after switching on the ignition.
The warning light should go out after driving a short distance.
If, after the motor is restarted and a short drive, the indicator light does not go
out, there is a system error.
Seek help from a specialist garage.
Stability control (ESC) / Traction control (TCS)
Read and observe
on page 32 first.
flashes – the ESC or TCS is currently being activated.
illuminates – there is an ESC or TCS fault.
ESC or TCS fault
illumi-
nates
Error: stabilisation control (ESC)ESC ERROR
or
illumi-
nates
Error: traction controlASR ERROR
Seek help from a specialist garage.
If the warning light comes on after starting the engine, the TCS may be
switched off for technical reasons. ▶ Switch the ignition off and on again.
If the warning light does not illuminate after you switch the engine back on,
the ASR is fully functional again.
Disconnecting the vehicle battery
If the vehicle's battery has been disconnected and reconnected, the indicator
light
comes on after switching on the ignition.
The warning light should go out after driving a short distance.
If, after a short drive, the indicator light does not go out, there is a system er-
ror.
Seek help from a specialist garage.
For more information on the ESC system » page 110, Stability Control (ESC) or
TCS system » page 110, Traction control (TCS) .
Traction control system (TCS) off
Read and observe
on page 32 first.
illuminates – the TCS system is disabled.
Anti-lock braking system (ABS)
Read and observe
on page 32 first.
illuminates – there is an ABS fault.
Error: ABSABS ERROR
The vehicle will only be braked by the normal brake system without the ABS.
Seek help from a specialist garage.
WARNING■ If the warning light illuminates simultaneously with warning light
» page 32 , Brake system , do not continue your journey! Seek help
from a specialist garage.■
A fault to the ABS system or the braking system can increase the vehi-
cle's braking distance – risk of accident!
33Instruments and Indicator Lights
Page 37 of 208

If the warning light flashes after starting the engine again, there is a system
error.
Seek help from a specialist garage.
Disconnecting the vehicle battery
If the vehicle's battery has been disconnected and reconnected, the indicator
light
comes on after switching on the ignition.
The warning light should go out after driving a short distance.
If, after a short drive, the indicator light does not go out, there is a system er-
ror.
Seek help from a specialist garage.
Other incidents
The illumination of the warning light can have the following reasons.
▶ The vehicle is loaded on one side. Distribute loads as evenly as possible.
▶ The wheels of one axle are loaded more heavily (e.g. when towing a trailer or
when driving uphill or downhill).
▶ Snow chains are mounted.
▶ A wheel has been changed.
CAUTION
Under certain circumstances (e.g. sporty style of driving, wintry or unpaved
roads) the warning light in the instrument cluster may be delayed or not
light up at all.
Fuel reserve
Read and observe
on page 32 first.
illuminates – the fuel level in the fuel tank is at the reserve level (approxi-
mately 7 litres).
Please refuel. Range: ...
kmPLEASE REFUEL RANGE …
km
An audible signal sounds as a warning.
Note
The text in the display goes out after refuelling and driving a short distance. Turn signal system
Read and observe
on page 32 first.
flashes – the left turn signal is switched on.
flashes – the right turn signal is switched on.
If there is a fault in the turn signal system, the warning light flashes at twice
its normal rate. This does not apply when towing a trailer.
When the hazard warning light system is switched on, this will cause all of the
turn signal lights as well as both warning lights to flash.
Trailer turn signal lights
Read and observe
on page 32 first.
flashes – the trailer turn signal lights are switched on.
If a trailer is hitched and the warning light is not flashing, one of the trailer
turn signal lights has failed.
An example message in the display of the instrument cluster
Trailer: check left turn signal!TRAILER TURN SIG_ CHECK LEFT
Check the trailer bulbs.
Fog lights
Read and observe
on page 32 first.
illuminates – the fog lights are switched on.
Cruise control system
Read and observe
on page 32 first.
illuminates – the vehicle speed is regulated by the cruise control system.
Brake pedal (automatic gearbox)
Read and observe
on page 32 first.
illuminates – apply the brake.
35Instruments and Indicator Lights
Page 38 of 208

Main beamRead and observe
on page 32 first.
illuminates – the main beam or the headlight flasher is switched on.
Automatic transmission
Read and observe
on page 32 first.
Gearbox overheated
The warning light
is only shown in the MAXI DOTdisplay.
illumi-
nates
Gearbox overheated. Stop! Owner's manual!STOP VEHICLE GEARBOX OVERHEAT illumi-
nates
Gearbox overheated.GEARBOX OVERHEATED
▶
do not continue to drive! Stop the vehicle and turn off the engine.
You can continue your journey as soon as the warning light disappears.
If the warning light does not go out, do not continue driving. Seek help from a specialist garage.
Transmission problem
The warning light is only shown in the MAXI DOTdisplay.
illumi-
nates
Gearbox faulty. Workshop!GEARBOX FAULTY WORKSHOP illumi-
nates
Error: gearbox. Reverse gear not available.GEARBOX ERROR REV_ GEAR NOT AVAIL illumi-
nates
Error: gearboxGEARBOX ERROR
Seek help from a specialist garage.
Rear seat belt warning light
Read and observe
on page 32 first.
illuminates – a rear seat belt is not fastened.
illuminates – a rear seat belt is fastened.
When the seat belt is fastened/unfastened, the particular light lights up briefly
and indicates the current belt status!
Alternator
Read and observe
on page 32 first.
illuminates – the battery is not being charged whilst the engine is running.
Seek help from a specialist garage.
CAUTION
If in addition to the light the light lights up while driving, stop driving -
risk of engine damage! Switch off the engine and seek assistance from a spe-
cialist garage.
Coolant
Read and observe
on page 32 first.
Coolant level too low
illumi-
nates
Check coolant! Owner's manual!ENGINE COOLANT PLEASE CHECK
▶ Stop the vehicle, switch off the engine, and check the coolant level
» page 148 , Checking the coolant level .
If the coolant level is within the specified range and the warning light illumi-
nated again after ignition on, then there may be a malfunction of the cooling
fan.
▶ Switch off the ignition.
▶ Check the fuse for the radiator fan, replace if necessary.
If the coolant level and the fan fuse are OK and the warning light illuminates
again after ignition on
do not continue to drive!
Seek help from a specialist garage.
Coolant temperature too high
illumi-
nates
Engine overheat. Stop! Owner's manual!ENGINE OVERHEAT STOP
▶ Stop the vehicle and turn off the engine.
▶ Continue your journey only after the warning light has disappeared.
36Using the system
Page 44 of 208

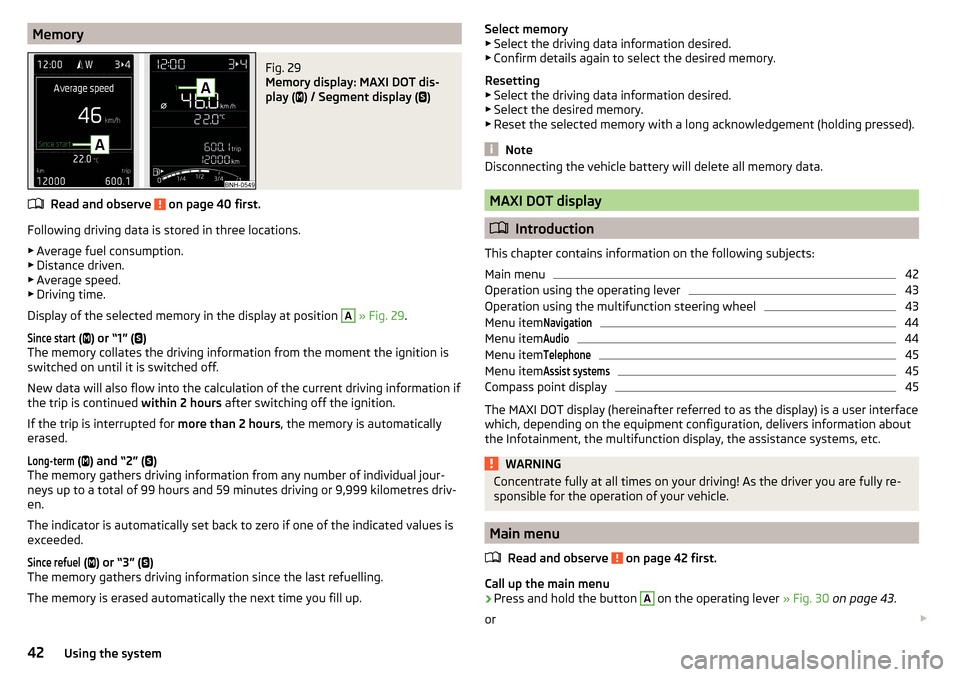
MemoryFig. 29
Memory display: MAXI DOT dis-
play (
) / Segment display (
)
Read and observe on page 40 first.
Following driving data is stored in three locations.
▶ Average fuel consumption.
▶ Distance driven.
▶ Average speed.
▶ Driving time.
Display of the selected memory in the display at position
A
» Fig. 29 .
Since start
(
) or “1” (
)
The memory collates the driving information from the moment the ignition is
switched on until it is switched off.
New data will also flow into the calculation of the current driving information if
the trip is continued within 2 hours after switching off the ignition.
If the trip is interrupted for more than 2 hours, the memory is automatically
erased.
Long-term
( ) and “2” (
)
The memory gathers driving information from any number of individual jour-
neys up to a total of 99 hours and 59 minutes driving or 9,999 kilometres driv-
en.
The indicator is automatically set back to zero if one of the indicated values is
exceeded.
Since refuel
( ) or “3” (
)
The memory gathers driving information since the last refuelling.
The memory is erased automatically the next time you fill up.
Select memory
▶ Select the driving data information desired.
▶ Confirm details again to select the desired memory.
Resetting ▶ Select the driving data information desired.
▶ Select the desired memory.
▶ Reset the selected memory with a long acknowledgement (holding pressed).
Note
Disconnecting the vehicle battery will delete all memory data.
MAXI DOT display
Introduction
This chapter contains information on the following subjects:
Main menu
42
Operation using the operating lever
43
Operation using the multifunction steering wheel
43
Menu item
Navigation44
Menu item
Audio44
Menu item
Telephone45
Menu item
Assist systems45
Compass point display
45
The MAXI DOT display (hereinafter referred to as the display) is a user interface
which, depending on the equipment configuration, delivers information about
the Infotainment, the multifunction display, the assistance systems, etc.
WARNINGConcentrate fully at all times on your driving! As the driver you are fully re-
sponsible for the operation of your vehicle.
Main menu
Read and observe
on page 42 first.
Call up the main menu
›
Press and hold the button
A
on the operating lever » Fig. 30 on page 43 .
or
42Using the system
Page 47 of 208

Menu itemTelephone
Read and observe on page 42 first.
Select menu item
Telephone›
Select and confirm
Telephone
in the main menu.
›
Turn dial
G
» Fig. 31 on page 43 .
The system displays a call list.
If the call list includes no entries, the following message appears
No entries avail-able.
The following symbols are displayed next to each entry in the call list. Incoming call
Outgoing call
Missed call
Outgoing call
■
Cancel
- Ends the call
Incoming call
■
Answer
– Answer incoming call
■
Reject
– Reject incoming call
■
Ignore
- Mute the ringer (this option is only available if there is no other call)
Ongoing conversation or conference call
■
Hang up
- End a call
■
Hold
– Hold a call
■
Continue
– Continue held call
■
Mic. off
– Microphone off
■
Mic. on
– Microphone on
■
Private
– Switch the call to the telephone
■
Hands-free
– Toggles the call to the device
Ongoing and held call ■
Hang up
– End an ongoing call
■
Call wait.
– Switch to a held call
■
Conference
– Make a conference call 1)
■
Mic. off
– Microphone off
■
Mic. on
– Microphone on
■
Private – Switch ongoing call to the telephone
■Hands-free
– Switch ongoing call to the device
Symbols in the display Charge status of the telephone battery 1)
Signal strength 1)
A telephone is connected to the unit
Missed calls (if there are several missed calls, the number of calls is shown
next to the symbol)
Switch-off microphone
Menu item
Assist systems
Read and observe on page 42 first.
Select menu item
Assist systems›
Select and confirm
Assist systems
in the main menu.
or
›
Press the button on the multi-function steering wheel .
In the
Assist systems
menu item, the Front Assist system can be activated/deac-
tivated.
Compass point display
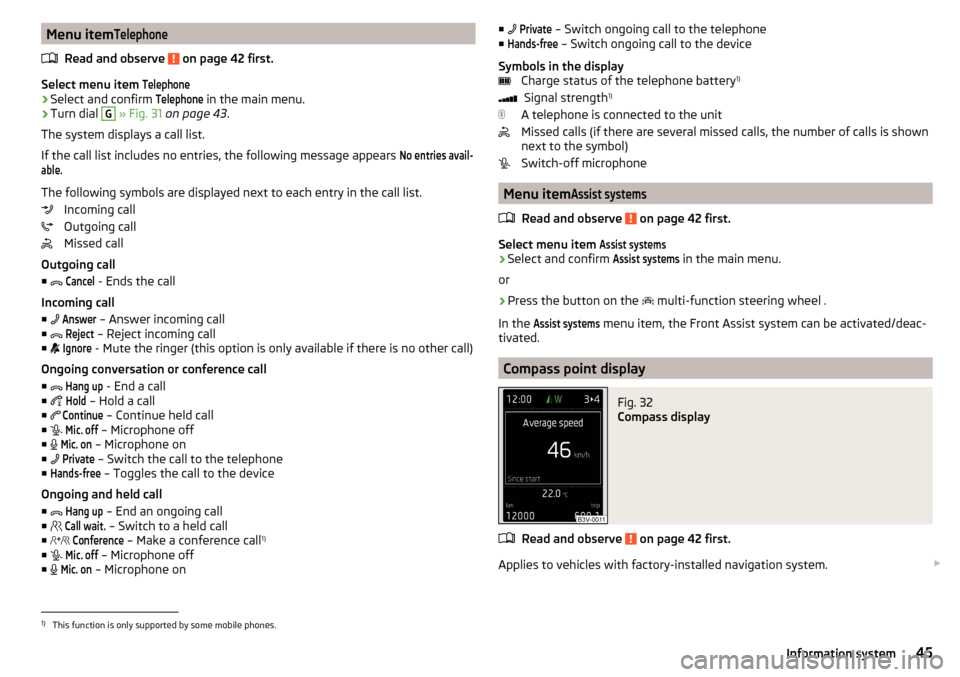
Fig. 32
Compass display
Read and observe on page 42 first.
Applies to vehicles with factory-installed navigation system.
1)
This function is only supported by some mobile phones.
45Information system
Page 52 of 208

▶The warning light in the driver door begins flashing.
▶ The anti-theft alarm system is activated.
If the doors or the boot lid remain open after the vehicle doors have been
locked, the turn signal lights do not flash until they have been closed.
Protection against unwanted vehicle unlocking
If you unlock the vehicle and do not open a door or the boot lid within the next
45 seconds, the vehicle will lock again automatically and the SafeLock system
or anti-theft alarm system will be switched on.WARNING■ Never leave the key in the vehicle when you exit the vehicle. Unauthor-
ized persons, such as children, for example, could lock the car, turn on the
ignition or start the engine - there is a danger of injury and accidents!■
When leaving the vehicle, never leave persons who are not completely in-
dependent, such as children, unattended in the vehicle. These individuals
might not be able to leave the vehicle on their own or to help themselves.
Can be fatal at very high or very low temperatures!
CAUTION
■ Each key contains electronic components; therefore it must be protected
against moisture and severe shocks.■
Keep the groove of the keys absolutely clean. Impurities (textile fibres, dust,
etc.) have a negative effect on the functionality of the locking cylinder and ig-
nition lock.
■
If the driver's door has been opened, the vehicle cannot be locked.
With the key on the lock cylinder unlock / lock
Fig. 35
Left side of the vehicle: Turning
the key for unlocking and locking
the vehicle
Read and observe and on page 50 first.
The key allows you to unlock or lock the vehicle via the lock cylinder in the
driver's door.
Unlocking/locking the vehicle with the key » Fig. 35
Unlocking the vehicle
Locking the vehicle
Unlocking/locking with the remote control key
Fig. 36
Remote control key
Read and observe and on page 50 first.
Function and description of the key » Fig. 36
Unlocking the vehicle
Locking the vehicle
Unlocking / locking the boot lid
Button for the fold out / fold in of the key
Warning light for the battery condition
If the red warning light does not flash when you press a button on the key,
the battery is discharged.
Unlocking / locking the boot lid
By pressing briefly symbol key
the boot lid unlocks.
Press and hold the symbol key
to release the lid (partially opened).
If the lid is unlocked or released with the key symbol on the key, then the
lid is automatically locked after closing. You can set a lock delay » page 55.
AB50Using the system