2015 SKODA OCTAVIA memory card
[x] Cancel search: memory cardPage 22 of 100
Store preferred stationRead and observe
on page 17 first.
For each broadcasting range there are 18 preset buttons to store the preferred
stations. These preset buttons are divided into three memory groups.
A station can be stored in the device memory in one of the following ways.
Store station from the Radio menu
›
In the menu Radio select a station and hold the desired station button
C
» Fig. 6 on page 17 until you hear an acoustic signal.
If a station was already stored in the desired position it is replaced with the
currently selected station.
Store station from the station list
›
In the list of available stations » page 18 hold the function key of the desired
station.
The following station button is displayed.
›
Press the station button.
Station logos
Read and observe
on page 17 first.
Channel logos are stored in the device memory which are assigned automati-
cally by the device when storing the stations under preset buttons.
Disable / Enable Auto-save station logos (FM / DAB)
›
In the Radio menu, press the function key
→ Advanced settings .
›
Select the menu item
Auto-save station logos Switch on or off » page 20,
Advanced Settings (FM) and » page 20 , Advanced settings (DAB) .
Assign station logo manually
A logo can be assigned manually for the preferred station.
›
In the Radio menu, press the function key
→ Station logos .
A menu with preset buttons for stations is displayed.
›
Press the preset button for the station, which a logo is to be assigned to.
A menu of media (SD card, USB) is displayed.
›
In the relevant media select the logo you want to have.
Remove station logo›In the Radio menu, press the function key → Station logos .
A menu with preset buttons for stations is displayed.›
Press the preset button for the station, which a logo is to be removed from.
Note
■ The following image formats are supported: jpg, gif, png, bmp.■We recommend a resolution of up to 500 x 500 pixels.
TP Traffic programme
Read and observe
on page 17 first.
The function allows the reception of traffic information.
Switching the traffic information station on and off manually
›
In the Radio menu, press the function key
.
›
Enable or disable the menu item
Traffic programme (TP).
Current traffic reports
During a traffic announcement, the following menu is displayed.
›
Cancel - Interruption of the current traffic report, the TP function remains ac-
tive
›
Deactivate - Interrupt the current traffic report and turn off TP function
Note
■
Should this station not transmit traffic reports or the signal is not available,
then the device automatically searches in the background for another TP sta-
tion.■
During playback in menu Media or a station in the AM radio range, traffic
news is received from the previously selected FM radio range.
19Radio
Page 26 of 100
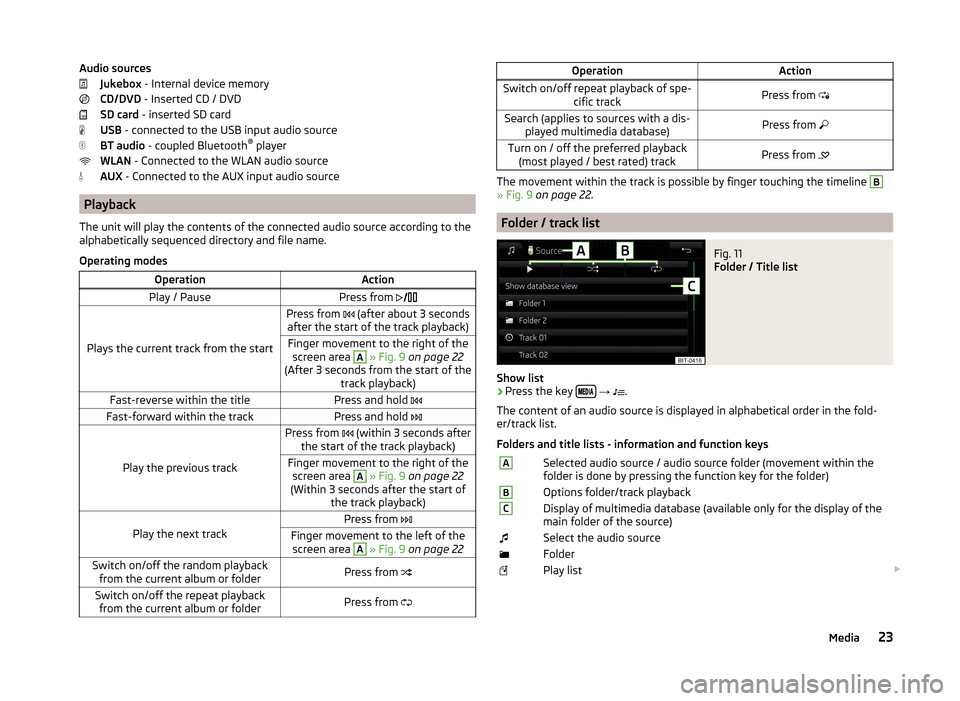
Audio sourcesJukebox - Internal device memory
CD/DVD - Inserted CD / DVD
SD card - inserted SD card
USB - connected to the USB input audio source
BT audio - coupled Bluetooth ®
player
WLAN - Connected to the WLAN audio source
AUX - Connected to the AUX input audio source
Playback
The unit will play the contents of the connected audio source according to the
alphabetically sequenced directory and file name.
Operating modes
OperationActionPlay / PausePress from
Plays the current track from the start
Press from (after about 3 seconds
after the start of the track playback)Finger movement to the right of the screen area A
» Fig. 9 on page 22
(After 3 seconds from the start of the track playback)Fast-reverse within the titlePress and hold Fast-forward within the trackPress and hold
Play the previous track
Press from (within 3 seconds after
the start of the track playback)Finger movement to the right of the screen area A
» Fig. 9 on page 22
(Within 3 seconds after the start of the track playback)Play the next track
Press from Finger movement to the left of the
screen area A
» Fig. 9 on page 22Switch on/off the random playback
from the current album or folderPress from Switch on/off the repeat playback
from the current album or folderPress from OperationActionSwitch on/off repeat playback of spe-
cific trackPress from Search (applies to sources with a dis-
played multimedia database)Press from Turn on / off the preferred playback
(most played / best rated) trackPress from
The movement within the track is possible by finger touching the timeline
B
» Fig. 9 on page 22 .
Folder / track list
Fig. 11
Folder / Title list
Show list
›
Press the key
→
.
The content of an audio source is displayed in alphabetical order in the fold-
er/track list.
Folders and title lists - information and function keys
ASelected audio source / audio source folder (movement within the
folder is done by pressing the function key for the folder)BOptions folder/track playbackCDisplay of multimedia database (available only for the display of the
main folder of the source)Select the audio sourceFolderPlay list 23Media
Page 27 of 100
/ Currently playing title / track playback stoppedThe title cannot be played (pressing the function key shows the
cause).
Note
■ With more than 1,000 tracks in the folder only the first 1,000 tracks with the
oldest creation date are displayed.■
The scanning speed of the folder / track list depends on the connection
speed and volume of data.
Multimedia database
Fig. 12
Multimedia database
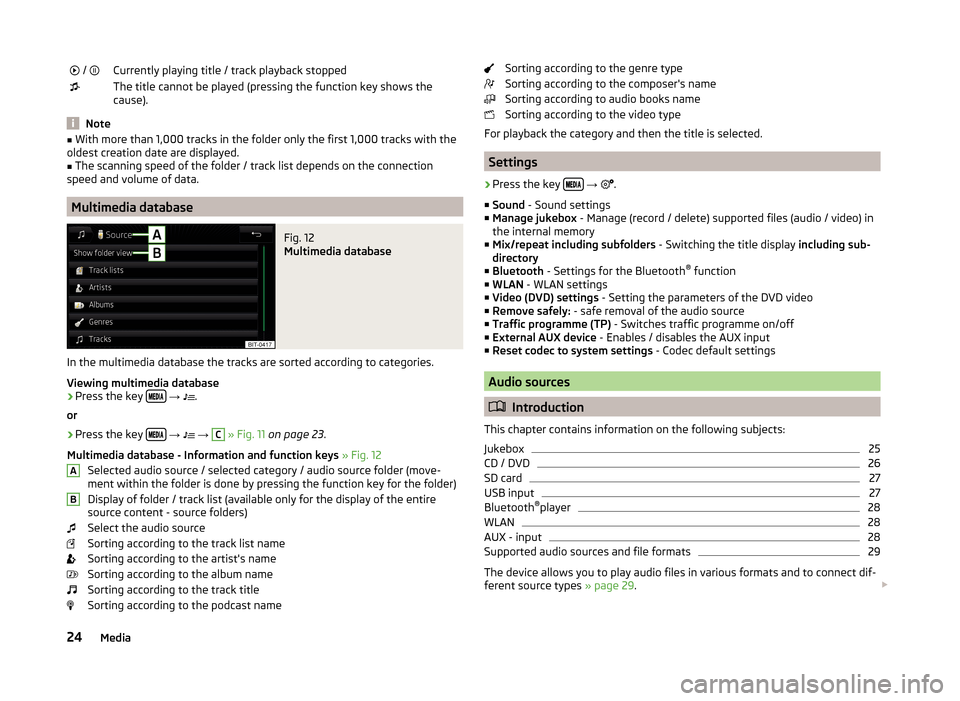
In the multimedia database the tracks are sorted according to categories.
Viewing multimedia database
›
Press the key
→
.
or
›
Press the key
→
→
C
» Fig. 11 on page 23 .
Multimedia database - Information and function keys » Fig. 12
Selected audio source / selected category / audio source folder (move- ment within the folder is done by pressing the function key for the folder)
Display of folder / track list (available only for the display of the entire
source content - source folders)
Select the audio source
Sorting according to the track list name
Sorting according to the artist's name
Sorting according to the album name
Sorting according to the track title
Sorting according to the podcast name
ABSorting according to the genre type
Sorting according to the composer's name
Sorting according to audio books name
Sorting according to the video type
For playback the category and then the title is selected.
Settings
›
Press the key
→
.
■ Sound - Sound settings
■ Manage jukebox - Manage (record / delete) supported files (audio / video) in
the internal memory
■ Mix/repeat including subfolders - Switching the title display including sub-
directory
■ Bluetooth - Settings for the Bluetooth ®
function
■ WLAN - WLAN settings
■ Video (DVD) settings - Setting the parameters of the DVD video
■ Remove safely: - safe removal of the audio source
■ Traffic programme (TP) - Switches traffic programme on/off
■ External AUX device - Enables / disables the AUX input
■ Reset codec to system settings - Codec default settings
Audio sources
Introduction
This chapter contains information on the following subjects:
Jukebox
25
CD / DVD
26
SD card
27
USB input
27
Bluetooth ®
player
28
WLAN
28
AUX - input
28
Supported audio sources and file formats
29
The device allows you to play audio files in various formats and to connect dif-
ferent source types » page 29.
24Media
Page 30 of 100
SD cardFig. 15
SD card slots
Read and observe
and on page 25 first.
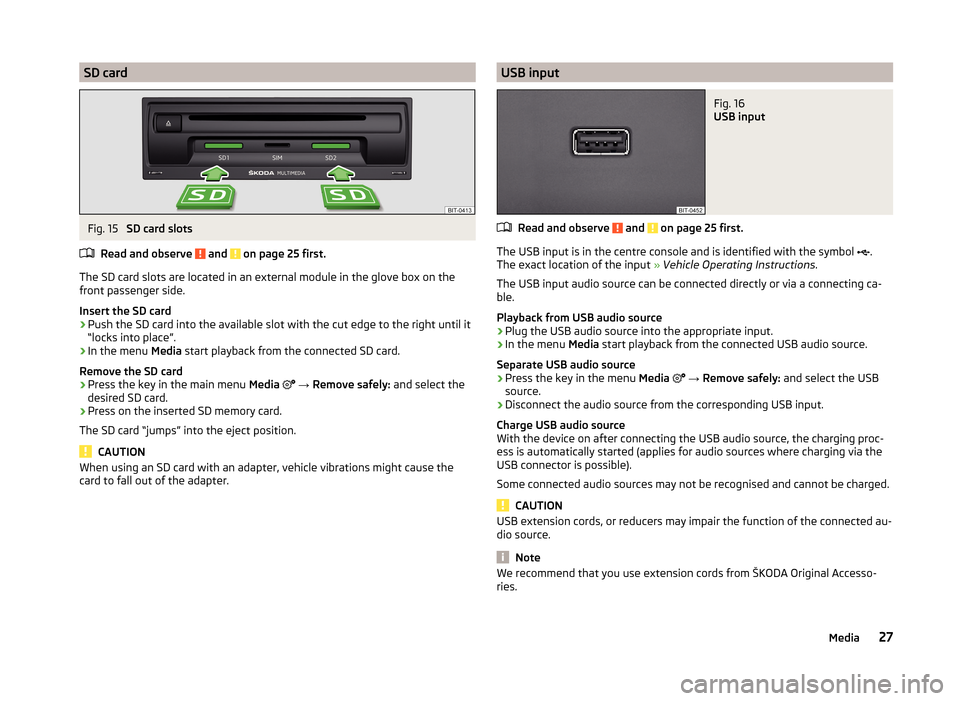
The SD card slots are located in an external module in the glove box on the
front passenger side.
Insert the SD card
›
Push the SD card into the available slot with the cut edge to the right until it
“locks into place”.
›
In the menu Media start playback from the connected SD card.
Remove the SD card
›
Press the key in the main menu Media
→ Remove safely: and select the
desired SD card.
›
Press on the inserted SD memory card.
The SD card “jumps” into the eject position.
CAUTION
When using an SD card with an adapter, vehicle vibrations might cause the
card to fall out of the adapter.USB inputFig. 16
USB input
Read and observe and on page 25 first.
The USB input is in the centre console and is identified with the symbol .
The exact location of the input » Vehicle Operating Instructions .
The USB input audio source can be connected directly or via a connecting ca-
ble.
Playback from USB audio source
›
Plug the USB audio source into the appropriate input.
›
In the menu Media start playback from the connected USB audio source.
Separate USB audio source
›
Press the key in the menu Media
→ Remove safely: and select the USB
source.
›
Disconnect the audio source from the corresponding USB input.
Charge USB audio source
With the device on after connecting the USB audio source, the charging proc-
ess is automatically started (applies for audio sources where charging via the
USB connector is possible).
Some connected audio sources may not be recognised and cannot be charged.
CAUTION
USB extension cords, or reducers may impair the function of the connected au-
dio source.
Note
We recommend that you use extension cords from ŠKODA Original Accesso-
ries.27Media
Page 35 of 100

DVD video
Video player
Introduction
This chapter contains information on the following subjects:
Main menu
32
Select a video source
32
Video playback
32
DVD menu
33
Supported video sources and file formats
33
Settings
33
First and foremost, pay attention to the safety instructions » page 6 , Impor-
tant notes .
Main menu
Fig. 19
DVD video: Main menu
Display main menu
›
Insert a CD/DVD into the appropriate slot in the external module.
or
›
Press the key
→
1
» Fig. 10 on page 22 -
and select the desired video
source.
›
Start the video file stored on the selected video source.
Main Menu - Information and function keys Select a video source
Playback time axis (movement within the video is possible by touching the
desired location in the time axis)
ABInformation for the selected video file (e.g., video title, chapter)
Open the DVD menu
Video settings
Note
■ For safety reasons, the video display is switched off at speeds over 5 km/h
and the following message is displayed: The vehicle is in motion. The display
has been switched off for your safety. The unit continues to play the sound-
track.■
The regional code of the player corresponds to the location of sale. If the fol-
lowing is displayed: Unable to play disc. DVD region code is incompatible. No.
of changes: …. , consult a ŠKODA service partner.
Select a video source
›
Press the key
→
1
» Fig. 10 on page 22 -
and select the desired video
source.
or
›
In the folder/track list and in the multimedia database press the function key
and select the desired video source
» Fig. 10 on page 22 -
.
Video sources Jukebox - Internal device memory
CD/DVD - Inserted CD / DVD
SD card 1 - inserted SD card 1
SD card 2 - inserted SD card 2
USB 1 - Connected to the USB input video source in the front centre con-
sole
USB 2 - Connected to the USB input audio source in the front centre con-
sole
Video playback
Playback starts automatically when a CD/DVD is inserted into the slot in the
external module.
In other cases, the video source must be selected and the video file started
manually.
C32DVD video
Page 48 of 100

Enter the PIN code and save
If the SIM card is protected by a PIN code then a menu appears after inserting
the SIM card, for entering and storing the PIN code » Fig. 28.›
Enter the PIN code of the SIM card.
›
If you would like to save the entered PIN code in the device memory, then
press the function key
(The next time the SIM card is inserted the device
PIN code will not be required).
›
Press the entered PIN code by pressing the function key
.
Establish a data connection using the SIM-card
After entering the PIN code a request is made by the device for data connec-
tion » page 52 .
The following menu is displayed.
›
Cancel - No data connection takes place
›
Connect - Data connection establishment
If the network is not sufficiently setup the device prompts for network set-
tings.
›
Press the function key Network settings.
›
Press the function key with the name of your data connection provider.
›
Set the parameters for the data connection » page 52.
Change PIN code
›
Press the key
→
→ PIN settings → Change PIN .
›
Enter the new PIN code and confirm.
Remove SIM card
Read and observe
on page 44 first.
›
Press on the inserted SIM memory card.
The SIM card “jumps” into the eject position.
›
Remove the SIM card from the slot.
CAUTION
If you let the SIM card protrude out from the slot, then it may fall out of the
slot while driving due to vehicle vibrations.Telephone functions
Introduction
This chapter contains information on the following subjects:
Enter a telephone number and dial
45
List of telephone contacts
46
Manage preferred contacts
47
Call list
47
Telephone conversation
48
Conference
48
Enter a telephone number and dial
Fig. 29
Numeric keypad / editing the telephone number
Enter a telephone number and dial
›
Press in the menu Telephone the function key
.
›
Enter the telephone number using the numeric keypad
» Fig. 29 -
.
›
Select the entered number by pressing the function key
, or select the en-
tered number with the prefix by pressing the function key .
Function keys of the numerical keyboard Enter the last dialled number / dial the telephone number entered
Enter the last dialled number / dial the telephone number entered with
the prefix
Dial the breakdown number in case of breakdown
Dial the info number (for information regarding the products and serv-
ices of the brand ŠKODA )
45Telephone
Page 50 of 100
Opens the menu for editing the telephone number of the contact before
dialling
Start the route guidance to the contact address
Searching for a contact in the contact list › Press the function key
Search.
› Search for the contact.
Import list
After the first connection of the primary telephone and/or the SIM card with
the device, the import of the telephone contacts to the device memory starts.
The import can take several minutes.
The device telephone book contains 4000 free memory locations for imported
telephone contacts. Each contact can contain up to 5 telephone numbers.
For the last 4 connected telephones an import follows with a maximum of
5000 contact assigned images to the device memory.
The number of contacts imported can be checked in the menu item Import
contacts » page 38 , Settings .
If an error occurs during the import, the following message appears Import
failed. Please try again and check whether the BT device … allows connec-
tions.
Refresh list
If the telephone is connected to the device again the list is updated automati-
cally.
The update can be performed manually as follows.
› Press the key
→
→ User profile → Import contacts .
During updating, the number of imported contacts to the device memory/the number of contacts in the telephone is displayed.
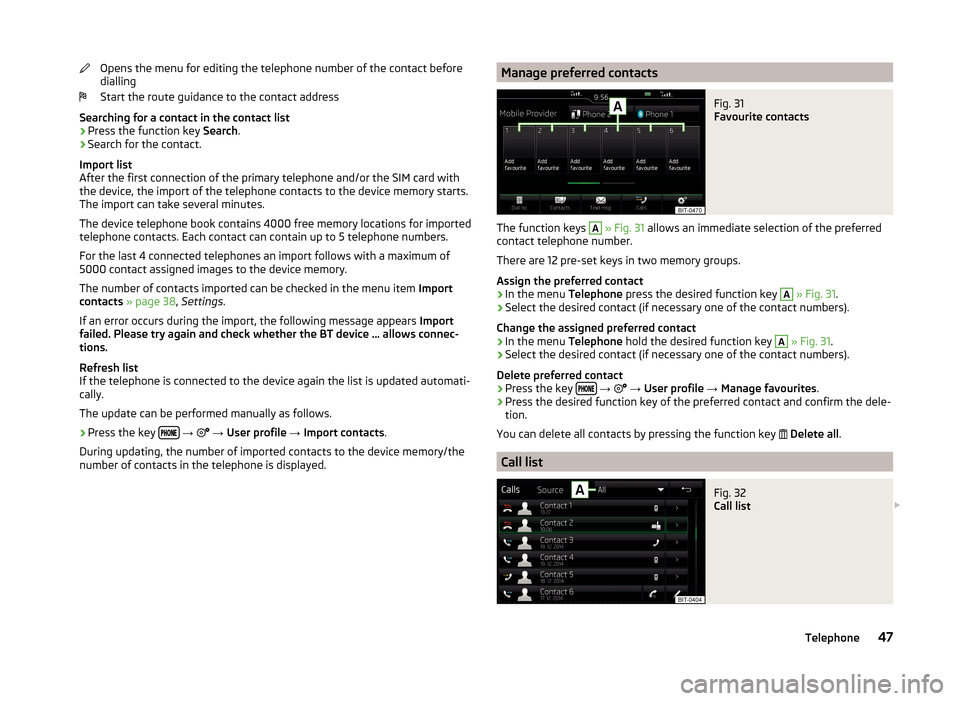
Manage preferred contactsFig. 31
Favourite contacts
The function keys
A
» Fig. 31 allows an immediate selection of the preferred
contact telephone number.
There are 12 pre-set keys in two memory groups.
Assign the preferred contact
›
In the menu Telephone press the desired function key
A
» Fig. 31 .
›
Select the desired contact (if necessary one of the contact numbers).
Change the assigned preferred contact
›
In the menu Telephone hold the desired function key
A
» Fig. 31 .
›
Select the desired contact (if necessary one of the contact numbers).
Delete preferred contact
›
Press the key
→
→ User profile → Manage favourites .
›
Press the desired function key of the preferred contact and confirm the dele-
tion.
You can delete all contacts by pressing the function key
Delete all .
Call list
Fig. 32
Call list
47Telephone
Page 54 of 100
WLAN connectivity and data connection
WLAN
Introduction
This chapter contains information on the following subjects:
WLAN Hotspot - Connection to the external device with the device WLAN
51
WLAN Client - Connect the device to an external device with WLAN
51
WLAN client - manual settings
52
The requirement for the WLAN function is the ignition is switched on.
After switching on the ignition, the last-used WLAN connection appears.
WLAN can be used to connect to the Internet or as a source for playing audio
files in the menu Media.
The device allows you to set up the WLAN hotspot on which up to 8 external
devices can be connected, or to connect to an external device via WLAN client.
WLAN hotspot and WLAN client are two independent connections, these can
be turned on simultaneously.
If the external module has a SIM card with activated data services or if there is
a connection with the telephone via the rSAP profile then it is not possible to
connect the device to the external device using WLAN.
WLAN Hotspot - Connection to the external device with the device
WLAN
WLAN hotspot switch on/off
›
Press the key
→
→ WLAN → Mobile hotspot → Mobile hotspot .
Connection set-up
›
Set WLAN hotspot in the device » page 16, WLAN Settings .
›
Enable the WLAN in the external device and search for any available WLAN.
›
Select the WLAN hotspot of the device (WLAN name of the device - SSID
» page 16 , WLAN Settings ).
›
Enter the type of security and the access password (if required).
WLAN Client - Connect the device to an external device with
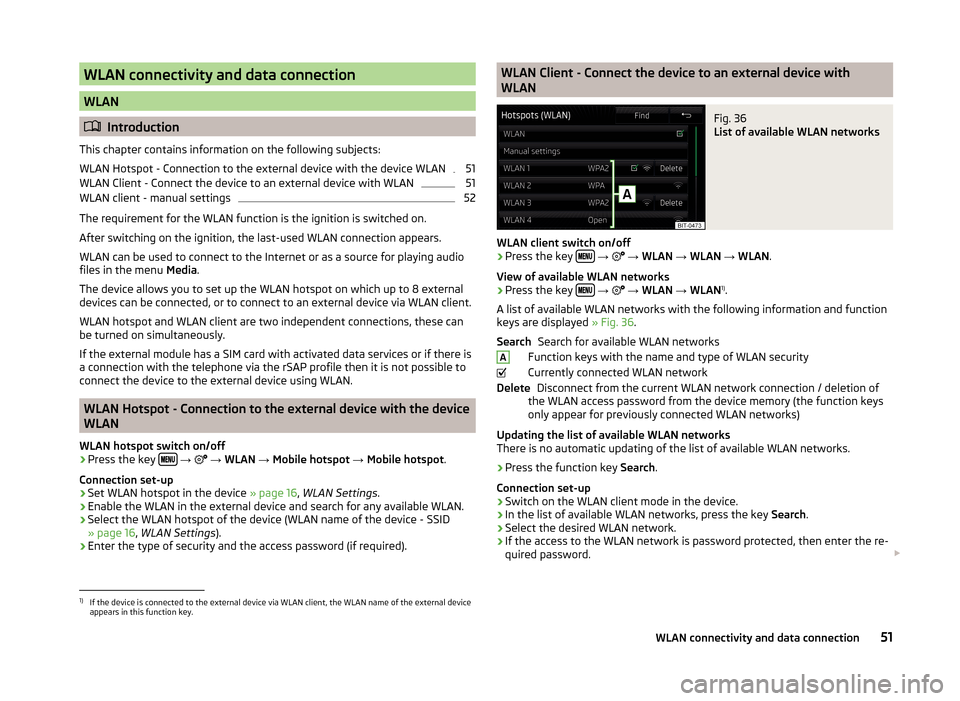
WLANFig. 36
List of available WLAN networks
WLAN client switch on/off
›
Press the key
→
→ WLAN → WLAN → WLAN .
View of available WLAN networks
› Press the key
→
→ WLAN → WLAN 1)
.
A list of available WLAN networks with the following information and function
keys are displayed » Fig. 36.
Search for available WLAN networks
Function keys with the name and type of WLAN security
Currently connected WLAN network Disconnect from the current WLAN network connection / deletion of
the WLAN access password from the device memory (the function keys
only appear for previously connected WLAN networks)
Updating the list of available WLAN networks
There is no automatic updating of the list of available WLAN networks.
› Press the function key
Search.
Connection set-up › Switch on the WLAN client mode in the device.
› In the list of available WLAN networks, press the key
Search.
› Select the desired WLAN network.
› If the access to the WLAN network is password protected, then enter the re-
quired password.
SearchADelete1)
If the device is connected to the external device via WLAN client, the WLAN name of the external device
appears in this function key.
51WLAN connectivity and data connection