2015 SKODA OCTAVIA Update
[x] Cancel search: UpdatePage 9 of 100
Introductory information
Important notes
Introduction
This chapter contains information on the following subjects:
Information on use, updating and compatibility
6
Component protection
6WARNING■ Concentrate fully at all times on your driving! As the driver you are fully
responsible for the operation of your vehicle.■
Only use the device in such a way that you are in full control of your vehi-
cle in every traffic situation – there is the risk of accidents!
■
Adjust the volume to ensure that acoustic signals from outside the vehi-
cle, e.g. sirens from emerging vehicles instructing you to give way to, such
as the police, ambulance and fire brigade, can be heard at all times.
■
High volumes can cause hearing damage!
CAUTION
In some countries, some unit features can no longer be selected when the ve-
hicle is running faster than a certain speed. This is not a malfunction, but com-
plies with the national legal regulations.
Information on use, updating and compatibility
Read and observe
and on page 6 first.
Refer to the ŠKODAInternet pages http://infotainment.skoda-auto.com for in-
formation on the compatibility of external devices as well as software updates
and navigation data.
Component protection
Read and observe
and on page 6 first.
Some electronic control units are equipped with protection components, which
serve as protective mechanisms, for example, in cases of theft of the ECUs.
For activated component theft protection the following message appears in
the screen Component theft protection: infotainment system availability cur-
rently limited. Please switch on the ignition.
If the component protection does not activate by switching on the ignition,
please contact a ŠKODA specialist garage.
Equipment overview
Introduction
This chapter contains information on the following subjects:
Description of the device
7
External module
7
Touch screen
7
Turn device on/off
7
Unit menus
8
Adjusting the volume
8
This chapter covers the device, the switching on and off and volume control of
the device.
6Introductory information
Page 19 of 100
■Voice control session end tone - Switch on/off the audible signal when voice
control ends
■ Input tone in voice dialogue - Switch on/off the audible signal for the voice
input
Safe removal of the data source
›
Press the key
→
→ Remove safely: Press and select the data source
to be removed.
Restore factory settings
›
Press the key
→
→ Factory settings .
In this menu, some or all settings can be restored.
Bluetooth ®
settings
›
Press the key
→
→ Bluetooth .
■ Bluetooth - Switch on/off Bluetooth ®
function
■ Visibility: - Switch on/off the visibility of the Bluetooth ®
device for other de-
vices
■ Name: - Change the device name
■ Paired devices - Display the list of coupled Bluetooth ®
Devices
■ Find devices - Searches for available devices
■ Bluetooth audio (A2DP/AVRCP) - Turn on/off the ability to connect an audio
device (e.g. MP3 player, tablet etc...)
WLAN Settings
›
Press the key
→
→ WLAN → Mobile hotspot .
The transfer all the settings is made only after pressing the function key
Store .
■ Mobile hotspot - WLAN hotspot switch on/off (if an external device is con-
nected to the device via a WLAN hotspot, then the symbol will appear in the
function key with the associated number of connected external devices)
■ Security level: - Setting the connection security with the WLAN hotspot
■ WPA2 - WPA2 security
■ WPA - WPA security
■ No security level - Without security (without access password for WLAN
hotspot)
■ Network key - Enter the access code to the WLAN hotspot
■ SSID: ... - Name of the WLAN hotspot device
■ Do not send network name (SSID) - WLAN hotspot security switch on/off
System information
›
Press the key
→
→ System information .
■ Device part number: ... - Part number of the unit
■ Hardware: ... - Version of the hardware used
■ Software: ... - Version of the software used
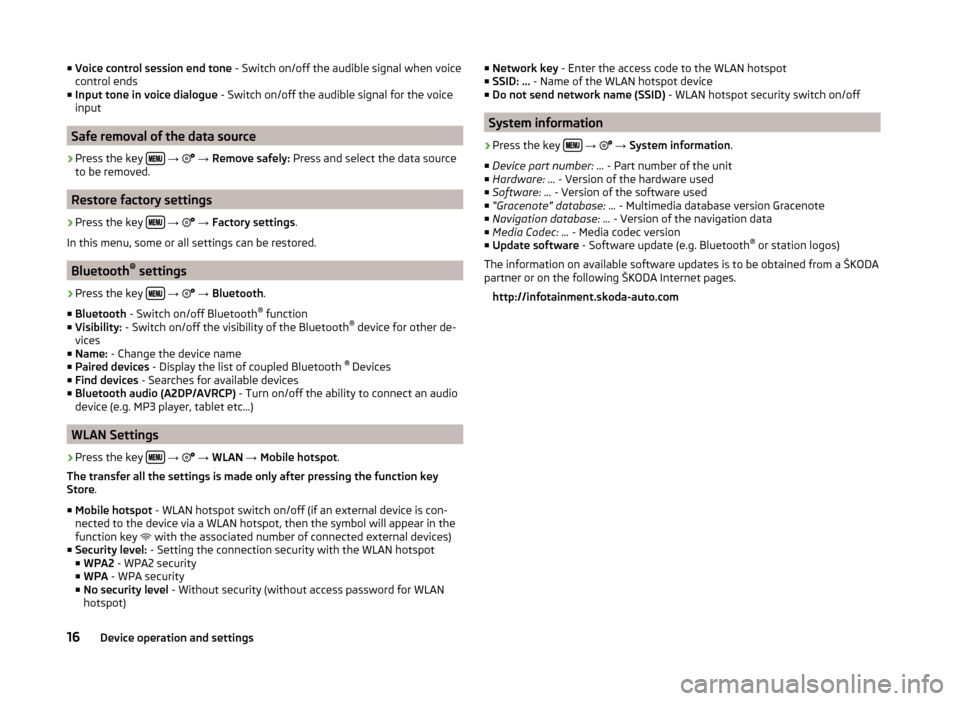
■ “Gracenote” database: ... - Multimedia database version Gracenote
■ Navigation database: ... - Version of the navigation data
■ Media Codec: ... - Media codec version
■ Update software - Software update (e.g. Bluetooth ®
or station logos)
The information on available software updates is to be obtained from a ŠKODA
partner or on the following ŠKODA Internet pages.
http://infotainment.skoda-auto.com
16Device operation and settings
Page 21 of 100
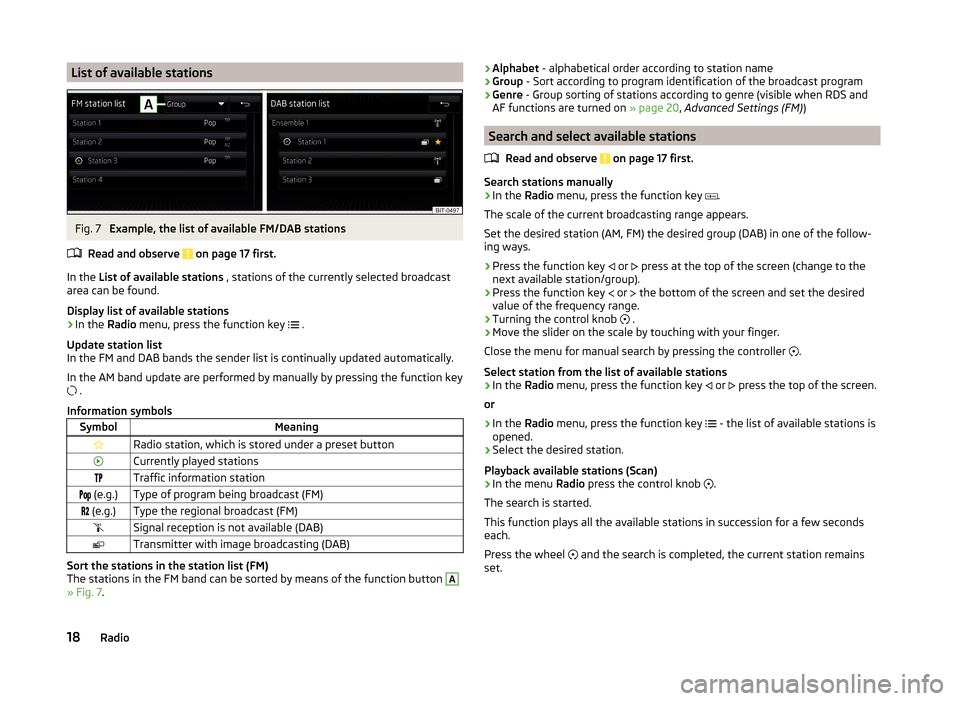
List of available stationsFig. 7
Example, the list of available FM/DAB stations
Read and observe
on page 17 first.
In the List of available stations , stations of the currently selected broadcast
area can be found.
Display list of available stations
›
In the Radio menu, press the function key
.
Update station list
In the FM and DAB bands the sender list is continually updated automatically.
In the AM band update are performed by manually by pressing the function key
.
Information symbols
SymbolMeaningRadio station, which is stored under a preset buttonCurrently played stationsTraffic information station (e.g.)Type of program being broadcast (FM) (e.g.)Type the regional broadcast (FM)Signal reception is not available (DAB)Transmitter with image broadcasting (DAB)
Sort the stations in the station list (FM)
The stations in the FM band can be sorted by means of the function button
A
» Fig. 7 .
›Alphabet
- alphabetical order according to station name
› Group
- Sort according to program identification of the broadcast program
› Genre
- Group sorting of stations according to genre (visible when RDS and
AF functions are turned on » page 20, Advanced Settings (FM) )
Search and select available stations
Read and observe
on page 17 first.
Search stations manually
›
In the Radio menu, press the function key
.
The scale of the current broadcasting range appears.
Set the desired station (AM, FM) the desired group (DAB) in one of the follow-
ing ways.
›
Press the function key or
press at the top of the screen (change to the
next available station/group).
›
Press the function key or
the bottom of the screen and set the desired
value of the frequency range.
›
Turning the control knob .
›
Move the slider on the scale by touching with your finger.
Close the menu for manual search by pressing the controller .
Select station from the list of available stations
›
In the Radio menu, press the function key
or
press the top of the screen.
or
›
In the Radio menu, press the function key
- the list of available stations is
opened.
›
Select the desired station.
Playback available stations (Scan)
›
In the menu Radio press the control knob
.
The search is started.
This function plays all the available stations in succession for a few seconds
each.
Press the wheel and the search is completed, the current station remains
set.
18Radio
Page 43 of 100

Pairing and connecting
Introduction
This chapter contains information on the following subjects:
conditions for coupling
40
Telephone search
40
Pairing - no telephone connected
41
Pairing - a telephone is connected
41
Pairing - two telephones connected
41
Connected SIM card in an external module, no telephone connected
42
Connected SIM card in an external module, a telephone - coupling
42
Pairing from the telephone
42
Pairing confirmation
42
Administering coupled devices
43
To connect a telephone with the device, the two devices must be paired via
Bluetooth ®
.
The pairing procedure is dependent on the number of telephones already con-
nected, whether using the inserted SIM card in the external module or via the
telephone using the profile rSAP » page 37, Possible connection types .
A connection with a telephone that is already paired does not require coupling. It is enough to find the telephone that has been coupled in the list of coupled
telephones and make the connection.
If a SIM card is located in the external module with activated telephone serv-
ices, then only one telephone can be connected with the device. Depending on
the telephone used only those telephone contact lists and text messages
(SMS) are available.
If a device is connected to the device using Apple CarPlay, then a connection
using Bluetooth ®
is possible.
Note
■ The range of the connection to the hands-free system is limited to the pas-
senger compartment.■
The maximum number of paired telephones is 20. Pairing a new telephone
after reaching the maximum number causes the telephone that has not been
paired for the longest time to be automatically replaced.
conditions for coupling
The telephone can be coupled with the device under the following conditions. The ignition is switched on.
The Bluetooth ®
function of the device » page 16 and the telephone is
switched on.
The visibility of the device » page 16 and the telephone is switched on.
The telephone is within range of the Bluetooth ®
signal of the device.
The telephone is compatible with the device.
There is no device connected to the device using Apple CarPlay.
The pairing can be initiated from the device or from the telephone.
During the pairing and connecting process the device can demand the confir-
mation by the Bluetooth ®
profile (e.g., enable contact import, enable the test
messaging or the connection of an audio player or similar). The telephone dis-
play should be monitored to acknowledge any possible request.
Please refer to the compatibility of telephones as well as updates which are
available for the Bluetooth ®
device, and are available on the following ŠKODA
Internet pages.
http://infotainment.skoda-auto.com
Telephone search
The telephone is not in the list of paired devices
The telephone can be searched for in one of the following ways.
›
If there is no connected telephone to the device, then press the key
→
Find telephone .
›
If there is
no telephone connected to the device, then press the key
→
→ Find telephone .
›
If a SIM card is inserted in the external module of the device, then press →
D
» Fig. 24 on page 37 → Find telephone .
A search for available devices starts. After about 30 seconds a list of found de-
vices appears, which is updated up to 1 minute after the start of the search ap-
pears.
›
If you do not want to wait for the display of the list press the function key
Results .
›
Select the desired select telephone.
40Telephone
Page 50 of 100
Opens the menu for editing the telephone number of the contact before
dialling
Start the route guidance to the contact address
Searching for a contact in the contact list › Press the function key
Search.
› Search for the contact.
Import list
After the first connection of the primary telephone and/or the SIM card with
the device, the import of the telephone contacts to the device memory starts.
The import can take several minutes.
The device telephone book contains 4000 free memory locations for imported
telephone contacts. Each contact can contain up to 5 telephone numbers.
For the last 4 connected telephones an import follows with a maximum of
5000 contact assigned images to the device memory.
The number of contacts imported can be checked in the menu item Import
contacts » page 38 , Settings .
If an error occurs during the import, the following message appears Import
failed. Please try again and check whether the BT device … allows connec-
tions.
Refresh list
If the telephone is connected to the device again the list is updated automati-
cally.
The update can be performed manually as follows.
› Press the key
→
→ User profile → Import contacts .
During updating, the number of imported contacts to the device memory/the number of contacts in the telephone is displayed.
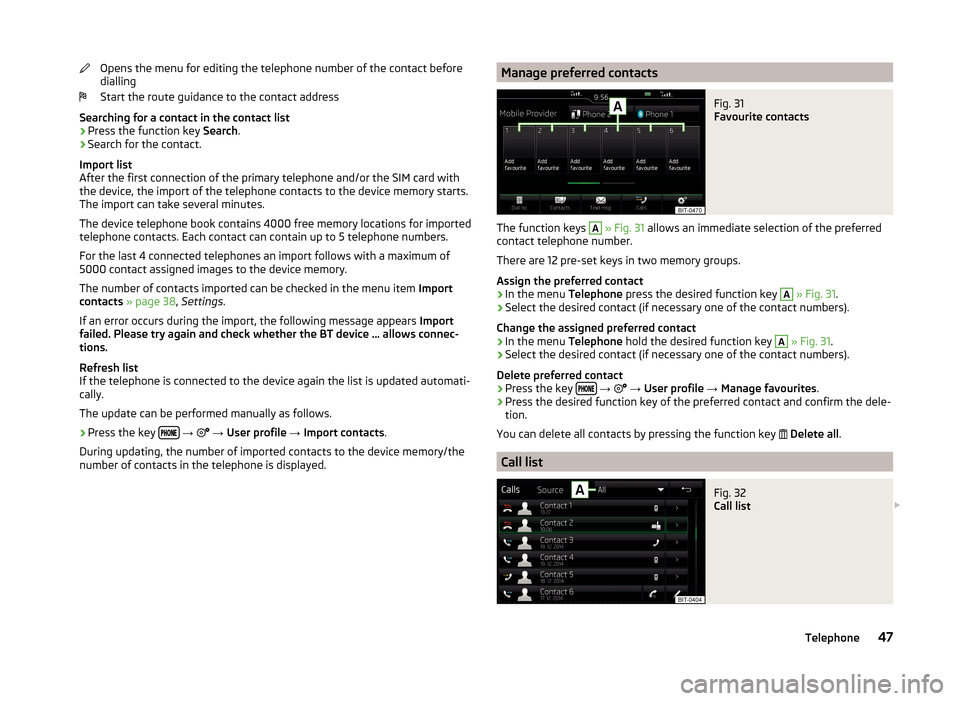
Manage preferred contactsFig. 31
Favourite contacts
The function keys
A
» Fig. 31 allows an immediate selection of the preferred
contact telephone number.
There are 12 pre-set keys in two memory groups.
Assign the preferred contact
›
In the menu Telephone press the desired function key
A
» Fig. 31 .
›
Select the desired contact (if necessary one of the contact numbers).
Change the assigned preferred contact
›
In the menu Telephone hold the desired function key
A
» Fig. 31 .
›
Select the desired contact (if necessary one of the contact numbers).
Delete preferred contact
›
Press the key
→
→ User profile → Manage favourites .
›
Press the desired function key of the preferred contact and confirm the dele-
tion.
You can delete all contacts by pressing the function key
Delete all .
Call list
Fig. 32
Call list
47Telephone
Page 58 of 100
Some applications require that the data connection in the connected device is
turned on.
By establishing the Android Auto ™
connection all existing Bluetooth ®
connec-
tions are terminated to the device and a Bluetooth ®
connection using the
Android Auto ™
is established to the device.
A device connected using Android Auto ™
cannot be used as an audio source in
the menu Media.
If route guidance is active at this moment in the device, then this is terminated
by starting the route guidance in the Android Auto ™
application. This is also
true reciprocally.
A list of devices and applications that the Android Auto ™
connection supports
can be found on the Google website.
Main menu
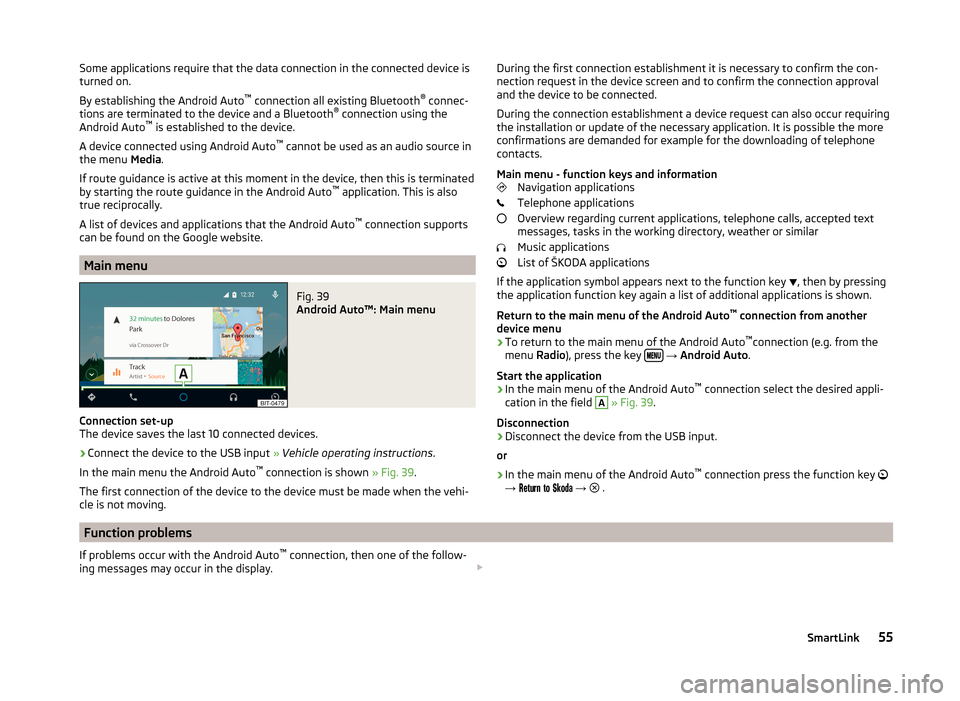
Fig. 39
Android Auto™: Main menu
Connection set-up
The device saves the last 10 connected devices.
›
Connect the device to the USB input » Vehicle operating instructions .
In the main menu the Android Auto ™
connection is shown » Fig. 39.
The first connection of the device to the device must be made when the vehi- cle is not moving.
During the first connection establishment it is necessary to confirm the con-
nection request in the device screen and to confirm the connection approval
and the device to be connected.
During the connection establishment a device request can also occur requiring
the installation or update of the necessary application. It is possible the more
confirmations are demanded for example for the downloading of telephone
contacts.
Main menu - function keys and information Navigation applications
Telephone applications
Overview regarding current applications, telephone calls, accepted text
messages, tasks in the working directory, weather or similar
Music applications
List of ŠKODA applications
If the application symbol appears next to the function key , then by pressing
the application function key again a list of additional applications is shown.
Return to the main menu of the Android Auto ™
connection from another
device menu
› To return to the main menu of the Android Auto ™
connection (e.g. from the
menu Radio), press the key
→ Android Auto .
Start the application › In the main menu of the Android Auto ™
connection select the desired appli-
cation in the field
A
» Fig. 39 .
Disconnection
› Disconnect the device from the USB input.
or
› In the main menu of the Android Auto ™
connection press the function key
→
→
.
Function problems
If problems occur with the Android Auto ™
connection, then one of the follow-
ing messages may occur in the display. 55SmartLink
Page 63 of 100
Navigation
Navigation description
Introduction
This chapter contains information on the following subjects:
GPS satellite signal
60
Navigation data
60
Main menu
60
Pop-up windows
61
GPS satellite signal
The unit uses the GPS (Global Positioning System) satellite signal for route
guidance.
Outside the range of the GPS satellite signal (e.g. in dense vegetation, in tun-
nels, parking garages, etc.), the unit navigates only with restrictions using
some on-vehicle sensors (such as speed sensor or steering angle sensor).
The unit offers the possibility to show in the split screen display the following
Position » Fig. 44 on page 61 information about the current geographical po-
sition of the vehicle and the satellite signal.
Geographical longitude
Geographical latitude
Elevation
Number of received/available satellites
To view the information on the longitude and latitude of the current vehicle
position display requires the reception of GPS signals from at least three satel-
lites.
To view the elevation information of the current vehicle position display re-
quires the reception of GPS signals from at least five satellites.
Navigation data
Navigation data source
The navigation data is stored in the internal memory.
Finding out the version of the navigation data › Press in the
Navigation menu the function key
→ Version information .
Update navigation data
We recommend that you update the navigation data on a regular basis (e.g.
Due to newly developed roads and changed traffic signs etc.).
For information on how to update the navigation data ask a ŠKODA partner or
go to the following ŠKODA website.
http://infotainment.skoda-auto.com
Main menu
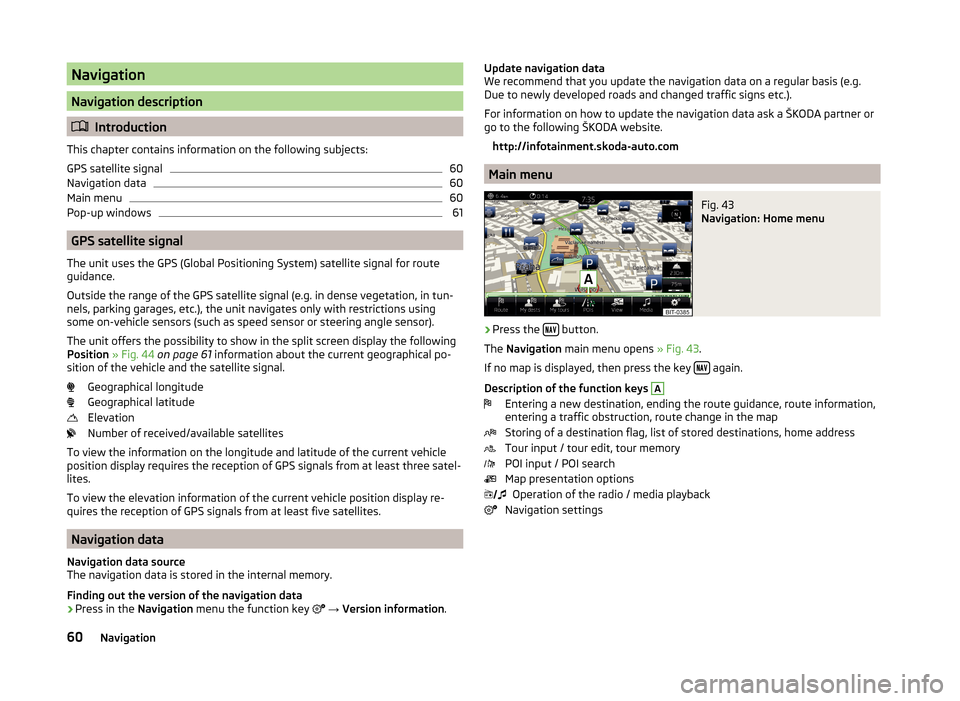
Fig. 43
Navigation: Home menu
›
Press the button.
The Navigation main menu opens » Fig. 43.
If no map is displayed, then press the key
again.
Description of the function keys
A
Entering a new destination, ending the route guidance, route information,
entering a traffic obstruction, route change in the map
Storing of a destination flag, list of stored destinations, home address
Tour input / tour edit, tour memory
POI input / POI search
Map presentation options Operation of the radio / media playback
Navigation settings
60Navigation
Page 69 of 100

http://infotainment.skoda-auto.com
Custom destination in vCard-format
In the device memory, a custom destination can be imported in the vCard for-
mat (*.vcf) from an SD card or a USB source.
Import
›
Insert the SD card into the device or connect a USB source with the file of
custom destination.
›
Press in the Navigation menu the function key
→ Import destinations .
›
Select the source and confirm the import.
Route guidance
›
Press in the Navigation menu the function key
→ Destinations →
→
.
›
Press the function key of the vCard to start the route guidance.
›
Press the function key
Start.
If the menu setting for the alternative routes is turned on, the guidance for
this route type (economic / fast / short) must be selected before starting.
If the destination entry occurs during route guidance, the destination change
must be confirmed by pressing the function key Start in addition to confirming
in the following menu that appears.
Delete
›
Press in the Navigation menu the function key
→ Destinations →
→
.
›
Press the function key
in the line with the name of your stored custom des-
tination.
›
In the destination details, press the function key Edit → Delete .
›
Confirm the deletion.
Custom POI category
In the device memory, custom POI categories that have been created using the
ŠKODA application “MyDestination” can be imported from the SD card.
Import
›
Insert the SD card with the POI categories into the device.
›
Press in the Navigation menu the function key
→ Version information →
Update .
›
Select the SD card as the source and confirm the import.
If there is already the same POI category name in the device, then it will be
overwritten during import.
Custom POI categories can be displayed on the map.›
Press in the Navigation menu the function key
→ Map → Select catego-
ries for POIs → My points of interest (Personal POI) .
Route guidance to a destination of another category
›
Press in the Navigation menu the function key
→ Other POIs .
›
Press the function key
A
» Fig. 50 on page 65 .
›
Select the search area.
›
Press the function key
B
» Fig. 50 on page 65 → My Points of Interest (Per-
sonal POI) .
›
Select the desired category of own destinations.
›
Press the function key Start.
If the menu setting for the alternative routes is turned on, the guidance for
this route type (economic / fast / short) must be selected before starting.
If the destination entry occurs during route guidance, the destination change
must be confirmed by pressing the function key Start in addition to confirming
in the following menu that appears.
Delete
›
Press in the Navigation menu the function key
→ Manage memory → De-
lete my POIs → Delete .
Map
Introduction
This chapter contains information on the following subjects:
Map description
67
Options for map display
67
Options for map display in the split screen
67
POI on the map
68
Road sign
68
Map Orientation
68
Map scale
68
Map alignment
6966Navigation