2015 SKODA OCTAVIA AUX
[x] Cancel search: AUXPage 11 of 100

Automatic Power On of the device
If the device was not turned off with the control switch before the ignition
was turned off, it will automatically switch on after the ignition is switched on.
Automatic Power Off of the device
If the vehicle key is pulled out of the ignition lock while the unit is switched on,
the device will switch off automatically.
If the vehicle is fitted with the starter button, the device will switch off auto-
matically after the engine is switched off and the door is opened.
With the ignition off, the device will automatically turn off after about 30 mi-
nutes.
The device turns off automatically under certain circumstances. The device in-
forms you for a few seconds by means of a text message on the device screen.
› Warning: 12 V battery low. Please start the engine or switch off the info-
tainment system. - The vehicle battery is low, start the engine or turn the
unit off.
› 12 V battery almost empty. The infotainment system will be switched off.
-
The vehicle battery is discharged, the device switches itself off.
› Operating temperature not maintained. The infotainment system will be
switched off. - The device temperature is too low or too high, the device
switches itself off.
Unit menus
Fig. 3
Unit menus
Call up the main menu
›
Press the key and the display shows the device menu
» Fig. 3.
Overview of the function keys
Menu Radio » page 17
Menu Media » page 22
Menu Images » page 30
Settings Sound » page 14
Device Settings Setup » page 14
Vehicle system settings Vehicle » page 80
Navigation menu » page 60
Menu Telephone » page 37
Menu TV tuner » page 34
Display of TMC traffic reports Road » page 76
Menu SmartLink » page 53
When connecting a supported mobile device, the actual connection is
shown instead of a symbol
›
-
Android Auto » page 54
›
-
Apple CarPlay » page 56
›
-
MirrorLink™ » page 57
Adjusting the volume
Every change in volume is displayed on the screen.
Increase volume
›
Turn the control to the right.
Decrease volume
›
Turn the control to the left.
Muting
›
Adjust the volume by turning the control to the left to 0.
The following symbol appears in the display when the sound is muted .
If at the time of muting a sound is made in the menu Media, then the playback
is interrupted (pause) 1)
.
CAUTION
If the volume is too high sound resonance can occur in the vehicle which can
lead to damaged speakers.1)
Does not apply to AUX.
8Introductory information
Page 17 of 100
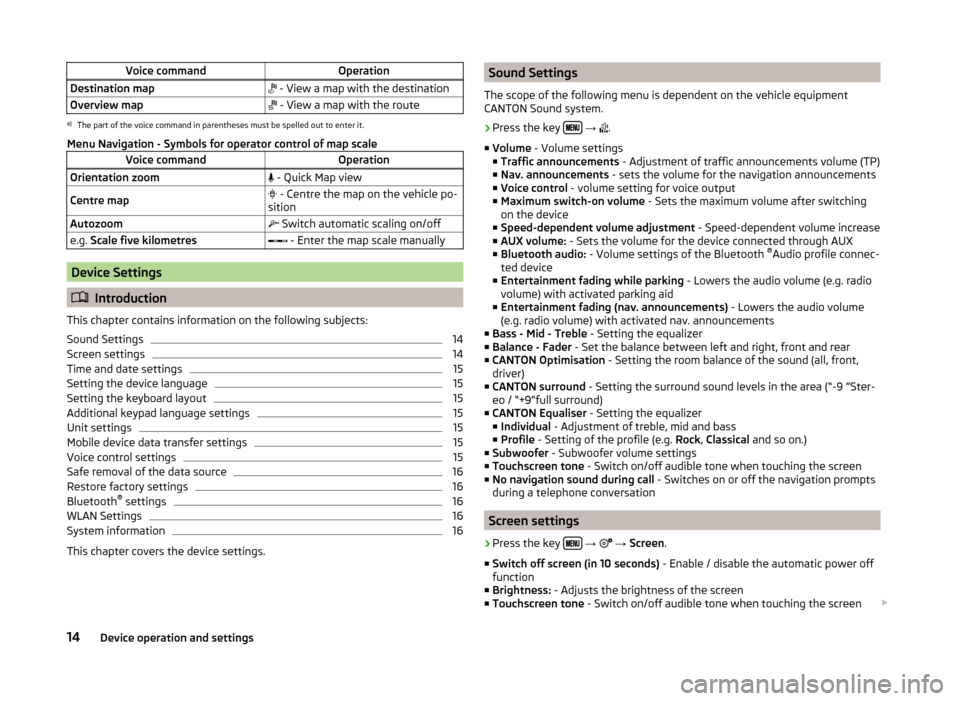
Voice commandOperationDestination map - View a map with the destinationOverview map - View a map with the routea)
The part of the voice command in parentheses must be spelled out to enter it.
Menu Navigation - Symbols for operator control of map scale
Voice commandOperationOrientation zoom - Quick Map viewCentre map - Centre the map on the vehicle po-
sitionAutozoom Switch automatic scaling on/offe.g. Scale five kilometres - Enter the map scale manually
Device Settings
Introduction
This chapter contains information on the following subjects:
Sound Settings
14
Screen settings
14
Time and date settings
15
Setting the device language
15
Setting the keyboard layout
15
Additional keypad language settings
15
Unit settings
15
Mobile device data transfer settings
15
Voice control settings
15
Safe removal of the data source
16
Restore factory settings
16
Bluetooth ®
settings
16
WLAN Settings
16
System information
16
This chapter covers the device settings.
Sound Settings
The scope of the following menu is dependent on the vehicle equipment
CANTON Sound system.›
Press the key
→
.
■ Volume - Volume settings
■ Traffic announcements - Adjustment of traffic announcements volume (TP)
■ Nav. announcements - sets the volume for the navigation announcements
■ Voice control - volume setting for voice output
■ Maximum switch-on volume - Sets the maximum volume after switching
on the device
■ Speed-dependent volume adjustment - Speed-dependent volume increase
■ AUX volume: - Sets the volume for the device connected through AUX
■ Bluetooth audio: - Volume settings of the Bluetooth ®
Audio profile connec-
ted device
■ Entertainment fading while parking - Lowers the audio volume (e.g. radio
volume) with activated parking aid
■ Entertainment fading (nav. announcements) - Lowers the audio volume
(e.g. radio volume) with activated nav. announcements
■ Bass - Mid - Treble - Setting the equalizer
■ Balance - Fader - Set the balance between left and right, front and rear
■ CANTON Optimisation - Setting the room balance of the sound (all, front,
driver)
■ CANTON surround - Setting the surround sound levels in the area (“-9 ”Ster-
eo / “+9”full surround)
■ CANTON Equaliser - Setting the equalizer
■ Individual - Adjustment of treble, mid and bass
■ Profile - Setting of the profile (e.g. Rock, Classical and so on.)
■ Subwoofer - Subwoofer volume settings
■ Touchscreen tone - Switch on/off audible tone when touching the screen
■ No navigation sound during call - Switches on or off the navigation prompts
during a telephone conversation
Screen settings
›
Press the key
→
→ Screen .
■ Switch off screen (in 10 seconds) - Enable / disable the automatic power off
function
■ Brightness: - Adjusts the brightness of the screen
■ Touchscreen tone - Switch on/off audible tone when touching the screen
14Device operation and settings
Page 26 of 100
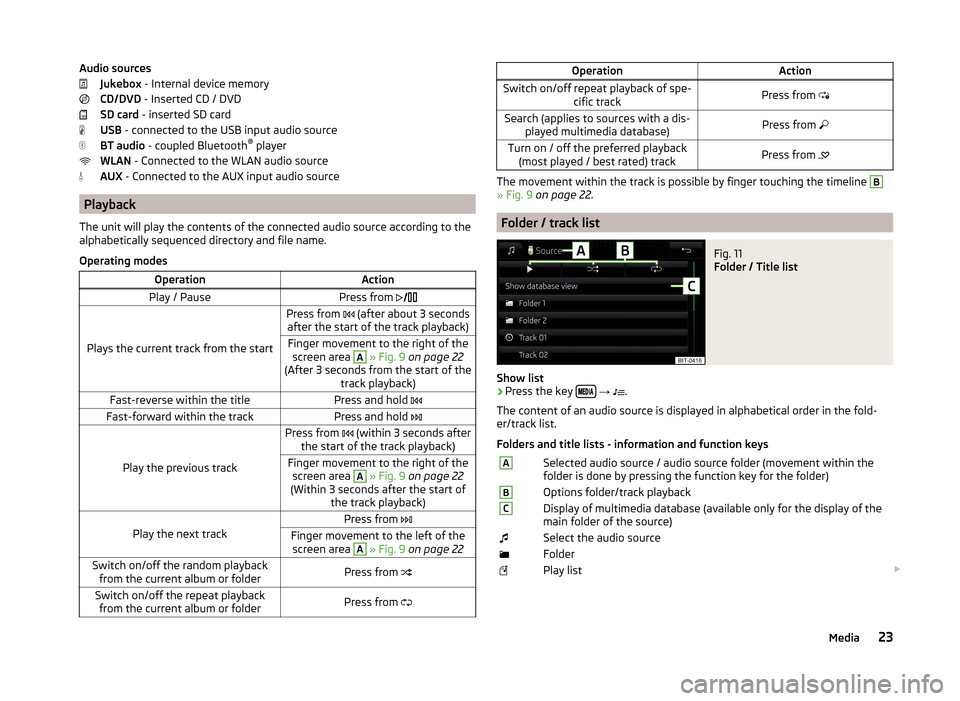
Audio sourcesJukebox - Internal device memory
CD/DVD - Inserted CD / DVD
SD card - inserted SD card
USB - connected to the USB input audio source
BT audio - coupled Bluetooth ®
player
WLAN - Connected to the WLAN audio source
AUX - Connected to the AUX input audio source
Playback
The unit will play the contents of the connected audio source according to the
alphabetically sequenced directory and file name.
Operating modes
OperationActionPlay / PausePress from
Plays the current track from the start
Press from (after about 3 seconds
after the start of the track playback)Finger movement to the right of the screen area A
» Fig. 9 on page 22
(After 3 seconds from the start of the track playback)Fast-reverse within the titlePress and hold Fast-forward within the trackPress and hold
Play the previous track
Press from (within 3 seconds after
the start of the track playback)Finger movement to the right of the screen area A
» Fig. 9 on page 22
(Within 3 seconds after the start of the track playback)Play the next track
Press from Finger movement to the left of the
screen area A
» Fig. 9 on page 22Switch on/off the random playback
from the current album or folderPress from Switch on/off the repeat playback
from the current album or folderPress from OperationActionSwitch on/off repeat playback of spe-
cific trackPress from Search (applies to sources with a dis-
played multimedia database)Press from Turn on / off the preferred playback
(most played / best rated) trackPress from
The movement within the track is possible by finger touching the timeline
B
» Fig. 9 on page 22 .
Folder / track list
Fig. 11
Folder / Title list
Show list
›
Press the key
→
.
The content of an audio source is displayed in alphabetical order in the fold-
er/track list.
Folders and title lists - information and function keys
ASelected audio source / audio source folder (movement within the
folder is done by pressing the function key for the folder)BOptions folder/track playbackCDisplay of multimedia database (available only for the display of the
main folder of the source)Select the audio sourceFolderPlay list 23Media
Page 27 of 100
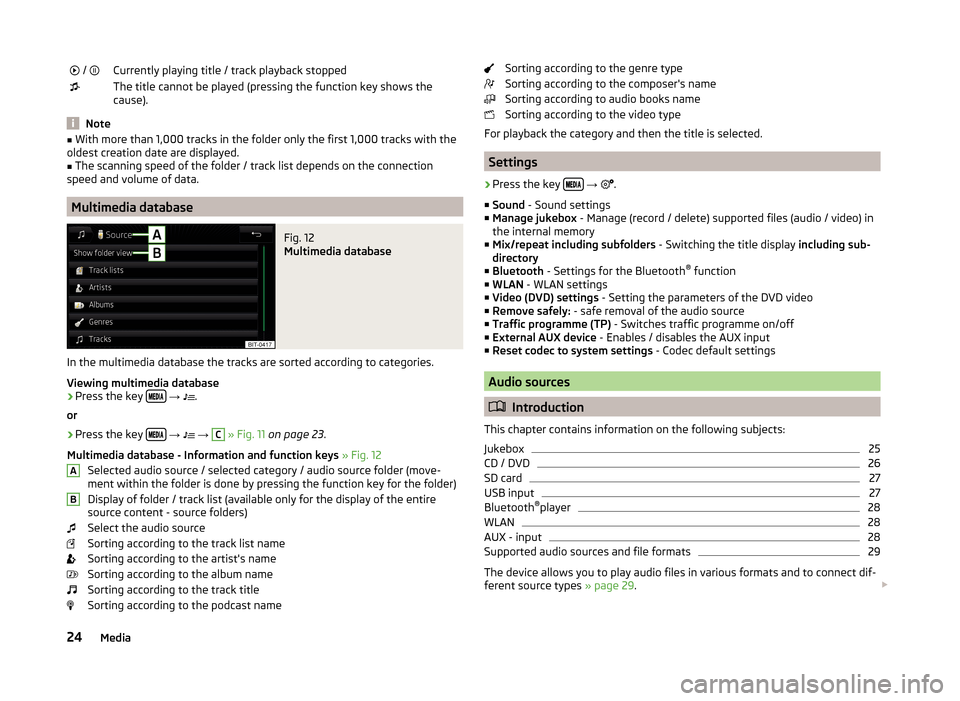
/ Currently playing title / track playback stoppedThe title cannot be played (pressing the function key shows the
cause).
Note
■ With more than 1,000 tracks in the folder only the first 1,000 tracks with the
oldest creation date are displayed.■
The scanning speed of the folder / track list depends on the connection
speed and volume of data.
Multimedia database
Fig. 12
Multimedia database
In the multimedia database the tracks are sorted according to categories.
Viewing multimedia database
›
Press the key
→
.
or
›
Press the key
→
→
C
» Fig. 11 on page 23 .
Multimedia database - Information and function keys » Fig. 12
Selected audio source / selected category / audio source folder (move- ment within the folder is done by pressing the function key for the folder)
Display of folder / track list (available only for the display of the entire
source content - source folders)
Select the audio source
Sorting according to the track list name
Sorting according to the artist's name
Sorting according to the album name
Sorting according to the track title
Sorting according to the podcast name
ABSorting according to the genre type
Sorting according to the composer's name
Sorting according to audio books name
Sorting according to the video type
For playback the category and then the title is selected.
Settings
›
Press the key
→
.
■ Sound - Sound settings
■ Manage jukebox - Manage (record / delete) supported files (audio / video) in
the internal memory
■ Mix/repeat including subfolders - Switching the title display including sub-
directory
■ Bluetooth - Settings for the Bluetooth ®
function
■ WLAN - WLAN settings
■ Video (DVD) settings - Setting the parameters of the DVD video
■ Remove safely: - safe removal of the audio source
■ Traffic programme (TP) - Switches traffic programme on/off
■ External AUX device - Enables / disables the AUX input
■ Reset codec to system settings - Codec default settings
Audio sources
Introduction
This chapter contains information on the following subjects:
Jukebox
25
CD / DVD
26
SD card
27
USB input
27
Bluetooth ®
player
28
WLAN
28
AUX - input
28
Supported audio sources and file formats
29
The device allows you to play audio files in various formats and to connect dif-
ferent source types » page 29.
24Media
Page 31 of 100
Bluetooth®
player
Read and observe
and on page 25 first.
The unit allows audio files of a connected Bluetooth ®
player to play using the
A2DP and AVRCP audio profile.
Connect the Bluetooth ®
player
›
Connect the player to the device - follow the same instructions as for pairing
the device with a telephone » page 41.
›
Select the audio source
BT audio » page 22 , Select audio source and then
the desired player.
Separate the Bluetooth ®
player
›
Terminate the connection in the list of paired devices » page 43.
Automatic playback stop and disconnection
If an Apple device is connected as a Bluetooth ®
player and is it connected to
the USB input (for example, for the purpose of charging the connected device),
then playback via Bluetooth ®
stops and playback is then only possible via USB.
If the audio source is switched from Bluetooth ®
Players to USB, then there is
an automatic interruption of the Bluetooth ®
connection. The following warning
message appears in the screen Bluetooth audio (A2DP) … Connection cancel-
led.
If the Bluetooth ®
player audio source is connected to the AUX input, then the
audio output is switched from the AUX input of the connected device. For fur-
ther playback the audio source is to be switched to AUX.
Note
If a device is connected to the device using Apple CarPlay, then a connection
using Bluetooth ®
is possible.
WLAN
Read and observe
and on page 25 first.
The device allows you to play audio files connected from a WLAN device to the
device.
Play over WLAN
›
Connect the player to the device's WLAN » page 51, WLAN Hotspot - Con-
nection to the external device with the device WLAN .
›Start the UPnP application in the connected device or connect a device that
allows you to set up a DLNA server.›
Select the audio source
WLAN » page 22 , Select audio source .
AUX - input
Fig. 17
AUX input
Read and observe and on page 25 first.
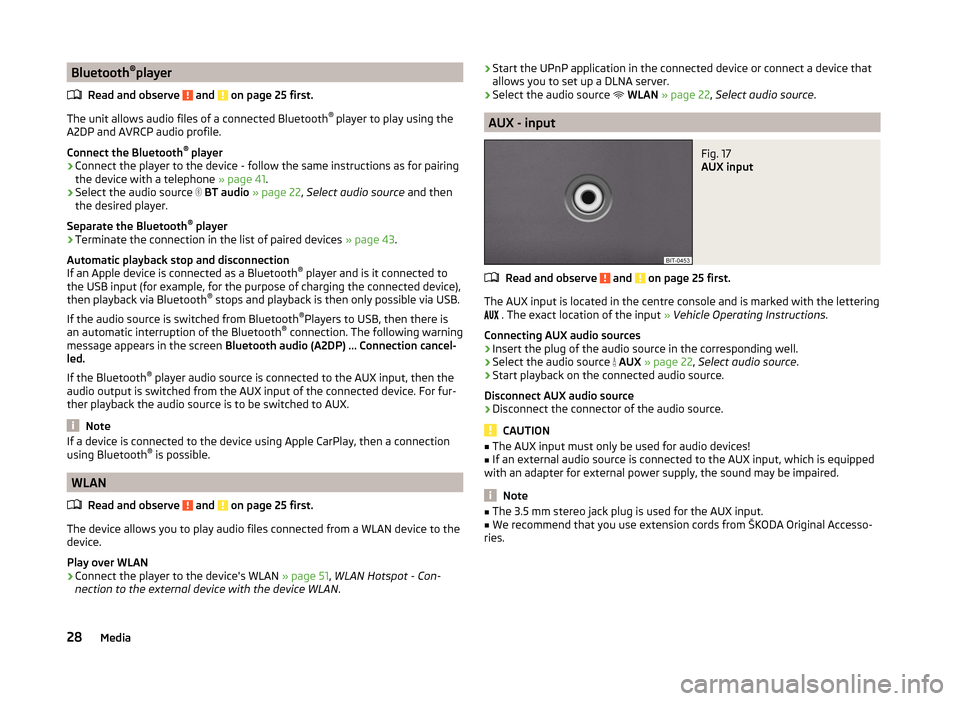
The AUX input is located in the centre console and is marked with the lettering
. The exact location of the input
» Vehicle Operating Instructions .
Connecting AUX audio sources
›
Insert the plug of the audio source in the corresponding well.
›
Select the audio source
AUX » page 22 , Select audio source .
›
Start playback on the connected audio source.
Disconnect AUX audio source
›
Disconnect the connector of the audio source.
CAUTION
■ The AUX input must only be used for audio devices!■If an external audio source is connected to the AUX input, which is equipped
with an adapter for external power supply, the sound may be impaired.
Note
■ The 3.5 mm stereo jack plug is used for the AUX input.■We recommend that you use extension cords from ŠKODA Original Accesso-
ries.28Media
Page 41 of 100
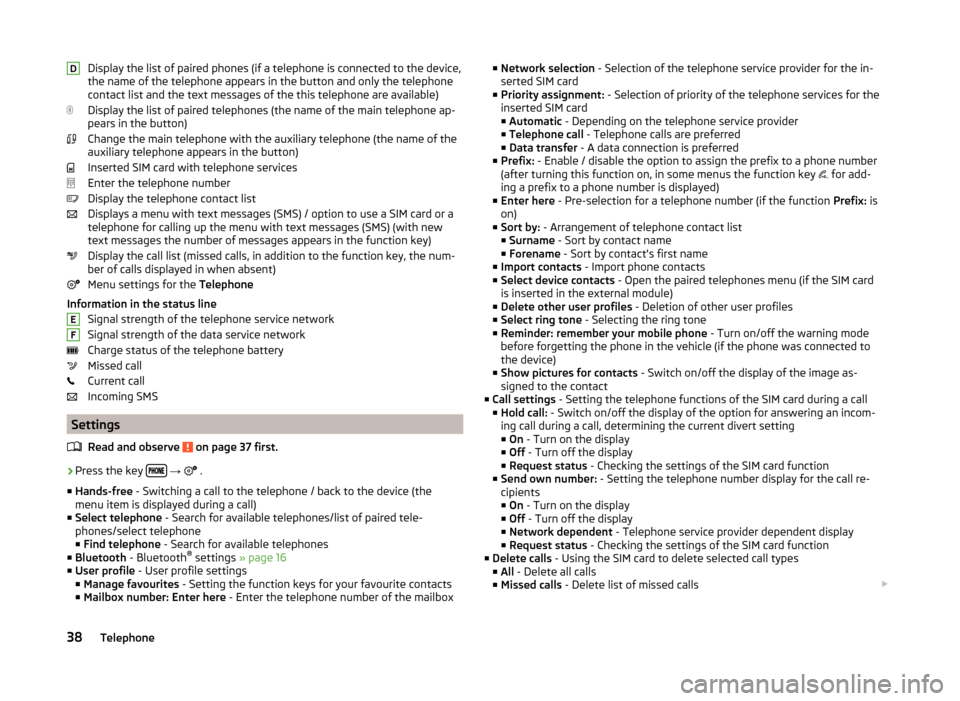
Display the list of paired phones (if a telephone is connected to the device,
the name of the telephone appears in the button and only the telephone
contact list and the text messages of the this telephone are available)
Display the list of paired telephones (the name of the main telephone ap-
pears in the button)
Change the main telephone with the auxiliary telephone (the name of the
auxiliary telephone appears in the button)
Inserted SIM card with telephone services
Enter the telephone number
Display the telephone contact list
Displays a menu with text messages (SMS) / option to use a SIM card or a telephone for calling up the menu with text messages (SMS) (with new
text messages the number of messages appears in the function key)
Display the call list (missed calls, in addition to the function key, the num-
ber of calls displayed in when absent)
Menu settings for the Telephone
Information in the status line Signal strength of the telephone service network
Signal strength of the data service network Charge status of the telephone battery
Missed call
Current call
Incoming SMS
Settings
Read and observe
on page 37 first.
›
Press the key
→
.
■ Hands-free - Switching a call to the telephone / back to the device (the
menu item is displayed during a call)
■ Select telephone - Search for available telephones/list of paired tele-
phones/select telephone ■ Find telephone - Search for available telephones
■ Bluetooth - Bluetooth ®
settings » page 16
■ User profile - User profile settings
■ Manage favourites - Setting the function keys for your favourite contacts
■ Mailbox number: Enter here - Enter the telephone number of the mailbox
DEF■
Network selection - Selection of the telephone service provider for the in-
serted SIM card
■ Priority assignment: - Selection of priority of the telephone services for the
inserted SIM card ■ Automatic - Depending on the telephone service provider
■ Telephone call - Telephone calls are preferred
■ Data transfer - A data connection is preferred
■ Prefix: - Enable / disable the option to assign the prefix to a phone number
(after turning this function on, in some menus the function key
for add-
ing a prefix to a phone number is displayed)
■ Enter here - Pre-selection for a telephone number (if the function Prefix: is
on)
■ Sort by: - Arrangement of telephone contact list
■ Surname - Sort by contact name
■ Forename - Sort by contact's first name
■ Import contacts - Import phone contacts
■ Select device contacts - Open the paired telephones menu (if the SIM card
is inserted in the external module)
■ Delete other user profiles - Deletion of other user profiles
■ Select ring tone - Selecting the ring tone
■ Reminder: remember your mobile phone - Turn on/off the warning mode
before forgetting the phone in the vehicle (if the phone was connected to
the device)
■ Show pictures for contacts - Switch on/off the display of the image as-
signed to the contact
■ Call settings - Setting the telephone functions of the SIM card during a call
■ Hold call: - Switch on/off the display of the option for answering an incom-
ing call during a call, determining the current divert setting ■ On - Turn on the display
■ Off - Turn off the display
■ Request status - Checking the settings of the SIM card function
■ Send own number: - Setting the telephone number display for the call re-
cipients
■ On - Turn on the display
■ Off - Turn off the display
■ Network dependent - Telephone service provider dependent display
■ Request status - Checking the settings of the SIM card function
■ Delete calls - Using the SIM card to delete selected call types
■ All - Delete all calls
■ Missed calls - Delete list of missed calls 38Telephone
Page 44 of 100

The telephone is in the list of coupled devices
If a telephone is connected with the device then proceed in one of the follow- ing ways.›
Press the key
→
or
D
» Fig. 24 on page 37 and select the desired
phone.
or
›
Press the key
→
Select telephone and select the desired telephone.
or
›
Press the key
→
→ Bluetooth → Paired devices and select the tele-
phone and a Bluetooth ®
- connection profile » page 43.
Pairing - no telephone connected
›
Press the key
→ Find telephone .
A search for available Bluetooth ®
devices takes place.
›
Select the desired select telephone.
›
Confirm the coupling.
After pairing confirmation the telephone is connected to the device as the
main telephone.
Pairing - a telephone is connected
›
Press the key
→
→ Find telephone .
A search for available Bluetooth ®
devices takes place.
›
Select the desired select telephone.
The following menu appears in the screen.
■ Cancel - Cancel the coupling
■ Replace - Pairing and replacement of the main telephone
■ Add - Pairing as additional telephone (the menu is not visible when the tele-
phone is connected via the rSAP profile)
› Select the desired connection type.
› Confirm the coupling.
After pairing confirmation the telephone connects to the device.
Pair the telephone when the main telephone is connected via the rSAP
profile
To connect another telephone to the device, it is necessary to first quit the
connection using the rSAP profile.
› Press the key
→
→ Find telephone .
› Select the desired select telephone.
› Press the function key
Add → Hands-free telephone (HFP) .
The main telephone ends the connection via the rSAP profile and connects to
the device via the HFP profile.
› Confirm the coupling.
The telephone to be connected connects with the device as the additional tel-
ephone.
Pairing - two telephones connected
›
Press the key
→
→ Find telephone .
A search for available Bluetooth ®
devices takes place.
›
Select the desired select telephone.
The following menu appears in the screen.
■ Cancel - Cancel the coupling
■ Main tel. - Changing the main telephone
■ Addition. tel. - Changing the auxiliary telephone
› Select the desired connection type.
› Confirm the coupling.
After pairing confirmation the telephone connects to the device.
If you want to replace a telephone that is also connected to the device as an audio player, then the following message appears on the screen.
Two devices are already connected. Please disconnect at least one of these
devices first in order to connect ….
Disconnect from the telephone to be replaced and repeat the coupling proce-
dure.
Pair the telephone via the rSAP profile › Press the key
→
→ Find telephone .
› Select the telephone you want with the rSAP profile.
41Telephone
Page 51 of 100
Show list›Press in the menu Telephone the function key .
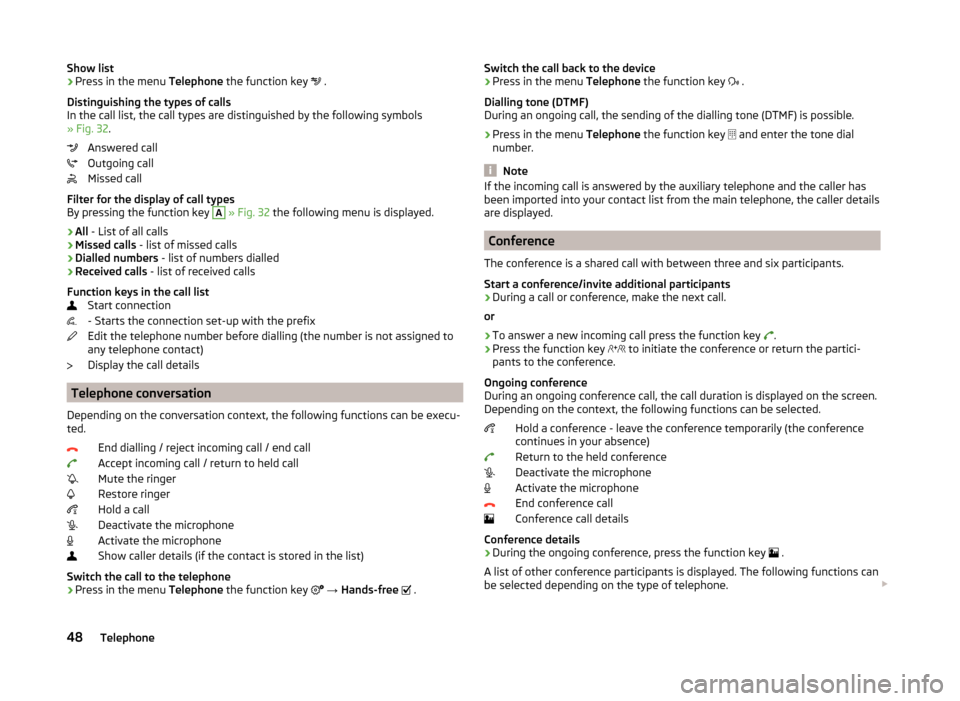
Distinguishing the types of calls
In the call list, the call types are distinguished by the following symbols
» Fig. 32 .
Answered call
Outgoing call
Missed call
Filter for the display of call types
By pressing the function key A
» Fig. 32 the following menu is displayed.
› All
- List of all calls
› Missed calls
- list of missed calls
› Dialled numbers
- list of numbers dialled
› Received calls
- list of received calls
Function keys in the call list Start connection
- Starts the connection set-up with the prefix
Edit the telephone number before dialling (the number is not assigned to
any telephone contact)
Display the call details
Telephone conversation
Depending on the conversation context, the following functions can be execu-
ted.
End dialling / reject incoming call / end call
Accept incoming call / return to held call
Mute the ringer
Restore ringer
Hold a call
Deactivate the microphone
Activate the microphone
Show caller details (if the contact is stored in the list)
Switch the call to the telephone
› Press in the menu
Telephone the function key
→ Hands-free
.
Switch the call back to the device
› Press in the menu
Telephone the function key .
Dialling tone (DTMF)
During an ongoing call, the sending of the dialling tone (DTMF) is possible.
› Press in the menu
Telephone the function key
and enter the tone dial
number.
Note
If the incoming call is answered by the auxiliary telephone and the caller has
been imported into your contact list from the main telephone, the caller details
are displayed.
Conference
The conference is a shared call with between three and six participants.
Start a conference/invite additional participants
›
During a call or conference, make the next call.
or
›
To answer a new incoming call press the function key .
›
Press the function key
to initiate the conference or return the partici-
pants to the conference.
Ongoing conference
During an ongoing conference call, the call duration is displayed on the screen.
Depending on the context, the following functions can be selected.
Hold a conference - leave the conference temporarily (the conference
continues in your absence)
Return to the held conference
Deactivate the microphone
Activate the microphone
End conference call
Conference call details
Conference details
› During the ongoing conference, press the function key
.
A list of other conference participants is displayed. The following functions can
be selected depending on the type of telephone.
48Telephone