2015 Seat Leon Sportstourer mirror
[x] Cancel search: mirrorPage 125 of 308

Opening and closing
their movements will trigger the alarm) or
when, f or e
x
ample, the vehicle is transported
or has to be towed with only one axle on the
ground.
False alarms
Interior monitoring will only operate correctly
if the vehicle is completely closed. Please ob-
serve related legal requirements.
The following cases may cause a false alarm:
● Open windows (partially or fully).
● Panoramic/tilting sunroof open (partially or
compl
etely).
● Movement of objects inside the vehicle,
such a
s loose papers, items hanging from
the rear vision mirror (air fresheners), etc. Note
● If the v
ehicle is relocked and the alarm is
activated without the volumetric sensor func-
tion, relocking will activate the alarm with all
its functions, except the volumetric sensor.
This function is reactivated when the alarm is
switched on again, unless it is deliberately
switched off.
● If the alarm has been triggered by the volu-
metric sensor
, this will be indicated by a
flashing of the warning lamp on the driver
door when the vehicle is opened. The flash is
different to the flash indicating the alarm is
activated. ●
The v ibr
ation of a mobile phone left inside
the vehicle may cause the vehicle interior
monitoring alarm to trigger, as both sensors
react to movements and shakes inside the ve-
hicle.
● If on activating the alarm, any door or the
rear lid i
s open, only the alarm will be activa-
ted. The vehicle interior monitoring and the
anti-tow system will only be activated once
all the doors are closed (including the rear
lid). Deactivating the vehicle interior moni-
t
orin
g and anti-t
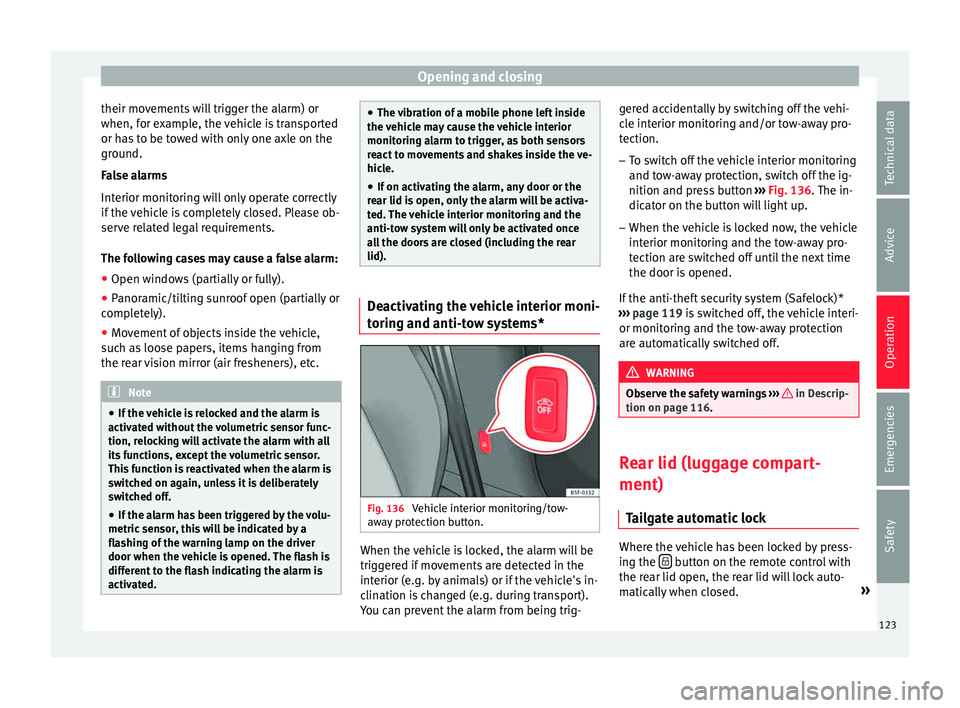
ow systems* Fig. 136
Vehicle interior monitoring/tow-
a w
a
y protection button. When the vehicle is locked, the alarm will be
trig
g
er
ed if movements are detected in the
interior (e.g. by animals) or if the vehicle's in-
clination is changed (e.g. during transport).
You can prevent the alarm from being trig- gered accidentally by switching off the vehi-
cle int
erior monitoring and/or tow-away pro-
tection.
– To switch off the vehicle interior monitoring
and tow-
away protection, switch off the ig-
nition and press button ››› Fig. 136. The in-
dicator on the button will light up.
– When the vehicle is locked now, the vehicle
interior monitorin
g and the tow-away pro-
tection are switched off until the next time
the door is opened.
If the anti-theft security system (Safelock)*
››› page 119 is switched off, the vehicle interi-
or monitoring and the tow-away protection
are automatically switched off. WARNING
Observe the safety warnings ›››
in Descrip-
tion on pag e 116
. Rear lid (luggage compart-
ment)
Tai
l
gate automatic lock Where the vehicle has been locked by press-
in
g the button on the remote control with
the r ear lid open, the r
ear lid will lock auto-
matically when closed. »
123
Technical data
Advice
Operation
Emergencies
Safety
Page 138 of 308

Operation
Options for adjusting driver and front pas-
sen g
er s
un visors:
● Lower the sun visor towards the wind-
scr
een.
● The sun visor can be pulled out of its
mounting and t
urned towards the door
››› Fig. 141 1 .
● Swing the sun visor towards the door, lon-
git udin
al
ly backwards.
Vanity mirror light
There may be a vanity mirror, with a cover, on
the rear of the sun visor. When the cover is
opened 2 a light comes on.
The l amp g
oe
s out when the vanity mirror
cover is closed or the sun visor is pushed
back up. WARNING
Folded sun blinds can reduce visibility.
● Always store sun blinds and visors in their
hous in
g when not in use. Note
The light above the sun visor automatically
swit c
hes off after a few minutes in certain
conditions. This prevents the battery from
discharging. Sun blind*
3 Applies to the model: LEON ST
Fig. 142
Rear window: sun blind. Rear window sun blind*
– Pull out the visor and hook it into the hooks
in the c entr
e of
the top of the door frame
››› Fig. 142.
Windscreen wiper and window
wiper sys
tems
Window wiper lever Read the additional information carefully
› ›
›
page 27 CAUTION
If the ignition is switched off with the wind-
sc r
een wipers active, they complete their wipe before returning to the rest position.
Ice, s
no
w and other obstacles on the wind-
screen may damage the wiper and the wind-
screen wiper motor.
● If necessary, remove snow and ice from the
winds
creen wipers before starting your jour-
ney.
● Carefully lift the frozen windscreen wipers
from the gla
ss. SEAT recommends a de-icer
spray for this operation.
● Do not switch on the windscreen wipers if
the winds
creen is dry. Cleaning with the
windscreen wipers while dry can cause dam-
age.
● In icy conditions, always check that the
wiper bl
ades are not frozen to the glass be-
fore using the wipers. In cold weather, it may
help to leave the vehicle parked with the wip-
ers in service position ›››
page 64. Note
● The wind s
creen and window wipers only
function when the ignition is switched on and
the bonnet or rear lid, respectively, are
closed.
● The interval wipe speed varies according to
the vehic
le speed. The faster the vehicle is
moving, the more often the windscreen is
cleaned.
● The rear wiper is automatically switched on
when the winds
creen wiper is on and the car
is in reverse gear. 136
Page 140 of 308

Operation
Rain sensor modified behaviour
P o
s
sible causes of faults and mistaken read-
ings on the sensitive surface ››› Fig. 144 of
the rain sensor include:
● Damaged blades: a film of water on the
damag
ed blades may lengthen the activation
time, reduce the washing intervals or result
in a fast and continuous wipe.
● Insects: insects on the sensor may trigger
the winds
creen wiper.
● Salt on roads: in winter, salt spread in the
roa
ds may cause an extra long wipe when the
windscreen is almost dry.
● Dirt: dry dust, wax, coating on glass (Lotus
effect) or trac
es of detergent (car wash) may
reduce the effectiveness of the rain sensor or
make it react more slowly, later or not at all.
● Cracked windscreen: the impact of a stone
wil
l trigger a single wipe cycle with the rain
sensor on. Next the rain sensor detects the
reduction in the sensitive surface area and
adapts accordingly. The behaviour of the sen-
sor will vary with the size of the damage
caused by the stone. WARNING
The rain sensor may not detect enough rain
to sw it
ch on the wipers.
● If necessary, switch on the wipers manually
when water on the w
indscreen obstructs visi-
bility. Note
● Cle
an the sensitive surface of the rain sen-
sor regularly and check the blades for dam-
age ››› Fig. 144 (arrow).
● To remove wax and coatings, we recom-
mend a window c
leaner containing alcohol. Rear vision mirror
Anti-dazz l
e rear vision mirrors Read the additional information carefully
› ›
›
page 17
Your vehicle is fitted with an interior rear vi-
sion mirror with a manual or automatic* con-
trol for anti-dazzle position.
Interior rear vision mirror with manual set-
ting for anti-dazzle position
– Position the small lever of the lower edge
of the mirror t
o face towards the rear. WARNING
In the event that an automatic anti-dazzle
re ar
vision mirror breaks, an electrolyte fluid
may leak. This could cause irritation to the
skin, eyes and respiratory organs. If you
come into contact with this liquid, it must be
rinsed with large quantities of water. If neces-
sary, get medial help. CAUTION
In the event that an automatic anti-dazzle
re ar
vision mirror breaks, an electrolyte fluid
may leak. This liquid attacks plastic surfaces.
Clean it with a wet sponge as soon as possi-
ble. Note
● If the light inc
ident in the interior rear vi-
sion mirror is obstructed (e.g. with the sun
blind*, the anti-dazzle rear vision mirror with
automatic setting will not operate perfectly.
● When the interior lights are on or reverse
gear en
gaged, the rear vision mirrors do not
darken with automatic adjustment for anti-
dazzle position. 138
Page 141 of 308

Lights and visibility
Adjusting the exterior rear view mir-
r or
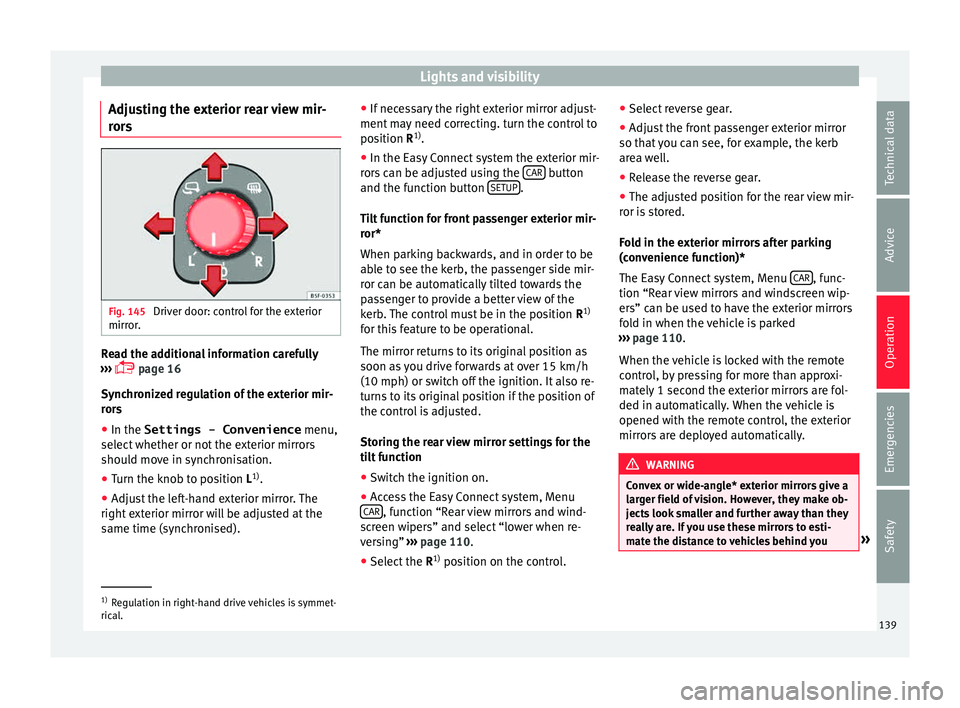
s Fig. 145
Driver door: control for the exterior
mirr or
. Read the additional information carefully
› ›
›
page 16
Synchronized regulation of the exterior mir-
rors
● In the Settings - Convenience menu,
select whether or not
the exterior mirrors
should move in synchronisation.
● Turn the knob to position L 1)
.
● Adjust the left-hand exterior mirror. The
right ext
erior mirror will be adjusted at the
same time (synchronised). ●
If nece
ssary the right exterior mirror adjust-
ment may need correcting. turn the control to
position R 1)
.
● In the Easy Connect system the exterior mir-
rors
can be adjusted using the CAR button
and the f u
nction b
utton SETUP .
Ti lt
f
unction for front passenger exterior mir-
ror*
When parking backwards, and in order to be
able to see the kerb, the passenger side mir-
ror can be automatically tilted towards the
passenger to provide a better view of the
kerb. The control must be in the position R1)
for this feature to be operational.
The mirror returns to its original position as
soon as you drive forwards at over 15 km/h
(10 mph) or switch off the ignition. It also re-
turns to its original position if the position of
the control is adjusted.
Storing the rear view mirror settings for the
tilt function
● Switch the ignition on.
● Access the Easy Connect system, Menu
CAR , function “Rear view mirrors and wind-
s c
r
een wipers” and select “lower when re-
versing” ›››
page 110.
● Select the R1)
position on the c
ontrol.●
Select r
everse gear.
● Adjust the front passenger exterior mirror
so that
you can see, for example, the kerb
area well.
● Release the reverse gear.
● The adjusted position for the rear view mir-
ror is
stored.
Fold in the exterior mirrors after parking
(convenience function)*
The Easy Connect system, Menu CAR , func-
tion “R e
ar
view mirrors and windscreen wip-
ers” can be used to have the exterior mirrors
fold in when the vehicle is parked
››› page 110.
When the vehicle is locked with the remote
control, by pressing for more than approxi-
mately 1 second the exterior mirrors are fol-
ded in automatically. When the vehicle is
opened with the remote control, the exterior
mirrors are deployed automatically. WARNING
Convex or wide-angle* exterior mirrors give a
lar g
er field of vision. However, they make ob-
jects look smaller and further away than they
really are. If you use these mirrors to esti-
mate the distance to vehicles behind you »1)
Regulation in right-hand drive vehicles is symmet-
rical .
139
Technical data
Advice
Operation
Emergencies
Safety
Page 142 of 308

Operation
when changing lane, you could misjudge the
dis
t
ance. Risk of accident! CAUTION
● If one of the mirr
or housings is knocked out
of position (e.g. when parking), the mirrors
must first be fully retracted with the electric
control. Do not readjust the mirror housing by
hand, as this will interfere with the mirror ad-
juster function.
● Before washing the vehicle in an automatic
car wa
sh, please make sure to retract the ex-
terior mirrors to prevent them from being
damaged. Electrically retractable exterior
mirrors must not be folded in or out by hand.
Always use the electrical power control. Note
If the electrical adjustment should fail to op-
erat e, both of
the mirrors can be adjusted by
hand by lightly pressing the edge of the mir-
ror glass. Seats and head restraints
Adju
s
tin
g the seats and headr-
ests
Manual adjustment of seats Read the additional information carefully
›› ›
page 15 WARNING
The safe driving chapter contains important
inform ation, tip
s, suggestions and warnings
that you should read and observe for your
own safety and the safety of your passengers
››› page 66. WARNING
● Adjus t
the front seats only when the vehi-
cle is stationary. Failure to follow this instruc-
tion could result in an accident.
● Be careful when adjusting the seat height.
Carel
ess or uncontrolled adjustment can
cause injuries.
● The front seat backrests must not be re-
clined for driv
ing. Otherwise, seat belts and
the airbag system might not protect as they
should, with the subsequent danger of injury. Electric driver seat adjustment*
Read the additional information carefully
›› ›
page 15 WARNING
● If the el ectric
front seats are used negli-
gently or without paying due attention, it can
cause serious injury.
● The front seats can also be electrically ad-
just
ed when the ignition is switched off. Nev-
er leave a child or any other person who may
need help in the vehicle.
● In the event of an emergency, electrical ad-
justment
can be stopped by pressing any
control. CAUTION
To avoid damaging the electrical components
of the fr ont
seats, please refrain from kneel-
ing on the seat or applying sharp pressure at
a single point to the seat cushion and back-
rest. Note
● It m a
y not be possible to electrically adjust
the seat if the vehicle battery is very low.
● If the engine is started while the seats are
being electric
ally adjusted, the adjustment
will stop. 140
Page 211 of 308

Driver assistance systems
Indication on display Fig. 211
On the instrument panel display: ex-
amp l
e
s of speed limits or overtaking prohibi-
tions with their respective additional signs. Speed limits or overtaking prohibitions with
their r
e
s
pective additional signs may be
shown on the instrument panel display
››› Fig. 211 and, depending on the navigation
system installed in a vehicle, also on the in-
fotainment system display ›››
page 28.
Traffic sign de-
tection system
messagesCause and solution
There are no
traffic signs
availableThe system is booting up.
OR: the camera has not recog-
nised any obligation or prohibi-
tion signs.
Error: Detec-
tion of traffic
signsThere is a fault in the system.
Have the system checked by a
specialised workshop.
Detection of traffic signs:
Clean the wind-
screen!The windscreen is dirty in the
camera area.
Clean the windscreen.
Traffic sign
detection is
currently limi-
tedThe navigation system is not
transmitting any data.
Check that the navigation sys-
tem has up-to-date maps.
OR: The vehicle is currently in a
region that is not included in the
navigation system's map.
Function not
availableThe traffic sign detection system
does not work in the current
country. WARNING
If messages are ignored, the vehicle may stall
in traffic and c
ause accidents and severe inju-
ries.
● Never ignore the messages displayed.
● Stop the vehicle at the next opportunity
and in a safe p
lace. Note
Failure to heed the control lamps and corre-
spondin g t
ext messages when they light up
may result in damage to the vehicle. Operation
The traffic sign detection system does not
work
in al
l countries ››› page 208, Countries
in which it works . Keep this in mind when
travelling abroad.
Display of traffic signs
When the traffic sign detection system is con-
nected, a camera located on the base of the
interior rear-view mirror records the traffic
signs in front of the vehicle. After checking
and evaluating the information from the cam-
era, the navigation system and the current
vehicle data, up to three valid traffic signs
are displayed ›››
Fig. 211 B in conjunction
with their corresponding additional signs.
The sign that is currently valid for the
driver is shown in the left side of the
screen For example, a maximum speed
limit of 130 km/h (100 mph)
››› Fig. 211 A.
A sign valid only in certain circum-
stances, e.g. 100 km/h (60 mph) is
shown second, together with the addi-
tional rain sign. »
First:
Second:
209
Technical data
Advice
Operation
Emergencies
Safety
Page 214 of 308

Operation
WARNING
● Alw a
ys pay attention, also when looking
straight ahead, to traffic and the vehicle
surroundings. The assistance systems are not
a replacement for driver awareness. When in-
serting or removing the vehicle from a park-
ing space, or when performing similar ma-
noeuvres the driver always assumes the re-
sponsibility.
● Adapt your speed and driving style at all
times t
o suit visibility, weather, road and traf-
fic conditions.
● The ultrasound sensors have blind spots in
which ob
stacles and people are not regis-
tered. Pay special attention to children and
animals.
● Always keep visual control of the vehicle
surrou
ndings: use the rear vision mirrors for
additional help. CAUTION
Parking Aid functions may be negatively af-
fect ed b
y different factors that may lead to
damage to the vehicle or its immediate sur-
rounds:
● Under certain circumstances, the system
does not
detect or display certain objects:
– Objects such as chains, trailer draw bars,
fences, posts and thin trees.
– Objects that are located above the sen-
sors, such as protrusions in a wall. –
Ob j
ects with certain surfaces or struc-
tures, such as wire mesh fences or pow-
der snow.
● Certain surfaces of objects and garments
do not refl
ect the ultrasound sensors' sig-
nals. The system cannot detect, at least cor-
rectly, these objects or people wearing such
clothes.
● Ultrasound sensor signals may be affected
by e
xternal sound sources. In certain circum-
stances this may prevent them from detect-
ing people or objects.
● Please note that low obstacles detected by
the syst
em may no longer be registered by
the sensors as the car moves closer, so the
system will not give any further warning. In
certain circumstances, objects such as high
kerbs that could damage the bottom of the
vehicle are not detected either.
● If the first warning from the Park Pilot is ig-
nored, the v
ehicle could suffer considerable
damage.
● The knocks or damage on the radiator
grill
e, bumper, wheel arch and vehicle under-
body can adjust the orientation of the sen-
sors. This can affect the parking aid function.
Have the function checked by a specialised
workshop. Note
● In cer t
ain situations, the system can give a
warning even though there is no obstacle in
the detected area, e.g: –
with r ough or c
obbled floors or ground
with long grass;
– with external ultrasound sources, such as
cleaning vehicles or other vehicles;
– In downpours, intense snow or dense ex-
haust gases;
– if the registration plate (front or rear) is
not properly affixed to the bumper sur-
face;
– or in locations such as the brow of a hill.
● In order to guarantee good system opera-
tion, keep the ultr
asound sensors clean, free
of snow or ice, and do not cover them with
adhesives or other objects.
● If you use high-pressure or vapour equip-
ment to c
lean the ultrasound sensors, apply
it directly only very briefly and always from a
distance of more than 10 cm.
● Retrofitting of accessories to the vehicle,
such a
s a bicycle carrier, may interfere with
the operation of the Parking Aid.
● In order to familiarise yourself with the sys-
tem, it i
s advised that you practice parking in
an area or car park that is free from traffic.
There must be good weather and light condi-
tions.
● The volume and tone of the warnings can
be modified, in addition t
o the indications
››› page 216.
● In vehicles without a driv
er information
system, these parameters can be modified in
a SEAT Official Service or in a specialised
workshop. 212
Page 221 of 308

Driver assistance systems
or removing the selector lever from the R po-
s ition (aut
om
atic gearbox). The system will
also disconnect immediately after the igni-
tion is switched off.
● The camera will stop transmitting images
above the s
peed of 15 km/h (9 mph) with re-
verse engaged.
In combination with the Parking System Plus
››› page 211, the camera image will cease to
be transmitted immediately when reverse
gear is disengaged or when the selector lever
is moved from the R position, and the optical
information provided by the Parking Aid sys-
tem will be displayed.
Also in combination with the system, the rear
assist image can also be concealed:
● By pressing one of the Infotainment system
button
s on the display.
● OR: By pressing the miniature vehicle that
appear
s on the left of the screen (which
switches to the full-screen mode of the Park-
ing System Plus's optical system).
If you wish to display the rear assist image
again: ●
Diseng
age reverse, or change the selector
lever's position, engage reverse again or
move the selector lever to position R.
● OR: Press the RVC function b
utton1)
Meaning of the orientation lines
››› Fig. 218
Side lines: extension of the vehicle (the
approximate width of the vehicle plus the
rear view mirrors) on the road surface.
End of the side lines: the area marked in
green ends approximately 2 m behind
the vehicle on the road surface.
Intermediate line: indicates a distance of
approximately 1 m behind the vehicle on
the road surface.
Red horizontal line: indicates a safe dis-
tance of approximately 40 cm at the rear
of the vehicle on the road surface.
Parking manoeuvre
● Place the vehicle in front of the parking
spac
e and engage reverse gear (manual
gearbox) or move the selector to the R posi-
tion (automatic gearbox). 1 2
3
4 ●
Rev
er
se slowly, and turn the steering wheel
so that the side orientation lines lead to-
wards the parking space.
● Guide the vehicle into the parking space so
that the s
ide orientation lines run parallel to
it. 1)
WARNING: the RVC function b
utton will only be ac-
tivated and available when the reverse gear is en-
gaged or the selector lever is set to position R.
219
Technical data
Advice
Operation
Emergencies
Safety