2015 Seat Leon SC infotainment
[x] Cancel search: infotainmentPage 75 of 96

Full Link™*
●
SEA T r
ecommends that to use Full Link™,
the “Date and time” should be correctly con-
figured ››› page 81.
● SEAT applications are designed to commu-
nicate w
ith the vehicle and interact with it via
the Full Link™ connection, therefore its func-
tionality is linked to the mobile device being
connected via USB.
● You can find further information on the
technic
al requirements, compatible devices,
suitable applications and availability at
www.seat.com or at SEAT dealers. Is Full Link blocked?
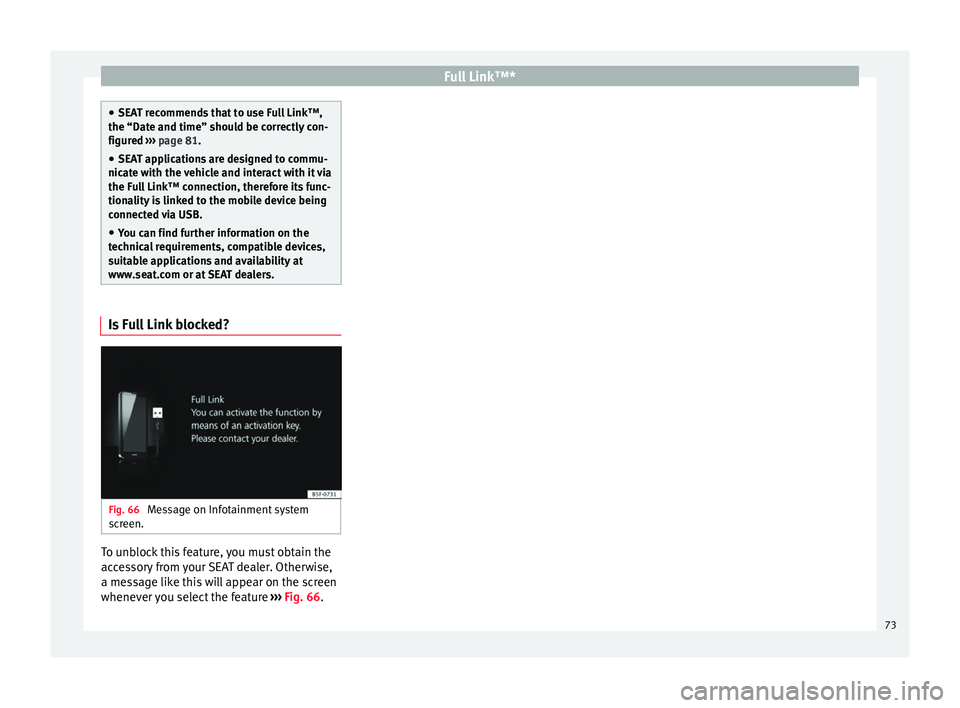
Fig. 66
Message on Infotainment system
s c
r
een. To unblock this feature, you must obtain the
ac
c
e
ssory from your SEAT dealer. Otherwise,
a message like this will appear on the screen
whenever you select the feature ››› Fig. 66. 73
Page 77 of 96

Full Link™*
Activation of Full Link Fig. 68
USB connection Fig. 69
Full Link Setup Data connection via Wi-Fi or SIM is not nec-
e
s
s
ary to establish the connection between
the smartphone and Full Link.
Data connection via Wi-Fi or SIM is necessary
to enable all of the app features 1)
.
Proceed as follows to use Full Link:
● Switch on the Infotainment system
● Connect the smartphone to the vehicle's
USB port u
sing a USB cable ››› Fig. 68.
● On the Full Link setup main menu, select
›››
Fig. 69:
Activate data transfer for SEAT apps.
Preferred connection type: Choose be-
tween MirrorLink™ or Android Auto™
(only for Android™ telephones that are
compatible with both technologies). In
the iOS system (Apple™), connection is
automatic if the device is compatible.
Select the device.
Finally, a message will appear stating that
data transfer will commence when the device
is connected. Press OK. Once selected, the
technology compatible with your device can
be used. 1 2
3 Note
Depending on your smartphone, it may have
to be u n
locked for the connection to occur. What should I do if it does not con-
nect?
Restart the mobile device
Check the USB cable visually.
Make sure that the USB cable is not damaged. Check
that both connections (USB/micro USB) are not dam-
aged or worn.
Visually check that
the USB ports are
properly connected.
Check that the vehi-
cle and device USB
connections are not
damaged and/or
worn.Clean the USB ports (device and
vehicle).
Try another compatible mobile
device.
Have the USB port replaced at a
SEAT Authorised Service.
Have the mobile device re-
paired or replace it.
Try another compatible mobile device.
1)
Using the data connection to transfer the smart-
phone app s
to Full Link may involve additional
charges. Please check the charges with your opera-
tor. 75
Page 78 of 96

Full Link™*
Pairing of portable devices supporting
the Mirr orLink™, Andr
oid Aut
o™
and/or Apple CarPlay™ technologies Fig. 70
Full Link™ menu Carousel
When
y
ou ent
er the Full Link™ context for the
first time, the technologies available for pair-
ing the portable device are displayed.
View of the device list
To connect to any of the technologies dis-
played, it is necessary to access the device
list and select the portable device ››› Fig. 70.
Some devices require unlocking in order to
establish the connection. When the connection with a device has been
est
ablished, the icon of the technology for
this session is displayed in the device list.
Some devices support MirrorLink™ and An-
droid Auto™. In this case, in Full Link setup
you can select the technology with which you
wish to use this device. The default value is
MirrorLink™.
iPhone™ devices only support Apple Car-
Play™.
Full Link™ settings
Function button: function
Select device: Press this to select the mobile device to be
connected to the Infotainment system.
Connection type: For those devices that support Mirror-
Link™ and Android Auto™, it is possible to select the
default technology you wish to use to pair the mobile
device to the Infotainment system.
Activate data transfer for SEAT apps: Allows the exchange of
information between the vehicle and external applica-
tions. Last Mode
If
a se
s
sion using one technology ends with-
out the disconnection being made from the
Infotainment system (simply by disconnect-
ing the cable) then when the device is next connected to it, the session will start without
the user being r
equired to take any action 1)
.
Info
Consult the mobile device manual.
Depends on each technology: Availability in a country
Third party applications
For further information:
MirrorLink™:
www.mirrorlink.com
Apple CarPlay™:
www.apple.com/ios/carplay
Android Auto™:
www.android.com/auto Note
In order to use Android Auto™ technology it
is nec
essary to download the Android Auto™
application, located on Google Play™. 1.
2.
1)
Unless the device requires the screen to be un-
lock ed in or
der to establish the connection.
76
Page 79 of 96

Full Link™*
MirrorLink™ Fig. 71
Function buttons in the general view
of c
omp
atible applications. Fig. 72
Other MirrorLink™ function buttons. MirrorLink™ is a protocol which enables the
c
ommu
nic
ation between a portable device
and the Infotainment system via USB.
Using it makes it possible to display and
manage the content and functions displayed on the portable device on the Infotainment
syst
em screen.
To avoid distracting the driver while driving,
only specially adapted applications can be
used ››› in Introduction on page 72.
R equir
ement
s
In order to use MirrorLink™, the following re-
quirements must be met:
● The mobile device must be compatible with
MirrorLink™.
● The mob
ile device must be connected to
the Infotainment
system via USB.
● Depending on the mobile device used, a
suitab
le application must be installed for the
use of MirrorLink™ on the device.
● Select the MirrorLink™ connection type in
Setup Full Link™ .
Function b
uttons and possible messages
Function button: function
DISCON-NECTEnd connection with MirrorLink™
CLOSEAPPSPress to close the open apps. Then
press the apps to be closed or the Close all
function button to close all the
open applications.
1 : 1Press to change to the mobile device
screen.
Function button: function
SETUPTo open the Full Link™ setup
››› Fig. 72 1Press to return to the main MirrorLink™
menu.
›››
Fig. 72 2Press to display the Infotainment Sys-
tem keypad on the screen.
›››
Fig. 72 3Press to display all the function buttons
in the right-hand margin.
›››
Fig. 72 4
View of other function buttons.
The display of the function buttons as
well as the number of buttons will de-
pend on the mobile device being used.
›››
Fig. 72 5
The symbol redirects to the right-hand
setup button
››› Fig. 1 12. Press the
right-hand setup button to show or hide
all the function buttons. MirrorLink™ Settings
Function button: function
Screen orientation: On those devices that support this fea-
ture, it is possible to select the following types of screen
display orientation:
Landscape
Portrait
Rotated 180°: Allows you to rotate the image provided
by the device by 180°.» 77
Page 80 of 96

Full Link™*Function button: function
Infotainment System keypad prioritised: Allows the Infotain-
ment System keypad to be made available to the user,
rather than the device's own keypad. Apple CarPlay™*
3 Valid for compatible iPhone™ mobile telephones.
A l
so, iPhone™ mobile telephones only support Ap-
ple CarPlay™
Apple CarPlay™ is a protocol which enables
communication between a mobile telephone
and the Infotainment system via USB.
This makes it possible to display and operate
the mobile telephone on the Infotainment
system screen.
Requirements
In order to use Apple CarPlay™, the following
requirements must be met: ● The mobile device must be compatible with
App l
e CarPlay™.
● The mobile device must be connected to
the Infotainment
system via USB.
Initiating the connection
In order to initiate the connection with the
mobile device, it is simply necessary to con-
nect it to the Infotainment system via the
USB connection. ●
A pop-up scr
een will appear, which will re-
quest that you accept the device.
● If you are initiating the session using Apple
CarPla
y™ technology it will not be possible
to pair another device via Bluetooth™. The
following message will appear in the main
PHONE menu.
Please disconnect Apple CarPlay
first, before you can connect
another mobile telephone.
Holding down the steering wheel multifunc-
tion button or the VOICE button of the Info-
t ainment
sy
stem will start the Apple™ “voice
engine”.
To return to the basic contents of the Infotain-
ment system, press the SEAT icon.
Android Auto™* 3 V
alid for compatible mobile telephones
Andr
oid Auto™ is a protocol which enables
communication between a portable device
and the Infotainment system via USB.
This makes it possible to display and operate
the mobile telephone on the Infotainment
system screen.
Requirements
In order to use Android Auto™, the following
requirements must be met: ●
The mob i
le device must be compatible with
Android Auto™.
● The mobile device must be connected to
the Infotainment
system via USB.
● The Android Auto™ application should al-
rea
dy be downloaded and installed on the
mobile device.
Initiating the connection
In order to initiate the connection with the
mobile device, it is simply necessary to con-
nect it to the Infotainment system via the
USB connection, and to be sure to follow the
instructions of the device being paired.
● A pop-up screen will appear, which will re-
quest
that you accept the device.
● When selecting the type of connection,
choose Andr
oid Auto™ in the Full Link™
settings .
● The first connection to Android Auto™
must
be done while the vehicle is stationary.
● If you are initiating the session using
Android Auto™ t
echnology via USB, the mo-
bile telephone connects automatically via
Bluetooth™ to the Infotainment system tele-
phone and it will not be possible to pair an-
other mobile telephone via Bluetooth™.
Holding down the steering wheel multifunc-
tion button or the VOICE button of the Info-
t ainment
sy
stem will start the Android™
voice “engine”.
78
Page 83 of 96

Settings
Settings
M enu and sy
s
tem settings
Main menu System settings
›› ›
table on page 2
The selection of possible settings will de-
pend on the country, the unit in question and
the vehicle equipment.
● Press the Infotainment system MENU but-
t on and then pr
e
ss the SETUP function but-
t on.
● To a
djust the settings for a certain function,
pres
s the appropriate function button.
Changes are automatically stored when a
menu is closed.
Function button: function
Screen: To perform screen setup.
Switch off screen (in 10 seconds): If this function is ac-
tive and the Infotainment system is not in use, the
screen will switch off after approximately 10 sec-
onds. Pressing the screen or pressing one of the Info-
tainment system buttons will switch the screen back
on.
Brightness: To select the brightness level of the
screen.
Day/Night: To select the display type ( Day, Night or
Automatic ).
Function button: function
Touchscreen tone: Confirmation tone for pressing a
function button is activated.
Proximity sensors: The proximity sensors are activa-
ted. Also see ››› page 11, Proximity sensors .
Show clock in standby mode: In standby mode, the cur-
rent time is shown on the Infotainment system dis-
play.
Date and time: To alter the time and date.
Clock time source: To select the time source (GPS or
manual).
GPS: The date and time can be selected using the
Time zone function button. In this case, the Dateand Time function buttons for manually entering
the data will not be active.
Manually: The date and time can be manually ad-
justed using the Date and Time function buttons.
In this case, the Time zone function button will not
be active.
Time: To manually alter the time.
Automatic summer timea)
: The time is set automatical-
ly.
Time zone: To change to the desired time zone.
Time format: To select the time display format (12- or
24-hour clock).
Date: To adjust the current time.
Date format: To select the display format for the date
(DD.MM.YYYY , YY-MM-DD or MM-DD-YY ).
Function button: function
Idioma/Language: To select the desired language for the
texts and announcements in the voice control system.
Keyboard: To select the keypad (ABC or QWERTY).
Additional keypad languages: To select the additional key-
pad languages.
Units: To set the measurement units for the vehicle dis-
plays.
Distance , vehicle speed , temperature, volume,
consumption and pressure .
Mobile device data transfer
Activate data transfer for SEAT apps : To allow the mobile
telephone paired via USB to transfer applications to
the system.
Use apps to operate: Allows the execution of all the
available functions from the App.
Deactivate: Limits specific functions that require a
higher level of security. Confirm
: Allows 100% functionality of the App but
with certain actions relating to the Infotainment
system requiring confirmation. Allow
: Allows the execution of all the available
functions from the App.
Voice control: To perform the voice control setup
››› page 12.
Remove safely: To eject the data storage device (SD card
1/SD card 2/USB) from the system. After correctly eject-
ing the data storage device from the system, the func-
tion button becomes inactive (grey colour).
» 81
Page 84 of 96

SettingsFunction button: function
Factory settings: When restoring factory settings, all
en-
tries and changes made are deleted, depending on the
selected setup.
Bluetooth: To perform Bluetooth ®
settings ››› page 70.
WLAN: To perform WLAN access point settings
››› page 38.
System information: Viewing system information (device
number, hardware and software versions).
Update: To update navigation data ››› page 42 Do not
remove the memory card while the navigation data is
being installed.
Copyright: Copyright information.
a) Option available depending on the equipment. Note
For the proper functioning of the Infotain-
ment sy s
tem it is important that the date and
time set in the vehicle are correct. Volume and sound setup
M ak
in
g settings The selection of possible settings will de-
pend on the c
ou
ntr
y, the unit in question and
the vehicle equipment. ●
Pres
s the MENU button on the Infotainment
sy s
t
em.
● Press the Sound function button to open
the m ain
Sound settings menu.
● Pr
ess the function button on the main
menu corre
sponding to one where changes
are to be made. All settings are applied in-
stantaneously.
Overview of screen and function buttons
Function button: function
Volume: To adjust the volume settings.
Traffic announcements: To set the playback volume of
traffic announcements.
Navigation announcements: To adjust the playback vol-
ume of audible driving recommendations.
Voice control: To set the volume for voice control
playback.
Maximum switch-on volume: To set the maximum
switch-on volume of the equipment.
Speed-dependent volume adjustment (GALA): To deter-
mine the level of adjustment for speed-dependent
volume. The audio volume will increase automati-
cally as vehicle speed increases.
Lowering Entertainment when parking: To adjust the de-
sired decrease in volume with ParkPilot activated.
Entertainment fading (nav. announc.): Adjusts the play-
back volume during a navigation announcement.
Function button: function
AUX volume: To set the playback volume of the au-
dio sources connected via the AUX-IN multi-media
socket ( Low, Medium or High). Also see
››› page 82, Overview of screen and function but-
tons.
Bluetooth audio: To set the playback volume of the
audio sources connected via Bluetooth ®
(Low , Me-
dium or High ). Also see ››› page 82, Overview of
screen and function buttons.
Equaliser: To adjust the characteristics of the sound.
Balance - Fader: To adjust the distribution of the sound.
The cursor indicates the current distribution of the
sound inside the passenger compartment. To modify the
distribution of the sound, briefly press the passenger
compartment view for the desired position or use the ar-
row keys to change it gradually. To focus the distribution
of sound in the centre of the passenger compartment,
press the central function button located between the
arrows.
Sound focus: Optimises the sound in the passenger com-
partment.
Subwoofer: To adjust the intensity of the subwoofer.
Touchscreen tone: Confirmation tone for pressing a func-
tion button is activated.
Turn off voice guidance during calls: No audible driving in-
structions will be given during a telephone conversa-
tion. 82
Page 85 of 96

Settings
Adjust the playback volume for external au-
dio sour c
e
s
If you need to increase the playback volume
for the external audio source, first lower the
base volume on the Infotainment system.
If the sound from the external audio source is
too low, increase the output volume on the
external audio source. If this is not enough,
change the input volume to medium or high.
If the sound from the connected external au-
dio source is too loud or distorted, lower the
output volume on the external audio source.
If this is not sufficient, set the input volume
to Medium or Quiet . 83