2015 Seat Leon SC ESP
[x] Cancel search: ESPPage 19 of 52

Media
Media
M edi
a mode
Intr
oduction Media sources are audio sour
c
es containing
audio files on various different data media
(for example, external MP3 player). These au-
dio files can be played by the infotainment
system from its corresponding drives or au-
dio input sockets (memory card slot, AUX-IN
multi-media socket etc.) Note
● The audio coding technology MPEG-4 HE-
AAC and p
atents have a Fraunhofer IIS li-
cence.
● This product is protected by copyright and
property
rights of Microsoft Corporation. Us-
ing or distributing similar technology outside
of this product without a licence from Micro-
soft or any of its authorised subsidiaries is
prohibited.
● The infotainment system only plays undam-
aged comp
atible audio files; other files are
ignored.
● Consult the list of supported devices on the
web
. Media source and audio file require-
ment
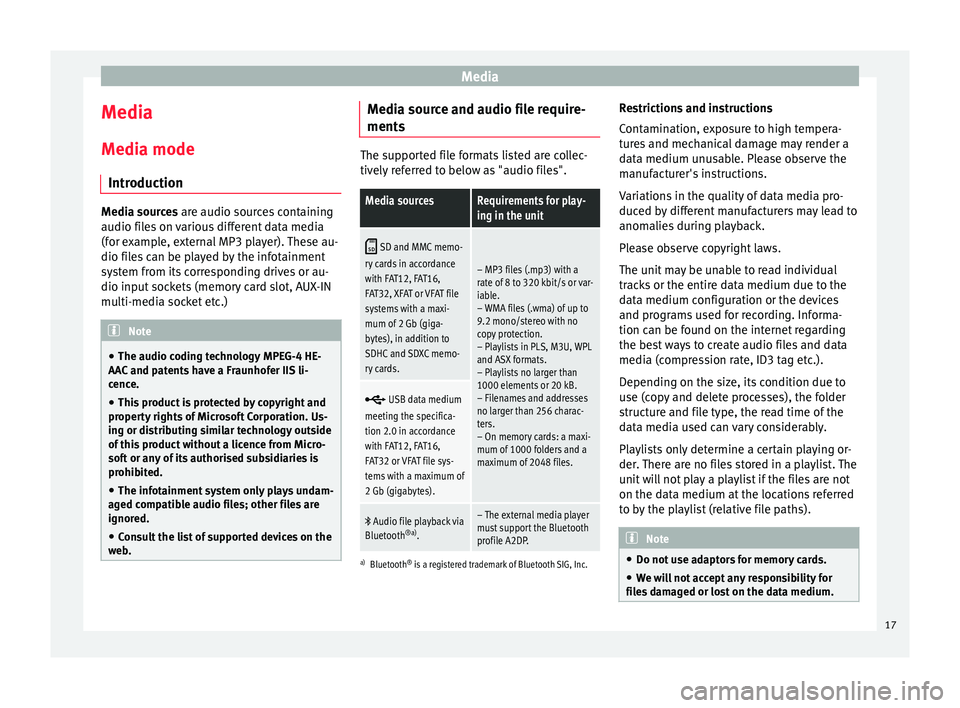
s The supported file formats listed are collec-
tively
r
eferred to below as "audio files".
Media sourcesRequirements for play-
ing in the unit
SD and MMC memo-
ry cards in accordance
with FAT12, FAT16,
FAT32, XFAT or VFAT file
systems with a maxi-
mum of 2 Gb (giga-
bytes), in addition to
SDHC and SDXC memo-
ry cards.
– MP3 files (.mp3) with a
rate of 8 to 320 kbit/s or var-
iable.
– WMA files (.wma) of up to
9.2 mono/stereo with no
copy protection.
– Playlists in PLS, M3U, WPL
and ASX formats.
– Playlists no larger than
1000 elements or 20 kB.
– Filenames and addresses
no larger than 256 charac-
ters.
– On memory cards: a maxi-
mum of 1000 folders and a
maximum of 2048 files.
USB data medium
meeting the specifica-
tion 2.0 in accordance
with FAT12, FAT16,
FAT32 or VFAT file sys-
tems with a maximum of
2 Gb (gigabytes).
Audio file playback via
Bluetooth ®a)
.– The external media player
must support the Bluetooth
profile A2DP.
a)Bluetooth ®
is a registered trademark of Bluetooth SIG, Inc.
Restrictions and instructions
Contamination, exposure to high tempera-
tures and mechanical damage may render a
data medium unusable. Please observe the
manufacturer's instructions.
Variations in the quality of data media pro-
duced by different manufacturers may lead to
anomalies during playback.
Please observe copyright laws.
The unit may be unable to read individual
tracks or the entire data medium due to the
data medium configuration or the devices
and programs used for recording. Informa-
tion can be found on the internet regarding
the best ways to create audio files and data
media (compression rate, ID3 tag etc.).
Depending on the size, its condition due to
use (copy and delete processes), the folder
structure and file type, the read time of the
data media used can vary considerably.
Playlists only determine a certain playing or-
der. There are no files stored in a playlist. The
unit will not play a playlist if the files are not
on the data medium at the locations referred
to by the playlist (relative file paths). Note
● Do not u se a
daptors for memory cards.
● We will not accept any responsibility for
file
s damaged or lost on the data medium. 17
Page 22 of 52

Media
Inserting and removing memory cards Inserting a memory card
If a memor
y
card cannot be inserted, make
sure it is positioned correctly and is compati-
ble with the unit.
Playback starts automatically if supported
audio files are stored on the memory card.
● Insert a compatible memory card into the
memory c
ard slot with the bevelled edge first
and facing right until the card clicks into
place ››› Fig. 1 9 .
R emo
v
ing a memory card
The memory card inserted must be prepared
before it is ejected.
● Press the function button Setup to open the
menu Media setup .
● Press the function button
R emo
v
e SD card safely . After the system closes
the memor y
c
ard, a message will appear on
the screen indicating that the card can be re-
moved.
● Press the inserted memory card. The mem-
ory c
ard “jumps” to the eject position.
● Remove the memory card.
Unrea
dable memory card
If you insert a memory card containing data
that cannot be read, the unit will not changeto memory card mode after loading. It will
show the corr
esponding indication.
Connect external audio source via
Bluetooth ® In Bluetooth audio mode, audio files from an
ext
ern
al audio source that is connected via
Bluetooth ®
, for example a mobile telephone
(Bluetooth audio playback), can be played
over the vehicle speakers.
The Bluetooth audio source must be compati-
ble with the Bluetooth A2DP profile.
Starting Bluetooth audio transmission
● Activate Bluetooth ®
vi s
ibility on the exter-
nal Bluetooth ®
audio source (e.g., mobile tel-
ephone).
● Lower the base volume on the Infotainment
syst
em.
● Press the Infotainment MEDIA button.
● Press the SOURC
E function button and then
sel ect
B
T audio .
● Press Find new dev
ic
e in order to connect an
e xt
ern
al Bluetooth ®
audio source for the first
time ›››
page 27.
● OR: Select a Bluetooth ®
ext
ernal audio
source from the list.
● Please refer to the instructions on the
scr
een of the Infotainment system and on the Bluetooth
®
audio source r
egarding the rest
of the procedure.
You may still need to manually start playback
on the Bluetooth ®
source.
When playback on the Bluetooth ®
audio
source is stopped, the Infotainment system
remains in Bluetooth ®
Audio mode.
Controlling playback
The extent to which the Bluetooth ®
audio
source can be controlled via the Infotainment
system depends on the connected Blue-
tooth ®
audio source.
The available functions will depend on the
Bluetooth ®
Audio profile that the connected
external player supports.
With media players that support the AVRCP
Bluetooth ®
profile, playback on the Blue-
tooth ®
audio source can be automatically
started or stopped when the unit is switched
to Bluetooth ®
Audio mode or to a different
audio source. In addition, it is possible to
view or change the track via the Infotainment
system. Note
● Due t o the l
arge number of different Blue-
tooth audio sources available, it is not possi-
ble to guarantee fault-free operation of all
functions described here. 20
Page 28 of 52

Telephone management system (PHONE)
Telephone management sys-
t em (PHONE)
Intr oduction t
o the telephone
management system
General information The Telephone functions described below
can be u
sed thr
ough the Infotainment system
if there is a mobile telephone connected to it
via Bluetooth ®
››› page 28.
In order for the mobile telephone to be able
to connect to the Infotainment system the tel-
ephone must be equipped with Bluetooth®
.
If there is no mobile telephone connected to
the Infotainment system, the telephone man-
agement system will not be available.
The instructions shown on the screen for the
telephone menus will depend on the mobile
telephone used. There may be variations.
Only use compatible Bluetooth ®
devices. For
further information on compatible Blue-
tooth ®
products, ask your nearest SEAT deal-
er or check on the internet.
Use the instruction manual of the mobile tel-
ephone and of any accessories.
If you detect any operating issues between
your mobile telephone and the Infotainment system, restart your mobile by switching it off
and on again.
Y ou m
ay experience poor reception or may be
cut off in areas where the signal is weak.
Most electronic devices are shielded against
HF (high-frequency) signals. In any case, the
electronic equipment may not be protected
from the HF signals of the telephone man-
agement system. This may cause interfer-
ence. WARNING
Speaking by telephone and operating the mo-
bi l
e telephone whilst driving can distract you
from the road and cause an accident.
● Always drive carefully and responsibly.
● Select volume settings that allow you to
eas
ily hear signals from outside the vehicle
at all times (e.g. emergency services sirens
and horns).
● In areas of little or no coverage or, in some
case
s, in a tunnel, garage or underpass, your
call may be cut off and you may not be able to
make even emergency calls. WARNING
If a mobile telephone is not secured or is in-
corr ectly
secured in the vehicle, it could move
around the passenger compartment in the
event of a sudden driving manoeuvre or emer-
gency stop, resulting in injury. ●
Whil e the
vehicle is in motion, always se-
cure the mobile telephone properly outside
the airbag deployment zone. WARNING
Mobile telephones may interfere with and al-
t er the c orr
ect operation of pacemakers if
they are carried directly over them.
● Maintain a minimum distance of at least
20 centimetre
s between the aerials of the
mobile telephone and the pacemaker, as mo-
bile phones may affect the functioning of
pacemakers.
● Do not carry your switched-on mobile tele-
phone in your br
east pocket directly over the
pacemaker.
● If you suspect interference, switch off the
mobi
le telephone immediately. CAUTION
High speeds, poor weather or road conditions
and the quality of
reception can all affect the
quality of a telephone conversation in the ve-
hicle. Note
● Re s
trictions on the use of devices using
Bluetooth ®
technology may apply in some
countries. For further information, contact the
local authorities. 26
Page 32 of 52

Telephone management system (PHONE)
Assign a user profile
The d at
a fr
om the phonebook, the call lists
and the stored speed dial buttons are as-
signed to a user profile and remain stored on
the telephone management system. This in-
formation will be available every time the mo-
bile telephone is connected to the telephone
management system.
After the first connection, it will take a few
minutes for the data from the phonebook of
the linked mobile phone to be available in
the Infotainment system. The next time that
the mobile telephone is connected (e.g. on
the next journey) the phonebook is updated
automatically.
If any entries in the mobile phonebook have
been modified while connected, a manual
update of the phonebook data can be initi-
ated from the User profile settings
menu ››› page 34.
Telephone management can store a maxi-
mum of 4 user profiles for mobile tele-
phones. If you wish to link/connect another
mobile phone, the oldest user profile will au-
tomatically be replaced. If you do not want it
to do this, you must previously delete one of
the user profiles. To delete a profile manual-
ly:
● Menu Setup >
U
ser pr
ofi
le and press
D el
et
e other user profiles .Telephone management system function but-
t
on s
● Pr
ess the PHONE button on the Infotain-
ment sy
s
tem to open the PHONE main menu.
Function button: function ››› Fig. 23
AName of connected mobile telephone.
Press on the name to access the Select
telephone menu.
BSpeed dial buttons, to which telephone
numbers from the phonebook may be as-
signed respectively ››› page 33.
and Shortcut keys scroll arrows. Allows you to
move between the various speed di-
al/phonebook shortcut banks.
DIAL NO.To open the number pad and enter a tele-
phone number
››› page 31.
CONTACTSTo open the phonebook of the connected
mobile telephone ››› page 32.
VIEWAllows you to choose between the dis-
play of speed dial and phonebook short-
cut keys ››› page 33.
CALLSTo open call lists of the connected mobile
telephone ››› page 32.
SETUPTo open the Telephone settings
menu ››› page 34. Display and symbols of the telephone man-
ag
ement
sy
stem
Display: Meaning ››› Fig. 24
CName of the mobile network operator (provid-
er) to which the mobile telephone is connec-
ted.
DView of stored telephone number or name.
››› page 34
Press to
accept a call.
Press to
end a call.
OR: Press to reject an incoming call.
Press to mute the call signal during a call and
to reactivate it.
Press to mute the microphone during an active
call and to reactivate it.
Charge status of a mobile telephone connec-
ted via “Hands-free profile” (HFP) Bluetooth
®
.
Strength of coverage signal received by the
mobile telephone.
Private mode
Priv
at
e mode c
an only be activated during an
active call.
To activate or deactivate private mode:
● Press the button t
o activate or deactivate
private mode.
30
Page 39 of 52

CAR menu
Since refuel
Di s
p
lay and storage of the values for the jour-
ney and the consumption. By refuelling, the
memory will be erased automatically.
Long-term
The memory records the values for a specific
number of partial trips, up to a total of 19
hours and 59 minutes or 99 hours and 59 mi-
nutes, or 1999.9 km (or miles) for 9999 km
(or miles), depending on the model of instru-
ment panel.
When one of these values is reached (de-
pending on the version of the instrument
panel), the memory is automatically deleted
and it starts counting from 0 again. Note
The values that appear in the figure are indi-
cativ e and m
ay vary depending on the fea-
tures. Ecotrainer*
Fig. 34
Ecotrainer menu. Fig. 35
Driving style symbols. Open ECOTRAINER menu
● With the vehicle stopped, press the CAR button on the Infotainment system.
● Press the VIEW function button and then
sel ect
ECOTRAINER . If
the corresponding equipment is available,
the ECO
TRAINER will provide information on
driving style. The information on driving style
is only evaluated and displayed when mov-
ing forward.
Points: Driving style display
This indicates the driving style since starting
the vehicle on a scale of 0 to 100. The higher
the score displayed, the more efficient the
driving style. To see more information, press
the display. It shows statistics for the last 30
minutes of driving since starting the vehicle.
If the car has not yet been driven for 30 mi-
nutes, it shows values from the last trip in
grey.
∅ km/l: Average fuel consumption
Shows the average fuel consumption. The
value is calculated by using the kilometres
covered since starting the vehicle. To see
more information, press the display. It shows
statistics for the last 30 minutes of driving
since starting the vehicle. If the car has not
yet been driven for 30 minutes, it shows val-
ues from the last trip in grey.
ECO tips: Tips on how to save fuel
By pressing the ECO tips function button, you
c an
v
iew tips on how to save fuel. These tips
can only be viewed when the vehicle is stop-
ped. »
37
Page 40 of 52

CAR menu
Evaluation of efficient driving style
The effic iency
of
the driving style is reflected
by different elements on the display.
Display ››› Fig. 34: Meaning
1The white column represents the current time.
It shows the position of the evaluation that is cur-
rently being performed.
2
Bars to represent acceleration.
The position of the car represents the acceleration.
If speed is constant, the car remains in the central
area. When accelerating or braking, the car moves
forward or backward respectively.
3
Columns to show driving style efficiency.
On the horizon, the columns represent the effi-
ciency of the driving style in a retrospective man-
ner and move from left to right every five seconds
or so. The higher the height of the columns, the
more efficient the driving style.
The colour of the sky represents the average of the
last three minutes. The colour changes from grey
(less efficient) to blue (more efficient).
4
Different symbols can be displayed on the right of
the vehicle representation; these provide informa-
tion on the current driving style. ››› table on
page 38 .
Symbols ››› Fig. 35: Meaning
AForesight when driving. If sudden changes of ac-
celeration occur, driving style efficiency is re-
duced.
BGear-change indicator.
Symbols ››› Fig. 35: Meaning
CThe current vehicle speed is having a negative im-
pact on fuel consumption.
DEcological driving style. Vehicle condition
Fig. 36
Vehicle status menu Press the button,
Vehicle status , to ac
-
c
ess the information on the vehicle status
messages and the Start-Stop System. Note
The values that appear in the figure are indi-
cativ e and m
ay vary depending on the fea-
tures. Tyres
Fig. 37
Tyres menu Press the button,
Tyres, to ac
c
ess informa-
tion on the status of the tyre pressures. From
this same menu, using the button Cali-
brate , the tyre pressures are stored.38
Page 41 of 52

Setup
Setup
S y
s
tem setup Menu (SETUP)
Introduction Fig. 38
Main menu Activate the setup main menu (SETUP)
● Press the Infotainment button MENU to
open the System setup main menu.
● Pr e
ss the function button corresponding to
the setup y
ou wish to carry out.
System setup main menu (SETUP) ●
Press the Infotainment button Set
up , to
open the S
y
stem setup main menu.
● Press the function button corresponding to
the setup y
ou wish to carry out.
Function button: effect
Display switched off: with this function activated, if there is
no activity in the infotainment system after a period of
time has elapsed the screen will switch off. When you
touch the screen or press an infotainment button, the
screen will light up again ››› page 39.
Screen setup: change screen setup ››› page 39.
Sound setup: adjust volume and sound setup
››› page 41.
Idioma/Language: adjusting the language for text.
Additional keypad languages: to select the additional key-
pad languages.
Date and time: adjust time and date setup ››› page 40.
Units: adjust units of measurement ››› page 40.
Bluetooth setup*: adjust Bluetooth setup
Factory settings: ››› page 40.
System information: indication of the system information
(device number, hardware and software version).
Copyright: message with radio software licensing infor-
mation. Note
For all the infotainment systems to work
properly , it
is important to set the correct
time and date in the vehicle. Screen setup
Fig. 39
Display in Standby mode ●
Press the Infotainment button, Set
up to
open the System setup main menu.
● Pr e
ss the Screen function button. When you
c lo
se a menu, the c
hanges will take effect au-
tomatically.
Summary of the indications and function
buttons
Function button: effect
Brightness: select the brightness level of the screen.
Show clock in standby mode: in standby mode the current
time and date are shown on the display of the Infotain-
ment system ››› Fig. 39.
Acoustic touchscreen feedback: the feedback when you press
a function button on the screen is activated. 39
Page 43 of 52

Setup
Setup
Sou nd and
v
olume setup
Introduction Depending on the country, the unit and the
vehic
l
e equipment, there may be differences
in the variety of settings.
Making settings Fig. 40
Sound setup menu ●
Press the Infotainment button, SOUND , to
open the Sound setup main menu.
Y
ou can
also use the MENU button and select sound.
● Press the function button corresponding to
the set up
y
ou wish to carry out.
All settings are applied instantaneously. Summary of the indications and function
button
s
Function button: effect
Balance - Fader: adjust the orientation of the sound (bal-
ance/fader). The circle displays the current orientation
of the sound inside the vehicle. To centre the orientation
of the sound in the passenger compartment, press the
button represented by two circles, located between the
arrows, or press the CENTRE
button or adjust progres-
sively using the arrow buttons. This function can be
modified in the SOUND
menu.
Equalizer: adjust sound setting characteristics (bass,
mid-range and treble). Press reset to lower the equalizer
level to 0.
Mute: function button to activate MUTE.
Miniplayer: in the top right corner MINIPLAYER (Radio or
Media mode).
Setup: opens the Sound setup menu
Maximum switch-on volume: to set the maximum switch-
on volume of the equipment.
Traffic announcements: to set the playback volume of the
incoming messages (for example, traffic announce-
ments).
Speed-dependent volume adjust: determine the volume
setting depending on the speed. The audio volume
increases automatically as speed increases.
Lowering Entertainment when parking: to adjust the desired
decrease in volume with ParkPilot activated.
Acoustic touchscreen feedback: the feedback when you
press a function button on the screen is activated.
Function button: effect
AUX volume: to set the playback volume of the audio
sources connected via AUX.
Bluetooth audio: configure Bluetooth audio volume. 41