2015 Seat Ibiza SC fuel
[x] Cancel search: fuelPage 99 of 248

Instruments and warning/control lamps
CAUTION
● To pr ev
ent damage to the engine, the rev
counter needle should only remain in the red
zone for a short period of time.
● When the engine is cold, avoid high revs
and heavy ac
celeration and do not make the
engine work hard. For the sake of the environment
Changing up a gear in time reduces fuel con-
sumption and noi se.Rev counter
The rev counter indicates the number of en-
gine r
ev
o
lutions per minute ›››
Fig. 121 1 .
T og
ether w
ith the gear-change indicator, the
rev counter offers you the possibility of using
the engine of your vehicle at a suitable
speed.
The start of the red zone on the dial indicates
the maximum engine speed which may be
used briefly when the engine is warm and af-
ter it has been run in properly. Before reach-
ing this range, you should change to a higher
gear for vehicles with a manual gearbox or for
automatic gearboxes put the selector lever in
“D” or take your foot off the accelerator ped-
al. We recommend that you avoid high revs and
that
you follow the recommendations on the
gear-change indicator. Consult the additional
information in ›››
page 28, Gear-change
indicator. CAUTION
Never allow the rev counter needle 1 ›››
Fig. 121 to g o int
o the red zone on the
scale for more than a very brief period, other-
wise there is a risk of engine damage. For the sake of the environment
Changing up a gear early will help you to save
fuel and minimi
se emissions and engine
noise. Indications on the display
A variety of information can be viewed on the
in
s
trument
panel display ›››
Fig. 121 3 de-
pendin g on the
v
ehicle equipment:
● Bonnet, rear lid and doors open
›››
page 28.
● Information and warning texts.
● Mileage.
● Time.
● Navigation instructions.
● Outside temperature.
● Compass. ●
Shift l
ever position ››› page 159.
● Recommended gear (manual gearbox)
›››
page 28.
● Multifunction display (MFD) and menus
with differ
ent setting options ›››
page 25.
● Service interval display ›››
page 33.
● Second speed display ›››
page 25.
● Speed warning function ›››
page 32.
● Start-Stop system status display
›››
page 173.
● Low consumption driving status (ECO)
›››
page 98
● Identifying letters on engine (MKB).
● Active cylinder management display
(ACT ®
)* ››
› page 167
Distance travelled
The odometer registers the total distance
travelled by the car.
The odometer (trip ) shows the distance
travelled since the last odometer reset. The
last digit of the trip recorder indicates distan-
ces of 100 metres or one tenths of a mile.
● Briefly press the button ›››
Fig. 121 4 to re-
set the trip r
ec
order to 0.
● Keep the button 4 pressed for about 3
sec ond
s
and the previous value will be dis-
played. »
97
Technical data
Advice
Operation
Emergencies
Safety
Page 100 of 248

Operation
Time
● To set the time, keep the button ››
› Fig. 121
4 pressed for more than 3 seconds to select
the hour or minut e di
s
play.
● To continue setting the time, press the up-
per or lower p
art of the button 4 . Hold but-
t on do
wn t
o scroll through the numbers
quickly.
● Press the button 4 again in order to finish
settin g the time.
The time c an al
so be set via the key and
Set up function button in the Easy Connect
sy s
t
em ››› page 107.
Compass
With the ignition on and the navigation sys-
tem on, the cardinal point corresponding to
the direction of travel of the vehicle is dis-
played on the instrument panel.
Selector lever position
The selected gear is displayed on the side of
the selector lever and on the instrument pan-
el display. In positions D and S, and with the
Tiptronic, the corresponding gear is also dis-
played.
Recommended gear (manual gearbox)
The recommended gear in order to save fuel
is displayed on the instrument panel while
you are driving ›››
page 28. Second speed display (mph or km/h)
In addition t
o the speedometer, the speed
can also be displayed in a different unit of
measurement (in miles or in km per hour).
This option cannot be deactivated in models
destined for countries in which the second
speed must always be visible.
The second speed display can be adjusted in
the Easy Connect system via the key and
the Set
up function button
››
›
page 107.
Speed warning
When the speed setting is exceeded, this will
be indicated on the instrument panel display.
This is very useful, for example when using
winter tyres that are not designed for driving
at the maximum speed of the vehicle
››› page 32.
The speed warning settings can be adjusted
in the Easy Connect system via the key
and the Set
up function button
››
›
page 107.
Start-Stop operating display
Updated information relating to the status is
displayed on the instrument panel
››› page 173.
Low consumption driving status (ECO)*
Depending on the equipment, when driving,
the “ECO ” display appears on the instrument
panel when the vehicle is in low consump- tion status due to active cylinder manage-
ment (A
CT®
)* ›››
page 30.
Identifying letters on engine (MKB)
Hold the button ››› Fig. 121 4 down for more
th an 15 sec
ond
s to display the identifying
letters of the vehicle engine (MKB). To do
this, the ignition must be switched on and
the engine switched off. WARNING
Observe the safety warnings ›››
in Warning
symbol s on p
age 101. WARNING
Even though outside temperatures are above
freez in
g, some roads and bridges may be icy.
● At outside temperatures above +4°C
(+39°F), even when the “ice c
rystal symbol”
is not visible, there may still be patches of ice
on the road.
● Never rely on the outside temperature indi-
cator! Note
● Differ ent
versions of the instrument panel
are available and therefore the versions and
instructions on the display may vary. In the
case of displays without warning or informa-
tion texts, faults are indicated exclusively by
the warning lamps. 98
Page 102 of 248

Operation
●
Addition a
l lights and other accessories in
front of the air inlet reduce the cooling effect
of the coolant. At high outside temperatures
and high engine loads, there is a risk of the
engine overheating.
● The front spoiler also ensures proper distri-
bution of the c
ooling air when the vehicle is
moving. If the spoiler is damaged this can re-
duce the cooling effect, which could cause
the engine to overheat. Seek specialist assis-
tance. Fuel level
Fig. 123
Fuel gauge. The display
6
› ›
› Fig. 121
only works when
the ignition is switched on. When the display
reaches the reserve mark, the lower diode
lights up in red and the control lamp ap-
pears ››› page 96. When the fuel level is very
low, the lower diode flashes in red. The distance to empty fuel level is displayed
on the instrument
panel 3
› ››
Fig. 121
.
Y
ou can consult the tank capacity of your ve-
hicle in the ›››
page 40 section. CAUTION
Never run the fuel tank completely dry. An ir-
re gu
lar fuel supply could cause misfiring. In
this way the unburned fuel can reach the ex-
haust system, which could cause the catalytic
converter to overheat resulting in damage. Warning and indication lamps
W arnin
g symbo
ls Read the additional information carefully
› ›
›
page 35
There are red warning symbols (priority 1)
and yellow warning symbols (priority 2).
Warning messages, Priority 1 (red)
If one of these faults occurs, the warning
lamp will light up or flash and will be accom-
panied by three audible warnings. This is a
danger warning. Stop the vehicle and switch
off the engine. Check the fault and correct it.
Obtain professional assistance if necessary.
If several priority 1 faults are detected at the
same time, the symbols will be displayed one after the other for about 2 seconds at a time
and wil
l continue until the fault is corrected.
No menus will be shown in the display for the
duration of a priority 1 warning message.
Examples of priority 1 warning messages
(red)
● Brake system symbol with the warnin
g
message STOP BRAKE FLUID INSTRUC-
TION MANUAL or STOP BRAKE FAULT IN-
STRUCTION MANUAL .
● Coolant symbol with the warnin
g mes-
sage STOP SEE COOLANT INSTRUCTION
MANUAL .
● Engine oil pressure symbol with the
warnin
g message STOP ENGINE OIL
PRESSURE LOW! INSTRUCTION MANUAL .
Warning messages, Priority 2 (yellow)
If one of these faults occurs, the correspond-
ing warning lamp lights up and is accompa-
nied by an audible warning. Check the corre-
sponding function as soon as possible al-
though the vehicle may be used without risk.
If several priority 2 warning messages are de-
tected at the same time, the symbols are dis-
played one after the other for about 2 sec-
onds at a time. After a set time, the informa-
tion text will disappear and the symbol will
be shown as a reminder at the side of the
display.
100
Page 103 of 248

Instruments and warning/control lamps
Priority 2 warning messages will not be
sho wn u
ntil all Priority 1 warning messages
have been dealt with!
Examples of priority 2 warning reports (yel-
low):*
● Fuel warning light with the information text
PLEASE REFUEL .WARNING
If the warning lamps and messages are ignor-
ed, the v ehic
le may stall in traffic, or may
cause accidents and severe injuries.
● Never ignore the warning lamps or text
mess
ages.
● Stop the vehicle safely as soon as possible.
● Park the vehicle away from traffic and en-
sure th
at there are no highly flammable ma-
terials under the vehicle that could come into
contact with the exhaust system (e.g. dry
grass, fuel).
● A faulty vehicle represents a risk of acci-
dent for the driv
er and for other road users. If
necessary, switch on the hazard warning
lamps and put out the warning triangle to ad-
vise other drivers.
● Before opening the bonnet, switch off the
engine and al
low it to cool.
● In any vehicle, the engine compartment is a
hazar
dous area and could cause severe inju-
ries ››› page 201. CAUTION
Failure to heed the control lamps and text
mes s
ages when they appear may result in
faults in the vehicle. Engine management*
This warning lamp monitors the engine man-
agement
sy
stem for petrol engines.
The warning lamp (Electronic Power Con-
trol) lights up when the ignition is switched
on while system operation is being verified. It
should go out once the engine is started.
If there is a fault in the electronic engine
management system while you are driving,
this warning lamp will light up. Stop the vehi-
cle and seek technical assistance.
Engine pre-heating/fault system* The warning lamp lights up to show that the
glo
w p
lug
s are preheating the diesel engine.
The control lamp lights up
If the control lamp lights up when the en-
gine is started it means that the glow plugs
are preheating. When the warning lamp goes
off, the engine should be started straight
away. Control lamp
flashe
s
If a fault develops in the engine management
system while you are driving, the glow plug
system lamp will flash . Take the vehicle to
a specialised workshop as soon as possible
and have the engine checked.
Accumulation of soot in the diesel en-
gine partic
ulate filter* If the control lamp
lights up
y
ou should
help the filter clean itself by driving in the ap-
propriate manner.
To do this, drive about 15 minutes in fourth
or fifth gear (automatic gearbox: S gear
range) at a minimum speed of 60 km/h
(37 mph), with the engine running at approxi-
mately 2,000 rpm. In this way, the soot build
up in the filter is burned. When cleaning is
successful, the control lamp turns off.
If the lamp does not turn off, or the three
lamps turn on (particulate filter , fault in
the emission control system and glow
plugs ), drive the vehicle to a specialised
workshop and have the fault repaired at the
earliest opportunity. »
101
Technical data
Advice
Operation
Emergencies
Safety
Page 104 of 248

Operation
WARNING
● Alw a
ys drive according to the road weather
conditions, the terrain and traffic. Driving rec-
ommendations should never lead to illegal
manoeuvres in surrounding traffic.
● The diesel engine particulate filter may
reac
h extremely high temperatures; in this
case the vehicle should be parked so that it
does not enter into contact with highly flam-
mable materials underneath the vehicle. Oth-
erwise there is a risk of fire. Engine oil pressure
If this warning lamp
is
r
ed it indicates
that the engine oil pressure is too low.
If this warning symbol starts to flash, and is
accompanied by three audible warnings,
switch off the engine and check the oil level.
If necessary, add more oil ›››
page 206.
If the warning lamp flashes although the oil
level is correct, stop driving. Do not even run
the engine at idle speed! Obtain technical as-
sistance.
Checking the oil level
If the warning lamp is yellow the engine
oil level should be checked as soon as possi-
ble. Top up the oil ›››
page 206 at the next
opportunity. Oil level sensor faulty*
If the
y
ellow warning lamp flashes, take
the vehicle to a specialised workshop to have
the oil level sensor checked. Until then it is
advisable to check the oil level every time
you refuel.
Lamp fault* The warning lamp lights up when there is
a f
au
lt on the turn signals, headlights, side
lights and fog lights.
Windscreen washer fluid* This warning lamp lights up to indicate that
the w
ind
s
creen washer level is very low.
This serves as a reminder to fill up the reser-
voir at the earliest opportunity ›››
page 209.
Rear fog light* The warning lamp lights
up when the r
e
ar
fog light is switched on. For further informa-
tion see ›››
page 123. Anti-lock brake system (ABS)* The control lamp
lights up for a f
ew sec-
onds when the ignition is switched on. It
goes out again after the system has run
through an automatic test sequence.
There is a fault in the ABS if:
● The control lamp does not
light up when
the ignition is switched on.
● The control lamp does not go out again af-
ter a few sec
onds.
● The control lamp lights up when the vehicle
is mo
ving.
The vehicle can still be braked in the normal
way, without the ABS function. Take the vehi-
cle to a specialised workshop as soon as
possible. For further information on the ABS
see the ›››
page 171.
If there is a fault in the ABS, the ESC* and the
tyre pressure control lamp will also light up.
Brake system fault
If the ABS warning lamp lights up together
with the brake warning lamp , there is a
fault in the ABS function and in the brake
system ››› .
102
Page 106 of 248
Operation
The l amp provides information about the
di s
connection status of the system:
● It stays lit when the ASR is disconnected on
pres
sing the switch or if we select ESC
Sport mode, only by means of Easy Connect.
Brake system* Situations in which the warning lamp lights
up
●
the brake fluid level is too low
› ››
page 208.
● there is a fault in the brake system.
This w
arning lamp can light up together with
the ABS system warning lamp. WARNING
● If the br ak
e warning lamp does not go out
or if it lights up when driving, the brake fluid
level in the reservoir is too low so there is a
risk of an accident ››› page 208, Brake fluid.
Stop the vehicle and do not drive on. Obtain
technical assistance.
● If the brake warning lamp lights up to-
gether w
ith the ABS lamp this could be
due to an ABS fault. This could cause the rear
wheels to lock quickly when you brake. This
could cause the rear to break away. Risk of
skidding. Stop the vehicle and seek technical
assistance. Cruise speed (cruise control system)*
The warning lamp
comes
on when the
cruise control system is switched on. For fur-
ther information on the cruise control system
please see ›››
page 34.
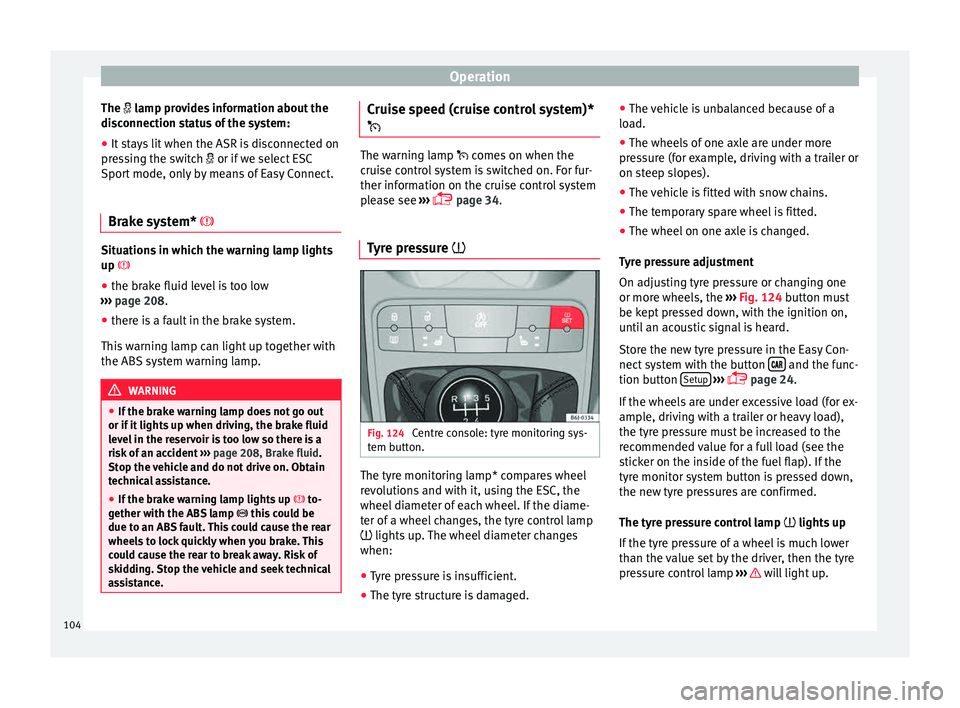
Tyre pressure Fig. 124
Centre console: tyre monitoring sys-
t em b
utt
on. The tyre monitoring lamp* compares wheel
r
ev
o
lutions and with it, using the ESC, the
wheel diameter of each wheel. If the diame-
ter of a wheel changes, the tyre control lamp
lights up. The wheel diameter changes
when:
● Tyre pressure is insufficient.
● The tyre structure is damaged. ●
The vehic
le is unbalanced because of a
load.
● The wheels of one axle are under more
pres
sure (for example, driving with a trailer or
on steep slopes).
● The vehicle is fitted with snow chains.
● The temporary spare wheel is fitted.
● The wheel on one axle is changed.
Tyr
e pressure adjustment
On adjusting tyre pressure or changing one
or more wheels, the ››› Fig. 124 button must
be kept pressed down, with the ignition on,
until an acoustic signal is heard.
Store the new tyre pressure in the Easy Con-
nect system with the button and the func-
tion b utt
on Set
up
› ›
›
page 24.
If the wheels are under excessive load (for ex-
ample, driving with a trailer or heavy load),
the tyre pressure must be increased to the
recommended value for a full load (see the
sticker on the inside of the fuel flap). If the
tyre monitor system button is pressed down,
the new tyre pressures are confirmed.
The tyre pressure control lamp lights up
If the tyre pressure of a wheel is much lower
than the value set by the driver, then the tyre
pressure control lamp ››› will light up.
104
Page 107 of 248

Instruments and warning/control lamps
WARNING
● When the tyr e pr
essure control lamp lights
up, reduce speed immediately and avoid any
sudden turning or braking manoeuvre. Stop
when possible, and check the tyre pressure
and status.
● The driver is responsible for maintaining
correct
tyre pressures. For this reason, tyre
pressure must be regularly checked.
● Under certain circumstances (e.g. when
driving in a s
porty manner, in winter condi-
tions or on a dirt track) the tyre control lamp
may light up belatedly or may function incor-
rectly. Note
If the battery is disconnected, the yellow
warnin g l
amp lights up after turning the
ignition on. This should turn off after a brief
journey. Speed selector lever lock*
The brake pedal must be depressed when
thi
s
w
arning lamp lights up. This is necessary
when the automatic gearbox* selector lever
is moved out of the positions P or N.Fuel Reserve/Level
It lights up when only 7 litres of fuel remain
in the tank, and an
ac
oustic signal* also
sounds. It reminds you to fuel up the fuel
tank as soon as possible ››› page 199.
Main beam headlights The control lamp
lights up when the m ain
be
ams are on or when the headlight flasher
is operated.
For further information see ›››
page 125.
Electromechanical steering* The control lamp should light up for a few
sec
ond
s
when the ignition is switched on. It
should go out once the engine is started.
For further information on steering see
››› page 152.
It lights up red
The electromechani-
cal steering is dam-
aged.Have the steering checked im-
mediately by a specialised work-
shop.
It lights up yellow
Electromechanical
steering operation
is limited.Have the steering checked im-
mediately by a specialised work-
shop.
If the yellow warning lamp does
not light up again after the en-
gine is restarted and the vehicle
has travelled a short distance,
you do not need to take it to a
specialised workshop.
The 12-volt battery
was disconnected
and has been recon-
nected.Take the vehicle for a short run
at 15-20 km/h (9-12 mph).
It flashes yellow
The steering column
is tight.Turn the wheel a little to both
sides.
The steering column
does not unlock or
lock.Remove the key from the ignition
and switch the ignition back on.
If necessary, check the messag-
es displayed on the instrument
panel display.
Do not drive on if
the steering
column remains locked after the
ignition has been switched on.
Seek specialist assistance. WARNING
If the warning lamps and the corresponding
mes s
ages are ignored when they light up, the
vehicle may stall in traffic and cause acci-
dents and severe injuries. » 105
Technical data
Advice
Operation
Emergencies
Safety
Page 131 of 248

Lights and visibility
For the sake of the environment
The heated rear window should be switched
off a s
soon as the glass is demisted. By sav-
ing electrical power you can also save fuel. Note
To avoid possible damage to the battery, an
autom atic
temporary disconnection of this
function is possible, coming back on when
normal operating conditions are re-establish-
ed. Sun visors
Fig. 137
Sun visor on the driver side. The sun visors for the driver and the front
p
a
s
senger can be pulled out of their central
supports and turned towards the doors in the
direction of the arrow ››› Fig. 137. Never pull
them downwards. The driver sun visor has compartments for
card
s, and the passenger sun visor has a
vanity mirror with a cover*. Note
Incorrect use of the sun visor (e.g. pulling
them down w
ards once they are open) may re-
sult in broken hinges. This damage is not cov-
ered by the vehicle warranty. Windscreen wiper and rear win-
dow w
iper sy
stems
Windscreen wipers Read the additional information carefully
› ›
›
page 23 WARNING
● Worn and dir ty
wiper blades reduce visibili-
ty and safety levels while driving.
● In cold conditions you should not use the
wash/w
ipe system unless you have warmed
the windscreen with the heating and ventila-
tion system. The windscreen washer fluid
could otherwise freeze on the windscreen and
obscure your view of the road.
● Always note the corresponding warnings
›››
page 54. WARNING
The rain sensor* may not detect enough rain
to sw it
ch on the wipers.
● If necessary, switch on the wipers manually
when water on the w
indscreen obstructs visi-
bility. CAUTION
In icy conditions, always check that the wiper
bl a
des are not frozen to the glass before us-
ing the wipers for the first time. If you switch
on the windscreen wipers when the wiper
blades are frozen to the windscreen, you
could damage both the wiper blades and the
wiper motor. Note
● The wind s
creen wipers will only work when
the ignition is switched on.
● The heat output of the heated jets* is con-
trol
led automatically when the ignition is
switched on, depending upon the outside
temperature.
● In certain versions of vehicles with alarms,
the winds
creen wiper will only work in inter-
val/rain sensor mode when the ignition is on
and the bonnet closed.
● When the interval wipe function is on, the
interv
als are directly proportional to the
speed. This way, the higher the vehicle speed
the shorter the intervals. » 129
Technical data
Advice
Operation
Emergencies
Safety