2015 Seat Altea XL ECO mode
[x] Cancel search: ECO modePage 61 of 236

Steering wheel controls*
Steering wheel audio version + telephone controls Fig. 43
Steering wheel controls. Fig. 44
Steering wheel controls (depending
on version of model).ButtonRadioCD/MP3/USB*/iPod*AUXTELEPHONE
AVolume upVolume upVolume upVolume up
BVolume downVolume downVolume downVolume down
CSearch for next stationNext track
Hold down: fast forwardNo function specifiedNo function specified
DSearch for last stationPrevious track
Hold down: quick rewindNo function specifiedNo function specified
EAccess telephone menu on instrument pan- elAccess telephone menu on instrument pan-elAccess telephone menu on instru-ment panelMake call
Accept incoming call End call
Hold down: reject incoming call
FEnable voice recognitionEnable voice recognitionEnable voice recognitionActivate voice control/
Interrupt current message/ Deactivate voice control
» 59
Technical specifications
Advice
Operation
Safety
Page 64 of 236

OperationButtonRadioCD/MP3/USB*/iPod*AUXNAVIGATORTELEPHONE
ENo function specifiedNo function specifiedNo function specifiedNo function specified
Accept incoming call (press briefly)
Reject incoming call (press and hold down)
End ongoing call /establish call (press briefly)
Switch to private mode (press and hold down)
Redial last number (press and hold down)a)
F
Activation of voice recog-
nition for mobile phone
connected to the system (if the phone has this function)* / MUTEActivation of voice recognition
for mobile phone connected to the system (if the phone has this function)* / MUTEActivation of voice recogni-tion for mobile phone con-
nected to the system (if the phone has this function)* / MUTEActivation of voice recogni-tion for mobile phone con-
nected to the system (if the phone has this function)* / MUTEActivation of voice recognition for mo-
bile phone connected to the system (if the phone has this function)* / MUTE
GNext preset b)Next trackb)No function specifiedOperates on instrument pan-
elOperates on instrument panel/no func-tion specified
HPrevious preset b)Previous trackb)No function specifiedOperates on instrument pan-
elOperates on instrument panel/no func-tion specified
IChange menu on instru-ment panelChange menu on instrument panelChange menu on instru-ment panelNo function specifiedChange menu on instrument panel
JChange menu on instru-ment panelChange menu on instrument panelChange menu on instru-ment panelNo function specifiedChange menu on instrument panel
KOperates on instrument panelOperates on instrument panelOperates on instrumentpanelOperates on instrument pan- elOperates on instrument panel/no func-tion specified
LOperates on instrumentpanelOperates on instrument panelOperates on instrumentpanelOperates on instrument pan- elOperates on instrument panel/no func-tion specified
a)For a more detailed description of how to use this button, please refer to the radio navigation system user handbook (SEAT Media System)
b) Only if the panel is in audio menu. 62
Page 71 of 236

Opening and closing
● The turn signal light will flash once on clos-
ing and activating the alarm.
When does the system trigger an alarm?
The system triggers an alarm if the following
unauthorised actions are carried out when
the vehicle is locked:
● Opening the vehicle mechanically using
the key and with the ignition off.
● A door is opened.
● Opening the bonnet.
● The rear lid is opened.
● Ignition switched on with a non-validated
key.
● Movements in the driving compartment
(vehicles with interior monitoring).
● Undue manipulation of the alarm.
● Battery handling.
The acoustic signals sound and the turn sig-
nals flash for approx. 30 seconds. This cycle
may be repeated up to 10 times depending
on the country.
Opening the doors mechanically (emergency
opening)
If the radio frequency remote control function
fails, you will have to use the key to unlock
the vehicle. This is done as follows: ●
Use the lock on the driver door to unlock
the vehicle. The anti-theft alarm system re-
mains active, but an alarm is not triggered
immediately.
● Switch on the ignition within 15 seconds.
When the ignition is switched on, the elec-
tronic immobiliser recognises a valid vehicle
key and deactivates the anti-theft alarm sys-
tem. If you do not switch on the ignition with-
in 15 seconds, the alarm is triggered (in cer-
tain markets, such as the Netherlands, there
is no 15-second waiting time and the alarm
is activated immediately after opening the
door).
Opening all the doors in manual mode
In vehicles without an alarm, when opening
the driver door manually, all doors are
opened.
How to switch the alarm off
When the vehicle is unlocked via the unlock-
ing button of the radio frequency remote con-
trol or when the key is inserted in the ignition
lock. Note
● After 28 days, the indicator light will be
switched off to prevent the battery from
draining if the vehicle has been left parked
for a long period of time. The alarm system
remains activated. ●
If, after the audible warning turns off, an-
other monitored area is accessed (e.g. the
boot hatch is opened after a door has been
opened), the alarm is triggered again.
● The anti-theft alarm is not activated when
the vehicle is locked from within using the
central locking button .
● If the vehicle battery is run down or flat
then the anti-theft alarm will not operate cor-
rectly.
● Vehicle monitoring remains active even if
the battery is disconnected or not working for
any reason.
● The alarm is triggered immediately if one of
the battery cables is disconnected while the
alarm system is active. Interior monitoring*
This is a monitoring or control function incor-
porated in the anti-theft alarm* which de-
tects unauthorized vehicle entry by means of
ultrasound.
The system consists of 3 sensors, 2 emitters
and a receptor.
Activation
– It is automatically turned on with the anti-
theft alarm, when the vehicle is locked me-
chanically with the key and when the but-
ton on the remote control is used.
»
69Technical specifications
Advice
Operation
Safety
Page 80 of 236

Operation
panel. The control lamp
flashes when the
t urn s
ignals are operated, provided a trailer is
correctly attached and connected to the vehi-
cle. If a turn signal bulb is defective, the con-
trol lamp flashes at double speed. If the trail-
er turn signal bulbs are defective, the control
lamp does not light up. Change the bulb.
● The main beam headlights can only be
sw
itched on if the dipped beam headlights
are already on. The warning lamp then
comes on in the instrument panel.
● The headlight flasher come
s on for as long
as you pull the lever – even if no other lights
are switched on. The warning lamp then
comes on in the instrument panel.
● When the parking lights are switched on,
the he
adlight and the tail light on the corre-
sponding side of the vehicle light up. The
parking lights will only work if the key is re-
moved from the ignition. If said light is on, an
audible warning will be emitted while the
driver door is open.
● If the turn signal lever is left on after the
key has been taken out of the ignition lock,
an acoustic signal sounds when the driver
door is opened. This is intended as a remind-
er to switch off the turn signal, unless you
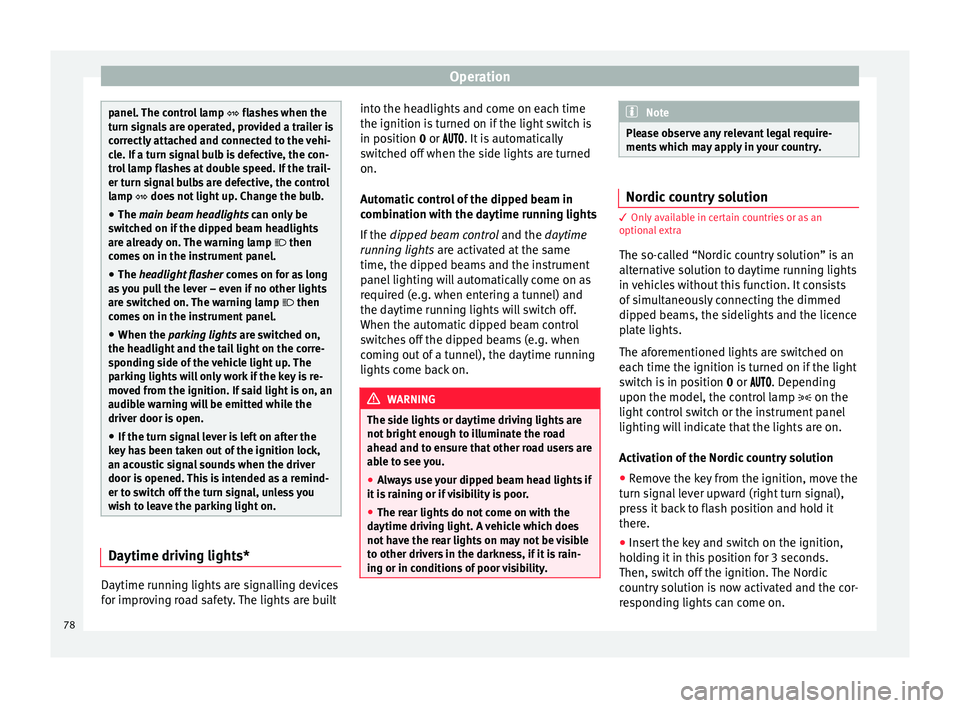
wish to leave the parking light on. Daytime driving lights*
Daytime running lights are signalling devices
for improving road safety. The lights are built into the headlights and come on each time
the ignition is turned on if the light switch is
in position
0 or
. It is automatically
sw
itched off when the side lights are turned
on.
Automatic control of the dipped beam in
combination with the daytime running lights
If the dipped beam control and the daytime
running lights
are activated at the same
time, the dipped beams and the instrument
panel lighting will automatically come on as
required (e.g. when entering a tunnel) and
the daytime running lights will switch off.
When the automatic dipped beam control
switches off the dipped beams (e.g. when
coming out of a tunnel), the daytime running
lights come back on. WARNING
The side lights or daytime driving lights are
not bright enough to illuminate the road
ahead and to ensure that other road users are
able to see you.
● Always use your dipped beam head lights if
it is raining or if visibility is poor.
● The rear lights do not come on with the
daytime driving light. A vehicle which does
not have the rear lights on may not be visible
to other drivers in the darkness, if it is rain-
ing or in conditions of poor visibility. Note
Please observe any relevant legal require-
ments which may apply in your country. Nordic country solution
3 Only available in certain countries or as an
option
al
extra
The so-called “Nordic country solution” is an
alternative solution to daytime running lights
in vehicles without this function. It consists
of simultaneously connecting the dimmed
dipped beams, the sidelights and the licence
plate lights.
The aforementioned lights are switched on
each time the ignition is turned on if the light
switch is in position 0 or . Depending
upon the model, the control lamp on the
light control switch or the instrument panel
lighting will indicate that the lights are on.
Activation of the Nordic country solution
● Remove the key from the ignition, move the
turn signal lever upward (right turn signal),
press it back to flash position and hold it
there.
● Insert the key and switch on the ignition,
holding it in this position for 3 seconds.
Then, switch off the ignition. The Nordic
country solution is now activated and the cor-
responding lights can come on.
78
Page 83 of 236

Lights and visibility
correct use of lights in all situations. “Auto-
matic headlight control” is merely a system
to support the driver. Where necessary,
switch on the lights manually using the light
switch.
Fog lights with cornering function*
3 Applies to the model: ALTEA / ALTEA XL
When the t urn s
ignal is switched on to turn or
on very tight bends, the right or left fog light
automatically comes on to function as a cor-
nering light. The cornering light only oper-
at e
s if the dipped beam lights are on. WARNING
Read and observe the relevant warnings ››› in Adaptive headlights* (for driving round
bends) on page 80 Hazard warning lights
Fig. 63
Dash panel: switch for hazard warn-
ing lights. The hazard warning lights are used to draw
the attention of other road users to your vehi-
cle in emergencies.
If your vehicle breaks down:
1. Park your vehicle at a safe distance from
moving traffic.
2. Press the button to switch on the hazard warning lights ››› .
3. Switch the ignition off.
4. Apply the handbrake.
5. For a manual gearbox, engage 1st gear; for an automatic gearbox, move the gear
lever to P
.
6.
Use the warning triangle to draw the atten-
tion of other road users to your vehicle. 7. Always take the vehicle key with you when
you leave the vehicle.
Switch on the hazard warning lights to warn
other road users, for example:
● reaching the tail end of a traffic jam,
● there is an emergency
● your vehicle breaks down due to a techni-
cal fault,
● you are towing another vehicle or your vehi-
cle is being towed.
All turn signals flash simultaneously when
the hazard warning lights are switched on.
The two turn signal turn signal lamps
and the turn signal lamp in the switch will
flash at the same time. The hazard warning
lights also work when the ignition is switch-
ed off.
Emergency braking warning
If the vehicle brakes suddenly and continu-
ously at a speed of more than 80 km/h (50
mph), the brake light flashes several times
per second to warn the vehicles driving be-
hind. If you continue braking, the hazard
warning lights will come on automatically
when the vehicle comes to a standstill. They
switch off automatically when the vehicle
starts to move again. »
81
Technical specifications
Advice
Operation
Safety
Page 85 of 236

Lights and visibility
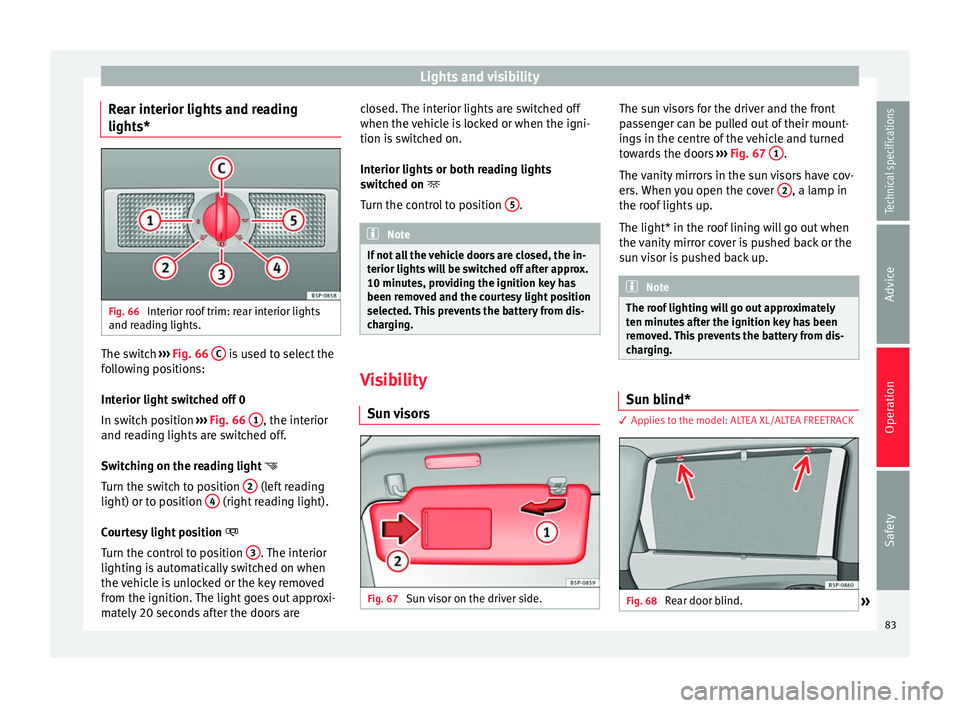
Rear interior lights and reading
lights* Fig. 66
Interior roof trim: rear interior lights
and reading lights. The switch
››› Fig. 66 C is used to select the
following positions:
Interior light switched off 0
In switch position ››› Fig. 66 1 , the interior
and reading lights are switched off.
Switching on the reading light
Turn the switch to position 2 (left reading
light) or to position 4 (right reading light).
Courtesy light position
Turn the control to position 3 . The interior
lighting is automatically switched on when
the vehicle is unlocked or the key removed
from the ignition. The light goes out approxi-
mately 20 seconds after the doors are closed. The interior lights are switched off
when the vehicle is locked or when the igni-
tion is switched on.
Interior lights or both reading lights
switched on
T urn the c
ontrol to position 5 .
Note
If not all the vehicle doors are closed, the in-
terior lights will be switched off after approx.
10 minutes, providing the ignition key has
been removed and the courtesy light position
selected. This prevents the battery from dis-
charging. Visibility
Sun visors Fig. 67
Sun visor on the driver side. The sun visors for the driver and the front
passenger can be pulled out of their mount-
ings in the centre of the vehicle and turned
towards the doors
››› Fig. 67 1 .
The vanity mirrors in the sun visors have cov-
ers. When you open the cover 2 , a lamp in
the roof lights up.
The light* in the roof lining will go out when
the vanity mirror cover is pushed back or the
sun visor is pushed back up. Note
The roof lighting will go out approximately
ten minutes after the ignition key has been
removed. This prevents the battery from dis-
charging. Sun blind*
3 Applies to the model: ALTEA XL/ALTEA FREETRACK
Fig. 68
Rear door blind.
» 83
Technical specifications
Advice
Operation
Safety
Page 107 of 236

Transport and practical equipment
distributed evenly along the entire length.
However, the maximum load permitted for
the entire roof (including the support system)
of 75 kg must not be exceeded nor the total
weight recommended for the entire vehicle.
See the “Technical Data” ››› page 207 sec-
tion.
● When transporting heavy or large objects
on the roof, any change in the normal vehicle
behaviour due to a change in the centre of
gravity or an increased wind resistance must
be taken into account. For this reason, a suit-
able speed and driving style must be used.
● On vehicles fitted with a sliding/tilting sun-
roof*, make sure it does not hit the load on
the roof upon opening. Attachment points
Fig. 112
Altea model: securing points for the
roof carrier. Fig. 113
Altea XL/Altea Freetrack model: se-
curing points for the roof carrier. Install and remove following the instructions
given.
Securing the base supports and roof carrier
system (Altea)
Location of the basic roof carrier attachment
points
››› Fig. 112 .
● A: marks for securing on the rear section.
● B: hole for securing on the front section.
Sec uring the base supports and roof carrier
system (Altea XL/Altea Freetrack)
Always secure the base supports and roof
carrier system correctly.
The roof carrier system must always be instal-
led exactly according to the instructions pro-
vided. »
105
Technical specifications
Advice
Operation
Safety
Page 116 of 236

Operation
A pleasant temperature is quickly reached in
automatic mode at a temperature of +22 °C
(+72 °F). Therefore, we recommend you not
to change this adjustment, except as neces-
sary to suit individual preferences or particu-
lar circumstances. It is possible to select inte-
rior temperatures from +18 °C (+64 °F) to
+26 °C (+80 °F). These are approximate tem-
peratures and the actual temperature may be
slightly higher or lower depending on out-
side ambient conditions.
Climatronic maintains a constant tempera-
ture. The temperature of the air supplied to the interior, the blower speed and the air dis-
tribution are regulated automatically. The
system also considers the sunlight radiation,
so there is no need for manual readjustment.
Therefore,
automatic mode
almo
s t always
provides the best comfort for the vehicle oc-
cupants throughout the year.
Automatic mode is switched off whenever an
adjustment is made using the buttons for the
air distribution, fan or or the air recircula-
tion button . The temperature will continue
to be regulated within the parameters man-
ually selected by the user. Note
There are two automatic modes:
● Automatic mode LO: this calculates the air
flow for two people.
● Automatic mode HI: this calculates the air
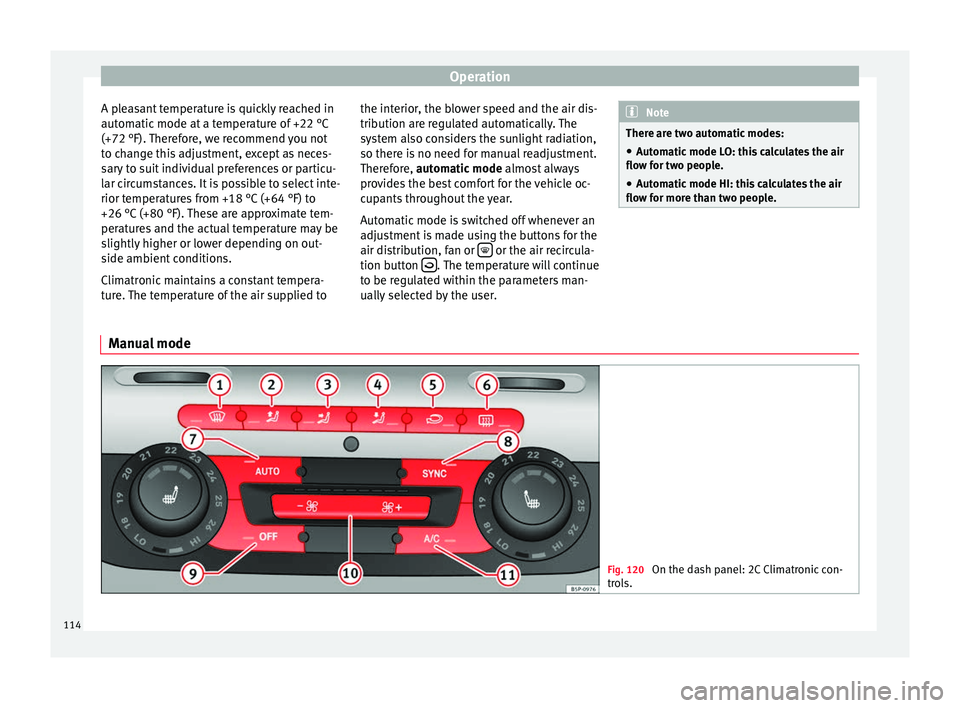
flow for more than two people. Manual mode
Fig. 120
On the dash panel: 2C Climatronic con-
trols. 114