Page 160 of 292
2.36
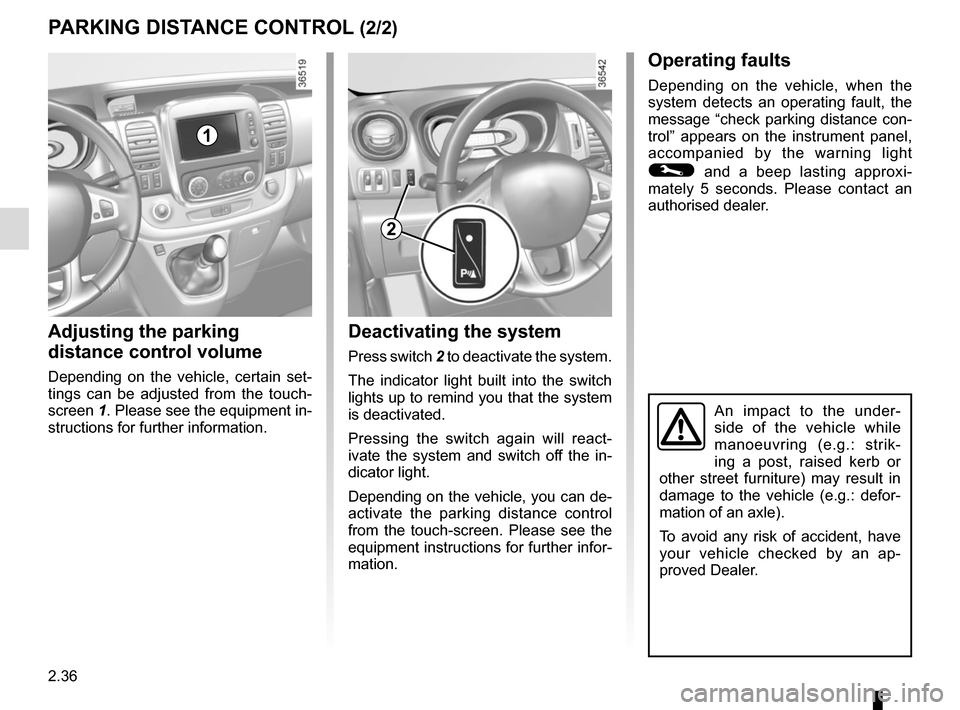
Deactivating the system
Press switch 2 to deactivate the system.
The indicator light built into the switch
lights up to remind you that the system
is deactivated.
Pressing the switch again will react-
ivate the system and switch off the in-
dicator light.
Depending on the vehicle, you can de-
activate the parking distance control
from the touch-screen. Please see the
equipment instructions for further infor-
mation.
An impact to the under-
side of the vehicle while
manoeuvring (e.g.: strik-
ing a post, raised kerb or
other street furniture) may result in
damage to the vehicle (e.g.: defor-
mation of an axle).
To avoid any risk of accident, have
your vehicle checked by an ap-
proved Dealer.
PARKING DISTANCE CONTROL (2/2)
Adjusting the parking
distance control volume
Depending on the vehicle, certain set-
tings can be adjusted from the touch-
screen 1. Please see the equipment in-
structions for further information.
Operating faults
Depending on the vehicle, when the
system detects an operating fault, the
message “check parking distance con-
trol” appears on the instrument panel,
accompanied by the warning light
© and a beep lasting approxi-
mately 5 seconds. Please contact an
authorised dealer.
2
1
Page 166 of 292
3.4
Adjusting the ventilation fan
speed.
Turn control 3 from 0 to 4. The further to
the right it is positioned, the more air is
blown into the passenger compartment.
If you want to shut off the flow of air, set
control 3 to 0.
The system is deactivated: the ventila-
tion speed for the passenger compart-
ment air is zero (vehicle stationary),
you can however still feel a slight flow
of air when the vehicle is moving.
Note:
Leaving this control in position 0 for
prolonged periods can lead to conden-
sation forming on the side windows and
windscreen and problems due to the
use of non-renewed air in the passen-
ger compartment.
Rapid demisting
Isolation of the passenger compart-
ment/air recirculation deactivated
(warning light integrated in button 4 is
off), put controls 1 and 3 to
W po-
sitions.
Using the climate control increases the
speed of demisting.
MANUAL AIR CONDITIONING (1/4)
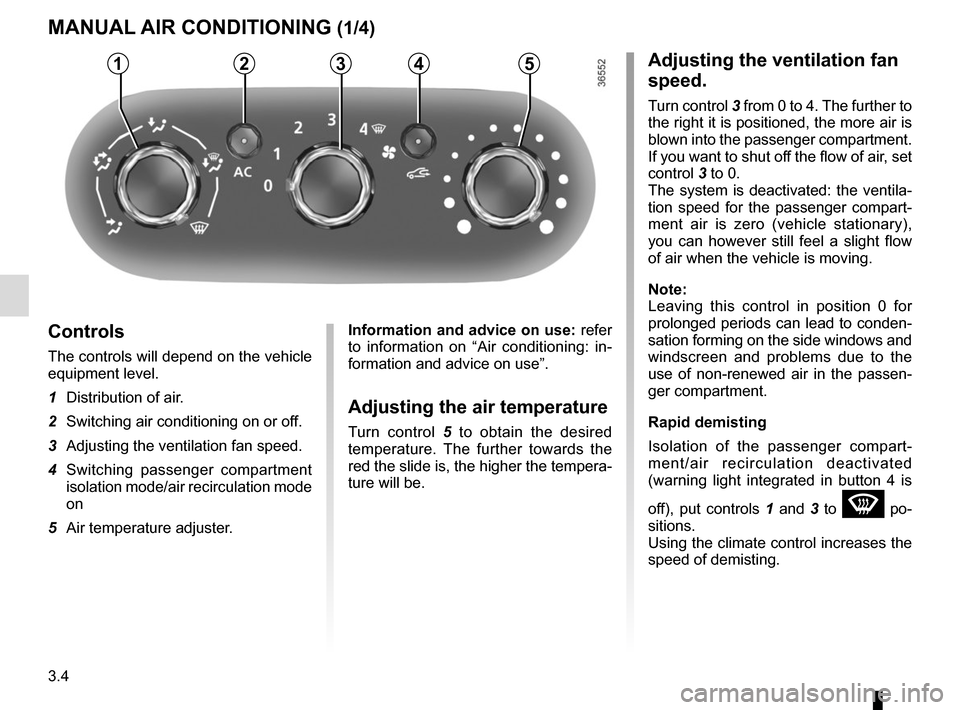
Controls
The controls will depend on the vehicle
equipment level.
1 Distribution of air.
2 Switching air conditioning on or off.
3 Adjusting the ventilation fan speed.
4 Switching passenger compartment isolation mode/air recirculation mode
on
5 Air temperature adjuster.
Information and advice on use: refer
to information on “Air conditioning: in-
formation and advice on use”.
Adjusting the air temperature
Turn control 5 to obtain the desired
temperature. The further towards the
red the slide is, the higher the tempera-
ture will be.
53214
Page 167 of 292
3.5
MANUAL AIR CONDITIONING (2/4)
Switching passenger
compartment isolation mode/
air recirculation mode on.
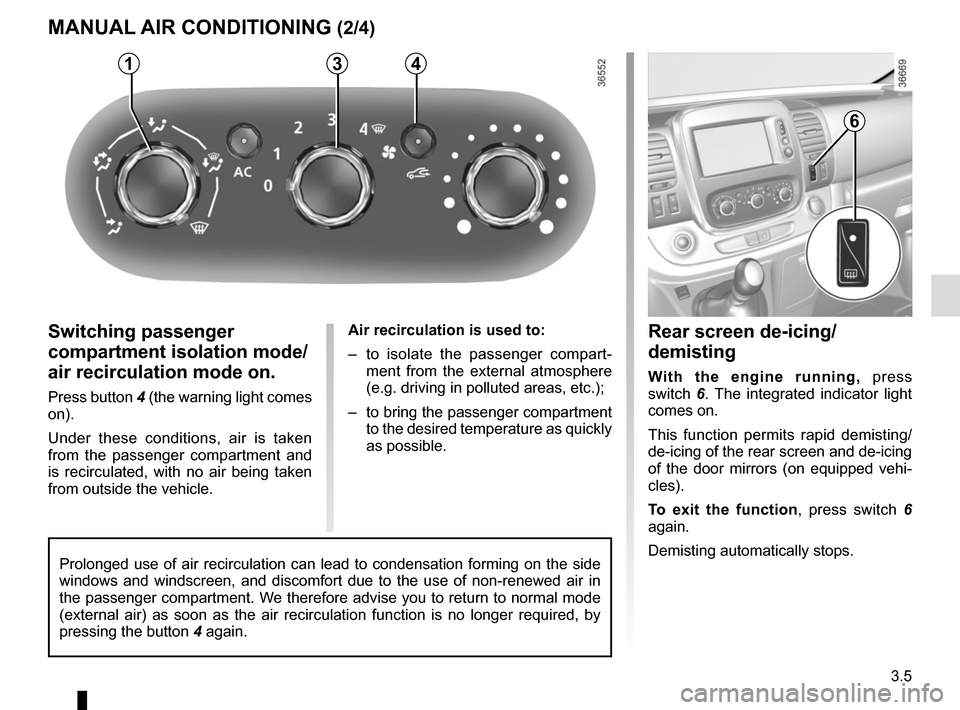
Press button 4 (the warning light comes
on).
Under these conditions, air is taken
from the passenger compartment and
is recirculated, with no air being taken
from outside the vehicle.Air recirculation is used to:
– to isolate the passenger compart-
ment from the external atmosphere
(e.g. driving in polluted areas, etc.);
– to bring the passenger compartment to the desired temperature as quickly
as possible.
31
Rear screen de-icing/
demisting
With the engine running, press
switch 6. The integrated indicator light
comes on.
This function permits rapid demisting/
de-icing of the rear screen and de-icing
of the door mirrors (on equipped vehi-
cles).
To exit the function , press switch 6
again.
Demisting automatically stops.
4
Prolonged use of air recirculation can lead to condensation forming on t\
he side
windows and windscreen, and discomfort due to the use of non-renewed air\
in
the passenger compartment. We therefore advise you to return to normal mode
(external air) as soon as the air recirculation function is no longer \
required, by
pressing the button 4 again.
6
Page 171 of 292
3.9
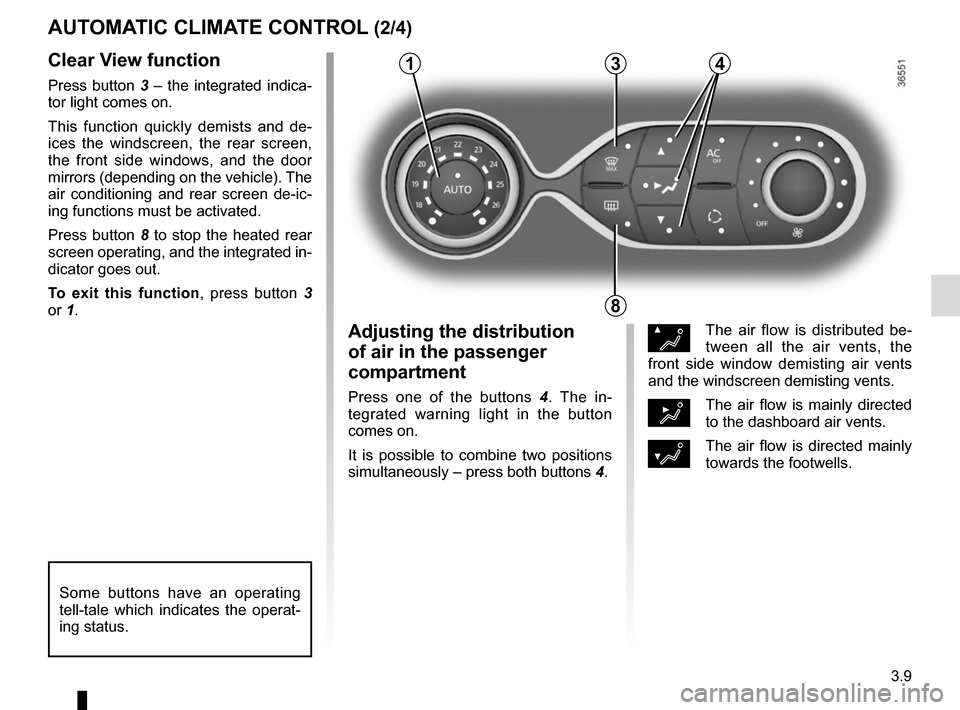
Clear View function
Press button 3 – the integrated indica-
tor light comes on.
This function quickly demists and de-
ices the windscreen, the rear screen,
the front side windows, and the door
mirrors (depending on the vehicle). The
air conditioning and rear screen de-ic-
ing functions must be activated.
Press button 8 to stop the heated rear
screen operating, and the integrated in-
dicator goes out.
To exit this function, press button 3
or 1.
AUTOMATIC CLIMATE CONTROL (2/4)
ØThe air flow is distributed be-
tween all the air vents, the
front side window demisting air vents
and the windscreen demisting vents.
½The air flow is mainly directed
to the dashboard air vents.
¿The air flow is directed mainly
towards the footwells.
Adjusting the distribution
of air in the passenger
compartment
Press one of the buttons 4 . The in-
tegrated warning light in the button
comes on.
It is possible to combine two positions
simultaneously – press both buttons 4.
8
3
Some buttons have an operating
tell-tale which indicates the operat-
ing status.
14
Page 173 of 292
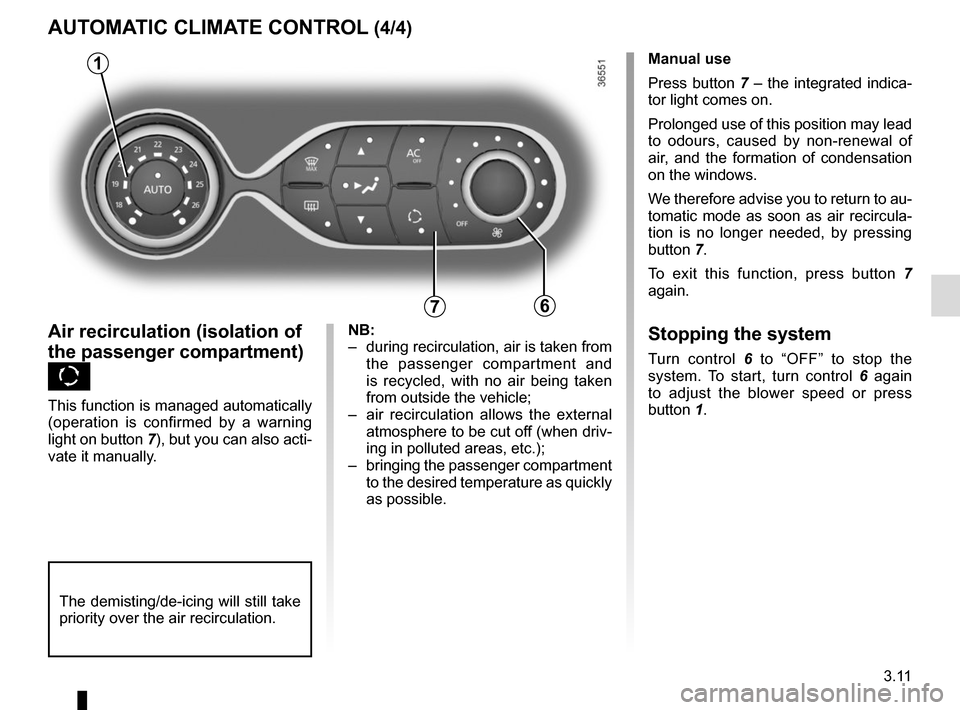
3.11
AUTOMATIC CLIMATE CONTROL (4/4)
76
Air recirculation (isolation of
the passenger compartment)
K
This function is managed automatically
(operation is confirmed by a warning
light on button 7), but you can also acti-
vate it manually.Manual use
Press button 7 – the integrated indica-
tor light comes on.
Prolonged use of this position may lead
to odours, caused by non-renewal of
air, and the formation of condensation
on the windows.
We therefore advise you to return to au-
tomatic mode as soon as air recircula-
tion is no longer needed, by pressing
button 7.
To exit this function, press button
7
again.
Stopping the system
Turn control 6 to “OFF” to stop the
system. To start, turn control 6 again
to adjust the blower speed or press
button 1.
1
NB:
– during recirculation, air is taken from the passenger compartment and
is recycled, with no air being taken
from outside the vehicle;
– air recirculation allows the external atmosphere to be cut off (when driv-
ing in polluted areas, etc.);
– bringing the passenger compartment to the desired temperature as quickly
as possible.
The demisting/de-icing will still take
priority over the air recirculation.
Page 175 of 292
3.13
ADDITIONAL AIR CONDITIONING
On equipped vehicles, there are four
adjustable air vents and controls 1.
These controls only affect the amount
of air blown into the passenger com-
partment:
– one control for hot (air comes from lower vents);
– one control for cold (air comes from upper vents).
Note: avoid closing the four air vents
at the same time (risk of damaging the
system components).Heating and air conditioning
system
Make sure that the air conditioning is
operational (warning light on button 2
lit up).
2
1
Button 2 has an operating tell-tale:
– indicator light on, the function is switched on;
– indicator light off, the function is switched off.
Page 214 of 292
4.10
TYRE PRESSURE (1/2)
A
When they need to be re-
placed, only tyres of the
same make, size, type and
profile should be used on a
single axle.
Tyres fitted to the vehicle should
either be identical to those fitted
originally or conform to those
recommended by your approved
dealer.
Label A
Open the driver’s door to read it.
Tyre pressures should be checked
when the tyres are cold.
If the tyre pressures cannot be checked
when the tyres are cold, increase the
pressures from 0.2 to 0.3 bar (or 3 PSI).
Never deflate a hot tyre. Vehicle fitted with a tyre pressure
loss warning system
If underinflated (puncture, low pres-
sure, etc.), the warning light
� on
the instrument panel comes on, see
“Tyre pressure loss warning system” in
Section 2.
Page 225 of 292

5.5
TYRE PRESSURE KIT (2/3)
Before using this kit, park
the vehicle at a sufficient
distance from traffic, switch
on the hazard warning
lights, apply the handbrake, ask all
passengers to leave the vehicle and
keep them away from traffic.
Nothing should be placed
around the driver’s feet
as such objects may slide
under the pedals during
sudden braking manoeuvres and
obstruct their use.
Please be aware that a
poorly tightened or miss-
ing valve cap can make the
tyres less airtight and may
lead to pressure loss.
Always use valve caps identical to
those fitted originally and tighten
them fully.
If the vehicle is parked on
the hard shoulder, you must
warn other road users of
your vehicle’s presence
with a warning triangle or with other
devices as per the legislation apply-
ing to the country you are in.
Following repair with the kit,
do not travel further than
120 miles (200 km). In addi-
tion, reduce your speed and
under no circumstances exceed
48 mph (80 km/h). The sticker,
which you must affix in a prominent
position on the dashboard, reminds
you of this.
Depending on the country or local
legislation, a tyre repaired with the
inflation kit may need to be replaced.
Depending on the vehicle, in the event
of a puncture, use the kit located in the
tool kit underneath the driver’s seat.
To remove it, move the seat forwards
as far as it will go, and move the seat-
back.
Unscrew the mounting screw C from
the unit and swivel to extract.
Precautions when using the
kit
The kit should not be operated for more
than 15 consecutive minutes.
C