Page 22 of 292
1.16
SLIDING SIDE DOOR (1/2)
Opening the doors from the
outside
With the vehicle unlocked, pull handle 1
towards you and slide the door towards
the rear.
Opening from the inside
Pull lever 2 towards the rear and open
the sliding door until it locks into posi-
tion.
1
2
3
Closing from the outside
Pull handle 1 and slide the door to-
wards the front of the vehicle until it
closes completely.
Closing from the inside
Pull lever 2 towards the front and close
the door until it latches.
Manual locking from inside
Lower button 3. The sliding door is
locked.
As a safety precaution,
the doors should only be
opened or closed when the
vehicle is stationary.
Vehicles with a remote
control
The sliding side door is locked and un-
locked by pressing the remote control
button.
Vehicles with RENAULT card
The sliding side door is locked and un-
locked:
– by pressing the RENAULT card but- tons;
– in hands-free mode by locking/unloc- king the front doors or the tailgate.
Page 28 of 292
1.22
TAILGATE
To open
With the tailgate unlocked, press the
button 1 and lift the tailgate.
To close
Lower the tailgate, initially using the in-
terior handle 2 to assist you.
When the tailgate has been lowered to
shoulder height, release handle 2 and
finish closing the tailgate by pressing
down on the tailgate from the outside.
1
2
Vehicles with a remote
control
The tailgate is locked and unlocked by
pressing the remote control button.
Vehicles with RENAULT card
The tailgate is locked and unlocked:
– by pressing the RENAULT card but- tons;
– in hands-free mode by locking/unloc- king the front doors.
Page 29 of 292

1.23
CENTRAL LOCKING/UNLOCKING OF OPENING ELEMENTS (1/2)
Interior locking/unlocking
door control
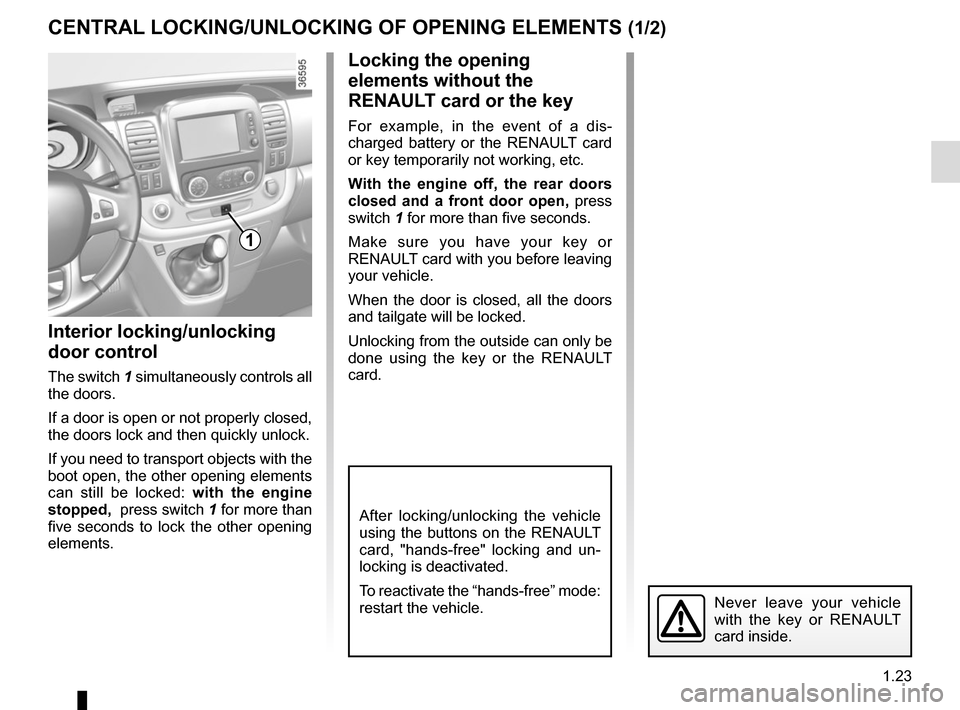
The switch 1 simultaneously controls all
the doors.
If a door is open or not properly closed,
the doors lock and then quickly unlock.
If you need to transport objects with the
boot open, the other opening elements
can still be locked: with the engine
stopped, press switch 1 for more than
five seconds to lock the other opening
elements.
Never leave your vehicle
with the key or RENAULT
card inside.
Locking the opening
elements without the
RENAULT card or the key
For example, in the event of a dis-
charged battery or the RENAULT card
or key temporarily not working, etc.
With the engine off, the rear doors
closed and a front door open, press
switch 1 for more than five seconds.
Make sure you have your key or
RENAULT card with you before leaving
your vehicle.
When the door is closed, all the doors
and tailgate will be locked.
Unlocking from the outside can only be
done using the key or the RENAULT
card.
After locking/unlocking the vehicle
using the buttons on the RENAULT
card, "hands-free" locking and un-
locking is deactivated.
To reactivate the “hands-free” mode:
restart the vehicle.
1
Page 30 of 292

1.24
CENTRAL LOCKING/UNLOCKING OF OPENING ELEMENTS (2/2)
Locking the doors with the
tailgate open
To lock the vehicle with the boot open
(e.g. when transporting something in
the boot which prevents it from being
closed), or when the vehicle is located
in a zone of high electromagnetic radia-
tion, or if the card or key is faulty: with
the engine switched off, press and hold
switch 1 for more than five seconds.
NB: If you close the boot, it will lock.
Driver’s responsibility
If you decide to keep the
doors locked when you are
driving, remember that it
may be more difficult for those as-
sisting you to gain access to the
passenger compartment in the
event of an emergency.
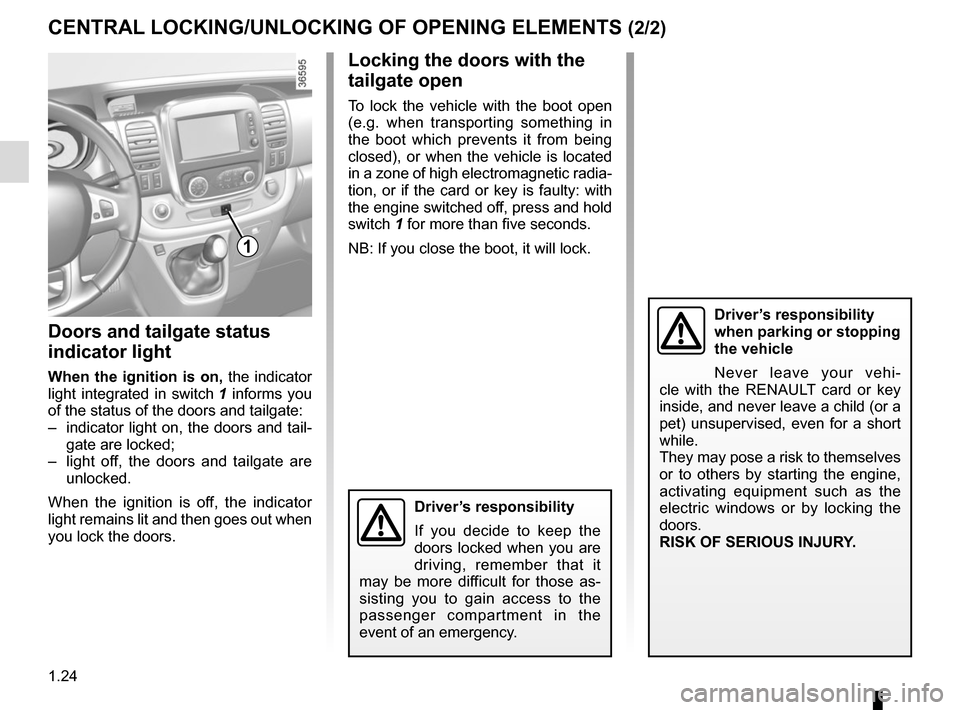
Doors and tailgate status
indicator light
When the ignition is on, the indicator
light integrated in switch 1 informs you
of the status of the doors and tailgate:
– indicator light on, the doors and tail- gate are locked;
– light off, the doors and tailgate are unlocked.
When the ignition is off, the indicator
light remains lit and then goes out when
you lock the doors.
1
Driver’s responsibility
when parking or stopping
the vehicle
Never leave your vehi-
cle with the RENAULT card or key
inside, and never leave a child (or a
pet) unsupervised, even for a short
while.
They may pose a risk to themselves
or to others by starting the engine,
activating equipment such as the
electric windows or by locking the
doors.
RISK OF SERIOUS INJURY.
Page 32 of 292
1.26
MANUAL DOOR LOCKING/UNLOCKING (2/2)
2
Locking the doors manually
Turn screw 2 with the door open (using the end of the key) and close the door.
This means that the doors are then
locked from the outside.
The doors may then only be opened
from inside the vehicle or with the key
for the front doors.
Special feature on vehicles with a
tailgate
After manually locking the doors, the
tailgate remains unlocked.
Driver’s responsibility
when parking or stopping
the vehicle
Never leave your vehi-
cle with the RENAULT card or key
inside, and never leave a child (or a
pet) unsupervised, even for a short
while.
They may pose a risk to themselves
or to others by starting the engine,
activating equipment such as the
electric windows or by locking the
doors.
RISK OF SERIOUS INJURY.
Page 111 of 292

1.105
EXTERIOR LIGHTING AND SIGNALS (3/3)
Cornering lights function
Whenever the dipped beam headlights
are on and under certain conditions (at
speed, the steering wheel at an angle,
in forward gear, the indicator lights on,
etc.), when taking a corner one of the
front fog lights will come on to light the
inside of the bend.
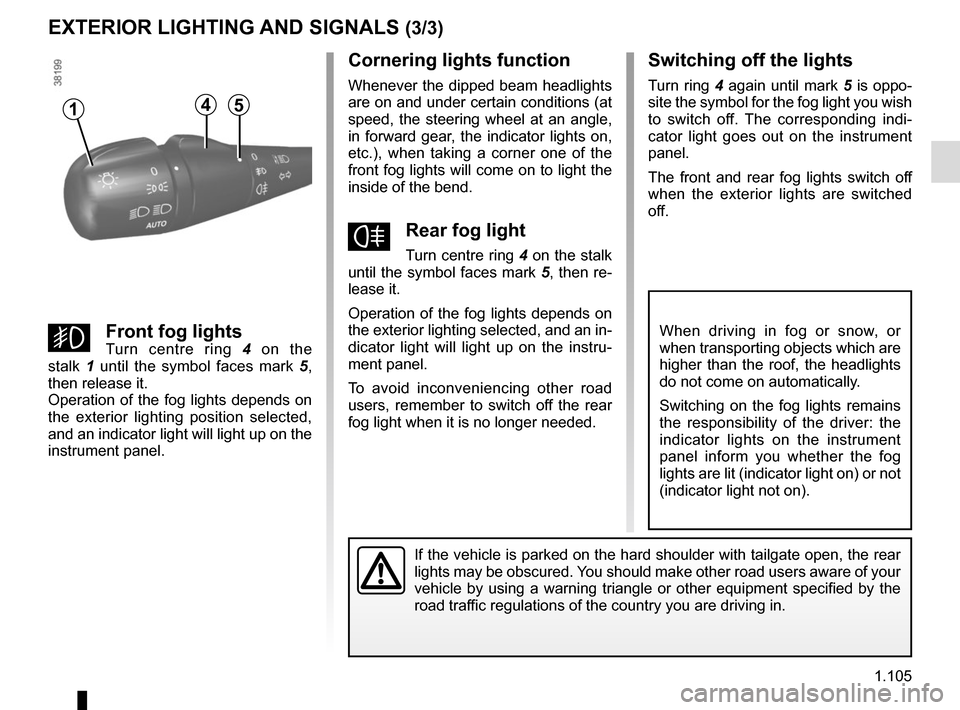
fRear fog light
Turn centre ring 4 on the stalk
until the symbol faces mark 5, then re-
lease it.
Operation of the fog lights depends on
the exterior lighting selected, and an in-
dicator light will light up on the instru-
ment panel.
To avoid inconveniencing other road
users, remember to switch off the rear
fog light when it is no longer needed.
Switching off the lights
Turn ring 4 again until mark 5 is oppo-
site the symbol for the fog light you wish
to switch off. The corresponding indi-
cator light goes out on the instrument
panel.
The front and rear fog lights switch off
when the exterior lights are switched
off.
gFront fog lightsTurn centre ring 4 on the
stalk 1 until the symbol faces mark 5,
then release it.
Operation of the fog lights depends on
the exterior lighting position selected,
and an indicator light will light up on the
instrument panel.
When driving in fog or snow, or
when transporting objects which are
higher than the roof, the headlights
do not come on automatically.
Switching on the fog lights remains
the responsibility of the driver: the
indicator lights on the instrument
panel inform you whether the fog
lights are lit (indicator light on) or not
(indicator light not on).
If the vehicle is parked on the hard shoulder with tailgate open, the re\
ar
lights may be obscured. You should make other road users aware of your
vehicle by using a warning triangle or other equipment specified by the \
road traffic regulations of the country you are driving in.
415
Page 116 of 292

1.110
Before any action involving the windscreen (washing the vehicle, de-ic-\
ing, cleaning the windscreen, etc.) return stalk 1 to position A (park).
Risk of injury and/or damage.
Windscreen washer
With the ignition on, pull stalk 1 to-
wards you.
A brief pull will trigger a single sweep
of the wipers, in addition to the wind-
screen washer.
A longer pull will trigger three sweeps
of the wipers followed, a few seconds
later, by a fourth, in addition to the wind-
screen washer.
WINDSCREEN WASH/WIPE (2/2)
A
B
C
D
11
In freezing or snowy weather, ensure
they are not stuck to the windscreen
(including the central area located
behind the interior rear-view mirror)
and the rear screen before starting
the wipers (risk of motor overheat-
ing).
Check the condition of the wiper
blades. You are responsible for their
service life:
– they must remain clean: clean the blades, windscreen and
rear screen regularly with soapy
water;
– do not use them when the wind- screen or rear screen are dry;
– free them from the windscreen or rear screen when they have not
been used for a long time.
In all cases, replace them as soon
as they begin to lose efficiency: ap-
proximately once a year.
Before using the rear wiper, check
that no object obstructs the travel of
the blade.
Do not use the wiper arm to open or
close the tailgate.
Note:
There is a maintenance position for re-
placing wiper blades.
With the ignition on and the engine
off, lower windscreen wiper stalk 1 fully
(position D). Wiper arms stop in a po-
sition away from the bonnet (please
refer to the information on “Windscreen
wiper blades” in Section 5).
Page 117 of 292

1 .
111
pRear screen wash/wipe
With the ignition on, turn the
end of stalk 1 to align mark 2 with the
symbol.
When the stalk is released, it returns to
the rear wipe position.
Special note
If the windscreen wipers are operat-
ing or are in automatic mode, the rear
screen wiper wipes intermittently when
reverse gear is engaged.
YSpeed-dependent
timed rear screen
wiper
With the ignition on, turn the end of
stalk 1 to align mark 2 with the symbol.
Wiping frequency varies with speed.
REAR SCREEN WASH/WIPE
12In freezing or snowy weather, ensure
they are not stuck to the windscreen
(including the central area located
behind the interior rear-view mirror)
and the rear screen before starting
the wipers (risk of motor overheat-
ing).
Check the condition of the wiper
blades. You are responsible for their
service life:
– they must remain clean: clean the blades, windscreen and
rear screen regularly with soapy
water;
– do not use them when the wind- screen or rear screen are dry;
– free them from the windscreen or rear screen when they have not
been used for a long time.
In all cases, replace them as soon
as they begin to lose efficiency: ap-
proximately once a year.
Before using the rear wiper, check
that no object obstructs the travel of
the blade.
Do not use the wiper arm to open or
close the tailgate.
Before any action on the
windscreen (washing the
vehicle, de-icing, cleaning
the windscreen, etc.) return
stalk 1 to the park position.
Risk of injury or damage.
When working in the engine
compartment, ensure that
the windscreen wiper stalk
is in the park position.
Risk of injury.