Page 145 of 298

2.41
TRANSMISSION: 4-wheel drive (4WD) (3/4)
Electronic stability program and
traction control when driving off-
road
When driving on soft ground (sand,
mud, deep snow), we recommend that
you deactivate the ESC function by
pressing the “ESC” switch.
In this case, only individual wheel brak-
ing remains active. This function ap-
plies the brake to any wheel that is slip-
ping, allowing the engine torque to be
transferred to the wheels with the most
grip. This is particularly useful when
crossing a bridge.
All the ESC functions will be reactivated
when the vehicle speed reaches ap-
proximately 30 mph (50 km/h) (36 mph
(60 km/h) in 4WD Lock mode), when
the engine is restarted or when the
“ESC” switch is pressed again.Operating faults
If the system detects an operating
fault, it automatically switches to “2WD”
mode, and the
‘ and © warn-
ing lights come on.
Drive as soon as possible at a moder-
ate speed to an approved dealer.
For certain operating faults, the system
may not be able to switch to “2WD" or
"4WD Lock" mode. "AUTO" mode re-
mains active.
Contact an approved dealer as soon as
possible.
After stopping the engine, the system
may take up to five minutes to cool
down.
If the system detects excessive wheel-
spin on the front wheels, it adapts the
engine to run in a way that reduces
wheelspin.
Anti-lock braking in
LOCK mode
When “4WD Lock" mode is active, the
ABS switches to off-road mode. In this
case, the wheels may lock intermit-
tently to achieve better grip, thus reduc-
ing braking distances on soft ground.
When this mode is active:
– the vehicle’s manoeuvrability is lim- ited during braking. This operating
mode is therefore not recommended
in very low-grip conditions (eg. ice).
– there may be some noise. This is normal, and does not indicate an op-
erating fault.
Page 146 of 298

2.42
TRANSMISSION: 4-wheel drive (4WD) (4/4)
All-wheel drive system
– Irrespective of the mode selected, do not start the engine if one or mor\
e wheels are not in contact with the ground
(eg. when the vehicle is on a jack or roller bench).
– Do not turn the mode selector when cornering, reversing or if the wheels\
are spinning excessively. Only select the
“2WD”, “AUTO” or “4WD Lock” mode when the vehicle is being driven in a str\
aight line.
– Only use tyres which meet the required specifications.
– “4WD Lock” mode is exclusively reserved for driving off-road. The use of this mode in any other conditions may adversely
affect the vehicle’s manoeuvrability and damage its mechanical components.
– Always ensure tyres with identical specifications are fitted to all four\
wheels (brand, size, structure, wear etc.). Fitting tyres
of different sizes to the front and rear wheels and/or left and right wheels m\
ay have serious consequences for the tyres,
gearbox, transfer gearbox and the rear differential pinions.
Page 151 of 298
2.47
Activation/deactivation
Vehicles fitted with a navigation
system
On the multifunction screen 3, select
the “Vehicle” menu, “Driving assist-
ance”, and “Driving assistance”, and
then choose “ON” or “OFF”.
You can access menu “Driving as-
sistance” directly from button 2
�.
Vehicles not fitted with a navigation
system
– With the vehicle at a standstill, press
and hold the switch 4 OK to access
the settings menu;
– repeatedly press the control 5 up or
down until you reach the “Driving as-
sistance” menu. Press the switch 4
OK;
BLIND SPOT WARNING (2/4)
– repeatedly press control 5 up or
down until you reach the “Blind spot
alert” menu, then press the switch 4
OK.
– Press the switch 4 OK again to acti-
vate or deactivate the function.
2
3
45
When the engine is started, the system
remembers its position when the igni-
tion was last switched off.
Page 153 of 298

2.49
Operating faults
If the system detects a fault, the mes-
sage “Check blind spot alert” is dis-
played on the instrument panel. Consult
an authorised dealer.
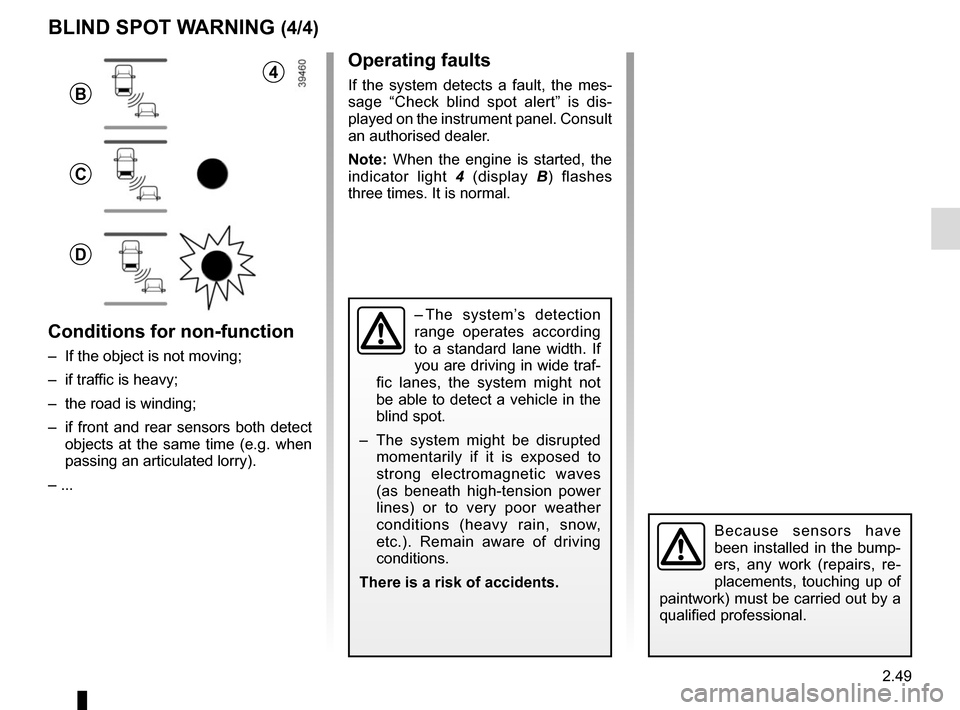
Note: When the engine is started, the
indicator light 4 (display B) flashes
three times. It is normal.
– The system’s detection
range operates according
to a standard lane width. If
you are driving in wide traf-
fic lanes, the system might not
be able to detect a vehicle in the
blind spot.
– The system might be disrupted momentarily if it is exposed to
strong electromagnetic waves
(as beneath high-tension power
lines) or to very poor weather
conditions (heavy rain, snow,
etc.). Remain aware of driving
conditions.
There is a risk of accidents.
BLIND SPOT WARNING (4/4)
Because sensors have
been installed in the bump-
ers, any work (repairs, re-
placements, touching up of
paintwork) must be carried out by a
qualified professional.
4
B
C
D
Conditions for non-function
– If the object is not moving;
– if traffic is heavy;
– the road is winding;
– if front and rear sensors both detect objects at the same time (e.g. when
passing an articulated lorry).
– ...
Page 172 of 298

2.68
Choice of manoeuvre
The system can perform four types of
manoeuvres:
– parallel parking;
– perpendicular parking;
– angle parking;
– moving out of a parallel parking space.
From the multifunction screen, select
the manoeuvre to be performed.
Note: When starting the vehicle, or
after successfully completed parallel
parking using the system, the default
manoeuvre proposed by the system is
assistance in exiting a parallel parking
space. In other cases, the default ma-
noeuvre can be set from the multifunc-
tion screen.
ASSISTED PARKING (2/4)
Operation
Parking
As long as the vehicle speed is less
than 20 mph (30 km/h), the system
looks for available parking spaces on
both sides of the vehicle.
Once a space has been found, it is dis-
played on the multifunction screen, indi-
cated by a small letter “P”. Drive slowly,
with the indicators activated on the side
of the space, until the message “Stop”
is displayed, alongside a beep.
The space is then indicated on the mul-
tifunction screen by a capital “P”.
– Stop the vehicle;
– select reverse gear.
Warning light
\f lights up on the in-
strument panel, along with a beep.
– release the steering wheel;
– follow the system instructions pro- vided on the multifunction screen. Your speed should not exceed around 4
mph (7 km/h).
Once the warning light
\f on the
instrument panel goes off and a beep
sounds, the manoeuvre has been com-
pleted.
Page 173 of 298

2.69
ASSISTED PARKING (3/4)
Your speed should not exceed around
4 mph (7 km/h).
Once in position to exit the space, the
system will notify you of the end of the
manoeuvre.
Once the warning light
\f on the
instrument panel goes off and a beep
sounds, the manoeuvre has been com-
pleted.
Suspending the manoeuvreThe manoeuvre is suspended in the fol-
lowing circumstances:
– you take control of the wheel;
– a door or the boot is opened;
– the vehicle is at a standstill for too long;
– an obstacle in the direction of move- ment prevents the manoeuvre from
being completed;
– the engine will stop.
Once the warning light
\f on the
instrument panel goes off and a beep
sounds, the manoeuvre has been sus-
pended. Then to resume the manoeu-
vre, press and hold the system activa-
tion switch. In this case, the reason for suspending
the manoeuvre will be displayed on the
multifunction screen.
Make sure:
– you have released the steering wheel
and;
– that all doors and the boot are closed, and;
– that no obstacles are in the way of the direction of movement, and;
– that the engine is started.
Cancelling the manoeuvre
The manoeuvre can be stopped in the
following cases:
– by pressing the system activation switch;
– the vehicle speed has exceeded 4 mph (7 km/h);
– You have performed more than ten forwards/backwards movements in
one manoeuvre;
– the parking distance control sensors are dirty or blocked;
– the vehicle wheels have skidded.
Once the warning light
\f on the
instrument panel goes off and a beep
sounds, the manoeuvre has been
ended.
Exiting a parallel parking space
– Select “exit parallel parking space” mode;
– activate the direction indicator on the side you wish to go out of;
– press and hold switch 1 (around
2 seconds).
Warning light
\f lights up on the in-
strument panel, along with a beep.
– release the steering wheel;
– go forwards and backwards using the parking distance control system
alerts.
1
Page 176 of 298

2.72
AUTOMATIC TRANSMISSION (2/3)
Special cases
In certain driving conditions (for exam-
ple, engine protection, operation of the
Electronic Stability Programme: the au-
tomatic system may change gear auto-
matically.
Likewise, to prevent incorrect manoeu-
vres, a gear change may be refused by
the automatic system: in this case the
gear display flashes for a few seconds
as a warning.
Special circumstances
– If the bends and road surface do
not allow you to stay in automatic
mode (e.g. in the mountains), we
recommend that you change to
manual mode. This will prevent the
automatic gearbox from changing
gear repeatedly when climbing, and
permit engine braking on long de-
scents.
– In cold weather , start the engine
and wait a few seconds before
moving the selector lever from posi-
tion P or N and engaging it in D or R
to prevent the engine stalling.
Driving in manual mode
With the selection lever 1 in position D,
move the lever to the left.
Shifting the lever repeatedly allows you
to change gears manually:
– to move down through the gears, push the lever forwards;
– to move up through the gears, push the lever backwards.
The gear selected is displayed on the
instrument panel.
1
When facing uphill, to remain
stopped, do not keep your foot on
the accelerator.
Risk of overheating the automatic
gearbox.
Page 185 of 298

3.7
AUTOMATIC CLIMATE CONTROL (1/6)Automatic mode
The automatic climate control system
guarantees comfort in the passen-
ger compartment and good visibility
(except in the event of extreme condi-
tions), while optimising consumption.
The system controls the ventilation
speed, air distribution, air recirculation,
and starting and stopping the air condi-
tioning and air temperature.
AUTO: allows the selected com-
fort level to be best attained, depend-
ing on the exterior conditions. Press
button 7. The integrated indicator light
on button 7 comes on.
Varying the ventilation speedIn automatic mode, the system uses
the most suitable amount of air to reach
and maintain the desired comfort level.
You can still adjust the fan speed by
pressing the buttons 6 to increase or
reduce the fan speed.
In this case, the integrated indicator
light on button 7 goes out and the ven-
tilation speed selected is displayed on
the indicator C.
Indicators
A Left-hand side air temperature.
B Distribution of air.
C Fan speed.
D Automatic air recirculation warning
light.
E Right-hand side air temperature.
The controls
1 Stopping the system or, depending on the vehicle, de-icing/demisting
the windscreen.
2 and 10 air temperature.
3 “Clear View” function.
4 and 5 Passenger compartment air
distribution.
6 Fan speed and, depending on the ventilation, stopping the system.
7 Automatic programme.
8 Air conditioning.
9 Air recirculation.
11 De-icing/demisting of the rear screen
and, depending on the vehicle, the
door mirrors.
12 DUAL function
124567891012
ABCDE
311