Page 65 of 298
1.59
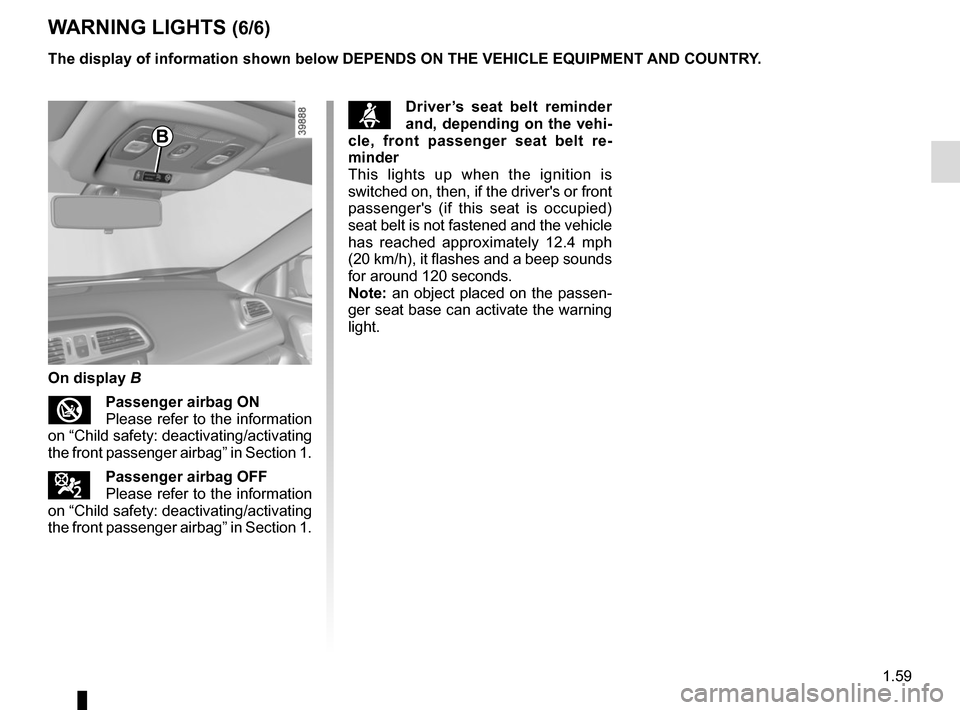
WARNING LIGHTS (6/6)
The display of information shown below DEPENDS ON THE VEHICLE EQUIPMENT \
AND COUNTRY.
On display B
�Passenger airbag ON
Please refer to the information
on “Child safety: deactivating/activating
the front passenger airbag” in Section 1.
¹Passenger airbag OFF
Please refer to the information
on “Child safety: deactivating/activating
the front passenger airbag” in Section 1.
ßDriver’s seat belt reminder
and, depending on the vehi-
cle, front passenger seat belt re-
minder
This lights up when the ignition is
switched on, then, if the driver's or front
passenger's (if this seat is occupied)
seat belt is not fastened and the vehicle
has reached approximately 12.4 mph
(20 km/h), it flashes and a beep sounds
for around 120 seconds.
Note: an object placed on the passen-
ger seat base can activate the warning
light.
B
Page 66 of 298

Instrument panel A
Depending on the vehicle, you can cus-
tomise your instrument panel with the
content and colours of your choice.
From the multifunction screen ,")
1.60
DISPLAYS AND INDICATORS (1/2)
Instrument panel A
Depending on the vehicle, you can cus-
tomise your instrument panel with the
content and colours of your choice.
From the multifunction screen , select
System, then User profile. Refer to the
handbook for the equipment.
Driving style indicator 3
Please refer to the information on “Eco-
driving” in Section 2.
A
5
3
Rev counter 4(graduations x 1000)
Speedometer 5(km or miles per hour)
This is displayed differently according
to how the instrument panel is custom-
ised.
Overspeed buzzer
Depending on the vehicle and coun-
try, a buzzer sounds for approximately
10 seconds every 40 seconds, as long
as the vehicle is travelling in excess of
72 mph (120 km/h).
6
Instrument panel in miles
(option to switch to km/h)
Vehicles not fitted with a navigation
system
– With the ignition off, press the OK
button 2 and the start button 6;
– using control 1, select “Settings”,
“Instrument panel”, then the unit;
– Press the OK button 2 to confirm.
To return to the previous mode, repeat
the same operation.
4
1
2
Page 72 of 298

The display of information shown below DEPENDS ON THE VEHICLE EQUIPMENT \
AND COUNTRY.
Examples of selectionsInterpreting the display selected
On-board comp")
1.66
ON-BOARD COMPUTER: trip settings (3/5)
The display of information shown below DEPENDS ON THE VEHICLE EQUIPMENT \
AND COUNTRY.
Examples of selectionsInterpreting the display selected
On-board computer with mileage-
before-service message
c) Mileage before service or oil change.Mileage before service
With the ignition switched on, the engine not running and
the display set to “Service Intervals”, press button OK for ap-
proximately 5 seconds to display the mileage before service (dis-
tance or time to the next service). When the range approaches
its limit, there are several possible scenarios:
– distance/time remaining less than 900 miles (1,500 km) or
one month : the message “Service due in” is displayed along
with the nearest limit (distance or time);
– range equal to 0 km/miles or service date reached: the
message “Service required” is displayed accompanied by
warning light
©.
The vehicle requires a service as soon as possible.
Service Intervals
Service in
30 000 Kms / 12 mo
Service due in
300 Kms / 24 days
Service required
Resetting: to reset the distance before service, press and hold button 2 for approximately 10 seconds until the display shows
the mileage permanently.
NB: if a service is performed without changing the engine oil, only the mi\
leage before the next service should be reset. In the
event of an oil change, both the distance before the next service and th\
e next oil change should be reset.
Page 73 of 298

Examples of selectionsInterpreting the display selected
On-board computer")
1.67
The display of information shown below DEPENDS ON THE VEHICLE EQUIPMENT \
AND COUNTRY.
TRIP COMPUTER: trip settings (4/5)
Examples of selectionsInterpreting the display selected
On-board computer with distance before
next service message (cntd.)
c) Mileage before service or oil change.Mileage before service
With the ignition switched on and the engine not running ,
and the selected display is “Mileage before service”, press
button OK for about 5 seconds to display the mileage before
the next service, then press button 2 to view the mileage before
the next oil change (distance or time remaining before the next
service). When the range approaches its limit, there are several
possible scenarios:
– distance/time remaining less than 900 miles (1,500 km) or
one month : the message “Service due in” is displayed, ac-
companied by the nearest term (distance or time);
– range equal to 0 km/miles or service date reached: the
message “Service required” is displayed accompanied by
warning light
©.
The vehicle requires an oil change as soon as possible.
Service Intervals
Oil change in
30 000 Kms / 24 mo
Service due in
300 Kms / 24 days
Service required
Depending on the vehicle, the mileage before an oil change varies accord\
ing to the driving style (frequent driving at low speed ,
door-to-door journeys, extensive use at idling speed, towing a trailer, etc.). The distance remaining until the next oil change can
therefore decrease more quickly in some cases than the actual distance t\
ravelled.
Resetting: to reset the mileage before a service, press and hold button 2 for approximately 10 seconds until the display shows
the range permanently.
NB: if a service is performed without changing the engine oil, only the mi\
leage before the next service should be reset. In the
event of an oil change, both the distance before the next service and th\
e next oil change should be reset.
Page 75 of 298
1.69
TRIP COMPUTER AND WARNING SYSTEM: information messages
Examples of messagesInterpreting the display selected
« Parking brake on » Indicates that the parking brake has been applied.
« Checking control functions » Displayed with the ignition on when the vehicle is running self-diagnost\
ics.
« Turn steeringwheel + START »Turn the steering wheel slightly whilst pressing the vehicle start button\
to unlock
the steering column.
« Steering wheel not locked » Indicates that the steering column has not been locked.
These can help in the vehicle starting phase, or give information about \
a selection or a driving status.
Examples of information messages are given in the following pages.
Page 82 of 298

From the multifunction screen, select
menu “vehicle”, “User settings”,
“External welcome” and activate or de-
activate the fu")
1.76
Welcome and goodbye function
(depending on the vehicle)
From the multifunction screen, select
menu “vehicle”, “User settings”,
“External welcome” and activate or de-
activate the function (ON or OFF).Depending on the selected choice, the
door mirrors will fold out:
– when the ignition is next switched on (function deactivated);
– upon detecting the RENAULT card or upon unlocking the vehicle (func-
tion activated)
REAR-VIEW MIRRORS (1/3)
Folding door mirrors
Press the switch 1 to automatically fold
in the door mirrors.
Door mirrors
Adjustment
Select the door mirror using the
switch 2, then use the control 3 to
adjust it to the desired position.
Heated door mirrors
Mirror de-icing is carried out at the
same time as rear screen de-icing.
Please refer to the information
on “Manual air conditioning” and
“Automatic climate control” in Section 3.
The driver’s door mirror
may have two clearly de-
fined zones. Zone B shows
what can normally be seen
in an ordinary rear-view mirror.
Zone A increases rear side visibility.
Objects in the mirror are closer
than they appear.
For safety reasons, carry
out any adjustments when
the vehicle is not being
driven.
AB
1
2
3
Page 93 of 298

1.87
Special note
When driving the vehicle, the wiping
speed slows down whenever the ve-
hicle stops. For example, fast wiping
speed will slow to normal wiping speed.
As soon as the vehicle moves off,
wiping will return to the speed originally
selected.
If stalk 1 is operated, it overrides and
cancels the automatic function.Vehicle fitted with intermittent
windscreen wipers
A single sweep
A short push will trigger one sweep
of the wipers.
B stop
C intermittent wiping
The wipers will pause for several
seconds between sweeps. It is
possible to change the time be-
tween sweeps by turning ring 2.
D slow continuous wiping
E fast continuous wiping
Positions A, C and D are accessible
with the ignition on. Position E is
accessible only when the engine is
running.
1
A
B
C
D
WINDSCREEN WASH/WIPE (1/6)
E
Check the condition of the wiper
blades. You are responsible for their
service life:
– they must remain clean: clean the blades, windscreen and
rear screen regularly with soapy
water;
– do not use them when the wind- screen or rear screen are dry;
– free them from the windscreen or rear screen when they have not
been used for a long time.
In all cases, replace them as soon
as they begin to lose efficiency: ap-
proximately once a year.
Before using the rear wiper, check
that no object obstructs the travel of
the blade.
Do not use the wiper arm to open or
close the tailgate.
12
Page 95 of 298

1.89
D slow continuous wiping
E fast continuous wiping
Positions A and D are accessible
with the ignition on. Positions B
and E are accessible only with the
engine running.
Operating fault
In the event of a malfunction of the
automatic wiping, the wiper is set to
intermittent wiping. Contact an au-
thorised dealer.
The operation of the rain sensor can
be disturbed in the event of:
– damaged wiper blades; a screen
of water or traces left by a blade in
the sensor’s detection zone may
increase the response time of the
automatic wiper, or increase the
wiping frequency;
– a windscreen with any chip or
crack level with the sensor, or a
windscreen covered in dust, dirt,
insects, ice, the use of washing
wax and water-repellent chemi-
cals; the automatic wiping will
be less sensitive, or even unres-
ponsive.
1
A
B
C
DE
WINDSCREEN WASH/WIPE (3/6)
Special note
When driving the vehicle, the wiping
speed slows down whenever the ve-
hicle stops. For example, fast wiping
speed will slow to normal wiping speed.
As soon as the vehicle moves off,
wiping will return to the speed originally
selected.
If stalk 1 is operated, it overrides and
cancels the automatic function.
Precautions
– In the event of ice, check whether the
blades are stuck to the windscreen
before operating the wiping mecha-
nism. If you activate the wipers while
the blades are stuck down with ice,
you may risk damaging both the
blade and the wiper motor.
– Do not activate the wipers on a dry
screen. This will lead to the prema-
ture wear or damage to the blades.