Page 95 of 252

2.5
When you leave your vehi-
cle, especially if you have
your RENAULT card with
you, check that the engine
is completely switched off.Remote control RENAULT
card
With the card in reader 2, press
button 1: the engine will stop. Removing
the card from the reader locks the steer-
ing column.
Special note
If the card is no longer in the reader
when you try to switch the engine off,
the message “NO KEYCARD PRESS
AND HOLD” will appear on the in-
strument panel: press the button 1 for
longer than two seconds.
Hands-free RENAULT card
With the card in the vehicle, press
button 1: the engine will stop. The steer-
ing column is locked when the driver’s
door is opened or the vehicle is locked.
If the card is no longer in the pas-
senger compartment when you try to
switch the engine off, the message “NO
KEYCARD PRESS AND HOLD” ap-
pears on the instrument panel: press
the button 1 for longer than two sec-
onds.
Conditions for stopping the
engine
The vehicle must stationary, with the
lever positioned in N or P for vehicles
with an automatic transmission.
Special note
Depending on the vehicle, accessories
(e.g. radio) stop working either when
the engine is switched off or when the
driver’s door is opened or when the
doors are locked.
STARTING/STOPPING THE ENGINE (3/3)
Never leave your vehicle
with the RENAULT card
inside and never leave a
child (or a pet) unsuper-
vised, even for a short while.
There is a risk that they could start
the engine or operate electrical
equipment (electric windows etc.)
and trap part of their body (neck,
arms, hands, etc.).
Risk of serious injury.
Never switch off the ignition before
the vehicle has stopped completely.
Once the engine has stopped, the
brake servo, power-assisted steer-
ing, etc. and the passive safety de-
vices such as air bags and preten-
sioners will no longer operate.
12
Page 98 of 252

2.8
STOP AND START FUNCTION (3/4)
Conditions preventing the
standby of the engine
Certain conditions prevent the system
from using the engine standby function,
including when:
– reverse gear is engaged;
– the bonnet is not locked;
– the driver’s door is not closed;
– the driver’s seatbelt is not fastened;
– the outdoor temperature is too low or too high (less than around 0 °C or
higher than around 30 °C);
– the battery is not sufficiently charged;
– the difference between the vehicle interior temperature and the auto-
matic climate control instruction is
too high; – for vehicles with automatic gear-
boxes, the gradient is steeper than
approximately 12%;
– the “Clear View” function is activated (please see “Automatic Climate
Control” in Section 3);
– the engine temperature is too low;
– the anti-pollution system is required;
or
– ...
the warning light
� or, depending
on the vehicle, the message “AUTO
STOP UNAVAILABLE” appears on the
instrument panel indicating that engine
standby is not available.
Deactivate the Stop and
Start function when per-
forming any operations in
the engine compartment.
Special cases
With the engine on standby (traffic jam,
traffic lights, etc.), if the driver unfastens
their seat belt, opens the driver’s door
or gets out of their seat, the ignition will
be switched off.
To restart and reactivate the Stop and
Start system, press the start button
(please see “Starting, stopping the
engine” in Section 2).
Page 113 of 252

2.23
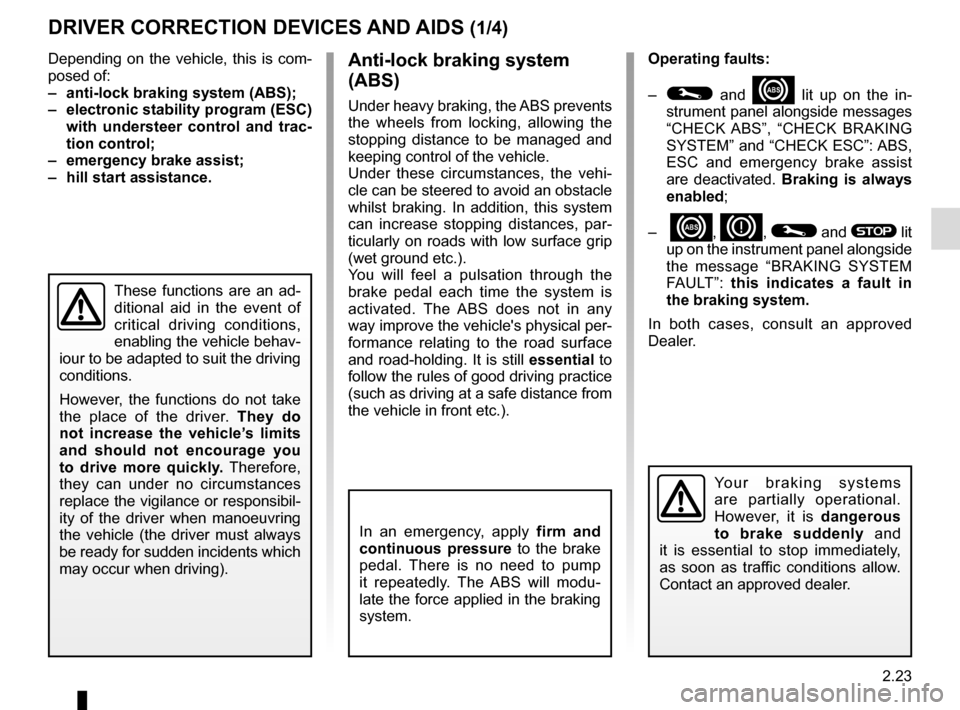
Depending on the vehicle, this is com-
posed of:
– anti-lock braking system (ABS);
– electronic stability program (ESC) with understeer control and trac-
tion control;
– emergency brake assist;
– hill start assistance.Operating faults:
–
© and x lit up on the in-
strument panel alongside messages
“CHECK ABS”, “CHECK BRAKING
SYSTEM” and “CHECK ESC”: ABS,
ESC and emergency brake assist
are deactivated. Braking is always
enabled;
–
x, D, © and ® lit
up on the instrument panel alongside
the message “BRAKING SYSTEM
FAULT”: this indicates a fault in
the braking system.
In both cases, consult an approved
Dealer.
Anti-lock braking system
(ABS)
Under heavy braking, the ABS prevents
the wheels from locking, allowing the
stopping distance to be managed and
keeping control of the vehicle.
Under these circumstances, the vehi-
cle can be steered to avoid an obstacle
whilst braking. In addition, this system
can increase stopping distances, par-
ticularly on roads with low surface grip
(wet ground etc.).
You will feel a pulsation through the
brake pedal each time the system is
activated. The ABS does not in any
way improve the vehicle's physical per-
formance relating to the road surface
and road-holding. It is still essential to
follow the rules of good driving practice
(such as driving at a safe distance from
the vehicle in front etc.).
DRIVER CORRECTION DEVICES AND AIDS (1/4)
These functions are an ad-
ditional aid in the event of
critical driving conditions,
enabling the vehicle behav-
iour to be adapted to suit the driving
conditions.
However, the functions do not take
the place of the driver. They do
not increase the vehicle’s limits
and should not encourage you
to drive more quickly. Therefore,
they can under no circumstances
replace the vigilance or responsibil-
ity of the driver when manoeuvring
the vehicle (the driver must always
be ready for sudden incidents which
may occur when driving).
In an emergency, apply firm and
continuous pressure to the brake
pedal. There is no need to pump
it repeatedly. The ABS will modu-
late the force applied in the braking
system.
Your braking systems
are partially operational.
However, it is dangerous
to brake suddenly and
it is essential to stop immediately,
as soon as traffic conditions allow.
Contact an approved dealer.
Page 128 of 252
2.38
Operation
With the selection lever 1 in position P,
switch on the ignition.
To move out of position P, you must de-
press the brake pedal before pressing
the unlocking button 2.
With your foot on the brake pedal
(warning light 3 on the display goes
out), move the lever out of position P.
Only engage D or R when the vehi-
cle is stopped, with your foot on the
brake and the accelerator pedal re-
leased.
Selector lever 1
P: park
R: reverse
N: Neutral
D: automatic mode
M: manual mode
+: upper gear
–: lower gear
4: displays the gear engaged in manual
mode.
Note: Press the button 2 to go from po-
sition D or N to R or P.
AUTOMATIC TRANSMISSION (1/3)
1
4
32
Gear change paddles 5
The paddles 5 enable you to change
gear while the gear lever is in ‘manual
mode’ position or, if driving, in ‘auto-
matic mode’ position.
P, N and R are not accessible using the
paddles.
The display 4 notifies the driver about
the current mode and gear.
55
Page 130 of 252

2.40
AUTOMATIC TRANSMISSION (3/3)
Parking the vehicle
When the vehicle is stopped, move the
lever to position P while keeping your
foot on the brake pedal: the gearbox is
in neutral and the drive wheels are me-
chanically locked by the driveshaft.
Apply the handbrake.
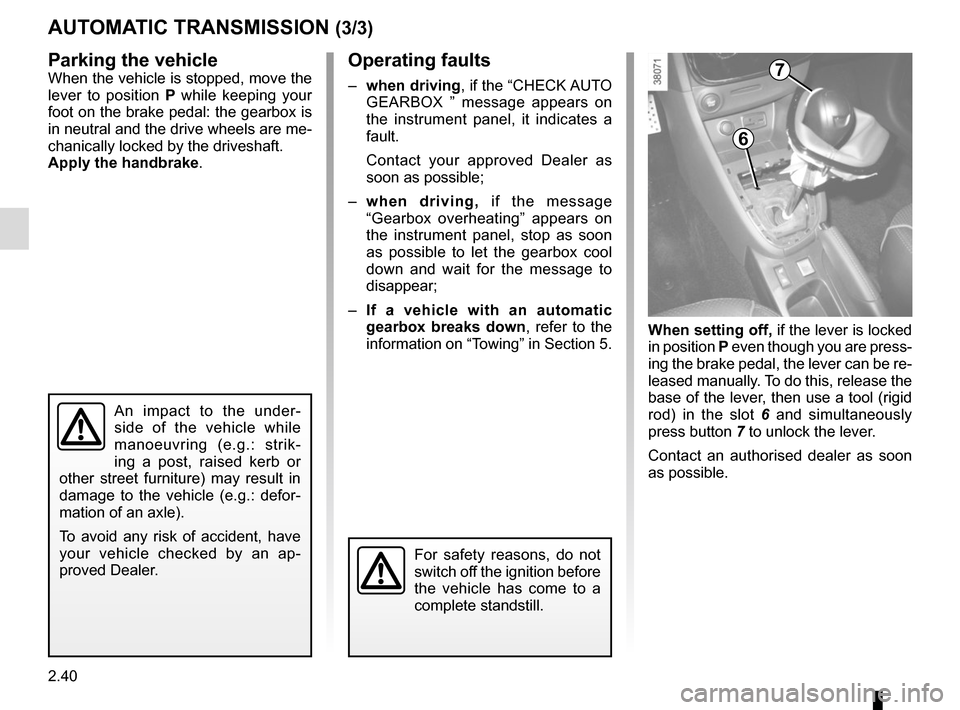
When setting off, if the lever is locked
in position P even though you are press-
ing the brake pedal, the lever can be re-
leased manually. To do this, release the
base of the lever, then use a tool (rigid
rod) in the slot 6 and simultaneously
press button 7 to unlock the lever.
Contact an authorised dealer as soon
as possible.Operating faults
– when driving , if the “CHECK AUTO
GEARBOX ” message appears on
the instrument panel, it indicates a
fault.
Contact your approved Dealer as
soon as possible;
– when driving, if the message
“Gearbox overheating” appears on
the instrument panel, stop as soon
as possible to let the gearbox cool
down and wait for the message to
disappear;
– If a vehicle with an automatic
gearbox breaks down, refer to the
information on “Towing” in Section 5.
For safety reasons, do not
switch off the ignition before
the vehicle has come to a
complete standstill.
An impact to the under-
side of the vehicle while
manoeuvring (e.g.: strik-
ing a post, raised kerb or
other street furniture) may result in
damage to the vehicle (e.g.: defor-
mation of an axle).
To avoid any risk of accident, have
your vehicle checked by an ap-
proved Dealer.
6
7
Page 142 of 252

3.12
ELECTRIC WINDOWS (1/2)
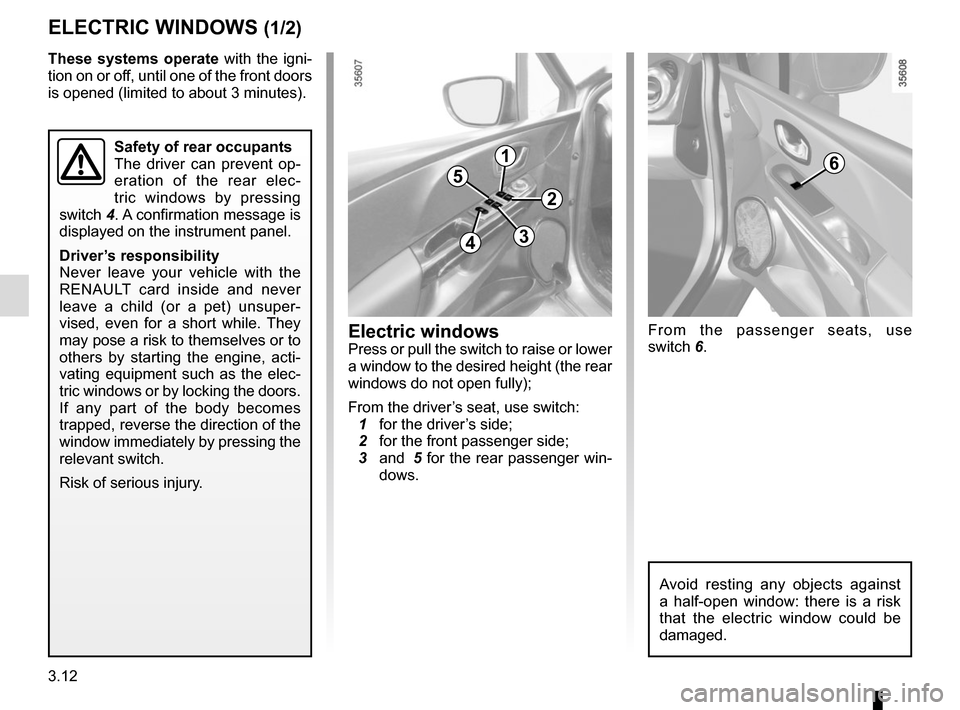
Electric windowsPress or pull the switch to raise or lower
a window to the desired height (the rear
windows do not open fully);
From the driver’s seat, use switch:
1 for the driver’s side;
2 for the front passenger side;
3 and 5 for the rear passenger win-
dows.
1
2
34
56
From the passenger seats, use
switch 6.
Avoid resting any objects against
a half-open window: there is a risk
that the electric window could be
damaged.
These systems operate with the igni-
tion on or off, until one of the front doors
is opened (limited to about 3 minutes).
Safety of rear occupants
The driver can prevent op-
eration of the rear elec-
tric windows by pressing
switch 4. A confirmation message is
displayed on the instrument panel.
Driver’s responsibility
Never leave your vehicle with the
RENAULT card inside and never
leave a child (or a pet) unsuper-
vised, even for a short while. They
may pose a risk to themselves or to
others by starting the engine, acti-
vating equipment such as the elec-
tric windows or by locking the doors.
If any part of the body becomes
trapped, reverse the direction of the
window immediately by pressing the
relevant switch.
Risk of serious injury.
Page 145 of 252
3.15
Unlocking and opening the doors
or tailgate switches on the timed
courtesy lights and lights.
Boot light 5
Light 5 comes on when the boot is
opened.
Courtesy light
Press switch 2 for:
– permanent lighting;
– intermittent lighting, which comes on when a door is opened. It only
switches off after a time delay and
when the doors concerned have
been closed correctly;
– lighting switches off immediately.
Map reading lights
Press switch 1 for the driver, 3 for the
front passenger.
INTERIOR LIGHTING
1235
Glovebox light 4
Light 4 comes on when the cover is
opened.
4
Page 151 of 252
3.21
The headrest is a safety
component; check that it is
fitted and in the correct po-
sition. The top of the head-
rest should be as close as possible
to the top of the head.
To raise the headrest
Raise the headrest as far as it will go,
then press button A and remove the
headrest.
To refit the headrest
Enter the rods in their housing and
push down the headrest until it locks to
use it in the high position. Check that it
is correctly locked.
Position for use
Raise the headrest as far as possible to
use it in the high position. Check that it
is correctly locked.
Storage position
Press button A and lower the headrest
completely.
When the headrest is set at the
lowest position, this is for storage
only. It should not be in this position
when a seat is occupied.
REAR HEAD RESTS
A