Page 92 of 389
90
4008_en_Chap03_confort_ed01-2014
Front fittings
1. Sun visor.
2. gl ove box.
3.
P
ortable ashtray.
4.
C
igarette lighter
1
2 V socket (120 W max).
5.
A
rmrest with storage compartments.
6.
C
u p h o l d e r.
7.
B
ottle holder.
Comfort
Page 94 of 389
92
4008_en_Chap03_confort_ed01-2014
Portable ashtray
F Pull the cover to open the ashtray.
F to e mpty it, remove the ashtray by pulling it
upwards.
Cigarette lighter /
1 2 V accessory
socket
F to use the cigarette lighter, press it in
and wait a few seconds until it pops out
automatically.
F
t
o c
onnect a 12 V accessory (max power:
120 W), remove the cigarette lighter and
connect a suitable adaptor.
You can use this socket to connect a telephone
charger, a bottle warmer...
After use, put the cigarette lighter
back into
place straight away.
Comfort
Page 99 of 389
97
4008_en_Chap03_confort_ed01-2014
Rear parcel shelfStowing rings
there are four stowing rings in the boot for
securing luggage:
-
t
wo rings are located on the boot floor,
-
t
wo rings are located on the rear side
pillars.to r
emove the shelf:
F
u
nhook the two cords,
F
r
aise the shelf slightly, then remove it.
ther
e are several options for storing the shelf:
-
ei
ther upright behind the front seats,
-
o
r flat at the base of the boot.
3
Comfort
Page 100 of 389

98
4008_en_Chap04_conduite_ed01-2014
Starting - stopping the engine with the key
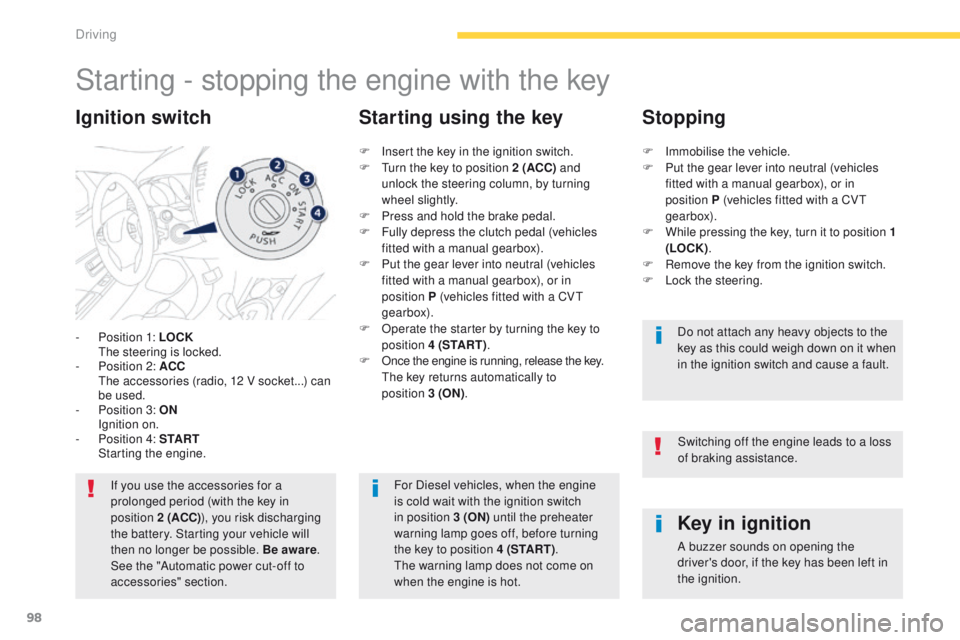
- Position 1: LOCK the steering is locked.
-
P
osition 2: ACC
t
h
e accessories (radio, 12 V socket...) can
be used.
-
P
osition 3: ON
I
gnition on.
-
P
osition 4: S TA R T
S
tarting the engine.
Ignition switch
If you use the accessories for a
prolonged period (with the key in
position 2 (ACC) ), you risk discharging
the battery. Starting your vehicle will
then no longer be possible. Be aware .
See the "Automatic power cut-off to
accessories" section.
Key in ignition
A buzzer sounds on opening the
driver's door, if the key has been left in
the ignition.
F
I
nsert the key in the ignition switch.
F
t
u
rn the key to position 2 (ACC)
and
unlock
the steering column, by turning
wheel slightly.
F
P
ress and hold the brake pedal.
F
F
ully depress the clutch pedal (vehicles
fitted with a manual gearbox).
F
P
ut the gear lever into neutral (vehicles
fitted with a manual gearbox), or in
position
P (vehicles fitted with a CV
t
gearbox).
F
O
perate the starter by turning the key to
position 4 (S TA R T ) .
F
O
nce the engine is running, release the key.
t
h
e key returns automatically to
position
3
(ON)
.
Starting using the key Stopping
F Immobilise the vehicle.
F
P ut the gear lever into neutral (vehicles
fitted with a manual gearbox), or in
position
P (vehicles fitted with a CV
t
gearbox).
F
W
hile pressing the key, turn it to position 1
(LOCK) .
F
R
emove the key from the ignition switch.
F
L
ock the steering.Do not attach any heavy objects to the
key as this could weigh down on it when
in the ignition switch and cause a fault.
For Diesel vehicles, when the engine
is cold wait with the ignition switch
in position 3 (ON) until the preheater
warning lamp goes off, before turning
the key to position 4 (S TA R T ) .
th
e warning lamp does not come on
when the engine is hot. Switching off the engine leads to a loss
of braking assistance.
Driving
Page 102 of 389

100
4008_en_Chap04_conduite_ed01-2014
For Diesel vehicles, when
the engine is cold starting
does not take place until the
pre-heater warning lamp has
gone of f.
If one of the starting conditions is not
met, a reminder message appears in
the instrument panel screen. In some
circumstances, it is necessary to
turn the steering wheel slightly while
pressing the "
START/STOP " button
to assist unlocking of the steering;
a message warns you when this is
needed.
th
e presence of the electronic key
in the defined zone is essential. For
reasons of safety, do not leave this area
when the engine is running.
Switching off using the
electronic key
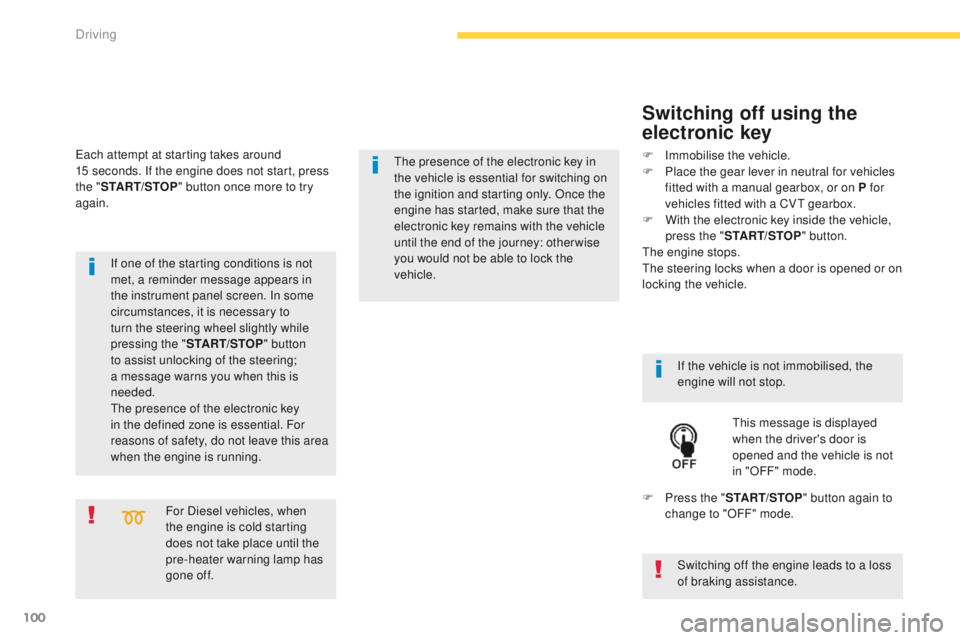
If the vehicle is not immobilised, the
engine will not stop.
th
is message is displayed
when the driver's door is
opened and the vehicle is not
in "OFF" mode.
F
P
ress the " START/STOP " button again to
change to "OFF" mode.
F
Imm
obilise the vehicle.
F
P
lace the gear lever in neutral for vehicles
fitted with a manual gearbox, or on P for
vehicles fitted with a CV
t
gearbox.
F
W
ith the electronic key inside the vehicle,
press the " START/STOP " button.
the
engine stops.
th
e steering locks when a door is opened or on
locking the vehicle.
ea
ch attempt at starting takes around
15 seconds. If the engine does not start, press
the " START/STOP " button once more to try
again.
the presence of the electronic key in
the vehicle is essential for switching on
the ignition and starting only. Once the
engine has started,
make sure that the
electronic key remains with the vehicle
until the end of the journey: otherwise
you would not be able to lock the
vehicle.
Switching off the engine leads to a loss
of braking assistance.
Driving
Page 113 of 389

111
4008_en_Chap04_conduite_ed01-2014
Stop & Start (Auto Stop & go) function
Operation
Going into engine STOP mode
the "AS &G" warning lamp comes on in
the instrument panel or the instrument
panel screen and the engine goes into
standby after a few seconds:
-
w
ith a manual gearbox , with the vehicle
stationary and your foot on the brake, when
you put the gear lever into neutral and
release the clutch pedal.
Never refuel with the engine in
S
tO
P mode; you must switch off the
ignition with the key or the S
tA
R
t/
St
OP
button.
When the engine is stopped
automatically, the operation of certain
vehicle systems, such as for example,
braking, power steering... are modified.
Ta k e c a r e
.
Special cases: STOP mode not
available
StOP mode is not invoked when:
-
t he driver's seat belt is not fastened,
-
t
he driver's door is open,
-
t
he bonnet is open,
-
t
he minimum time period of 30 seconds
since starting the engine has not elapsed,
-
t
he vehicle has not exceeded 3 mph
(5
km/h) since the last engine start,
-
t
he vehicle has restarted less than
10
seconds ago,
-
t
he engine is needed to maintain a
comfortable temperature in the passenger
compartment,
-
d
emisting is active,
-
s
ome special conditions (battery charge,
engine temperature, braking assistance,
ambient temperature...) where the engine is
needed to assure control of a system,
-
the "AS &G" warning lamp is
flashing in the instrument panel.
This operation is perfectly normal.
th
e Stop & Start (Auto Stop &
g
o
) function puts the engine temporarily into standby during stops in the traffic (red lights, traffic jams, or other...).
th
e engine restarts automatically as soon as you want to move off.
t
h
e restart takes place instantly, quickly and silently.
Per fect for urban use, the Stop & Start (Auto Stop &
g
o
) function reduces fuel consumption and exhaust emissions as well as the noise level when
stationary.
If you move the gear lever, the "AS &G"
warning lamp flashes, accompanied by
an audible signal.
th
e alert stops as soon as the gear
lever is returned to the neutral position.
4
Driving
Page 129 of 389

127
4008_en_Chap05_visibilite_ed01-2014
Lighting controls
Stalk for selecting and switching the vehicle's
front and rear exterior lamps.Main lighting
the various front and rear lamps of the vehicle
are designed to adapt the lighting progressively
in relation to the climatic conditions and so
ensure the best visibility for the driver:
-
s
idelamps, to be seen,
-
d
ipped beam headlamps to see without
dazzling other drivers,
-
m
ain beam headlamps to see clearly when
the road is clear.
Additional lighting
Other lamps are provided to fulfil the
requirements of particular driving conditions:
-
a r
ear foglamp to be seen from a distance,
-
f
ront foglamps for even better visibility,
-
d
aytime running lamps to be seen during
t h e d ay.
In some weather conditions (e.g. low
temperature or humidity), the presence
of misting on the internal sur face of the
glass of the headlamps and rear lamps
is normal; it disappears after the lamps
have been on for a few minutes. Other lighting functions are also available:
-
a
utomatic illumination of
headlamps,
-
gu
ide-me-home lighting,
-
w
elcome lighting.
Travelling abroad
If using your vehicle in a country that
drives on the other side of the road, the
headlamps must be adjusted to avoid
dazzling on-coming drivers.
Contact a P
e
uge
Ot
dealer or a
qualified workshop.
5
Visibility
Page 130 of 389
128
4008_en_Chap05_visibilite_ed01-2014
Model without AUTO lighting
Model with AUTO lighting
Manual controls
the lighting is controlled directly by the driver
by means of the ring A and the stalk B.
Lighting off / daytime running lamps. Automatic illumination of headlamps. Sidelamps.
Dipped headlamps or main beam headlamps.
Displays
Illumination of the corresponding indicator
lamp in the instrument panel confirms that the
lighting selected is on.
A.
M
ain lighting mode selection ring: turn it
to position the symbol required facing the
mark.
B.
S
talk for switching headlamps: pull the stalk
towards you to switch the lighting between
dipped and main beam headlamps.
In the lamps off and sidelamps modes, the
driver can switch on the main beam headlamps
temporarily ("headlamp flash") by maintaining a
pull on the stalk.
Visibility