2015 Peugeot 308 tow
[x] Cancel search: towPage 5 of 344
.
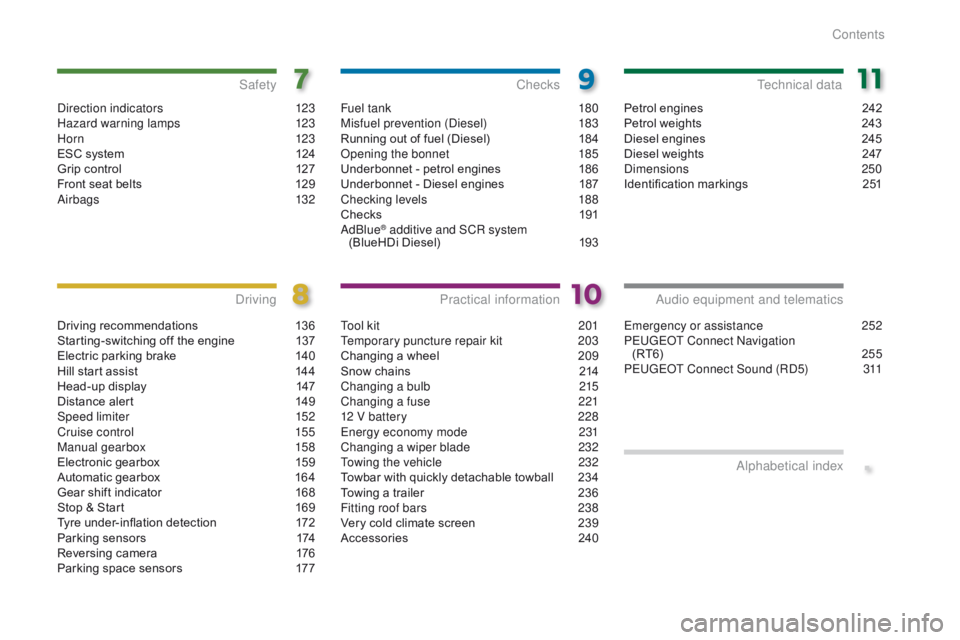
Direction indicators 123
Hazard warning lamps 1 23
H or n
12
3
ESC system
1
24
Grip control
1
27
Front seat belts
1
29
Airbags
1
32
Safety
Driving recommendations 136
Starting-switching off the engine 1 37
Electric parking brake
1
40
Hill start assist
1
44
Head-up display
1
47
Distance alert
1
49
Speed limiter
1
52
Cruise control
1
55
Manual gearbox
1
58
Electronic gearbox
1
59
Automatic gearbox
1
64
Gear shift indicator
1
68
Stop & Start
1
69
Tyre under-inflation detection
1
72
Parking sensors
1
74
Reversing camera
1
76
Parking space sensors
1
77
Driving
Emergency or assistance 2 52
PEUGEOT Connect Navigation (RT6)
2
55
PEUGEOT Connect Sound (RD5)
3
11
Audio equipment and telematics
Alphabetical index
Fuel tank 1 80
Misfuel prevention (Diesel) 1 83
Running out of fuel (Diesel)
1
84
Opening the bonnet
1
85
Underbonnet - petrol engines
1
86
Underbonnet - Diesel engines
1
87
Checking levels
1
88
Checks
19
1
AdBlue
® additive and SCR system
(BlueHDi Diesel) 1 93
Checks
Tool kit 2 01
Temporary puncture repair kit 2 03
Changing a wheel
2
09
Snow chains
2
14
Changing a bulb
2
15
Changing a fuse
2
21
12 V battery
2
28
Energy economy mode
23
1
Changing a wiper blade
2
32
Towing the vehicle
2
32
Towbar with quickly detachable towball
2
34
Towing a trailer
2
36
Fitting roof bars
2
38
Very cold climate screen
2
39
Accessories
2
40
Practical information
Petrol engines 2 42
Petrol weights 2 43
Diesel engines
2
45
Diesel weights
2
47
Dimensions
250
Identification markings
2
51
Technical data
Contents
Page 6 of 344
4
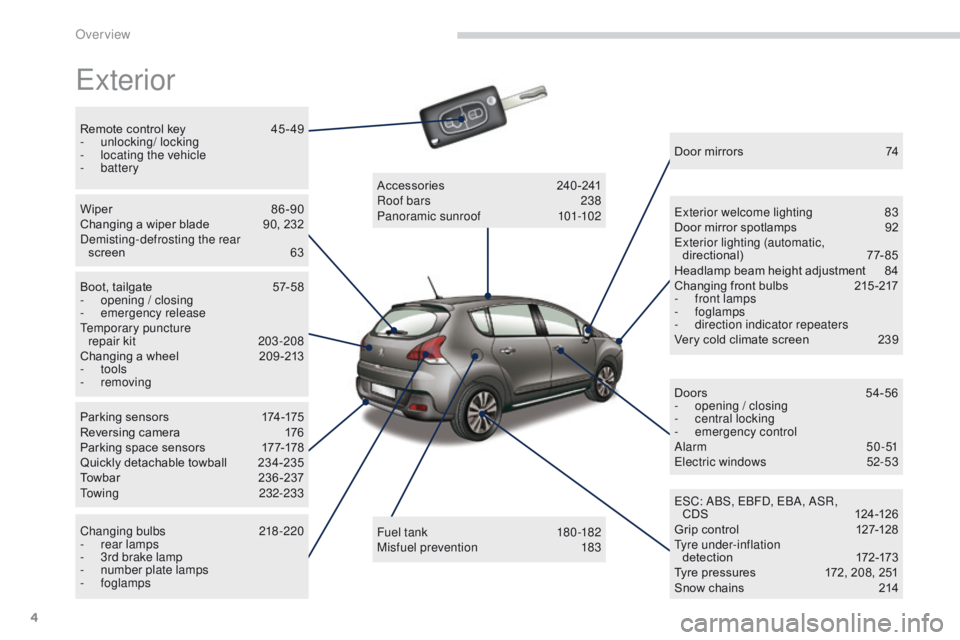
Exterior
Remote control key 45 - 49
- u nlocking/ locking
-
l
ocating the vehicle
-
battery
Wiper
8
6 -90
Changing a wiper blade
9
0, 232
Demisting-defrosting the rear screen
6
3
Boot, tailgate
5
7-58
-
ope
ning / closing
-
em
ergency release
Temporary puncture repair kit
2
03-208
Changing a wheel
2
09 -213
-
tools
-
removing
Parking sensors
1
74-175
Reversing camera
1
76
Parking space sensors
1
77-178
Quickly detachable towball
2
34-235
Towbar
23
6-237
Towing
232-233
Changing bulbs
2
18-220
-
r
ear lamps
-
3
rd brake lamp
-
n
umber plate lamps
-
foglamps Fuel tank
18
0 -182
Misfuel prevention
1
83
Accessories
2
40-241
Roof bars
2
38
Panoramic sunroof
1
01-102Door mirrors
7
4
Exterior welcome lighting
8
3
Door mirror spotlamps
9
2
Exterior lighting (automatic, directional)
7
7-85
Headlamp beam height adjustment
8
4
Changing front bulbs
2
15 -217
-
f
ront lamps
-
foglamps
-
d
irection indicator repeaters
Very cold climate screen
2
39
Doors
5
4-56
-
ope
ning / closing
-
c
entral locking
-
em
ergency control
Alarm
50-51
Electric windows
5
2-53
ESC: ABS, EBFD, EBA, ASR, CDS
12
4 -126
Grip control
1
27-128
Tyre under-inflation d ete c t i o n
17
2-173
Tyre pressures
1
72, 208, 251
Snow chains
2
14
Over view
Page 14 of 344
12
Eco-driving
Eco-driving is a range of everyday practices that allow the motorist to optimise their fuel consumption and CO2 emissions.
Optimise the use of your gearbox
With a manual gearbox, move off gently and change up without waiting.
During acceleration change up early.
With an automatic or electronic gearbox, give preference to automatic
mode and avoid pressing the accelerator pedal heavily or suddenly.
The gear efficiency indicator invites you engage the most suitable gear:
as soon as the indication is displayed in the instrument panel, follow it
straight away.
For vehicles fitted with an electronic or automatic gearbox, this
indicator appears only in manual mode.
Drive smoothly
Maintain a safe distance between vehicles, use engine braking rather
than the brake pedal, and press the accelerator progressively. These
practices contribute towards a reduction in fuel consumption and CO
2
emissions and also helps reduce the background traffic noise.
If your vehicle has cruise control, make use of the system at speeds
above 25 mph (40 km/h) when the traffic is flowing well.
Control the use of your electrical
equipment
Before moving off, if the passenger compartment is too warm, ventilate it
by opening the windows and air vents before using the air conditioning.
Above 30 mph (50 km/h), close the windows and leave the air vents
open.
Remember to make use of equipment that can help keep the
temperature in the passenger compartment down (sunroof and window
blinds...).
Switch off the air conditioning, unless it has automatic regulation, as
soon as the desired temperature is attained.
Switch off the demisting and defrosting controls, if not automatic.
Switch off the heated seat as soon as possible.
Switch off the headlamps and front foglamps when the level of light
does not require their use.
Avoid running the engine before moving off, particularly in winter; your
vehicle will warm up much faster while driving.
As a passenger, if you avoid connecting your multimedia devices
(film, music, video game...), you will contribute towards limiting the
consumption of electrical energy, and so of fuel.
Disconnect your portable devices before leaving the vehicle.
Eco-driving
Page 18 of 344
16
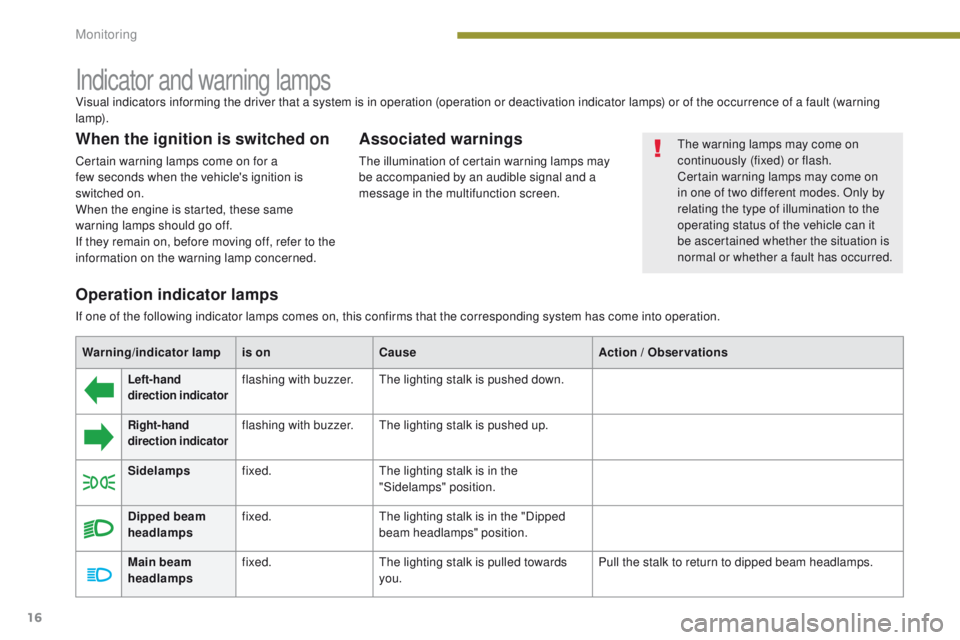
Indicator and warning lamps
When the ignition is switched on
Certain warning lamps come on for a
few seconds when the vehicle's ignition is
switched on.
When the engine is started, these same
warning lamps should go off.
If they remain on, before moving off, refer to the
information on the warning lamp concerned.
Associated warnings
The illumination of certain warning lamps may
be accompanied by an audible signal and a
message in the multifunction screen.
Visual indicators informing the driver that a system is in operation (operation or deactivation indicator lamps) or of the occurrence of a fault (warning
lamp).
The warning lamps may come on
continuously (fixed) or flash.
Certain warning lamps may come on
in one of two different modes. Only by
relating the type of illumination to the
operating status of the vehicle can it
be ascertained whether the situation is
normal or whether a fault has occurred.
Operation indicator lamps
If one of the following indicator lamps comes on, this confirms that the corresponding system has come into operation.
Warning/indicator lamp is onCause Action
/ Observations
Left-hand
direction indicatorflashing with buzzer.The lighting stalk is pushed down.
Right-hand
direction indicatorflashing with buzzer.The lighting stalk is pushed up.
Sidelamps fixed. The lighting stalk is in the
"Sidelamps" position.
Dipped beam
headlamps fixed.
The lighting stalk is in the "Dipped
beam headlamps" position.
Main beam
headlamps fixed.
The lighting stalk is pulled towards
you. Pull the stalk to return to dipped beam headlamps.
Monitoring
Page 58 of 344
56
Automatic locking
Above 6 mph (10 km/h), the doors and boot
lock automatically.
If one of the doors is open, the automatic
central locking does not take place.
If the boot is open, the automatic central
locking of the doors is active.
Deactivation
F Press this button again for more than two seconds.
Unlocking
F Above 6 mph (10 km/h), press this button to unlock the doors and boot temporarily.
In the event of an impact, the doors
unlock automatically.
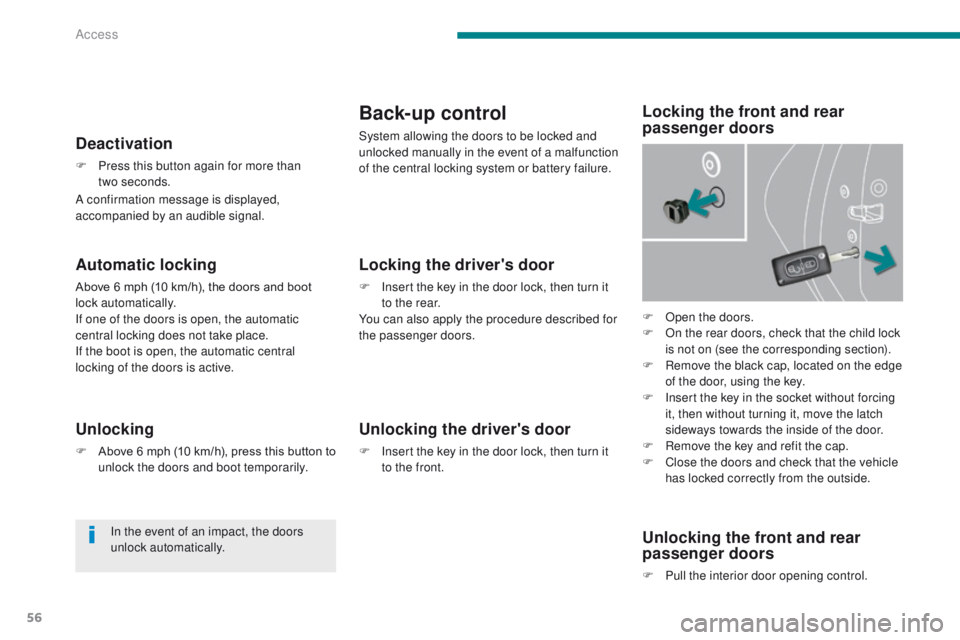
Back-up control
System allowing the doors to be locked and
unlocked manually in the event of a malfunction
of the central locking system or battery failure.
F
O
pen the doors.
F
O
n the rear doors, check that the child lock
is not on (see the corresponding section).
F
R
emove the black cap, located on the edge
of the door, using the key.
F
I
nsert the key in the socket without forcing
it, then without turning it, move the latch
sideways towards the inside of the door.
F
R
emove the key and refit the cap.
F
C
lose the doors and check that the vehicle
has locked correctly from the outside.
Locking the driver's door
F Insert the key in the door lock, then turn it to the rear.
You can also apply the procedure described for
the passenger doors.
Unlocking the driver's door
F Insert the key in the door lock, then turn it to the front.
Locking the front and rear
passenger doors
Unlocking the front and rear
passenger doors
F Pull the interior door opening control.
A confirmation message is displayed,
accompanied by an audible signal.
Access
Page 60 of 344
58
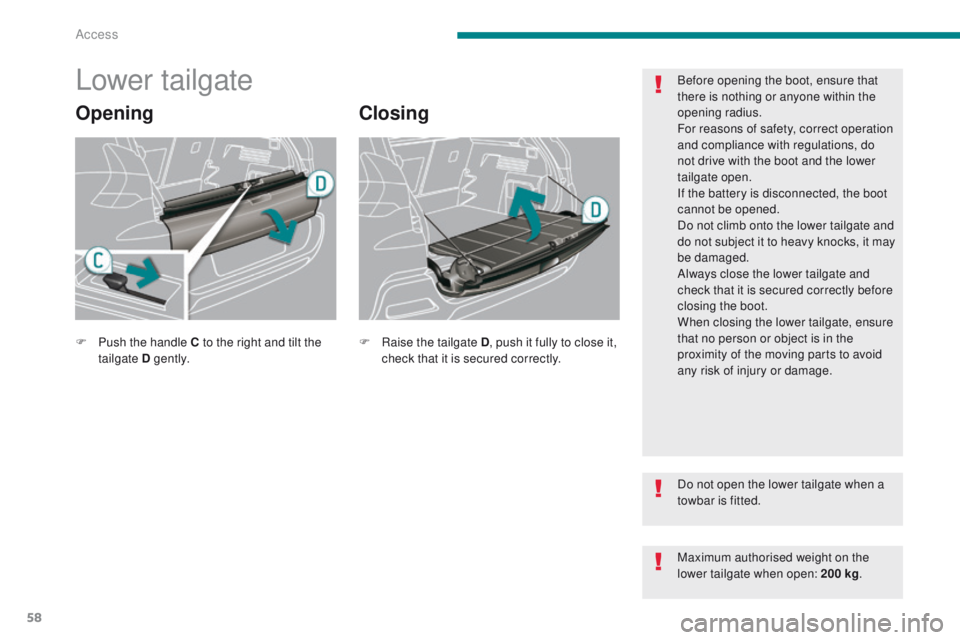
Lower tailgate
OpeningClosing
Before opening the boot, ensure that
there is nothing or anyone within the
opening radius.
For reasons of safety, correct operation
and compliance with regulations, do
not drive with the boot and the lower
tailgate open.
If the battery is disconnected, the boot
cannot be opened.
Do not climb onto the lower tailgate and
do not subject it to heavy knocks, it may
be damaged.
Always close the lower tailgate and
check that it is secured correctly before
closing the boot.
When closing the lower tailgate, ensure
that no person or object is in the
proximity of the moving parts to avoid
any risk of injury or damage.
Do not open the lower tailgate when a
towbar is fitted.
Maximum authorised weight on the
lower tailgate when open: 200 kg .
F
P
ush the handle C to the right and tilt the
tailgate D g e nt l y. F
Ra
ise the tailgate D , push it fully to close it,
check that it is secured correctly.
Access
Page 62 of 344
60
Recommendations for ventilation and air conditioning
In order for these systems to be fully effective, follow the operation and maintenance
guidelines below:
F
I
f the interior temperature remains very high after the vehicle has been parked in the sun for
a considerable time, first ventilate the passenger compartment for a few minutes.
P
lace the air flow control at a sufficient level to provide an adequate renewal of air in the
passenger compartment.
F
T
o obtain an even air distribution, take care not to obstruct the exterior air intake grilles
located at the base of the windscreen, the nozzles, the vents and the air outlets, as well
as the air extractor located in the boot.
F
I
n normal conditions, use the intake of exterior air as prolonged use of the air
recirculation may cause misting of the windows and side windows.
F
D
o not cover the sunshine sensor, located on the dashboard; this is used for regulation
of the automatic air conditioning system.
F
O
perate the air conditioning system for 5 to 10 minutes, once or twice a month to keep it
in good working order.
F
E
nsure that the passenger compartment filter is in good condition and have the filter
elements replaced regularly (refer to the "Checks" section).
W
e recommend the use of a combined passenger compartment filter. Thanks to its
second special active filter, it contributes to the purification of the air breathed by the
occupants and the cleanliness of the passenger compartment (reduction of allergic
symptoms, bad odours and greasy deposits).
F
T
he air conditioning uses power from the engine while operating. This results in an
increase in the vehicle's fuel consumption.
W
hen towing at or near maximum capacity or on steep slopes in high ambient
temperatures, switching off the air conditioning saves engine power and so improves
towing capacity.
C
ondensation created by the air conditioning results in a discharge of water under the
vehicle when stationary, which is per fectly normal.
F
T
o ensure correct operation of the air conditioning system, you are also advised to have
it checked regularly.
F
I
f the system does not produce cold air, do not use it and contact a PEUGEOT dealer or
a qualified workshop. The air conditioning system does not
contain chlorine and does not present
any danger to the ozone layer.
Comfort
Page 67 of 344
65
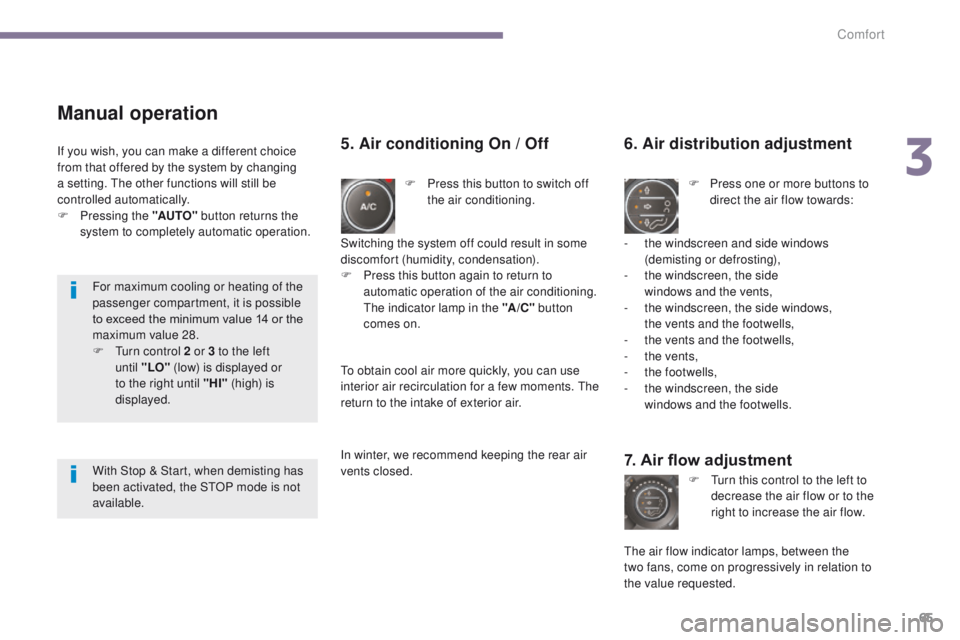
Manual operation
F Press this button to switch off the air conditioning.
6. Air distribution adjustment
F Press one or more buttons to direct the air flow towards:
7. Air flow adjustment
F Turn this control to the left to decrease the air flow or to the
right to increase the air flow.
5. Air conditioning On / Off
- the windscreen and side windows (demisting or defrosting),
-
t
he windscreen, the side
windows and the vents,
-
t
he windscreen, the side windows,
the vents and the footwells,
-
t
he vents and the footwells,
-
t
he vents,
-
t
he footwells,
-
t
he windscreen, the side
windows and the footwells.
The air flow indicator lamps, between the
two
fans, come on progressively in relation to
the value requested.
Switching the system off could result in some
discomfort (humidity, condensation).
F
P
ress this button again to return to
automatic operation of the air conditioning.
The indicator lamp in the "A /C " button
comes on.
If you wish, you can make a different choice
from that offered by the system by changing
a setting. The other functions will still be
controlled automatically.
F
P
ressing the "AUTO"
button returns the
system to completely automatic operation.
To obtain cool air more quickly, you can use
interior air recirculation for a few moments. The
return to the intake of exterior air.
In winter, we recommend keeping the rear air
vents closed.
For maximum cooling or heating of the
passenger compartment, it is possible
to exceed the minimum value 14 or the
maximum value 28.
F
T
urn control 2 or 3 to the left
until
"LO" (low) is displayed or
to the right until "HI" (high) is
displayed.
With Stop & Start, when demisting has
been activated, the STOP mode is not
available.
3
Comfort