2015 Peugeot 301 Seat belt
[x] Cancel search: Seat beltPage 116 of 285

114
301_en_Chap08_securite-enfants_ed01-2014
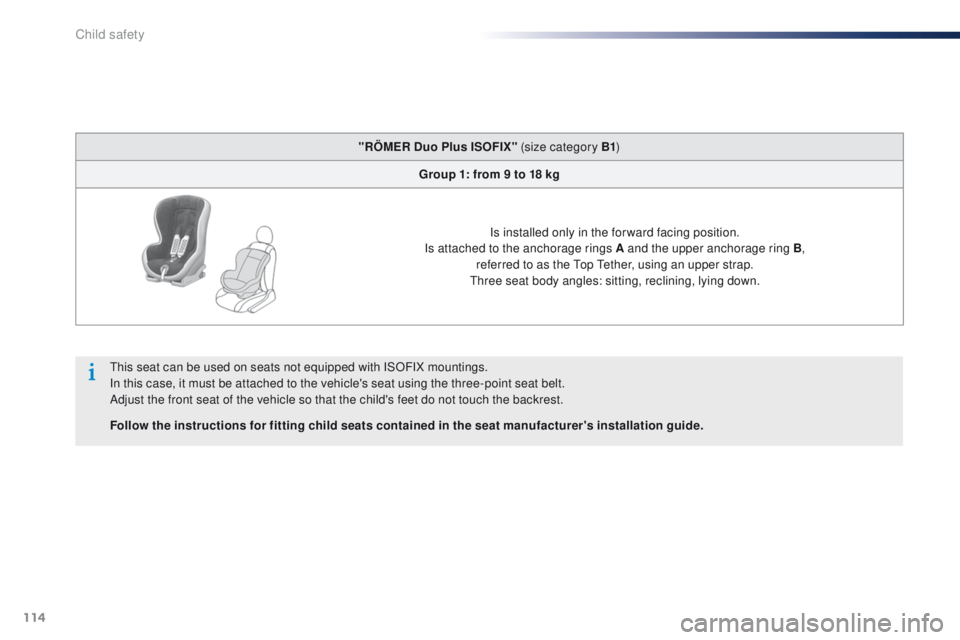
"RÖMER Duo Plus ISOFIX" (size category B1)
Group 1: from 9 to 18 kg
Is installed only in the forward facing position.
Is attached to the anchorage rings A and the upper anchorage ring B, referred to as the Top Tether, using an upper strap.
Three seat body angles: sitting, reclining, lying down.
This seat can be used on seats not equipped with ISOFIX mountings.
In this case, it must be attached to the vehicle's seat using the three-point seat belt.
Adjust the front seat of the vehicle so that the child's feet do not touch the backrest.
Follow the instructions for fitting child seats contained in the seat manufacturer's installation guide.
Child safety
Page 117 of 285

115
301_en_Chap08_securite-enfants_ed01-2014
"Baby P2C Midi" and its ISOFIX base (size categories: D, C, A, B, B1 )
Group 1: from 9 to 18 kg
Installed rear ward facing using an ISOFIX base which is attached to the anchorage rings A .
The base has a support leg, adjustable for height, which sits on the vehicle's floor. This child seat can also be used for ward facing.This seat can not be secured with a seat belt.
We recommend that you use the seat in the rear ward facing position up to the age of 3 years.
Follow the instructions for fitting child seats contained in the seat manufacturer's installation guide. FAIR G 0/1 S and its RWF A and FWF A ISOFIX bases
(size category C for the rear ward facing version, size category A for the for ward facing version)
Group 0+ and 1: from bir th to 18 kg
Installed in the rear ward facing position for children under 18 kg and for ward facing for children between 13 and 18 kg, using its ISOFIX base, which is attached to the rings A .
Use the rear ward facing ( RWF) type A ISOFIX base
or the for ward facing ( FWF) type A ISOFIX base.
6 positions of inclination of the shell.
This child seat can also be used in a for ward facing position on seating positions not equipped with ISOFIX mountings. In this case the shell of the child seat must be attached to the vehicle seat using the three-point seat belt.
8
Child safety
Page 227 of 285

225
301_en_Chap13_recherche-visuelle_ed01-2014
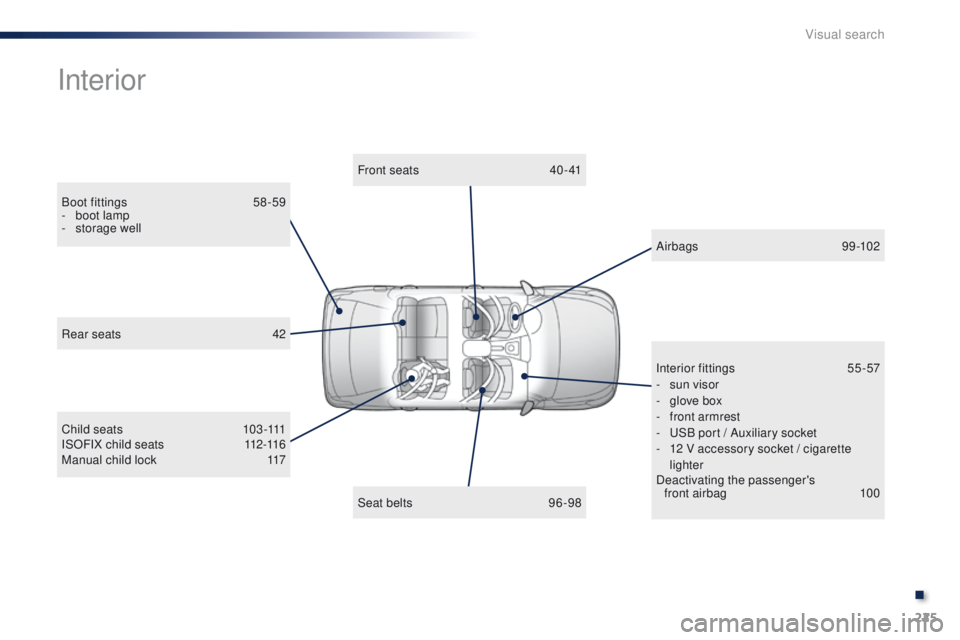
Interior
Boot fittings 58 -59
- b oot lamp
-
s
torage well Front seats
4
0 - 41
C h i l d s e a t s
1
0 3 -111
ISOFIX child seats
1
12-116
Manual child lock
1
17 Airbags
99-102
Interior fittings
5
5-57
-
s
un visor
-
g
love box
-
f
ront armrest
-
U
SB port / Auxiliary socket
-
1
2 V accessory socket / cigarette
lighter
Deactivating the passenger's front airbag
1
00
Seat belts
9
6-98
Rear seats
4
2
.
Visual search
Page 234 of 285

232
301_en_Chap14_index-alpha_ed01-2014
Replacing the oil filter ...................................16 9
Replacing the passenger compartment filter
...................................... 169
Replacing wiper blades ...........................8 8 , 151
Resetting the service indicator
........................................................ 21
Resetting the trip recorder
..............................22
Rev counter
..................................................... 10
Reversing lamps
........................................... 140
Roof bars
....................................................... 16
0
Routine checks
..................................... 16 9, 170
Running out of fuel (Diesel)
..........................12
1
Safety for children
....................98, 10 0, 103 -117
Screen C, monochrome (Audio system / Bluetooth) ...................................................... 26
Screen menu map
.........................201, 202, 220
Screen, monochrome
...........................201, 220
Screen, multifunction (with audio equipment)
............................................ 26, 180
Screenwash fluid level
..................................168
Screenwash, front
........................................... 87
Screen-wash reservoir
.................................168
Seat adjustment
...............................
...............40
Seat belts
......................................... 9
6, 98, 109
Seats, rear
....................................................... 42
Serial number, vehicle
.................................. 17
6
Service indicator
............................................. 20
Servicing
...............................
............................8
Setting the clock
............................................. 23
S
Towing another vehicle .................................15 3
Three flashes (direction indicators) ................90
Traction control (ASR)
....................................95
Traffic information (TA)
.................................182
Tr a i l e r
............................................................ 15 4
Trip computer
............................................ 24-25
Trip distance recorder
..................................... 22
Tyre pressures
.............................................. 176
Ty r e s
.................................................................. 8
Tyre under-inflation detection
........................................... 16, 91, 93
Table of weights
.................................... 17
2 , 174
Tables of engines
.................................. 171, 173
Tables of fuses
.............................................. 142
Ta n k , f u e l
....................................................... 11 9
Technical data
........................................ 171-174
Telephone
..................................................... 193
Temporary tyre repair kit ...............................12 2
Third brake lamp
........................................... 141
To o l s
...................................................... 128, 129
Total distance recorder
................................... 22
To w b a r
........................................................... 15 4
Towed loads
.......................................... 172 , 174Under floor storage
......................................... 59
Under-inflation (detection)
.................. 16
, 91- 93
Unlocking
..............................
..........................30
Unlocking the boot
.......................................... 30
Vanity mirror
.................................................... 56
V
entilation
..............................
.............46-48, 50
T
U
V
Shields for very cold conditions ................... 15 6
Sidelamps ....................................... 81, 138, 140
Side repeater
..............................
..................13 9
Snow chains
.................................................. 13
5
Spare wheel
...............................
...........128, 129
Speed limiter
................................................... 75
Speedometer
.................................................. 10
Stability control (ESP)
..................................... 95
Start
...............................
................................148
Starting the engine
................................... 61- 63
Steering mounted controls, audio
........................................................... 179
Storage
...................................................... 55-57
Sun visor
......................................................... 56
Switching off the engine
........................... 61
- 63
Synchronising the remote control
...................32
Systems, ASR and ESP
..................................95
Alphabetical index
Page 250 of 285

7
5
Driving
301-add_en_Chap05_conduite_ed01-2014
Stop & Start
Operation
Going into engine STOP mode
The "ECO" warning lamp comes on in the instrument panel and the engine goes into standby:
- with a 5-speed electronic gearbox , with the vehicle stationary, when you press the brake pedal or put the gear lever in position N .
A time counter calculates the sum of the periods in STOP mode during a journey. It rests itself to zero every time the ignition is switched on with the key.
Special cases: STOP mode not available
STOP mode is not invoked when: - the driver's door is open, - the driver's seat belt is not fastened, - the engine is needed to maintain a comfortable temperature in the passenger compartment, - demisting is active, - some special conditions (battery charge, engine temperature, braking assistance, ambient temperature...) where the engine is needed to assure control of a system.
The "ECO" warning lamp flashes for a few seconds then goes off.
This operation is perfectly normal.
The Stop & Start system puts the engine temporarily into standby - STOP mode - during stops in the traffic (red lights, traffic jams, or other...). The engine restarts automatically - START mode - as soon as you want to move off. The restart takes place instantly, quickly and silently. Per fect for urban use, the Stop & Start system reduces fuel consumption and exhaust emissions as well as the noise level when stationary.
Never refuel with the engine in STOP mode; you must switch off the ignition with the key.
For your comfort, during parking manoeuvres, STOP mode is not available for a few seconds after coming out of reverse gear. STOP mode does not affect the functionality of the vehicle, such as for example, braking, power steering...
Page 251 of 285

8
Driving
301-add_en_Chap05_conduite_ed01-2014
Deactivation
Going into engine START mode
At any time, press the "ECO OFF" switch to deactivate the system. This is confirmed by the switch warning lamp coming on accompanied by a message in the screen.
Special cases: START invoked automatically
The "ECO" warning lamp goes off and the engine starts with an electronic gearbox :
- gear lever in position A or M , when you release the brake pedal, - or gear lever in position N and the brake pedal released, when you move the gear lever to position A or M , - or when you engage reverse gear.
For reasons of safety and for your comfort, START mode is invoked automatically when: - you open the driver's door, - you unfasten the driver's seat belt, - the speed of the vehicle exceeds 2 mph (3 km/h) with an electronic gearbox, - some special conditions (battery charge, engine temperature, braking assistance, ambient temperature...) where the engine is needed for control of a system.
The "ECO" warning lamp flashes for
a few seconds, then goes off.
This operation is perfectly normal.
If the system has been deactivated in STOP mode, the engine restarts immediately.