Page 13 of 396
1. Roof rack (P. 2-45)
2. Vehicle loading (P. 9-12)
3. Rear window and outside mirror (if soequipped) defroster switch (P. 2-28)
4. Rear window wiper (P. 2-27)
5. Rearview camera (if so equipped)
(P. 4-10)
6. Liftgate (P. 3-10)
7. Spare tire (P. 6-3)
8. Replacing bulbs (P. 8-29)
9. Fuel-filler door and fuel recommenda-
tions (P. 3-11, 9-33)
10. Child safety rear door lock (P. 3-5)
See the page number indicated in paren-
theses for operating details.
LII2112
EXTERIOR REAR
0-4Illustrated table of contents
Page 14 of 396
1. Map lights (P. 2-51)
2. Sun visors (P. 3-13)
3. Automatic anti-glare rearview mirror(if so equipped) , rearview mirror
(P. 3-14, 3-14)
4. Glove box (P. 2-39)
5. Console box (P. 2-39)
6. Front seats (P. 1-2)
7. Rear seats (P. 1-5)
8. Storage (P. 2-38)
See the page number indicated in paren-
theses for operating details.
WII0056
PASSENGER COMPARTMENT
Illustrated table of contents0-5
Page 93 of 396

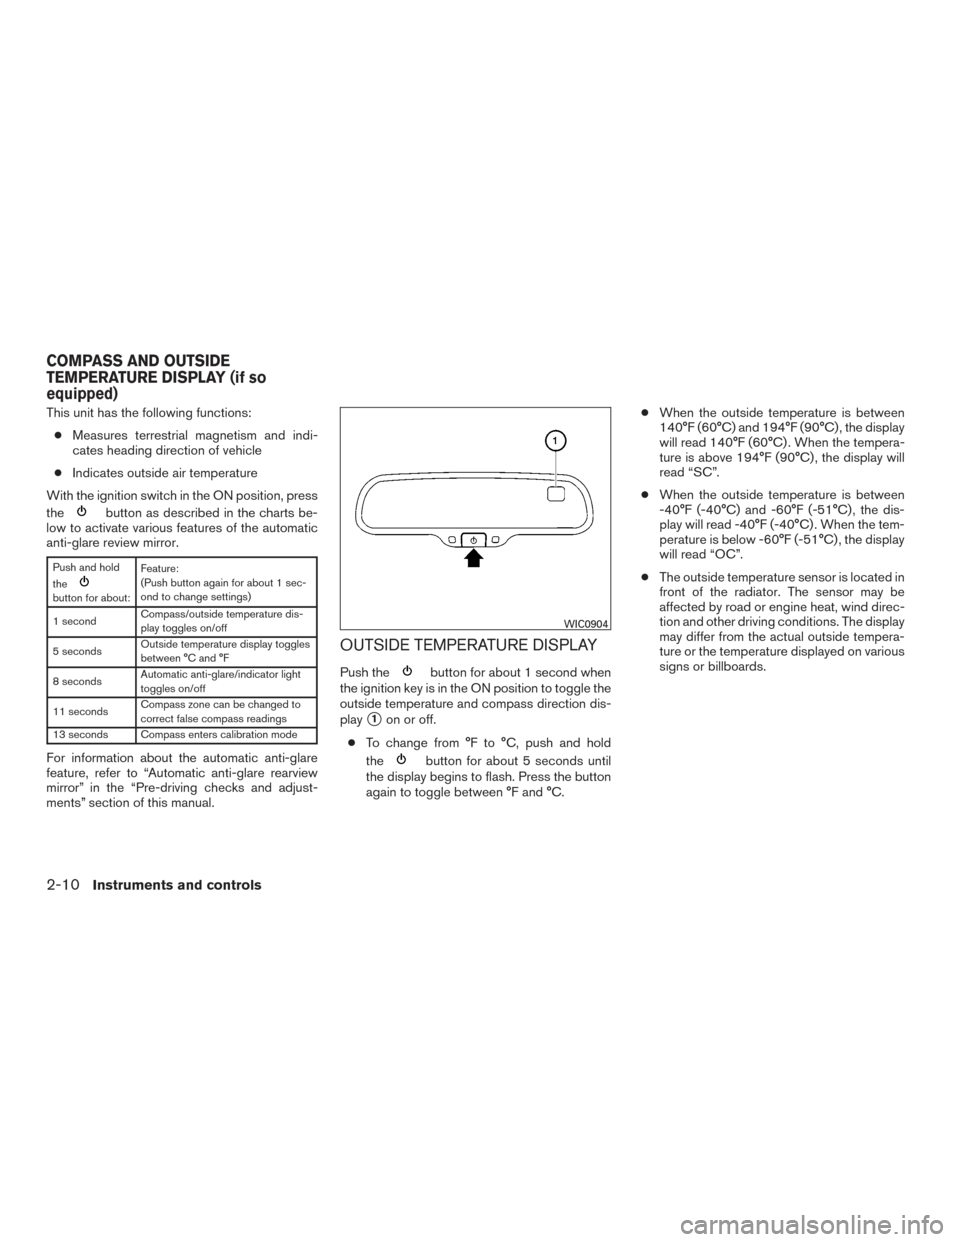
This unit has the following functions:● Measures terrestrial magnetism and indi-
cates heading direction of vehicle
● Indicates outside air temperature
With the ignition switch in the ON position, press
the
button as described in the charts be-
low to activate various features of the automatic
anti-glare review mirror.
Push and hold
the
button for about: Feature:
(Push button again for about 1 sec-
ond to change settings)
1 second Compass/outside temperature dis-
play toggles on/off
5 seconds Outside temperature display toggles
between °C and °F
8 seconds Automatic anti-glare/indicator light
toggles on/off
11 seconds Compass zone can be changed to
correct false compass readings
13 seconds Compass enters calibration mode
For information about the automatic anti-glare
feature, refer to “Automatic anti-glare rearview
mirror” in the “Pre-driving checks and adjust-
ments” section of this manual.
OUTSIDE TEMPERATURE DISPLAY
Push thebutton for about 1 second when
the ignition key is in the ON position to toggle the
outside temperature and compass direction dis-
play
�1on or off.
● To change from °F to °C, push and hold
the
button for about 5 seconds until
the display begins to flash. Press the button
again to toggle between °F and °C. ●
When the outside temperature is between
140°F (60°C) and 194°F (90°C) , the display
will read 140°F (60°C) . When the tempera-
ture is above 194°F (90°C) , the display will
read “SC”.
● When the outside temperature is between
-40°F (-40°C) and -60°F (-51°C) , the dis-
play will read -40°F (-40°C) . When the tem-
perature is below -60°F (-51°C) , the display
will read “OC”.
● The outside temperature sensor is located in
front of the radiator. The sensor may be
affected by road or engine heat, wind direc-
tion and other driving conditions. The display
may differ from the actual outside tempera-
ture or the temperature displayed on various
signs or billboards.
WIC0904
COMPASS AND OUTSIDE
TEMPERATURE DISPLAY (if so
equipped)
2-10Instruments and controls
Page 136 of 396

3 Pre-driving checks and adjustments
Keys .............................................3-2NISSAN Vehicle Immobilizer System keys .........3-2
Doors ............................................3-3
Locking with key ................................3-3
Locking with inside lock knob ....................3-4
Locking with power door lock switch . . . ..........3-4
Automatic door locks ...........................3-5
Child safety rear door lock .......................3-5
Remote keyless entry system .......................3-6
How to use remote keyless entry system ..........3-7
Hood ............................................3-9
Liftgate .......................................... 3-10
Key operation ................................. 3-10Opening the liftgate
............................ 3-11
Fuel-filler door ................................... 3-11
Opening the fuel-filler lid .......................3-11
Fuel-filler cap ................................. 3-11
Steering wheel ................................... 3-13
Tilt operation .................................. 3-13
Sun visors ....................................... 3-13
Vanity mirrors (if so equipped) ...................3-14
Mirrors .......................................... 3-14
Rearview mirror (if so equipped) .................3-14
Automatic anti-glare rearview mirror
(if so equipped) ............................... 3-15
Outside mirrors ............................... 3-15
Page 149 of 396
�3To extend the sun visor, slide in or out as
needed.
CAUTION
● Do not store the sun visor before return-
ing the extension to its original
position.
● Do not pull the extension sun visor
forcedly downward.
VANITY MIRRORS (if so equipped)
To access the vanity mirror, pull the sun visor
down and flip open the mirror cover.
REARVIEW MIRROR (if so equipped)
Use the night position�1to reduce glare from
the headlights of vehicles behind you at night.
Use the day position
�2when driving in daylight
hours.
WARNING
Use the night position only when neces-
sary, because it reduces rear view clarity.
LPD2261WPD0126
MIRRORS
3-14Pre-driving checks and adjustments
Page 150 of 396

AUTOMATIC ANTI-GLARE
REARVIEW MIRROR (if so equipped)
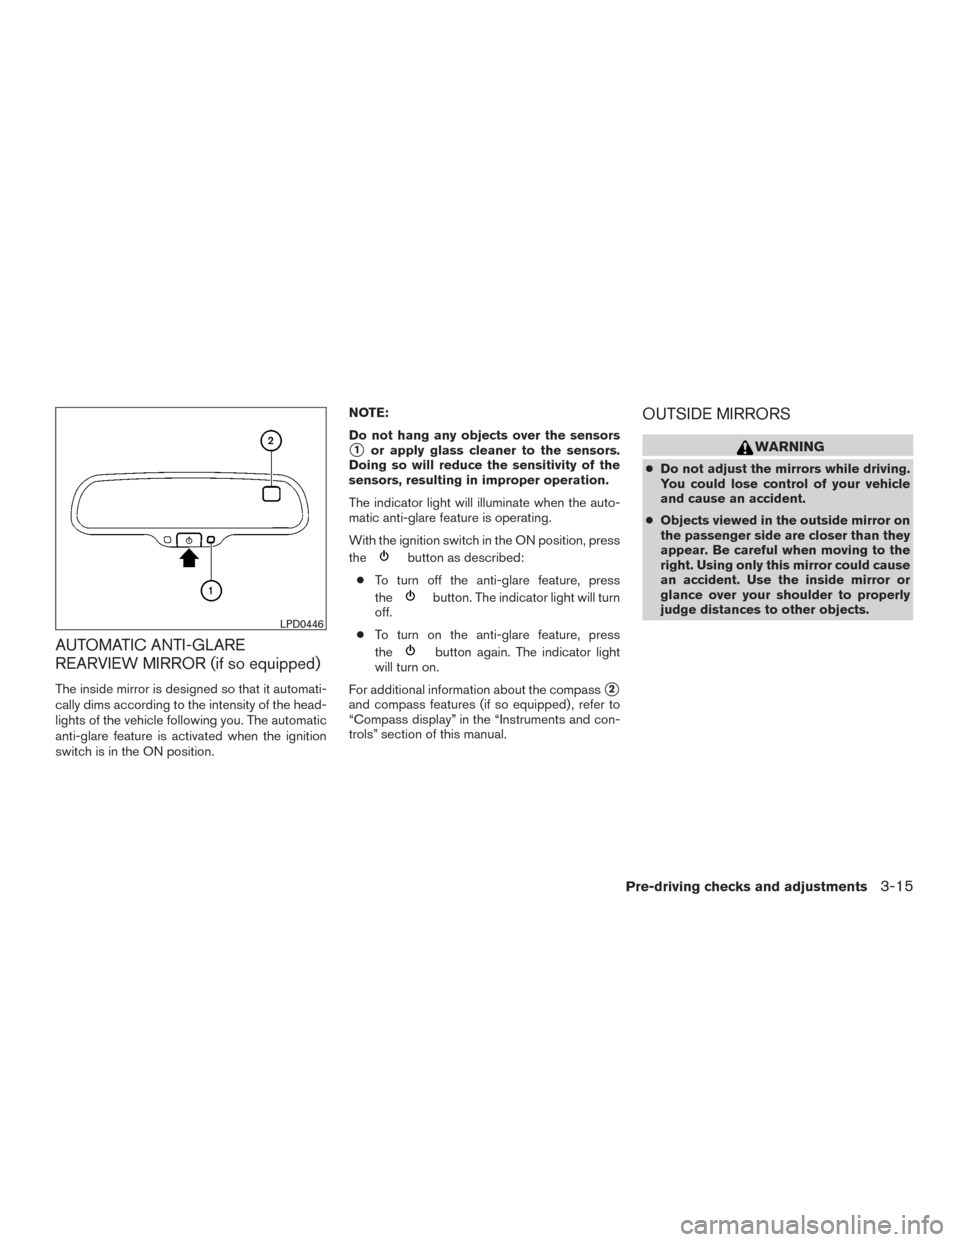
The inside mirror is designed so that it automati-
cally dims according to the intensity of the head-
lights of the vehicle following you. The automatic
anti-glare feature is activated when the ignition
switch is in the ON position.NOTE:
Do not hang any objects over the sensors
�1or apply glass cleaner to the sensors.
Doing so will reduce the sensitivity of the
sensors, resulting in improper operation.
The indicator light will illuminate when the auto-
matic anti-glare feature is operating.
With the ignition switch in the ON position, press
the
button as described:
● To turn off the anti-glare feature, press
the
button. The indicator light will turn
off.
● To turn on the anti-glare feature, press
the
button again. The indicator light
will turn on.
For additional information about the compass
�2
and compass features (if so equipped) , refer to
“Compass display” in the “Instruments and con-
trols” section of this manual.
OUTSIDE MIRRORS
WARNING
● Do not adjust the mirrors while driving.
You could lose control of your vehicle
and cause an accident.
● Objects viewed in the outside mirror on
the passenger side are closer than they
appear. Be careful when moving to the
right. Using only this mirror could cause
an accident. Use the inside mirror or
glance over your shoulder to properly
judge distances to other objects.
LPD0446
Pre-driving checks and adjustments3-15
Page 151 of 396
Manual control type (if so equipped)
The outside mirror can be moved in any direction
for a better rear view.
Electric control type (if so equipped)
The outside mirror remote control will operate
only when the ignition switch is placed in the
ACC or ON position.
Move the small switch
�1to select the right or left
mirror. Move the large switch
�2to adjust each
mirror to the desired position.
Heated mirrors (if so equipped)
The outside mirrors can be heated to defrost,
defog, or de-ice for improved visibility. For addi-
tional information, refer to “Rear window and
outside mirror defroster switch” in the “Instru-
ments and controls” section of this manual.
Foldable outside mirrors
Pull the outside mirror toward the door to fold it.
WPD0170LPD0237LPD0259
3-16Pre-driving checks and adjustments
Page 161 of 396

When the shift lever is shifted into the R (Re-
verse) position, the monitor display shows the
view to the rear of the vehicle.
WARNING
Failure to follow the warnings and instruc-
tions for proper use of the RearView
Monitor could result in serious injury or
death.
●The RearView Monitor is a convenience
but it is not a substitute for proper back-
ing. Always turn and look out the win-
dows, and check mirrors to be sure that
it is safe to move before operating the
vehicle. Always back up slowly.
● The system is designed as an aid to the
driver in showing large stationary ob-
jects directly behind the vehicle, to help
avoid damaging the vehicle.
● The system cannot completely elimi-
nate blind spots and may not show ev-
ery object. ●
Underneath the bumper and the corner
areas of the bumper cannot be viewed
on the RearView Monitor because of its
monitoring range limitation. The system
will not show small objects below the
bumper, and may not show objects
close to the bumper or on the ground.
● Objects viewed in the RearView Moni-
tor differ from actual distance because
a wide-angle lens is used.
● Objects in a RearView Monitor will ap-
pear visually opposite than when
viewed in the rear view and outside
mirrors.
● Make sure that the trunk is securely
closed when backing up.
● Do not put anything on the rearview
camera. The rearview camera is in-
stalled above the license plate.
● When washing the vehicle with high
pressure water, be sure not to spray it
around the camera. Otherwise, water
may enter the camera unit causing wa-
ter condensation on the lens, a mal-
function, fire or an electric shock. ●
Do not strike the camera. It is a preci-
sion instrument. Otherwise, it may mal-
function or cause damage resulting in a
fire or an electric shock.CAUTION
There is a plastic cover over the camera.
Do not scratch the cover when cleaning
dirt or snow from the cover.
REARVIEW MONITOR (if so
equipped)
4-10Monitor, climate, audio, phone and voice recognition systems