2015 NISSAN TITAN instrument panel
[x] Cancel search: instrument panelPage 2 of 24

Beneath the
instrument panel
1
2
4
3
13
12
14
15
5
6
9
8
7
10
11
Behind
steering wheel
Behind shift lever
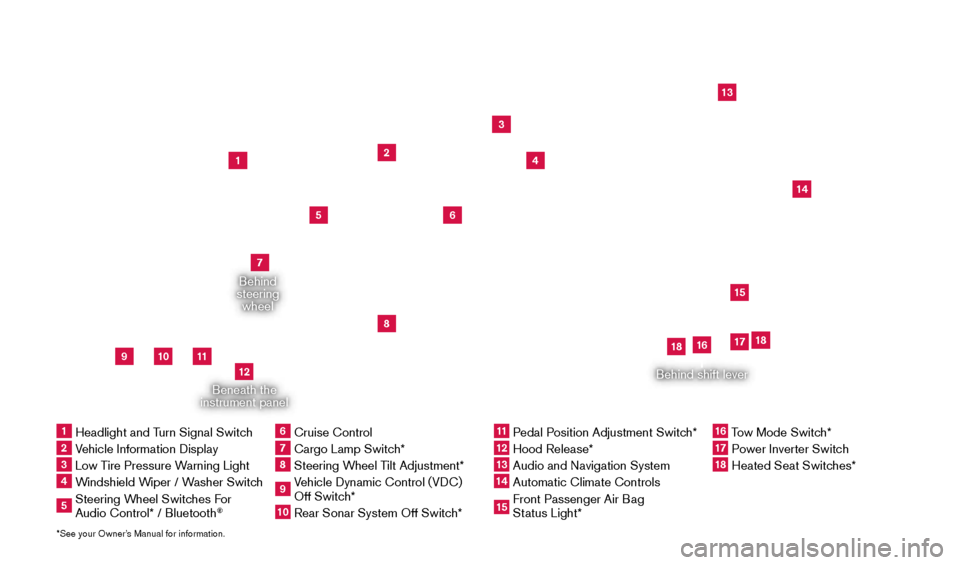
*See your Owner’s Manual for information.1 Headlight and T urn Signal Switch2 Vehicle Information Display3 Low Tire Pressure Warning Light4 Windshield Wiper / Washer Switch5 Steering Wheel Switches For
Audio Control* / Bluetooth
®
6 Cruise Control 7 Cargo Lamp Switc h*8 Steering Wheel Tilt Adjustment*9 Vehicle Dynamic Control (VDC)
Off Switch*10 Rear Sonar System Off Switc h*
11 Pedal Position Adjustment Switch*12 Hood Release*
13 Audio and Navigation System 14 Automatic Climate Controls
15 Front Passenger Air Bag
Status Light*
16 Tow Mode Switch* 17 Power Inverter Switch
18 Heated Seat Switc hes* 17
18
18
16
1925624_15b_Titan_QRG_041415.indd 44/14/15 2:33 PM
Page 10 of 24

8
FIRST DRIVE FEATURES
HEADLIGHT CONTROL SWITCH
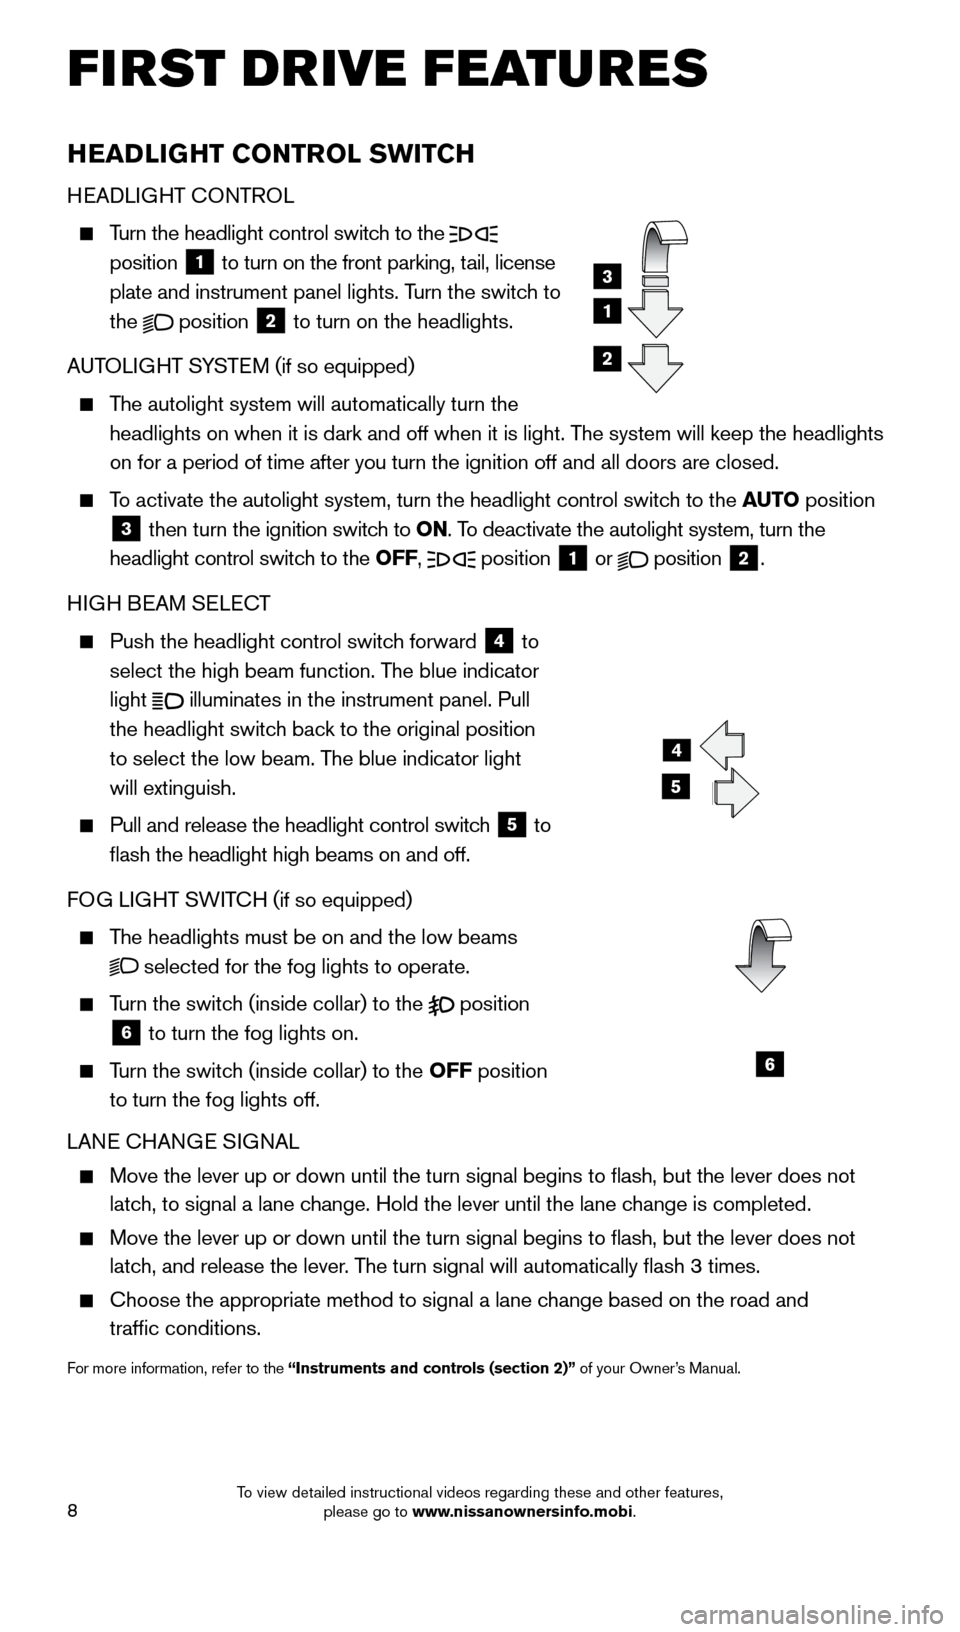
HEADLIGHT CONTROL
Turn the headlight control switch to the
position 1 to turn on the front parking, tail, license
plate and instrument panel lights. Turn the switch to
the
position
2 to turn on the headlights.
AUTOLIGHT SYSTEM (if so equipped)
The autolight system will automatically turn the
headlights on when it is dark and off when it is light. The system will keep the headlights
on for a period of time after you turn the ignition off and all doors ar\
e closed.
To activate the autolight system, turn the headlight control switch to the AUTO position
3 then turn the ignition switch to ON. To deactivate the autolight system, turn the
headlight control switch to the OFF, position 1 or
position
2.
HIGH BEAM SELECT
Push the headlight control switc h forward
4 to
select the high beam function. The blue indicator
light
illuminates in the instrument panel. Pull
the headlight switch back to the original position
to select the low beam. The blue indicator light
will extinguish.
Pull and release the headlight control switc h
5 to
flash the headlight high beams on and off.
FOG LIGHT SWITCH (if so equipped)
The headlights must be on and the low beams
selected for the fog lights to operate.
Turn the switch (inside collar) to the
position
6 to turn the fog lights on.
Turn the switch (inside collar)
to the OFF position
to turn the fog lights off.
LANE CHANGE SIGNAL
Move the lever up or down until the turn signal begins to flash, but t\
he lever does not
latch, to signal a lane change. Hold the lever until the lane change is completed.
Move the lever up or down until the turn signal begins to flash, but t\
he lever does not
latch, and release the lever. The turn signal will automatically flash 3 times.
Choose the appropriate method to signal a lane c hange based on the road and
traffic conditions.
For more information, refer to the “Instruments and controls (section 2)” of your Owner’s Manual.
4
5
6
1
3
2
1925624_15b_Titan_QRG_041415.indd 84/14/15 2:33 PM
To view detailed instructional videos regarding these and other features, please go to www.nissanownersinfo.mobi.
Page 14 of 24

12
FI RST DRIVE FEATURES
CRUISE CONTROL (if so equipped)
The cruise control system enables you to set a
constant cruising speed once the vehicle has
reached 25 mph (40 km/h).
The system will automatically maintain the set
speed until you tap the brake pedal, accelerate,
cancel or turn the system off.
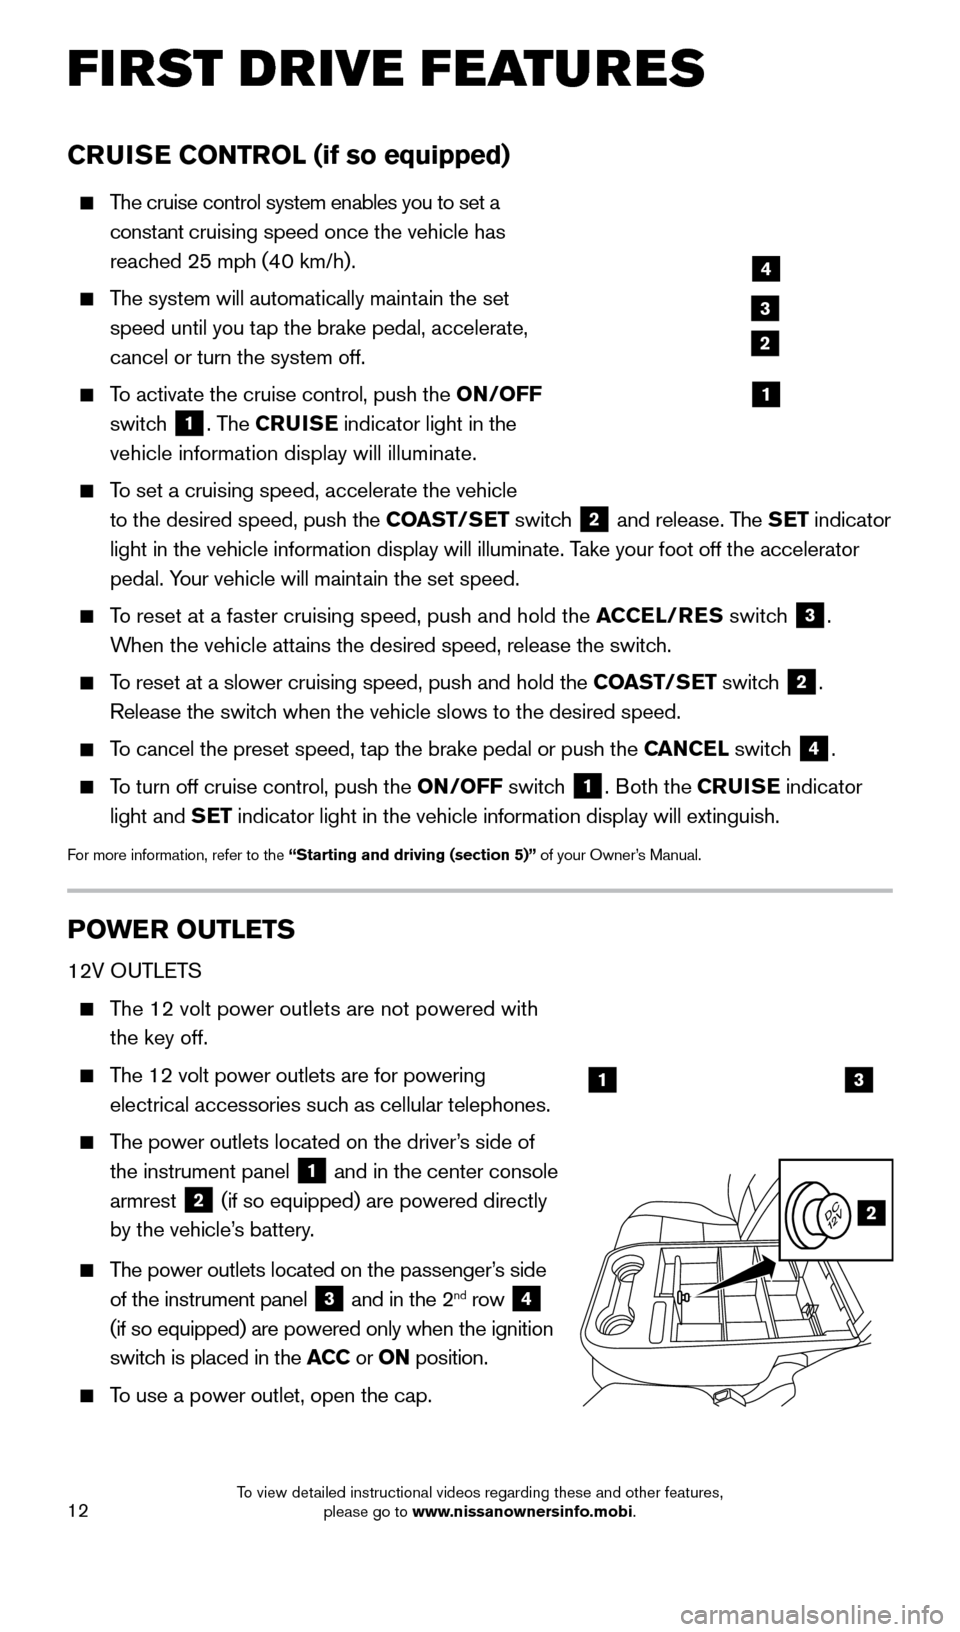
To activate the cruise control, push the ON/OFF
switch
1. The CRUISE indicator light in the
vehicle information display will illuminate.
To set a cruising speed, accelerate the vehicle
to the desired speed, push the COAST/SET switch
2 and release. The SET indicator
light in the vehicle information display will illuminate. Take your foot off the accelerator
pedal. Your vehicle will maintain the set speed.
To reset at a faster cruising speed, push and hold the ACCEL/RES switch
3.
When the vehicle attains the desired speed, release the switch.
To reset at a slower cruising speed, push and hold the COAST/SET switch 2.
Release the switch when the vehicle slows to the desired speed.
To cancel the preset speed, tap the brake pedal or push the CANCEL switch 4.
To turn off cruise control, push the ON/OFF switch 1. Both the CRUISE indicator
light and SET indicator light in the vehicle information display will extinguish.
For more information, refer to the “Starting and driving (section 5)” of your Owner’s Manual.
POWER OUTLETS
12V OUTLETS
The 12 volt power outlets are not powered with the key off.
The 12 volt power outlets are for powering
electrical accessories such as cellular telephones.
The power outlets located on the driver’s side of
the instrument panel
1 and in the center console
armrest 2 (if so equipped) are powered directly
by the vehicle’s battery.
The power outlets located on the passenger’s side
of the instrument panel
3 and in the 2nd row 4
(if so equipped) are powered only when the ignition
switch is placed in the ACC or ON position.
To use a power outlet, open the cap.
4
3
2
1
13
2
1925624_15b_Titan_QRG_041415.indd 124/14/15 2:33 PM
To view detailed instructional videos regarding these and other features, please go to www.nissanownersinfo.mobi.
Page 16 of 24

14
SYS T E M GUIDE
TEXT MESSAGING * (if so equipped)
This system allows for sending and receiving text
messages through the vehicle interface.
Using predefined or custom mess ages, send a
text to a name or phone number stored in your
Bluetooth
® Hands-free Phone System.
Once enabled, the text mess age, sender and
delivery time are shown on the control panel display screen.
Text messages have the option of being read aloud. Many phones require special permission to enable Text Messaging. Check the phone’s screen during Bluetooth
pairing or phone Bluetooth Settings to enable messages or notifications.
Text messages are only displayed on the control panel if the vehicle speed is les\
s than 5 mph (8 km/h).
Some phones do not support sending or reading mess ages over Bluetooth Message
Access Profile (MAP). See your cellular phone’s Owner’s Manual for details and also
visit www.nissanusa.com/bluetooth.
*Laws in some jurisdictions may restrict the use of “Text-to-Speech.” Some of the applications and features, such as social
networking and texting may also be restricted. Check local regulations for any requirements before using these features.
For more information, refer to the “Monitor, climate, audio, phone and voice recognition systems (section 4) ” of
your Owner’s Manual.
VEHICLE INFORMATION DISPLAY (if so equipped)
When the INFO button
1 is pressed, the
following modes will appear in the vehicle
information display
2:
• M
PG – Displays the instant fuel economy.
•
RAN
GE – Displays the estimated distance the
vehicle can be driven before refueling.
• W
ARNING – Displays when a warning is present.
Turn the INF O button 1 to highlight the desired
menu within the selected mode.
Press the INF O button 1 to enter the
highlighted menu.
For more information, refer to the “Instruments and controls (section 2)” of your Owner’s Manual.
1
2
1925624_15b_Titan_QRG_041415.indd 144/14/15 2:33 PM
To view detailed instructional videos regarding these and other features, please go to www.nissanownersinfo.mobi.