2015 NISSAN TITAN heater
[x] Cancel search: heaterPage 212 of 457
1. Driver temperature control dial
2. A/C ON/OFF button
3. Front window defroster button
4. Fan speed control dial
5.
(system off) button
6. Rear window defroster button
7. Air recirculation button
8. Passenger temperature control dial
9. DUAL button
10. Air flow control buttons 11. AUTO button
WARNING
●
The air conditioner cooling function op-
erates only when the engine is running.
● Do not leave children or adults who
would normally require the assistance
of others alone in your vehicle. Pets
should also not be left alone. They
could accidentally injure themselves or
others through inadvertent operation of
the vehicle. Also, on hot, sunny days,
temperatures in a closed vehicle could
quickly become high enough to cause
severe or possibly fatal injuries to
people or animals.
● Do not use the recirculation mode for
long periods as it may cause the interior
air to become stale and the windows to
fog up.
Start the engine and operate the controls to
activate the air conditioner.
NOTE: ● Odors from inside and outside the vehicle
can build up in the air conditioner unit. Odor
can enter the passenger compartment
through the vents.
LHA2611
HEATER AND AIR CONDITIONER
(automatic) (if so equipped)
4-24Monitor, climate, audio, phone and voice recognition systems
Page 213 of 457
●When parking, set the heater and air condi-
tioner controls to turn off air recirculation to
allow fresh air into the passenger compart-
ment. This should help reduce odors inside
the vehicle.
AUTOMATIC OPERATION
Cooling or heating (auto)
This mode may be normally used all year round as
the system automatically works to keep a con-
stant temperature. Air flow distribution and fan
speed are also controlled automatically.
1. Press the AUTO button on.
2. Turn the temperature dial to the left or right to set the desired temperature. Driver and
passenger temperatures can be set inde-
pendently. Press DUAL to activate dual cli-
mate control functions. Turn the passenger’s
side temperature control dial to the left or
right to set the desired passenger’s tem-
perature.
● Adjust the temperature dial to about 75°F
(24°C) for normal operation.
● The temperature of the passenger compart-
ment will be maintained automatically. Air
flow distribution, fan speed and A/C on/off
are also controlled automatically. ●
A visible mist may be seen coming from the
vents in hot, humid conditions as the air is
cooled rapidly. This does not indicate a mal-
function.
Heating (A/C OFF)
The air conditioner does not activate. When you
need to heat only, use this mode.
1. Press the A/C button.
2. Turn the temperature control dial to set the desired temperature.
● The temperature of the passenger compart-
ment will be maintained automatically. Air
flow distribution and fan speed are also con-
trolled automatically.
● Do not set the temperature lower than the
outside air temperature. Otherwise, the sys-
tem may not work properly.
● Not recommended if windows fog up.
Dehumidified defrosting or defogging
1. Press the defroster control buttonto
turn the system on. The indicator light in the
button will illuminate.
2. Turn the temperature dial to the left or right to set the desired temperature. ●
To quickly remove ice from the outside of the
windows, turn the manual fan control to the
maximum position.
● As soon as possible after the windshield is
clean, press the AUTO button to return to
the auto mode.
● When the
control is activated, the air
conditioner will automatically be turned on at
outside temperatures above 36°F (2°C) . If in
defrost mode for more than 1 minute, the air
conditioning system will continue to operate
until the fan control is turned OFF, the ve-
hicle is shut off or the A/C button is used to
turn off the compressor even if an air flow
button other than
is selected. This
dehumidifies the air which helps defog the
windshield. The air recirculation mode auto-
matically turns off, allowing outside air to be
drawn into the passenger compartment to
further improve the defogging performance.
MANUAL OPERATION
Fan speed control dial
Turn the fan speed control dialleft or right
to manually control the fan speed or turn the
system on or off.
Press the AUTO button to return to automatic
control of the fan speed.
Monitor, climate, audio, phone and voice recognition systems4-25
Page 243 of 457
CAUTION
●To avoid damage and loss of function
when using a USB device, note the fol-
lowing precautions.
● Do not force the USB device into the
USB port. Inserting the USB device
tilted or up-side-down into the port may
damage the port. Make sure that the
USB device is connected correctly into
the USB port.
● Do not grab the USB port cover (if so
equipped) when pulling the USB device
out of the port. This could damage the
port and the cover.
● Do not leave the USB cable in a place
where it can be pulled unintentionally.
Pulling the cable may damage the port.
Refer to your device manufacturer’s owner infor-
mation regarding the proper use and care of the
device.
The USB connection port is located on the center
console beneath the heater and air conditioner
controls. Insert the USB device into the connec-
tion port. When a compatible storage device is plugged
into the connection port, compatible audio files
on the storage device can be played through the
vehicle’s audio system.
Audio file operation
MEDIA button
Place the ignition switch in the ON or ACC
position and press the MEDIA button to switch to
the USB input mode. If a CD is playing or another
audio source is plugged in through the AUX IN
jack, the MEDIA button toggles between the
three sources.
Play information
Information about the audio files being played
can be displayed on the display screen of the
vehicle’s audio system. Depending on how the
audio files are encoded, information such as
Folder, Song and Artist will be displayed.
The track number and number of total tracks in
the folder are displayed on the screen as well.
SEEK/CAT (Reverse or
Fast Forward) buttons
Press and hold the
orSEEK/CAT
buttons for 1.5 seconds while an audio file on the
USB device is playing to reverse or fast forward
the track being played. The track plays at an increased speed while reversing or fast forward-
ing. When the button is released, the audio file
returns to normal play speed.
SEEK/CAT and TRACK
buttons
Press the SEEK/CAT button
while an au-
dio file on the USB device is playing to return to
the beginning of the current track. Press the
SEEK/CAT button
several times to skip
backward several tracks.
Press the TRACK button
while an audio
file on the USB device is playing to advance one
track. Press the TRACK button
several
times to skip forward several tracks. If the last
track in a folder on the USB device is skipped, the
first track of the next folder is played.
RDM (random) button
When the RDM (random) button is pressed while
an audio file on the USB device is playing, the
play pattern can be changed as follows:
All Random →1 Folder Random →OFF
All Random: all tracks on the USB device will be
played randomly.
1 Folder Random: all tracks in the current folder
will be played randomly.
Monitor, climate, audio, phone and voice recognition systems4-55
Page 245 of 457
CAUTION
●To avoid damage and loss of function
when using a USB device, note the fol-
lowing precautions.
● Do not force the USB device into the
USB port. Inserting the USB device
tilted or up-side-down into the port may
damage the port. Make sure that the
USB device is connected correctly into
the USB port.
● Do not grab the USB port cover (if so
equipped) when pulling the USB device
out of the port. This could damage the
port and the cover.
● Do not leave the USB cable in a place
where it can be pulled unintentionally.
Pulling the cable may damage the port.
Refer to your device manufacturer’s owner infor-
mation regarding the proper use and care of the
device.
The USB connection port is located on the center
console beneath the heater and air conditioner
controls. Insert the USB device into the connec-
tion port. When a compatible storage device is plugged
into the connection port, compatible audio files
on the storage device can be played through the
vehicle’s audio system.
Audio file operation
AUX (auxiliary) button
Place the ignition switch in the ON or ACC
position and press the AUX button to switch to
the USB input mode. If another audio source is
playing and a USB connection port device is
inserted, press the AUX button until the center
display changes to the USB memory mode.
If the system has been turned off while the USB
memory was playing, push the ON-OFF/VOL
control knob to restart the USB memory.
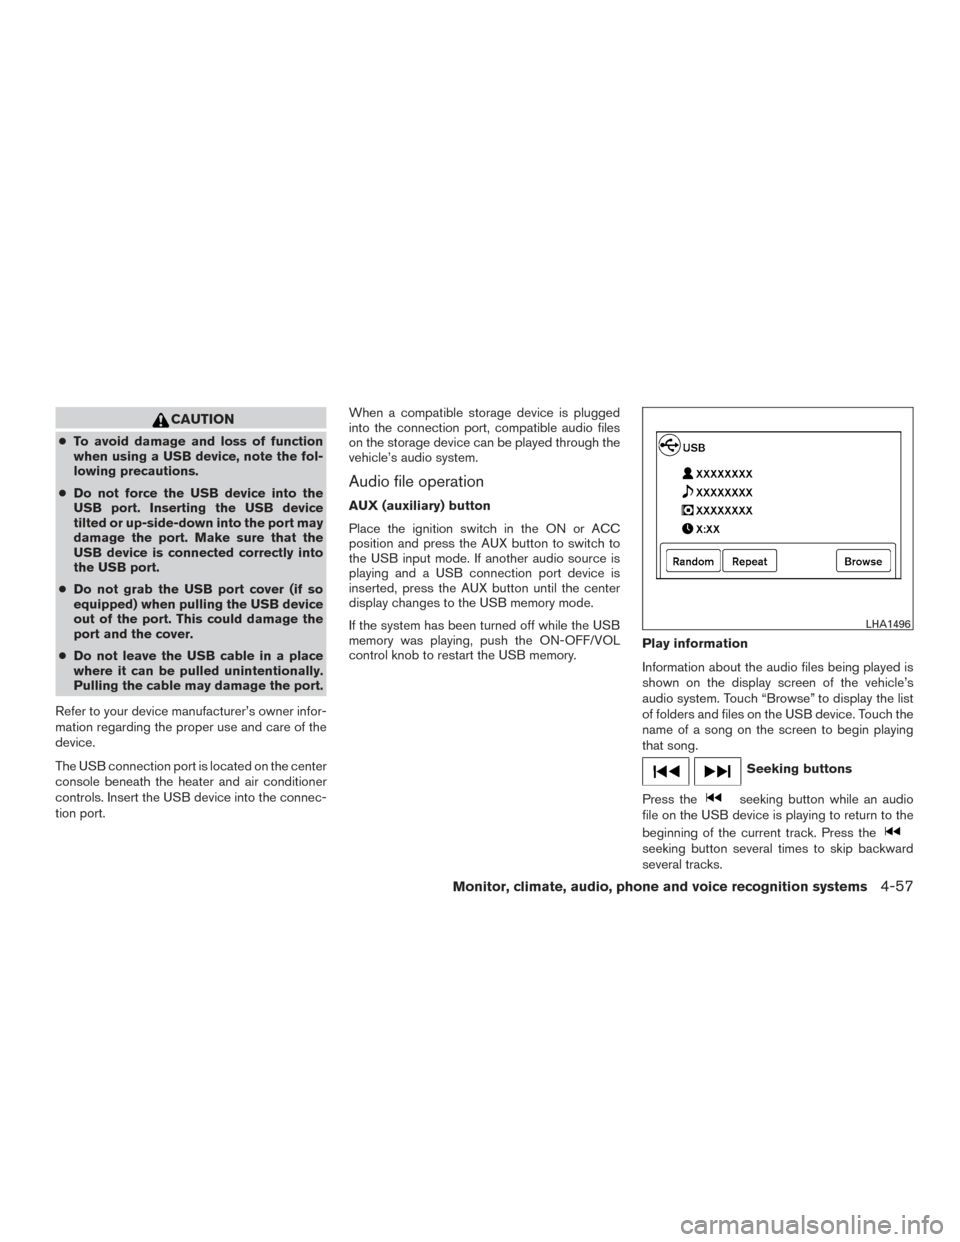
Play information
Information about the audio files being played is
shown on the display screen of the vehicle’s
audio system. Touch “Browse” to display the list
of folders and files on the USB device. Touch the
name of a song on the screen to begin playing
that song.
Seeking buttons
Press the
seeking button while an audio
file on the USB device is playing to return to the
beginning of the current track. Press the
seeking button several times to skip backward
several tracks.
LHA1496
Monitor, climate, audio, phone and voice recognition systems4-57
Page 246 of 457
Press theseeking button while an audio
file on the USB device is playing to advance one
track. Press the
seeking button several
times to skip forward several tracks. If the last
track in a folder on the USB device is skipped, the
first track of the next folder is played.
Random and repeat play mode
While files on a USB device are playing, the play
pattern can be altered so that songs are repeated
or played randomly.
Random
Touch the “Random” key to apply a random play
pattern to the USB device. When the random
mode is active, the
icon is displayed to the
left of the song title or album name to denote
which random pattern is applied. To cancel Ran-
dom mode, touch the “Random” key until
no
icon is displayed.
Repeat
Touch the “Repeat” key to apply a repeat play
pattern to the USB device. When the repeat
mode is active, the
icon is displayed to the
left of the song title or album name to denote
which repeat pattern is applied. To cancel Repeat
mode, touch the “Repeat” key until no
icon
is displayed.
iPod®* PLAYER OPERATION
WITHOUT NAVIGATION SYSTEM (if
so equipped)
Connecting iPod®
WARNING
Do not connect, disconnect, or operate the
USB device while driving. Doing so can be
a distraction. If distracted you could lose
control of your vehicle and cause an acci-
dent or serious injury.
CAUTION
● Do not force the USB device into the
USB port. Inserting the USB device
tilted or up-side-down into the port may
damage the port. Make sure that the
USB device is connected correctly into
the USB port.
● Do not grab the USB port cover (if so
equipped) when pulling the USB device
out of the port. This could damage the
port and the cover.
● Do not leave the USB cable in a place
where it can be pulled unintentionally.
Pulling the cable may damage the port.
Refer to your device manufacturer’s owner infor-
mation regarding the proper use and care of the
device.
To connect an iPod® to the vehicle so that the
iPod® can be controlled with the audio system
controls and display screen, use the USB con-
nection port located on the center console below
the heater and air conditioner controls. Connect
the iPod®-specific end of the cable to the iPod®
and the USB end of the cable to the USB con-
nection port on the vehicle. If your iPod® sup-
ports charging via a USB connection, its battery
LHA2455
4-58Monitor, climate, audio, phone and voice recognition systems
Page 249 of 457
iPod®* PLAYER OPERATION WITH
NAVIGATION SYSTEM (if so
equipped)
Connecting iPod®
WARNING
Do not connect, disconnect, or operate the
USB device while driving. Doing so can be
a distraction. If distracted you could lose
control of your vehicle and cause an acci-
dent or serious injury.
CAUTION
●Do not force the USB device into the
USB port. Inserting the USB device
tilted or up-side-down into the port may
damage the port. Make sure that the
USB device is connected correctly into
the USB port.
● Do not grab the USB port cover (if so
equipped) when pulling the USB device
out of the port. This could damage the
port and the cover.
● Do not leave the USB cable in a place
where it can be pulled unintentionally.
Pulling the cable may damage the port.
Refer to your device manufacturer’s owner infor-
mation regarding the proper use and care of the
device.
To connect an iPod® to the vehicle so that the
iPod® can be controlled with the audio system
controls and display screen, use the USB con-
nection port located on the center console below
the heater and air conditioner controls. Connect
the iPod®-specific end of the cable to the iPod®
and the USB end of the cable to the USB con-
nection port on the vehicle. If your iPod® sup-
ports charging via a USB connection, its battery will be charged while connected to the vehicle
with the ignition switch in the ACC or ON posi-
tion.
While connected to the vehicle, the iPod® can
only be operated by the vehicle audio controls.
To disconnect the iPod® from the vehicle, re-
move the USB end of the cable from the USB
connection port on the vehicle, then remove the
cable from the iPod®.
* iPod® is a trademark of Apple Inc., registered in
the U.S. and other countries.
Compatibility
The following models are compatible:
● iPod® Classic 5th generation (firmware ver-
sion 1.3.0 or later)
● iPod® Classic 6th generation (firmware ver-
sion 2.0.1 or later)
● iPod® Classic 7th generation (firmware ver-
sion 2.0.4 or later)
● iPod® Touch 2nd generation (firmware ver-
sion 4.2.1 or later)*
● iPod® Touch 3rd generation (firmware ver-
sion 5.1 or later)
● iPod® Touch 4th generation (firmware ver-
sion 5.1 or later)
LHA2455
Monitor, climate, audio, phone and voice recognition systems4-61
Page 293 of 457
Battery....................................... 5-39
Draining of coolant water .......................5-40
Tire equipment ................................ 5-40Special winter equipment
.......................5-40
Driving on snow or ice ......................... 5-40
Engine block heater (if so equipped) .............5-41
Page 333 of 457
ENGINE BLOCK HEATER (if so
equipped)
Engine block heaters are used to assist with cold
temperature starting.
The engine block heater should be used when
the outside temperature is 20°F (-7°C) or lower.
WARNING
●Do not use your engine block heater
with an ungrounded electrical system or
a 2-pronged adapter. You can be seri-
ously injured by an electrical shock if
you use an ungrounded connection.
● Disconnect and properly store the en-
gine block heater cord before starting
the engine. Damage to the cord could
result in an electrical shock and can
cause serious injury.
● Use a heavy-duty 3-wire, 3-pronged ex-
tension cord rated for at least 10 A. Plug
the extension cord into a Ground Fault
Interrupt (GFI) protected, grounded
110-VAC outlet. Failure to use the
proper extension cord or a grounded
outlet can result in a fire or electrical
shock and cause serious personal
injury. To use the engine block heater:
1. Turn the engine off.
2. Open the hood and unwrap the engine block heater cord.
3. Plug the engine block heater cord into a grounded 3-wire, 3-pronged extension
cord.
4. Plug the extension cord into a Ground Fault Interrupt (GFI) protected, grounded 110-
volt AC (VAC) outlet.
5. The engine block heater must be plugged in for at least 2–4 hours, depending on outside
temperatures, to properly warm the engine
coolant. Use an appropriate timer to turn the
engine block heater on.
6. Before starting the engine, unplug and prop- erly store the cord to keep it away from
moving parts.
Starting and driving5-41