2015 NISSAN SENTRA climate control
[x] Cancel search: climate controlPage 6 of 402
Table of
ContentsIllustrated table of contents
Safety—Seats, seat belts and supplemental restraint system
Instruments and controls
Pre-driving checks and adjustments
Monitor, climate, audio, phone and voice recognition systems
Starting and driving
In case of emergency
Appearance and care
Maintenance and do-it-yourself
Technical and consumer information
Index
0
1
2
3
4
5
6
7
8
9
10
Page 13 of 402
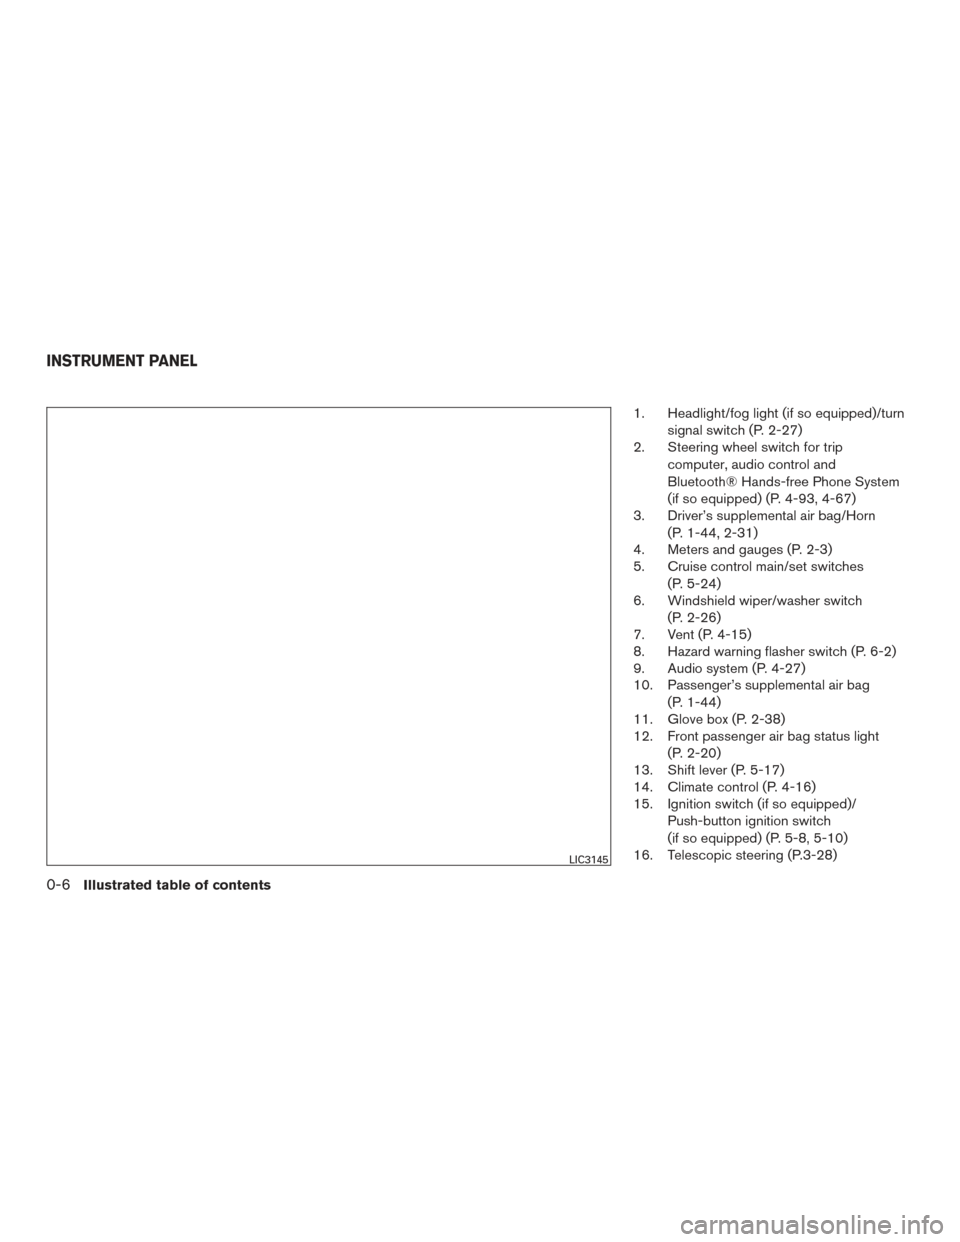
1. Headlight/fog light (if so equipped)/turnsignal switch (P. 2-27)
2. Steering wheel switch for trip
computer, audio control and
Bluetooth® Hands-free Phone System
(if so equipped) (P. 4-93, 4-67)
3. Driver’s supplemental air bag/Horn
(P. 1-44, 2-31)
4. Meters and gauges (P. 2-3)
5. Cruise control main/set switches
(P. 5-24)
6. Windshield wiper/washer switch
(P. 2-26)
7. Vent (P. 4-15)
8. Hazard warning flasher switch (P. 6-2)
9. Audio system (P. 4-27)
10. Passenger’s supplemental air bag
(P. 1-44)
11. Glove box (P. 2-38)
12. Front passenger air bag status light
(P. 2-20)
13. Shift lever (P. 5-17)
14. Climate control (P. 4-16)
15. Ignition switch (if so equipped)/
Push-button ignition switch
(if so equipped) (P. 5-8, 5-10)
16. Telescopic steering (P.3-28)
LIC3145
INSTRUMENT PANEL
0-6Illustrated table of contents
Page 77 of 402
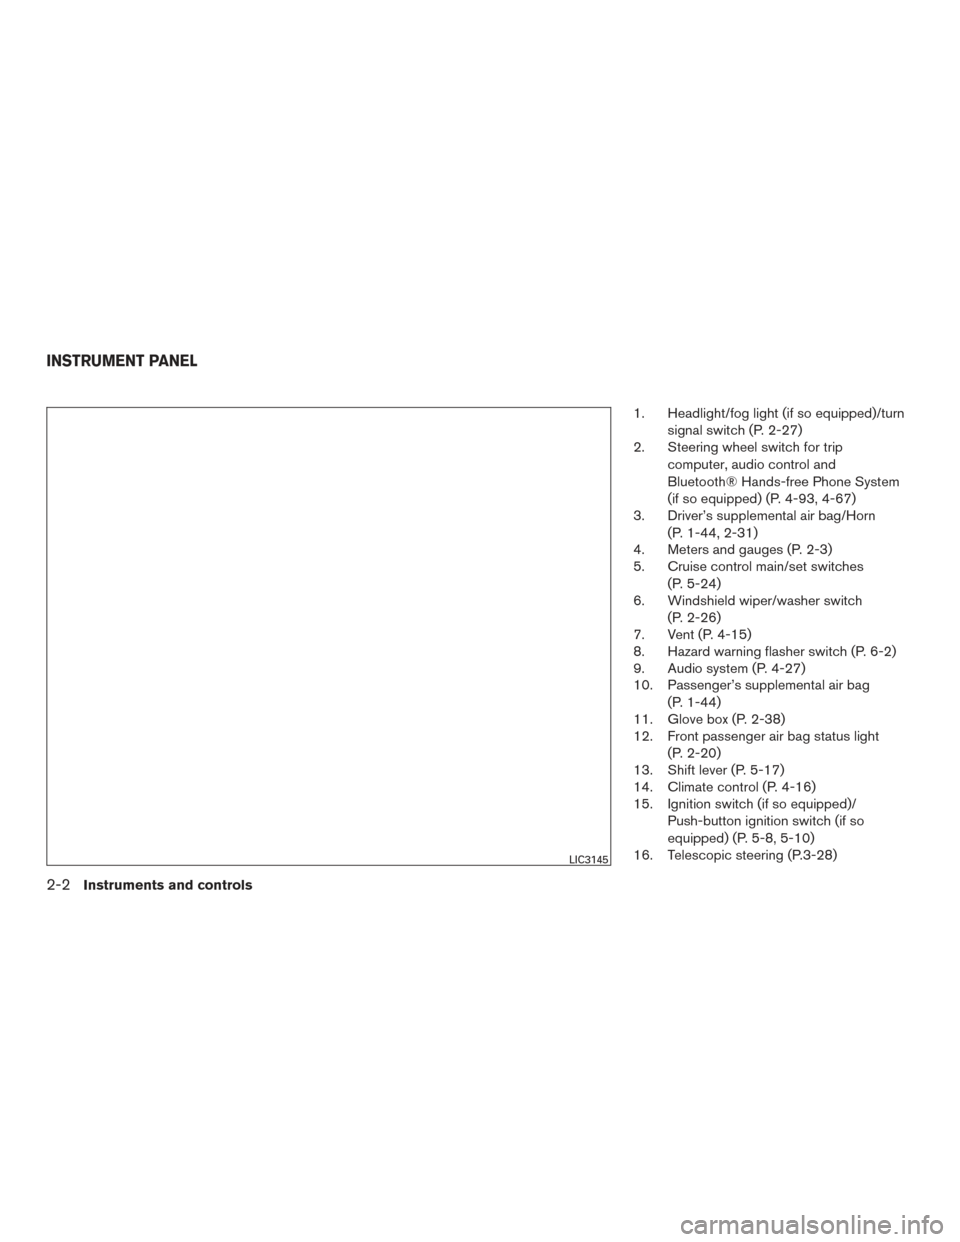
1. Headlight/fog light (if so equipped)/turnsignal switch (P. 2-27)
2. Steering wheel switch for trip
computer, audio control and
Bluetooth® Hands-free Phone System
(if so equipped) (P. 4-93, 4-67)
3. Driver’s supplemental air bag/Horn
(P. 1-44, 2-31)
4. Meters and gauges (P. 2-3)
5. Cruise control main/set switches
(P. 5-24)
6. Windshield wiper/washer switch
(P. 2-26)
7. Vent (P. 4-15)
8. Hazard warning flasher switch (P. 6-2)
9. Audio system (P. 4-27)
10. Passenger’s supplemental air bag
(P. 1-44)
11. Glove box (P. 2-38)
12. Front passenger air bag status light
(P. 2-20)
13. Shift lever (P. 5-17)
14. Climate control (P. 4-16)
15. Ignition switch (if so equipped)/
Push-button ignition switch (if so
equipped) (P. 5-8, 5-10)
16. Telescopic steering (P.3-28)
LIC3145
INSTRUMENT PANEL
2-2Instruments and controls
Page 160 of 402
4 Monitor, climate, audio, phone and voice
recognition systems
Control panel buttons — color screen with
Navigation System (if so equipped)..................4-4
How to use the touch-screen . . ..................4-5
How to use the BACK button ....................4-7
How to use the [
] button ..................4-7
button...................................4-9
How to use the ON-OFF button/VOL
(volume) control knob ...........................4-9
How to use the CAMERA button .................4-9
RearView Monitor (if so equipped) ..................4-10
How to read the displayed lines .................4-11
Difference between predicted and actual
distances ..................................... 4-11
Adjusting the screen ........................... 4-14
Operating tips ................................. 4-14
Vents ........................................... 4-15
Heater and Air Conditioner (manual)
(if so equipped) .................................. 4-16
Controls ...................................... 4-17
Heater operation .............................. 4-18
Air conditioner operation (if so equipped) ........4-19
Air flow charts ................................. 4-20Heater and air conditioner (automatic)
(if so equipped)
.................................. 4-24
Automatic operation ........................... 4-25
Manual operation .............................. 4-26
Operating tips ................................. 4-26
Servicing air conditioner (if so equipped) ............4-27
Audio system .................................... 4-27
Radio ........................................ 4-27
FM radio reception ............................ 4-28
AM radio reception ............................ 4-28
Satellite radio reception (if so equipped) .........4-28
Audio operation precautions ....................4-29
FM/AM radio with compact disc (CD) player
(if so equipped) ............................... 4-36
FM/AM/SAT radio with compact disc (CD)
player (Type A) (if so equipped) .................4-41
FM/AM/SAT radio with compact disc (CD)
player (Type B) (if so equipped) .................4-46
USB (Universal Serial Bus) Connection Port
(models without Navigation System)
(if so equipped) ............................... 4-52
Page 163 of 402
WARNING
●Positioning of the heating or air condi-
tioning controls and display controls
should not be done while driving in or-
der that full attention may be given to
the driving operation.
● Do not disassemble or modify this sys-
tem. If you do, it may result in accidents,
fire, or electrical shock.
● Do not use this system if you notice any
abnormality, such as a frozen screen or
lack of sound. Continued use of the
system may result in accident, fire or
electric shock.
● In case you notice any foreign object in
the system hardware, spill liquid on it,
or notice smoke or smell coming from it,
stop using the system immediately and
contact a NISSAN dealer. Ignoring such
conditions may lead to accidents, fire or
electrical shock.
1. MAP button*
2. Display screen
3.
button**
4.
button 5.
(brightness control) button
6. BACK button
7. ON-OFF button/VOL (volume) control knob
8. CAMERA button
LHA2898
CONTROL PANEL BUTTONS —
COLOR SCREEN WITH NAVIGATION
SYSTEM (if so equipped)
4-4Monitor, climate, audio, phone and voice recognition systems
Page 164 of 402
9. NAV button*
* For additional information regarding the Naviga-
tion system control buttons, refer to the separate
Navigation System Owner’s Manual.
** For additional information regarding the
Bluetooth® Hands-Free Phone System control
button, refer to “Bluetooth® Hands-Free Phone
System with navigation system” or “Bluetooth®
Hands-Free Phone System without navigation
system” in this section.
When you use this system, make sure the engine
is running.
If you use the system with the engine not
running (ignition ON or ACC) for a long
time, it will discharge the battery, and the
engine will not start.
Reference symbols:
“Example” — Words marked in quotes refer to a
key shown only on the display. These keys can be
selected by touching the screen.HOW TO USE THE TOUCH-
SCREEN
CAUTION
● The glass display screen may break if it
is hit with a hard or sharp object. If the
glass screen breaks, do not touch it.
Doing so could result in an injury.
● To clean the display, never use a rough
cloth, alcohol, benzine, thinner or any
kind of solvent or paper towel with a
chemical cleaning agent. They will
scratch or deteriorate the panel.
● Do not splash any liquid such as water
or car fragrance on the display. Contact
with liquid will cause the system to
malfunction.
To help ensure safe driving, some functions can-
not be operated while driving.
The on-screen functions that are not available
while driving will be “grayed out” or muted.
Park the vehicle in a safe location and then oper-
ate the navigation system.
WARNING
● ALWAYS give your full attention to
driving.
● Avoid using vehicle features that could
distract you. If distracted, you could
lose control of your vehicle and cause
an accident.
Monitor, climate, audio, phone and voice recognition systems4-5
Page 167 of 402
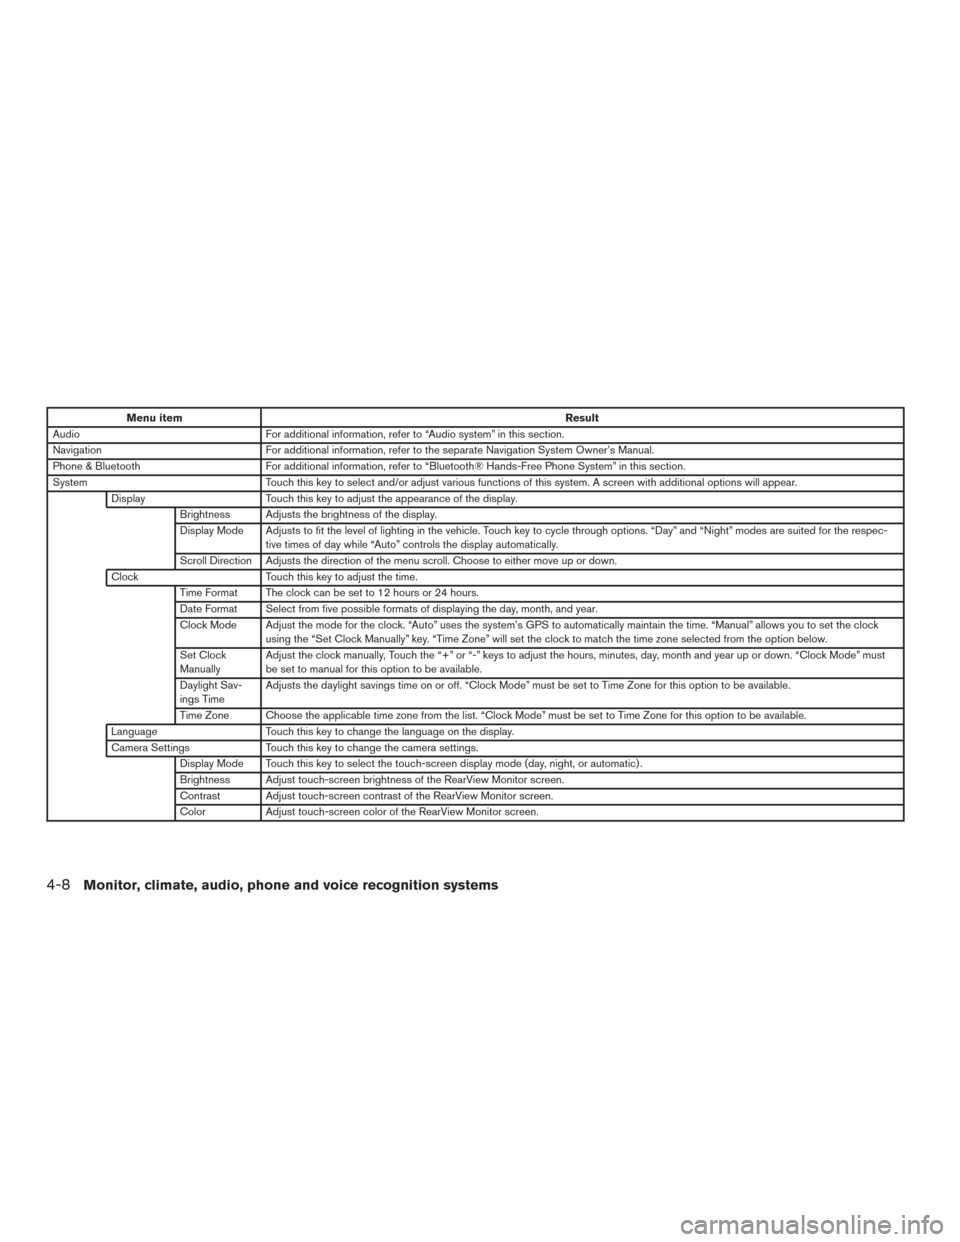
Menu itemResult
Audio For additional information, refer to “Audio system” in this section.
Navigation For additional information, refer to the separate Navigation System Owner’s Manual.
Phone & Bluetooth For additional information, refer to “Bluetooth® Hands-Free Phone System” in this section.
System Touch this key to select and/or adjust various functions of this system. A screen with additional options will appear.
Display Touch this key to adjust the appearance of the display.
Brightness Adjusts the brightness of the display.
Display Mode Adjusts to fit the level of lighting in the vehicle. Touch key to cycle through options. “Day” and “Night” modes are suited for the respec- tive times of day while “Auto” controls the display automatically.
Scroll Direction Adjusts the direction of the menu scroll. Choose to either move up or down.
Clock Touch this key to adjust the time.
Time Format The clock can be set to 12 hours or 24 hours.
Date Format Select from five possible formats of displaying the day, month, and year.
Clock Mode Adjust the mode for the clock. “Auto” uses the system’s GPS to automatically maintain the time. “Manual” allows you to set the clock using the “Set Clock Manually” key. “Time Zone” will set the clock to match the time zone selected from the option below.
Set Clock
Manually Adjust the clock manually, Touch the “+” or “-” keys to adjust the hours, minutes, day, month and year up or down. “Clock Mode” must
be set to manual for this option to be available.
Daylight Sav-
ings Time Adjusts the daylight savings time on or off. “Clock Mode” must be set to Time Zone for this option to be available.
Time Zone Choose the applicable time zone from the list. “Clock Mode” must be set to Time Zone for this option to be available.
Language Touch this key to change the language on the display.
Camera Settings Touch this key to change the camera settings.
Display Mode Touch this key to select the touch-screen display mode (day, night, or automatic) .
Brightness Adjust touch-screen brightness of the RearView Monitor screen.
Contrast Adjust touch-screen contrast of the RearView Monitor screen.
Color Adjust touch-screen color of the RearView Monitor screen.
4-8Monitor, climate, audio, phone and voice recognition systems
Page 168 of 402
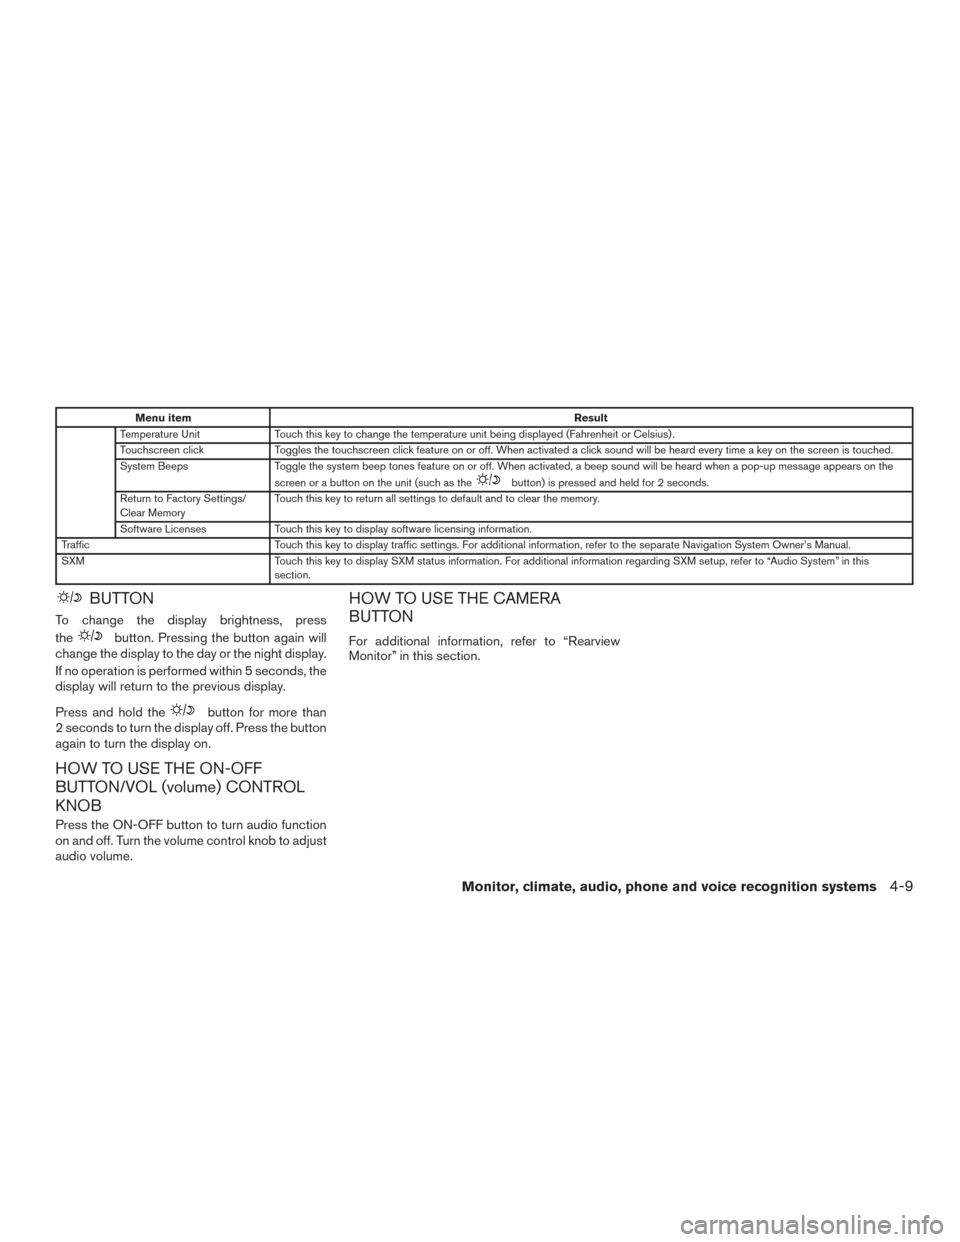
Menu itemResult
Temperature Unit Touch this key to change the temperature unit being displayed (Fahrenheit or Celsius) .
Touchscreen click Toggles the touchscreen click feature on or off. When activated a click sound will be heard every time a key on the screen is touched.
System Beeps Toggle the system beep tones feature on or off. When activated, a beep sound will be heard when a pop-up message appears on the
screen or a button on the unit (such as the
button) is pressed and held for 2 seconds.
Return to Factory Settings/
Clear Memory Touch this key to return all settings to default and to clear the memory.
Software Licenses Touch this key to display software licensing information.
Traffic Touch this key to display traffic settings. For additional information, refer to the separate Navigation System Owner’s Manual.
SXM Touch this key to display SXM status information. For additional information regarding SXM setup, refer to “Audio System” in this
section.
BUTTON
To change the display brightness, press
the
button. Pressing the button again will
change the display to the day or the night display.
If no operation is performed within 5 seconds, the
display will return to the previous display.
Press and hold the
button for more than
2 seconds to turn the display off. Press the button
again to turn the display on.
HOW TO USE THE ON-OFF
BUTTON/VOL (volume) CONTROL
KNOB
Press the ON-OFF button to turn audio function
on and off. Turn the volume control knob to adjust
audio volume.
HOW TO USE THE CAMERA
BUTTON
For additional information, refer to “Rearview
Monitor” in this section.
Monitor, climate, audio, phone and voice recognition systems4-9