2015 NISSAN ROGUE SELECT Power windows
[x] Cancel search: Power windowsPage 12 of 322
JVC0751X
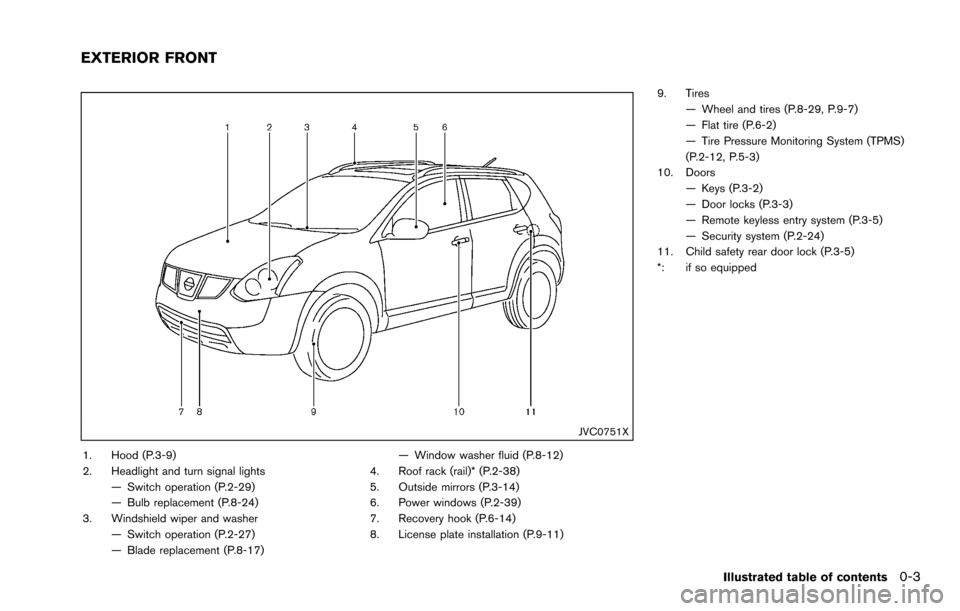
1. Hood (P.3-9)
2. Headlight and turn signal lights— Switch operation (P.2-29)
— Bulb replacement (P.8-24)
3. Windshield wiper and washer — Switch operation (P.2-27)
— Blade replacement (P.8-17) — Window washer fluid (P.8-12)
4. Roof rack (rail)* (P.2-38)
5. Outside mirrors (P.3-14)
6. Power windows (P.2-39)
7. Recovery hook (P.6-14)
8. License plate installation (P.9-11) 9. Tires
— Wheel and tires (P.8-29, P.9-7)
— Flat tire (P.6-2)
— Tire Pressure Monitoring System (TPMS)
(P.2-12, P.5-3)
10. Doors — Keys (P.3-2)
— Door locks (P.3-3)
— Remote keyless entry system (P.3-5)
— Security system (P.2-24)
11. Child safety rear door lock (P.3-5)
*: if so equipped
Illustrated table of contents0-3
EXTERIOR FRONT
Page 76 of 322
2 Instruments and controls
Instrument panel ........................................................................\
2-3
Meters and gauges ................................................................... 2-4Speedometer ........................................................................\
2-5
Odometer/twin trip odometer .......................................... 2-5
Tachometer ........................................................................\
... 2-6
Engine coolant temperature gauge ................................ 2-6
Fuel gauge ........................................................................\
.... 2-7
Instrument brightness control .......................................... 2-8
Warning/indicator lights and audible reminders ............... 2-9 Checking bulbs ................................................................. 2-10
Warning lights ................................................................... 2-10
Indicator lights ................................................................... 2-14
Audible reminders ............................................................ 2-16
Vehicle information display .................................................. 2-17 Outside air temperature .................................................. 2-17
Indicators for operation ................................................... 2-19
Indicators for maintenance ............................................. 2-20
Trip computer .................................................................... 2-21
Continuously Variable Transmission (CVT)
position indicator .............................................................. 2-24
Security systems .................................................................... 2-24 Vehicle Security System ................................................. 2-24
NISSAN Vehicle Immobilizer System .......................... 2-26 Windshield wiper and washer switch .............................. 2-27
Rear window wiper and washer switch .......................... 2-28
Rear window defroster switch ........................................... 2-29
Headlight and turn signal switch ....................................... 2-29
Headlight switch ............................................................ 2-29
Turn signal switch .......................................................... 2-30
Horn ........................................................................\
.................. 2-31
Vehicle Dynamic Control (VDC) OFF switch ................. 2-31
Power outlet ........................................................................\
.... 2-31
Storage ........................................................................\
............ 2-32 Cup holders ..................................................................... 2-32
Sunglasses holder ......................................................... 2-33
Glove box ........................................................................\
. 2-34
Console box .................................................................... 2-35
Luggage floor box (if so equipped) .......................... 2-35
Luggage side box .......................................................... 2-36
Cargo cover (if so equipped) ..................................... 2-36
Luggage hooks ............................................................... 2-37
Coat hooks ...................................................................... 2-38
Utility hook ....................................................................... 2-38
Roof rack (if so equipped) .......................................... 2-38
Windows ........................................................................\
......... 2-39 Power windows .............................................................. 2-39�!
Page 100 of 322
prevent it, nor can it prevent the theft of interior
or exterior vehicle components in all situations.
Always secure your vehicle even if parking for a
brief period. Never leave your keys in the vehicle,
and always lock it when unattended. Be aware
of your surroundings, and park in secure, well-lit
areas whenever possible.
Many devices offering additional protection,
such as component locks, identification markers,
and tracking systems, are available at auto
supply stores and specialty shops. Your
NISSAN dealer may also offer such equipment.
Check with your insurance company to see if
you may be eligible for discounts for various
theft protection features.
SIC2045
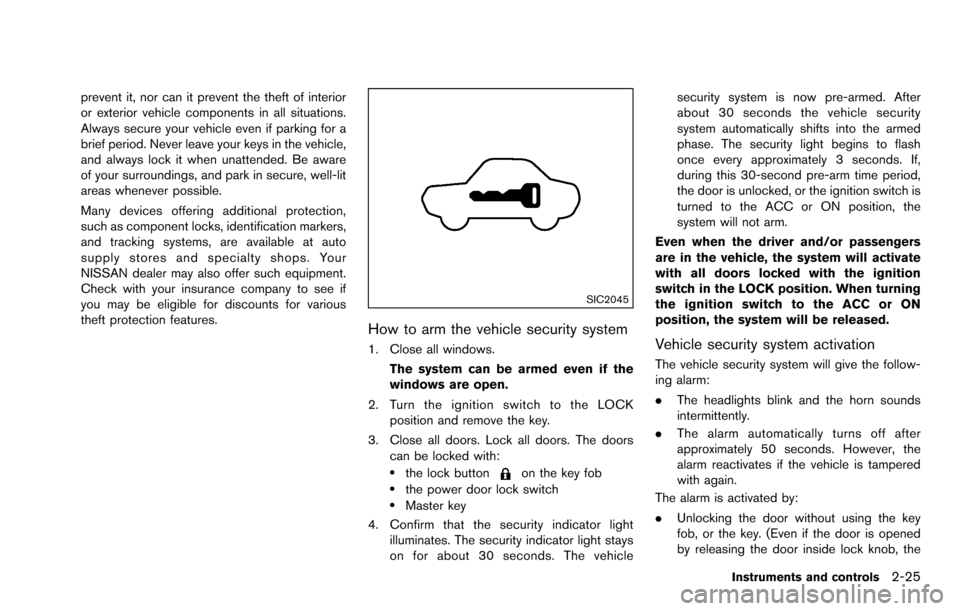
How to arm the vehicle security system
1. Close all windows.The system can be armed even if the
windows are open.
2. Turn the ignition switch to the LOCK position and remove the key.
3. Close all doors. Lock all doors. The doors can be locked with:
.the lock buttonon the key fob.the power door lock switch.Master key
4. Confirm that the security indicator light illuminates. The security indicator light stays
on for about 30 seconds. The vehicle security system is now pre-armed. After
about 30 seconds the vehicle security
system automatically shifts into the armed
phase. The security light begins to flash
once every approximately 3 seconds. If,
during this 30-second pre-arm time period,
the door is unlocked, or the ignition switch is
turned to the ACC or ON position, the
system will not arm.
Even when the driver and/or passengers
are in the vehicle, the system will activate
with all doors locked with the ignition
switch in the LOCK position. When turning
the ignition switch to the ACC or ON
position, the system will be released.
Vehicle security system activation
The vehicle security system will give the follow-
ing alarm:
. The headlights blink and the horn sounds
intermittently.
. The alarm automatically turns off after
approximately 50 seconds. However, the
alarm reactivates if the vehicle is tampered
with again.
The alarm is activated by:
. Unlocking the door without using the key
fob, or the key. (Even if the door is opened
by releasing the door inside lock knob, the
Instruments and controls2-25
Page 114 of 322
WARNING
.Drive extra carefully when the vehi-
cle is loaded at or near the cargo
carrying capacity, especially if the
significant portion of that load is
carried on the roof rack.
. Heavy loading of the roof rack has
the potential to affect the vehicle
stability and handling during sud-
den or unusual handling maneuvers.
. Roof rack load should be evenly
distributed.
. Do not exceed maximum roof rack
load weight capacity.
. Properly secure all cargo with ropes
or straps to help prevent it from
sliding or shifting. In a sudden stop
or collision, unsecured cargo could
cause personal injury.
CAUTION
Use care when placing or removing
items from the roof rack. If you cannot
comfortably lift the items onto the roof rack from the ground, use a ladder or
stool.
POWER WINDOWS
WARNING
.
Make sure that all passengers have
their hands, etc. inside the vehicle
while it is in motion and before
closing the windows. Use the win-
dow lock switch to prevent unex-
pected use of the power windows.
. Do not leave children unattended
inside the vehicle. They could un-
knowingly activate switches or con-
trols and become trapped in the
window. Unattended children could
become involved in serious acci-
dents.
The power windows operate when the ignition
switch is in the ON position, or for about 45
seconds after the ignition switch is turned to the
OFF position. If the driver’s or front passenger’s
door is opened during this period of about 45
seconds, power to the windows is canceled.
Instruments and controls2-39
WINDOWS
Page 115 of 322
2-40Instruments and controls
SIC3507
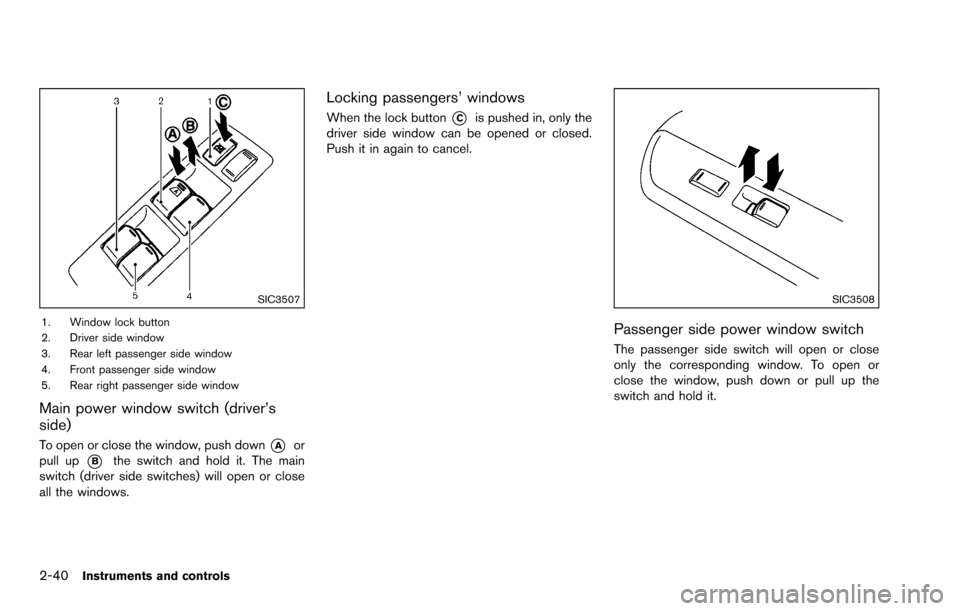
1. Window lock button
2. Driver side window
3. Rear left passenger side window
4. Front passenger side window
5. Rear right passenger side window
Main power window switch (driver’s
side)
To open or close the window, push down*Aor
pull up
*Bthe switch and hold it. The main
switch (driver side switches) will open or close
all the windows.
Locking passengers’ windows
When the lock button*Cis pushed in, only the
driver side window can be opened or closed.
Push it in again to cancel.
SIC3508
Passenger side power window switch
The passenger side switch will open or close
only the corresponding window. To open or
close the window, push down or pull up the
switch and hold it.
Page 116 of 322
SIC3509
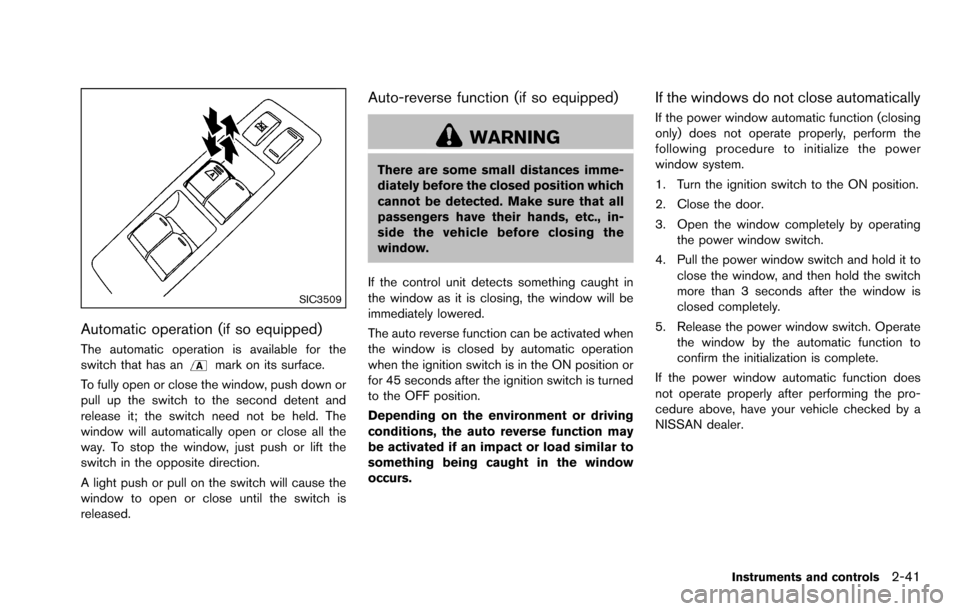
Automatic operation (if so equipped)
The automatic operation is available for the
switch that has anmark on its surface.
To fully open or close the window, push down or
pull up the switch to the second detent and
release it; the switch need not be held. The
window will automatically open or close all the
way. To stop the window, just push or lift the
switch in the opposite direction.
A light push or pull on the switch will cause the
window to open or close until the switch is
released.
Auto-reverse function (if so equipped)
WARNING
There are some small distances imme-
diately before the closed position which
cannot be detected. Make sure that all
passengers have their hands, etc., in-
side the vehicle before closing the
window.
If the control unit detects something caught in
the window as it is closing, the window will be
immediately lowered.
The auto reverse function can be activated when
the window is closed by automatic operation
when the ignition switch is in the ON position or
for 45 seconds after the ignition switch is turned
to the OFF position.
Depending on the environment or driving
conditions, the auto reverse function may
be activated if an impact or load similar to
something being caught in the window
occurs.
If the windows do not close automatically
If the power window automatic function (closing
only) does not operate properly, perform the
following procedure to initialize the power
window system.
1. Turn the ignition switch to the ON position.
2. Close the door.
3. Open the window completely by operating the power window switch.
4. Pull the power window switch and hold it to close the window, and then hold the switch
more than 3 seconds after the window is
closed completely.
5. Release the power window switch. Operate the window by the automatic function to
confirm the initialization is complete.
If the power window automatic function does
not operate properly after performing the pro-
cedure above, have your vehicle checked by a
NISSAN dealer.
Instruments and controls2-41
Page 197 of 322
5-10Starting and driving
When the ignition switch cannot be turned to
the LOCK position:
1. Move the shift lever to the P (Park) position.
2. Turn the ignition switch slightly in the ONdirection.
3. Turn the ignition switch to the LOCK position.
4. Remove the key.
If the ignition switch is turned to the LOCK
position, the shift lever cannot be moved from
the P (Park) position. The shift lever can be
moved if the ignition switch is in the ON position
with the foot brake pedal depressed.
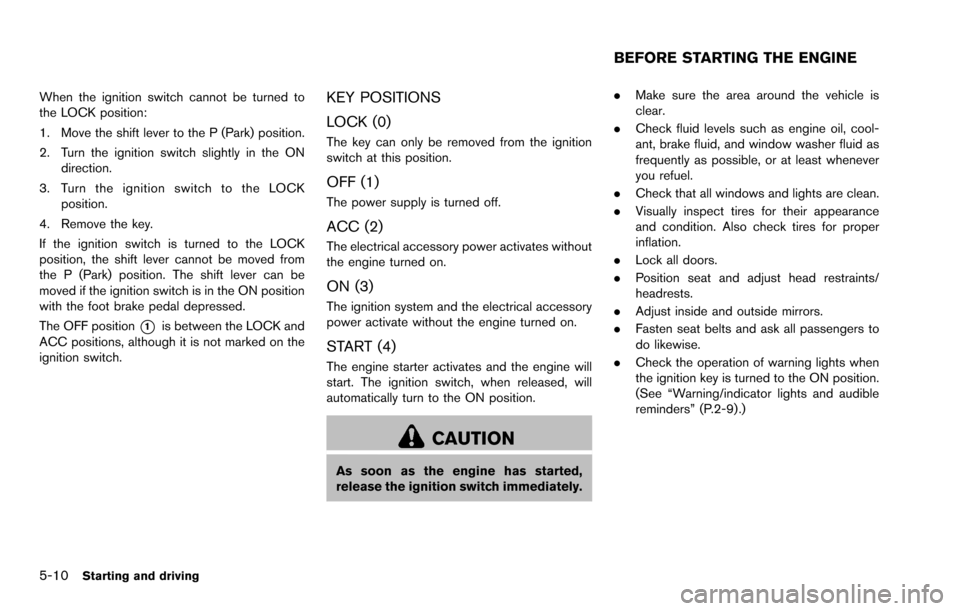
The OFF position
*1is between the LOCK and
ACC positions, although it is not marked on the
ignition switch.
KEY POSITIONS
LOCK (0)
The key can only be removed from the ignition
switch at this position.
OFF (1)
The power supply is turned off.
ACC (2)
The electrical accessory power activates without
the engine turned on.
ON (3)
The ignition system and the electrical accessory
power activate without the engine turned on.
START (4)
The engine starter activates and the engine will
start. The ignition switch, when released, will
automatically turn to the ON position.
CAUTION
As soon as the engine has started,
release the ignition switch immediately. .
Make sure the area around the vehicle is
clear.
. Check fluid levels such as engine oil, cool-
ant, brake fluid, and window washer fluid as
frequently as possible, or at least whenever
you refuel.
. Check that all windows and lights are clean.
. Visually inspect tires for their appearance
and condition. Also check tires for proper
inflation.
. Lock all doors.
. Position seat and adjust head restraints/
headrests.
. Adjust inside and outside mirrors.
. Fasten seat belts and ask all passengers to
do likewise.
. Check the operation of warning lights when
the ignition key is turned to the ON position.
(See “Warning/indicator lights and audible
reminders” (P.2-9).)
BEFORE STARTING THE ENGINE
Page 228 of 322
Do not attempt to start the engine by pushing.
CAUTION
Continuously Variable Transmission
(CVT) models cannot be push-started
or tow-started. Attempting to do so may
cause transmission damage.
CAUTION
.Do not continue to drive if your
vehicle overheats. Doing so could
cause engine damage or a vehicle
fire.
. To avoid the danger of being
scalded, never remove the radiator
cap while the engine is still hot.
When the radiator cap is removed,
pressurized hot water will spurt out,
possibly causing serious injury.
. Do not open the hood if steam is
coming out.
If your vehicle is overheating (indicated by an
extremely high temperature gauge reading) , or if
you feel a lack of engine power, detect abnormal
noise, etc., take the following steps:
1. Move the vehicle safely off the road, apply the parking brake and move the shift lever to
the P (Park) position.
Do not stop the engine.
2. Turn off the air conditioner. Open all the windows, move the heater or air conditioner
temperature control to maximum hot and fan
control to high speed. 3. Get out of the vehicle. Look and listen for
steam or coolant escaping from the radiator
before opening the hood. (If steam or
coolant is escaping, turn off the engine.)
Do not open the hood further until no steam
or coolant can be seen.
4. Open the engine hood.
WARNING
If steam or water is coming from the
engine, stand clear to prevent getting
burned.
5. Visually check drive belts for damage or looseness. Also check if the cooling fan is
running. The radiator hoses and radiator
should not leak water. If coolant is leaking,
the water pump belt is missing or loose, or
the cooling fan does not run, stop the
engine.
WARNING
Be careful not to allow your hands, hair,
jewelry or clothing to come into contact
with, or get caught in, engine belts or
the engine cooling fan. The engine
In case of emergency6-11
PUSH STARTING IF YOUR VEHICLE OVERHEATS