2015 NISSAN ROGUE SELECT tire pressure
[x] Cancel search: tire pressurePage 212 of 322
BRAKING PRECAUTIONS
The brake system has two separate hydraulic
circuits. If one circuit malfunctions, you will still
have braking at two wheels.
You may feel a small click and hear a sound
when the brake pedal is fully depressed slowly.
This is not a malfunction and indicates that the
brake assist mechanism is operating properly.
Vacuum assisted brakes
The brake booster aids braking by using engine
vacuum. If the engine stops, you can stop the
vehicle by depressing the brake pedal. However,
greater foot pressure on the brake pedal will be
required to stop the vehicle and the stopping
distance will be longer.
Using the brakes
Avoid resting your foot on the brake pedal while
driving. This will cause overheating of the
brakes, wearing out the brake and pads faster
and reduce gas mileage.
To help reduce brake wear and to prevent the
brakes from overheating, reduce speed and
downshift to a lower gear before going down a
slope or long grade. Overheated brakes may
reduce braking performance and could result in
loss of vehicle control.
WARNING
.While driving on a slippery surface,
be careful when braking, accelerat-
ing or downshifting. Abrupt braking
or accelerating could cause the
wheels to skid and result in an
accident.
. If the engine is not running or is
turned off while driving, the power
assist for the brakes will not work.
Braking will be harder.
Wet brakes
When the vehicle is washed or driven through
water, the brakes may get wet. As a result, your
braking distance will be longer and the vehicle
may pull to one side during braking.
To dry brakes, drive the vehicle at a safe speed
while lightly tapping the brake pedal to heat-up
the brakes. Do this until the brakes return to
normal. Avoid driving the vehicle at high speeds
until the brakes function correctly.
PARKING BRAKE BREAK-IN
Break in the parking brake shoes whenever the
stopping effect of the parking brake is weakened
or whenever the parking brake shoes and/or
drums/rotors are replaced, in order to assure the
best braking performance.
This procedure is described in the vehicle
service manual and can be performed by a
NISSAN dealer.
ANTI-LOCK BRAKING SYSTEM (ABS)
WARNING
.The Anti-lock Braking System (ABS)
is a sophisticated device, but it
cannot prevent accidents resulting
from careless or dangerous driving
techniques. It can help maintain
vehicle control during braking on
slippery surfaces. Remember that
stopping distances on slippery sur-
faces will be longer than on normal
surfaces even with ABS. Stopping
distances may also be longer on
rough, gravel or snow covered
roads, or if you are using tire chains.
Always maintain a safe distance
from the vehicle in front of you.
Ultimately, the driver is responsible
Starting and driving5-25
BRAKE SYSTEM
Page 213 of 322
5-26Starting and driving
for safety.
. Tire type and condition may also
affect braking effectiveness.
— When replacing tires, install the
specified size of tires on all four
wheels.
— When installing a spare tire, make sure that it is the proper
size and type as specified on the
Tire and Loading Information
label. See “Tire and loading
information label” (P.9-10) of
this manual.
— For detailed information, see “Wheels and tires” (P.8-29) of
this manual.
The Anti-lock Braking System (ABS) controls
the brakes so the wheels do not lock during hard
braking or when braking on slippery surfaces.
The system detects the rotation speed at each
wheel and varies the brake fluid pressure to
prevent each wheel from locking and sliding. By
preventing each wheel from locking, the system
helps the driver maintain steering control and
helps to minimize swerving and spinning on
slippery surfaces.Using the system
Depress the brake pedal and hold it down.
Depress the brake pedal with firm steady
pressure, but do not pump the brakes. The
ABS will operate to prevent the wheels from
locking up. Steer the vehicle to avoid obstacles.
WARNING
Do not pump the brake pedal. Doing so
may result in increased stopping dis-
tances.
Self-test feature
The ABS includes electronic sensors, electric
pumps, hydraulic solenoids and a computer. The
computer has a built-in diagnostic feature that
tests the system each time you start the engine
and move the vehicle at a low speed in forward
or reverse. When the self-test occurs, you may
hear a “clunk” noise and/or feel a pulsation in the
brake pedal. This is normal and does not
indicate a malfunction. If the computer senses
a malfunction, it switches the ABS off and
illuminates the ABS warning light on the
instrument panel. The brake system then oper-
ates normally, but without anti-lock assistance.
If the ABS warning light illuminates during the self-test or while driving, have the vehicle
checked by a NISSAN dealer.
Normal operation
The ABS operates at speeds above 3 to 6 MPH
(5 to 10 km/h) . The speed varies according to
road conditions.
When the ABS senses that one or more wheels
are close to locking up, the actuator rapidly
applies and releases hydraulic pressure. This
action is similar to pumping the brakes very
quickly. You may feel a pulsation in the brake
pedal and hear a noise from under the hood or
feel a vibration from the actuator when it is
operating. This is normal and indicates that the
ABS is operating properly. However, the pulsa-
tion may indicate that road conditions are
hazardous and extra care is required while
driving.
Page 218 of 322
6 In case of emergency
Hazard warning flasher switch .............................................. 6-2
Flat tire ........................................................................\
................. 6-2Tire Pressure Monitoring System (TPMS) .................... 6-2
Changing a flat tire ............................................................. 6-3
Jump starting ........................................................................\
...... 6-9 Push starting ........................................................................\
... 6-11
If your vehicle overheats ...................................................... 6-11
Towing your vehicle .............................................................. 6-12
Towing recommended by NISSAN ........................... 6-13
Vehicle recovery (freeing a stuck vehicle) ............... 6-14
Page 219 of 322
6-2In case of emergency
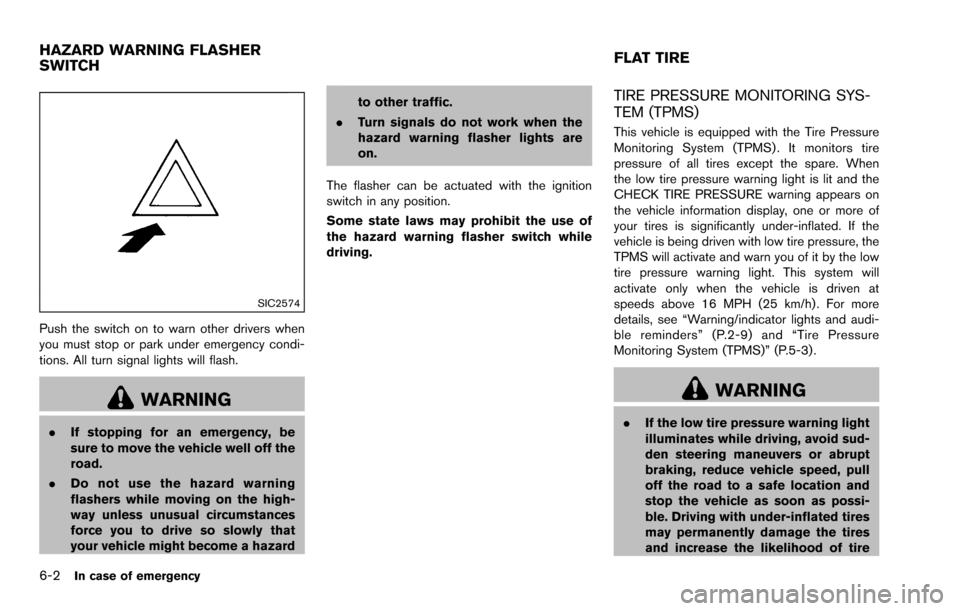
SIC2574
Push the switch on to warn other drivers when
you must stop or park under emergency condi-
tions. All turn signal lights will flash.
WARNING
.If stopping for an emergency, be
sure to move the vehicle well off the
road.
. Do not use the hazard warning
flashers while moving on the high-
way unless unusual circumstances
force you to drive so slowly that
your vehicle might become a hazard to other traffic.
. Turn signals do not work when the
hazard warning flasher lights are
on.
The flasher can be actuated with the ignition
switch in any position.
Some state laws may prohibit the use of
the hazard warning flasher switch while
driving.
TIRE PRESSURE MONITORING SYS-
TEM (TPMS)
This vehicle is equipped with the Tire Pressure
Monitoring System (TPMS) . It monitors tire
pressure of all tires except the spare. When
the low tire pressure warning light is lit and the
CHECK TIRE PRESSURE warning appears on
the vehicle information display, one or more of
your tires is significantly under-inflated. If the
vehicle is being driven with low tire pressure, the
TPMS will activate and warn you of it by the low
tire pressure warning light. This system will
activate only when the vehicle is driven at
speeds above 16 MPH (25 km/h) . For more
details, see “Warning/indicator lights and audi-
ble reminders” (P.2-9) and “Tire Pressure
Monitoring System (TPMS)” (P.5-3) .
WARNING
. If the low tire pressure warning light
illuminates while driving, avoid sud-
den steering maneuvers or abrupt
braking, reduce vehicle speed, pull
off the road to a safe location and
stop the vehicle as soon as possi-
ble. Driving with under-inflated tires
may permanently damage the tires
and increase the likelihood of tire
HAZARD WARNING FLASHER
SWITCH FLAT TIRE
Page 220 of 322
failure. Serious vehicle damage
could occur and may lead to an
accident and could result in serious
personal injury. Check the tire pres-
sure for all four tires. Adjust the tire
pressure to the recommended COLD
tire pressure shown on the Tire and
Loading Information label to turn
the low tire pressure warning light
OFF. If you have a flat tire, replace it
with a spare tire as soon as possi-
ble.
. When a spare tire is mounted or a
wheel is replaced, the TPMS will not
function and the low tire pressure
warning light will flash for approxi-
mately 1 minute. The light will
remain on after 1 minute. Contact
your NISSAN dealer as soon as
possible for tire replacement and/
or system resetting.
. Replacing tires with those not ori-
ginally specified by NISSAN could
affect the proper operation of the
TPMS.
. Do not inject any tire liquid or
aerosol tire sealant into the tires,
as this may cause a malfunction of the tire pressure sensors.
CHANGING A FLAT TIRE
If you have a flat tire, follow the instructions
below.
Stopping the vehicle
1. Safely move the vehicle off the road and
away from traffic.
2. Turn on the hazard warning flashers.
3. Park on a level surface and apply the parking brake. Move the shift lever to the P (Park)
position.
4. Turn off the engine.
5. Raise the hood to warn other traffic, and to signal professional road assistance person-
nel that you need assistance.
6. Have all passengers get out of the vehicle and stand in a safe place, away from traffic
and clear of the vehicle.
WARNING
.Make sure the parking brake is
securely applied and the transmis-
sion is shifted into the P (Park)
position. .
Never change tires when the vehicle
is on a slope, ice or slippery areas.
This is hazardous.
. Never change tires if oncoming
traffic is close to your vehicle. Wait
for professional road assistance.
In case of emergency6-3
Page 225 of 322
6-8In case of emergency
SCE0039
Installing the spare tire
The spare tire is designed for emergency
use. (See specific instructions under the
heading “Wheels and tires” (P.8-29) .)
1. Clean any mud or dirt from the surfacebetween the wheel and hub.
2. Carefully put the spare tire on and tighten the wheel nuts finger tight. Check that all the
wheel nuts contact the wheel surface
horizontally.
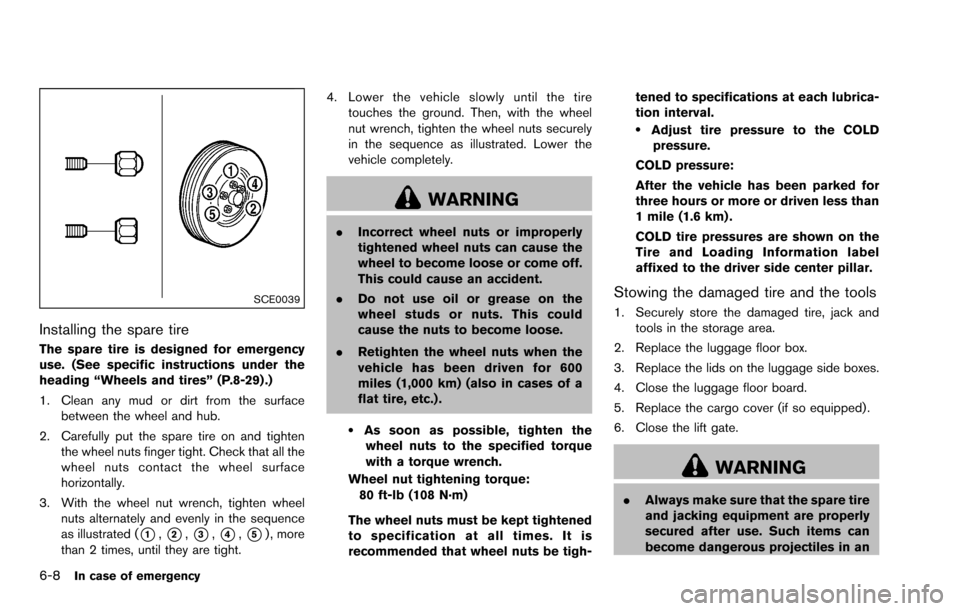
3. With the wheel nut wrench, tighten wheel nuts alternately and evenly in the sequence
as illustrated (
*1,*2,*3,*4,*5) , more
than 2 times, until they are tight. 4. Lower the vehicle slowly until the tire
touches the ground. Then, with the wheel
nut wrench, tighten the wheel nuts securely
in the sequence as illustrated. Lower the
vehicle completely.
WARNING
.Incorrect wheel nuts or improperly
tightened wheel nuts can cause the
wheel to become loose or come off.
This could cause an accident.
. Do not use oil or grease on the
wheel studs or nuts. This could
cause the nuts to become loose.
. Retighten the wheel nuts when the
vehicle has been driven for 600
miles (1,000 km) (also in cases of a
flat tire, etc.) .
.As soon as possible, tighten the
wheel nuts to the specified torque
with a torque wrench.
Wheel nut tightening torque: 80 ft-lb (108 N·m)
The wheel nuts must be kept tightened
to specification at all times. It is
recommended that wheel nuts be tigh- tened to specifications at each lubrica-
tion interval.
.Adjust tire pressure to the COLD
pressure.
COLD pressure:
After the vehicle has been parked for
three hours or more or driven less than
1 mile (1.6 km) .
COLD tire pressures are shown on the
Tire and Loading Information label
affixed to the driver side center pillar.
Stowing the damaged tire and the tools
1. Securely store the damaged tire, jack and tools in the storage area.
2. Replace the luggage floor box.
3. Replace the lids on the luggage side boxes.
4. Close the luggage floor board.
5. Replace the cargo cover (if so equipped) .
6. Close the lift gate.
WARNING
. Always make sure that the spare tire
and jacking equipment are properly
secured after use. Such items can
become dangerous projectiles in an
Page 236 of 322
finish or leave swirl marks.
REMOVING SPOTS
Remove tar and oil spots, industrial dust,
insects, and tree sap as quickly as possible
from the paint surface to avoid lasting damage
or staining. Special cleaning products are
available at a NISSAN dealer or any automotive
accessory stores.
UNDERBODY
In areas where road salt is used in winter, the
underbody must be cleaned regularly. This will
prevent dirt and salt from building up and
causing the acceleration of corrosion on the
underbody and suspension. Before the winter
period and again in the spring, the underseal
must be checked and, if necessary, re-treated.
GLASS
Use glass cleaner to remove smoke and dust
film from the glass surfaces. It is normal for glass
to become coated with a film after the vehicle is
parked in the hot sun. Glass cleaner and a soft
cloth will easily remove this film.
CAUTION
When cleaning the inside of the win-
dows, do not use sharp-edged tools,
abrasive cleaners or chlorine-baseddisinfectant cleaners. They could da-
mage the electrical conductors, radio
antenna elements or rear window
defroster elements.
WHEELS
Wash the wheels when washing the vehicle to
maintain their appearance.
.
Clean the inner side of the wheels when the
wheel is changed or the underside of the
vehicle is washed.
. Inspect wheel rims regularly for dents or
corrosion. Such damage may cause loss of
pressure or poor seal at the tire bead.
. NISSAN recommends that the road wheels
be waxed to protect against road salt in
areas where it is used during winter.
CAUTION
Do not use abrasive cleaners when
washing the wheels.
Aluminum alloy wheels
Wash regularly with a sponge dampened in a
mild soap solution, especially during winter
months in areas where road salt is used. Salt
could discolor the wheels if not removed.
CAUTION
Follow the directions below to avoid
staining or discoloring the wheels:
.Do not use a cleaner that uses
strong acid or alkali contents to
clean the wheels.
. Do not apply wheel cleaners to the
wheels when they are hot. The
wheel temperature should be the
same as ambient temperature.
. Rinse the wheel to completely re-
move the cleaner within 15 minutes
after the cleaner is applied.
CHROME PARTS
Clean chrome parts regularly with a non-
abrasive chrome polish to maintain the finish.
Appearance and care7-3
Page 242 of 322
8 Maintenance and do-it-yourself
Maintenance requirement ........................................................ 8-2Scheduled maintenance .................................................... 8-2
General maintenance ......................................................... 8-2
Where to go for service .................................................... 8-2
General maintenance ............................................................... 8-2 Explanation of maintenance items ................................... 8-2
Maintenance precautions ........................................................ 8-5
Engine compartment check locations .................................. 8-6 QR25DE engine .................................................................. 8-6
Engine cooling system ............................................................. 8-7
Checking engine coolant level ......................................... 8-8
Changing engine coolant .................................................. 8-8
Engine oil ........................................................................\
............ 8-9
Checking engine oil level .................................................. 8-9
Changing engine oil and filter .......................................... 8-9
Continuously Variable Transmission (CVT) fluid ............ 8-11
Brake fluid ........................................................................\
........ 8-11
Window washer fluid ............................................................ 8-12
Battery ........................................................................\
............... 8-13 Jump starting ..................................................................... 8-14
Drive belts ........................................................................\
........ 8-14
Spark plugs ........................................................................\
..... 8-15 Replacing spark plugs .................................................... 8-15 Air cleaner ........................................................................\
....... 8-16
Windshield wiper blades ..................................................... 8-17
Cleaning ........................................................................\
... 8-17
Replacing ........................................................................\
. 8-17
Rear window wiper blade ................................................... 8-18
Brakes ........................................................................\
.............. 8-18
Self-adjusting brakes .................................................... 8-18
Brake pad wear indicators .......................................... 8-18
Fuses ........................................................................\
................ 8-19 Engine compartment ..................................................... 8-19
Passenger compartment .............................................. 8-20
Battery replacement .............................................................. 8-22 Key fob ........................................................................\
...... 8-22
Lights ........................................................................\
................ 8-24 Headlights ........................................................................\
8-24
Exterior and interior lights ............................................ 8-26
Wheels and tires ................................................................... 8-29 Tire pressure ................................................................... 8-29
Tire labeling ..................................................................... 8-31
Types of tires ................................................................... 8-33
Tire chains ....................................................................... 8-34
Changing wheels and tires .......................................... 8-35