2015 NISSAN ROGUE buttons
[x] Cancel search: buttonsPage 239 of 440
SEEK (Reverse or FastForward) buttons
Press and hold the
orseek buttons
for 1.5 seconds while the compact disc is playing
to reverse or fast forward the track being played.
The compact disc plays at an increased speed
while reversing or fast forwarding. When the but-
ton is released, the compact disc returns to nor-
mal play speed.
SEEK buttons
Press the
seek button while a CD or
MP3/WMA CD is playing to return to the begin-
ning of the current track. Press the
seek
button several times to skip backward several
tracks.
Press the
seek button while a CD or
MP3/WMA CD is playing to advance one track.
Press the
seek button several times to skip
forward several tracks. If the last track on a CD is
skipped, the first track on the disc is played. If the
last track in a folder of an MP3/WMA CD is
skipped, the first track of the next folder is played. AUX button
The AUX IN audio input jack accepts any stan-
dard analog audio input such as from a portable
cassette tape/CD player, MP3 player or a laptop
computer. Press the AUX button to play a com-
patible device plugged into the AUX IN jack.
CD EJECT button
When the
CD EJECT button is pressed
with a compact disc loaded, the compact disc
will eject and the last source will be played.
If the disc is not removed within 10 seconds, the
disc will reload.
Additional features
For additional information, refer to “iPod® player
operation with Navigation System”in this section.
For additional information, refer to “USB (Univer-
sal Serial Bus) Connection Port (models with
Navigation System)” in this section.
For additional information, refer to “Bluetooth®
streaming audio with Navigation System” in this
section.USB (Universal Serial Bus)
CONNECTION PORT (models
without Navigation System) (if so
equipped)
Connecting a device to the USB
Connection Port
WARNING
Do not connect, disconnect, or operate the
USB device while driving. Doing so can be
a distraction. If distracted you could lose
control of your vehicle and cause an acci-
dent or serious injury.
LHA2929
4-60Monitor, climate, audio, phone and voice recognition systems
Page 240 of 440
CAUTION
●To avoid damage and loss of function
when using a USB device, note the fol-
lowing precautions.
● Do not force the USB device into the
USB port. Inserting the USB device
tilted or up-side-down into the port may
damage the port. Make sure that the
USB device is connected correctly into
the USB port.
● Do not grab the USB port cover (if so
equipped) when pulling the USB device
out of the port. This could damage the
port and the cover.
● Do not leave the USB cable in a place
where it can be pulled unintentionally.
Pulling the cable may damage the port.
Refer to your device manufacturer’s owner infor-
mation regarding the proper use and care of the
device.
The USB connection port is located on the center
console beneath the heater and air conditioner
controls. Insert the USB device into the connec-
tion port. When a compatible storage device is plugged
into the connection port, compatible audio files
on the storage device can be played through the
vehicle’s audio system.
Audio file operation
MEDIA button
Place the ignition switch in the ON or ACC
position and press the MEDIA button to switch to
the USB input mode. If a CD is playing or another
audio source is plugged in through the AUX IN
jack located in the center console, the MEDIA
button toggles between the three sources.
Play information
Information about the audio files being played
can be displayed on the display screen of the
vehicle’s audio system. Depending on how the
audio files are encoded, information such as
Folder, Song and Artist will be displayed.
The track number and number of total tracks in
the folder are displayed on the screen as well.
SEEK•CAT/TRACK
(Reverse or Fast Forward)
button
Press and hold the
orSEEK•CAT/TRACK buttons for 1.5 seconds
while an audio file on the USB device is playing to
reverse or fast forward the track being played.
The track plays at an increased speed while
reversing or fast forwarding. When the button is
released, the audio file returns to normal play
speed.
SEEK/CAT and TRACK buttons
Press the SEEK/CAT button
while an au-
dio file on the USB device is playing to return to
the beginning of the current track. Press the
SEEK/CAT button
several times to skip
backward several tracks.
Press the SEEK/CAT button
while an au-
dio file on the USB device is playing to advance
one track. Press the SEEK/CAT button
several times to skip forward several tracks. If the
last track in a folder on the USB device is
skipped, the first track of the next folder is played.
Monitor, climate, audio, phone and voice recognition systems4-61
Page 243 of 440
SEEK/CAT and TRACKbuttons
Press the SEEK/CAT button
while an au-
dio file on the USB device is playing to return to
the beginning of the current track. Press the
SEEK/CAT button
several times to skip
backward several tracks.
Press the SEEK/CAT button
while an au-
dio file on the USB device is playing to advance
one track. Press the SEEK/CAT button
several times to skip forward several tracks. If the
last track in a folder on the USB device is
skipped, the first track of the next folder is played.
Random and repeat play mode
While files on a USB device are playing, the play
pattern can be altered so that songs are repeated
or played randomly.
Random
Touch the “Random” key to apply a random play
pattern to the USB device. When the Random
mode is active, the icon will illuminate. By touch-
ing the “Random” key again, the ”Random
Folder” key appears. By touching the “Random”
key once more, the “Random All” key appears. To
cancel Random mode, touch the “Random” key
until no icons are illuminated. Repeat
Touch the “Repeat” key to apply a repeat play
pattern to the USB device. When the Repeat
mode is active, the icon will illuminate. By touch-
ing the “Repeat” key again, the ”Repeat Track”
key appears. By touching the “Repeat” key once
more, the “Repeat Folder” key appears. . To can-
cel Repeat mode, touch the “Repeat” key until no
icons are illuminated.
iPod®* PLAYER OPERATION
WITHOUT NAVIGATION SYSTEM (if
so equipped)
Connecting iPod®
WARNING
Do not connect, disconnect, or operate the
USB device while driving. Doing so can be
a distraction. If distracted you could lose
control of your vehicle and cause an acci-
dent or serious injury.
LHA2929
4-64Monitor, climate, audio, phone and voice recognition systems
Page 245 of 440
Audio main operation
Place the ignition switch in the ACC or ON
position. Press the MEDIA button repeatedly to
switch to the iPod® mode.
If the system has been turned off while the iPod®
was playing, pressing the VOL/
control
knob will start the iPod®.
iPod® MENU button (if so equipped)
Press the iPod® MENU button while the iPod®
is connected to show the iPod® operation menu
on the audio display. Scroll through the menu list
using the TUNE/FOLDER control dial. Press
ENTER/SETTING button to select a menu item.
Items in the iPod® menu appear on the display in
the following order:
● Now playing
● Playlists
● Artists
● Albums
● Songs
● Podcasts
● Genres
● Composers
● Audiobooks ●
Shuffle songs
For additional information, refer to the iPod®
Owner’s Manual regarding each item.
SEEK/CAT and TRACK buttons
When theSEEK/CAT button orTRACK button is pressed for less than 1.5 sec-
onds while the iPod® is playing, the next track or
the beginning of the current track on the iPod®
will be played.
When the
SEEK/CAT button orTRACK button is pressed for more than 1.5 sec-
onds while the iPod® is playing, the iPod® will
play while fast forwarding or rewinding. When the
button is released, the iPod® will return to the
normal play speed.
REPEAT (RPT)
When the RPT button is pressed while a track is
being played, the play pattern can be changed as
follows:
Repeat Off →1 Track Repeat →All Repeat →
Repeat Off
1 Track Repeat: the current track will be re-
peated.
All Repeat: all songs in the current list are re-
peated.
Repeat Off: no repeat play pattern is applied. RANDOM (RDM)
When the RDM button is pressed while a track is
being played, the play pattern can be changed as
follows:
Shuffle Off
→Track Shuffle →Album Shuffle →
Shuffle Off
Track Shuffle: the tracks in the current list will be
played randomly.
Album Shuffle: the albums in the current list will
be played randomly.
Shuffle Off: no random play pattern is applied.BACK button
When the
BACK button is pressed, it re-
turns to the previous menu.
4-66Monitor, climate, audio, phone and voice recognition systems
Page 248 of 440
●Artists
● Albums
● Genres
● Songs
● Composers
● Audiobooks
● Podcasts
Shuffle and repeat play mode
While the iPod® is playing, the play pattern can
be altered so that songs are repeated or played
randomly.
Shuffle
Touch the “Shuffle” key to apply a random play
pattern to the iPod®. When the Shuffle mode is
active, the text is illuminated. Touching the
“Shuffle” key once more will display the “Shuffle
songs” key. To cancel Shuffle mode, touch the
“Shuffle” key again until the text is no longer
illuminated. Repeat
Touch the “Repeat” key to apply a repeat play
pattern to the iPod®. When the repeat mode is
active, the text is illuminated. Touching the “Re-
peat” key once more will display the “Repeat
song” key. To cancel Repeat mode, touch the
“Repeat” key again until the text is no longer
illuminated.
Seek buttons
Press the
orseek button to skip
backward or forward one track.
Press and hold the
orseek button
for 1.5 seconds while a track is playing to reverse
or fast forward the track being played. The track
plays at an increased speed while reversing or
fast forwarding. When the button is released, the
track returns to normal play speed. Scrolling menus
While navigating long lists of artists, albums or
songs in the music menu, it is possible to scroll
the list by the first character in the name. To
activate character indexing, touch and hold the
“A-Z” key in the upper right corner of the screen.
Turn the TUNE/SCROLL knob to choose the
number or letter to jump to in the list and then
press the ENTER/AUDIO button.
If no character is selected after 2 seconds, the
display returns to normal.LHA2279
Monitor, climate, audio, phone and voice recognition systems4-69
Page 259 of 440
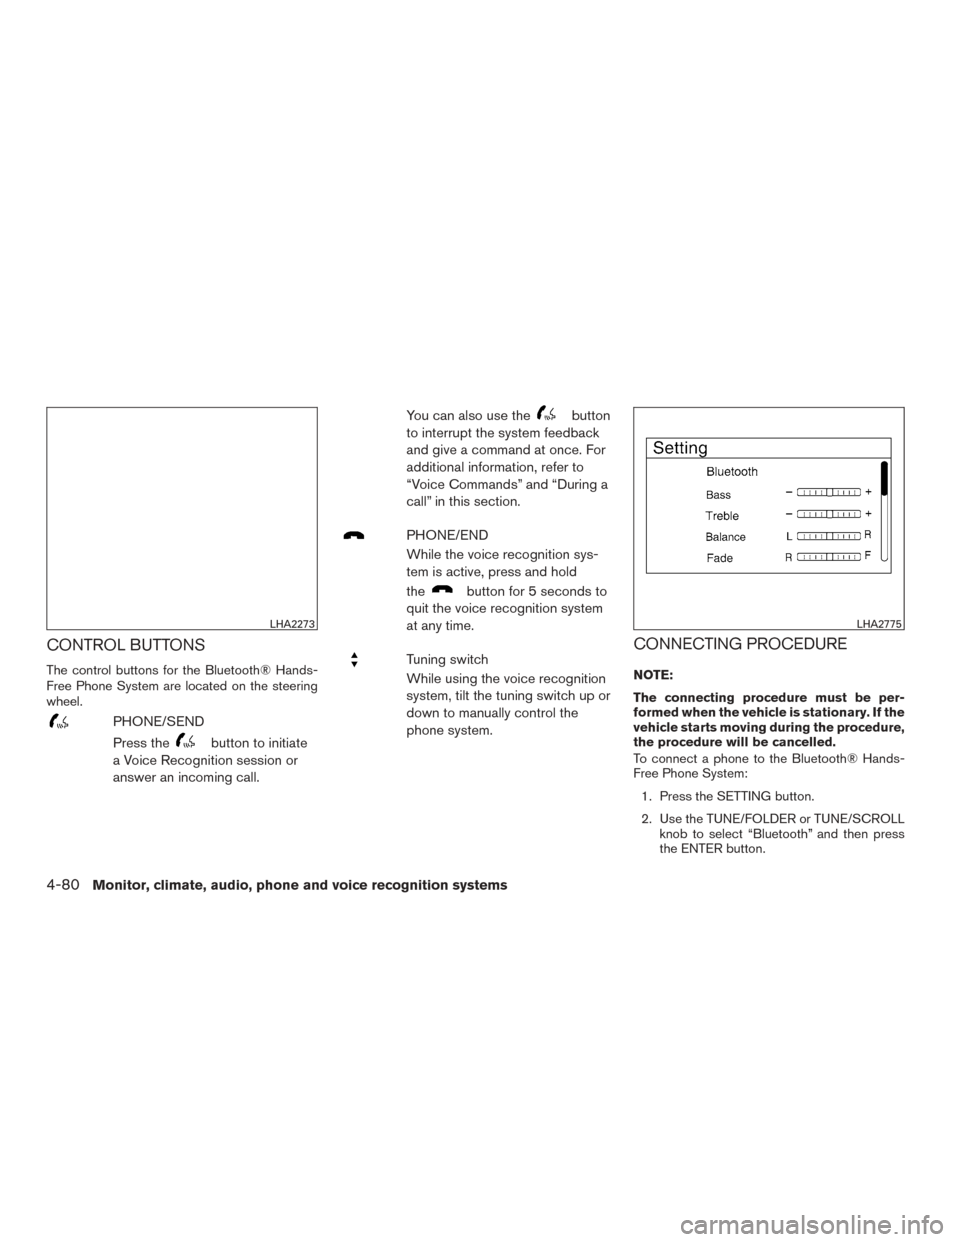
CONTROL BUTTONS
The control buttons for the Bluetooth® Hands-
Free Phone System are located on the steering
wheel.
PHONE/SEND
Press the
button to initiate
a Voice Recognition session or
answer an incoming call. You can also use the
button
to interrupt the system feedback
and give a command at once. For
additional information, refer to
“Voice Commands” and “During a
call” in this section.
PHONE/END
While the voice recognition sys-
tem is active, press and hold
the
button for 5 seconds to
quit the voice recognition system
at any time.
Tuning switch
While using the voice recognition
system, tilt the tuning switch up or
down to manually control the
phone system.CONNECTING PROCEDURE
NOTE:
The connecting procedure must be per-
formed when the vehicle is stationary. If the
vehicle starts moving during the procedure,
the procedure will be cancelled.
To connect a phone to the Bluetooth® Hands-
Free Phone System:
1. Press the SETTING button.
2. Use the TUNE/FOLDER or TUNE/SCROLL knob to select “Bluetooth” and then press
the ENTER button.
LHA2273LHA2775
4-80Monitor, climate, audio, phone and voice recognition systems
Page 306 of 440
1. Press thebutton until “Settings” dis-
plays in the vehicle information display. Use
the
to select “Driver Assistance”.
Then press the ENTER button.
2. Select “Driving Aids”, and press the ENTER button.
3. To set the BSW system to on or off, use the
buttons to navigate in the menu
and use the ENTER button to select or
change an item:
● Select “Blind Spot” and press the ENTER
button.
● To turn on the warning, use the ENTER
button to check box for “Warning (BSW)”
WARNING
● The camera unit may not be able to
detect when certain objects are present
such as:
– Pedestrians, bicycles, animals
– Some types of small vehicles such as motorcycles, and very short length
vehicles
– Oncoming vehicles – A vehicle approaching rapidly from
behind. For additional information,
refer to “BSW driving situations” in
this section.
– A vehicle which your vehicle over- takes rapidly. For additional informa-
tion, refer to “BSW driving situa-
tions” in this section.
– A vehicle that merges or changes lanes rapidly directly next to your
vehicle.
● The camera unit may not be able to
detect property when your vehicle trav-
els beside the middle section of a ve-
hicle with long wheelbase (e.g. trailer
truck, semi-trailer, tractor) .
● The camera detection zone is designed
based on a standard lane width. When
driving in a wider lane, the camera unit
may not detect vehicles in an adjacent
lane. When driving in a narrow lane, the
camera unit may detect vehicles driving
two lanes away. ●
The camera unit is designed to ignore
most stationary objects, however ob-
jects such as guardrails, walls, foliage
and parked vehicles may occasionally
be detected. This is a normal operating
condition.
● The camera unit may detect the re-
flected image of vehicles or roadside
objects that are not actually in the de-
tection zone, especially when the road
is wet.
BSW DRIVING SITUATIONS
Another vehicle approaching from
behind
Starting and driving5-25
Page 309 of 440
Turning on or off the LDW system
The LDW system is turned on or off using the
settings menu in the vehicle information display.
SYSTEM ON:
The LDW light on the instrument panel will light
up.
SYSTEM OFF:
The LDW light on the instrument panel will go
out.
Perform the following steps to enable or disable
the LDW system:1. Press the
button until “Settings” dis-
plays in the vehicle information display. Use
the
to select “Driver Assistance”.
Then press the ENTER button.
2. Select “Driving Aids”, and press the ENTER button.
3. To set the LDW system to on or off, use the
buttons to navigate in the menu
and use the ENTER button to select or
change an item:
● Select “Lane” and press the ENTER but-
ton.
● To turn on the warning, use the ENTER
button to check box for “Warning (LDW)”
WARNING
● The camera unit may not be able to
detect properly under the following
conditions:
– On roads where there are multiple parallel lane markers; lane markers
that are faded or not painted clearly;
yellow painted lane markers; non-
standard lane markers; or lane mark-
ers covered with water, dirt, snow,
etc.
– On roads where the discontinued lane markers are still detectable.
– On roads where there are sharp curves.
– On roads where there are sharply contrasting objects, such as shad-
ows, snow, water, wheel ruts, seams
or lines remaining after road repairs.
(The LDW system could detect these
items as lane markers.)
– On roads where the traveling lane merges or separates.
– When the vehicle’s traveling direc- tion does not align with the lane
marker. – When the road surface is very dark
due to weak ambient light or im-
paired tail lamp.
– When traveling close to the vehicle in front of you, which obstructs the lane
camera unit detection range.
– When rain, snow, dirt or object ad- heres to the windshield in front of the
lane camera unit.
– When the headlights are not bright due to dirt on the lens or if the aiming
is not adjusted properly.
– When strong light enters the lane camera unit. (For example, the light
directly shines on the front of the
vehicle at sunrise or sunset) .
– When a sudden change in brightness occurs. (For example, when the ve-
hicle enters or exits a tunnel or under
a bridge) .
5-28Starting and driving