Page 64 of 440

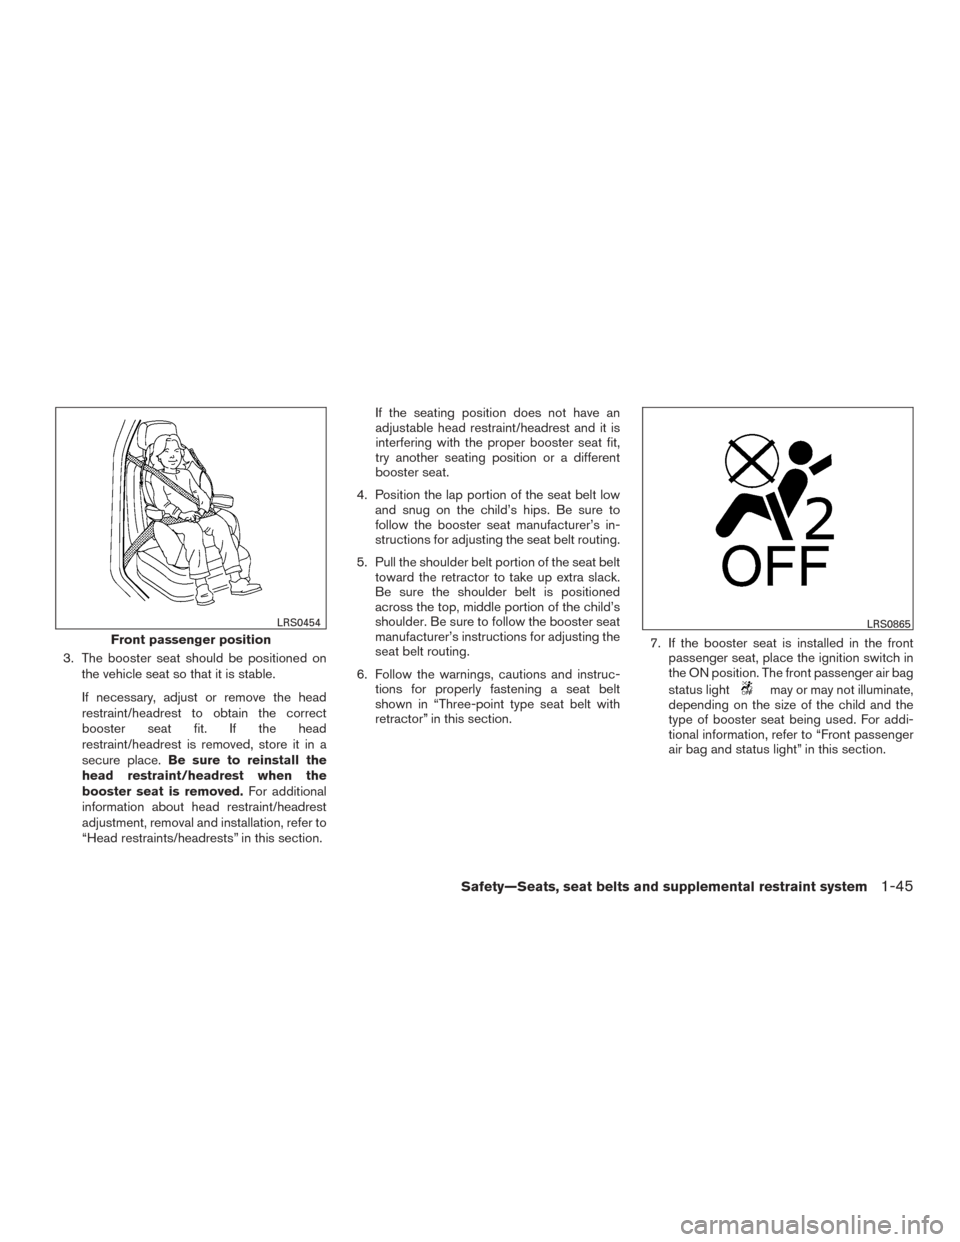
3. The booster seat should be positioned onthe vehicle seat so that it is stable.
If necessary, adjust or remove the head
restraint/headrest to obtain the correct
booster seat fit. If the head
restraint/headrest is removed, store it in a
secure place. Be sure to reinstall the
head restraint/headrest when the
booster seat is removed. For additional
information about head restraint/headrest
adjustment, removal and installation, refer to
“Head restraints/headrests” in this section. If the seating position does not have an
adjustable head restraint/headrest and it is
interfering with the proper booster seat fit,
try another seating position or a different
booster seat.
4. Position the lap portion of the seat belt low and snug on the child’s hips. Be sure to
follow the booster seat manufacturer’s in-
structions for adjusting the seat belt routing.
5. Pull the shoulder belt portion of the seat belt toward the retractor to take up extra slack.
Be sure the shoulder belt is positioned
across the top, middle portion of the child’s
shoulder. Be sure to follow the booster seat
manufacturer’s instructions for adjusting the
seat belt routing.
6. Follow the warnings, cautions and instruc- tions for properly fastening a seat belt
shown in “Three-point type seat belt with
retractor” in this section. 7. If the booster seat is installed in the front
passenger seat, place the ignition switch in
the ON position. The front passenger air bag
status light
may or may not illuminate,
depending on the size of the child and the
type of booster seat being used. For addi-
tional information, refer to “Front passenger
air bag and status light” in this section.
Front passenger position
LRS0454LRS0865
Safety—Seats, seat belts and supplemental restraint system1-45
Page 124 of 440

The front seats are warmed by built-in heaters.1. Start the engine.
2. Push the LO or HI position of the switch, as desired. The indicator light in the switch will
illuminate.
The heater is controlled by a thermostat,
automatically turning the heater on and off.
The indicator light will remain on as long as
the switch is on.
3. When the seat is warmed or before you leave the vehicle, be sure to turn the switch
off.
WARNING
Do not use or allow occupants to use the
seat heater if you or the occupants cannot
monitor elevated seat temperatures or
have an inability to feel pain in body parts
that contact the seat. Use of the seat
heater by such people could result in seri-
ous injury.
CAUTION
●The battery could run down if the seat
heater is operated while the engine is
not running.
● Do not use the seat heater for extended
periods or when no one is using the
seat.
● Do not put anything on the seat which
insulates heat, such as a blanket, cush-
ion, seat cover, etc. Otherwise, the seat
may become overheated.
● Do not place anything hard or heavy on
the seat or pierce it with a pin or similar
object. This may result in damage to the
heater.
● Any liquid spilled on the heated seat
should be removed immediately with a
dry cloth. ●
When cleaning the seat, never use
gasoline, benzine, thinner, or any simi-
lar materials.
● If any malfunctions are found or the
heated seat does not operate, turn the
switch off and have the system checked
by a NISSAN dealer.
LIC2670
HEATED SEATS (if so equipped)
Instruments and controls2-39
Page 172 of 440

LIFTGATE RELEASE
WARNING
●Always be sure the liftgate has been
closed securely to prevent it from open-
ing while driving.
● Do not drive with the liftgate open. This
could allow dangerous exhaust gases
to be drawn into the vehicle. For addi-
tional information, refer to “Exhaust
gas (carbon monoxide)” in the “Starting
and driving” section of this manual.
●
To avoid personal injury, do not attempt
to activate the power liftgate if one or
both of the liftgate gas stays are removed.
CAUTION
●If the power liftgate does not stay open or
if the liftgate unexpectedly closes at any
time while a continuous warning chime
sounds, do not operate the liftgate. There
may be a pressure loss in one or both of
the liftgate gas stays. Have the liftgate
inspected by a NISSAN dealer.
● Do not activate the power liftgate if one
or both of the liftgate gas stays are
removed. Damage to the liftgate or
power liftgate mechanisms may occur.
Liftgate release (manual and power)
The liftgate release mechanism allows the liftgate
to be opened in the event of a discharged battery.
To release the liftgate from the inside of the
vehicle, perform the following operations:
1. Fold the rear seats down. For additional information, refer to “Folding 3rd row bench
(if so equipped)” in the “Safety — seats, seat
belts and supplemental restraint system”
section of this manual.
2. Insert a suitable tool in the access opening. Move the release lever to the right. The lift-
gate will be unlatched. 3. Push the liftgate up to open.
NOTE:
If you had to open the liftgate using this
lever, have your vehicle checked by a
NISSAN dealer as soon as possible.
LIFTGATE POSITION SETTING
The liftgate can be set to open to a specific height
by performing the following: 1. Open the liftgate using the request switch or the Intelligent Key.
2. Pull the liftgate down to the desired position and hold the liftgate (the liftgate will have
some resistance when being manually ad-
justed) .
3. While holding the liftgate in position, press and hold the liftgate switch
located
on the liftgate for approximately 5 seconds
or until three beeps are heard.
The liftgate will open to the selected position
setting. To change the position of the liftgate,
repeat Steps 1-3 for setting the position of the
liftgate.
LPD2202
Pre-driving checks and adjustments3-29
Page 355 of 440

Occasionally remove loose dust from the interior
trim, plastic parts and seats using a vacuum
cleaner or soft bristled brush. Wipe the vinyl and
leather surfaces with a clean, soft cloth damp-
ened in mild soap solution, then wipe clean with a
dry, soft cloth.
Regular care and cleaning is required in order to
maintain the appearance of the leather.
Before using any fabric protector, read the manu-
facturer’s recommendations. Some fabric pro-
tectors contain chemicals that may stain or
bleach the seat material.
Use a cloth dampened only with water to clean
the meter and gauge lens.
WARNING
Do not use water or acidic cleaners (hot
steam cleaners) on the seat. This can dam-
age the seat or occupant classification
sensor. This can also affect the operation
of the air bag system and result in serious
personal injury.
CAUTION
●Never use benzine, thinner or any simi-
lar material.
● Small dirt particles can be abrasive and
damaging to leather surfaces and
should be removed promptly. Do not
use saddle soap, car waxes, polishes,
oils, cleaning fluids, solvents, deter-
gents or ammonia-based cleaners as
they may damage the leather’s natural
finish.
● Never use fabric protectors unless rec-
ommended by the manufacturer.
● Do not use glass or plastic cleaner on
meter or gauge lens covers. It may dam-
age the lens cover.
AIR FRESHENERS
Most air fresheners use a solvent that could affect
the vehicle interior. If you use an air freshener,
take the following precautions:
● Hanging-type air fresheners can cause per-
manent discoloration when they contact ve-
hicle interior surfaces. Place the air fresh-
ener in a location that allows it to hang free
and not contact an interior surface. ●
Liquid-type air fresheners typically clip on
the vents. These products can cause imme-
diate damage and discoloration when
spilled on interior surfaces.
Carefully read and follow the manufacturer’s in-
structions before using the air fresheners.
FLOOR MATS
WARNING
To avoid potential pedal interference that
may result in a collision or injury:
● NEVER place a floor mat on top of an-
other floor mat in the driver front
position.
● Use only Genuine NISSAN floor mats
specifically designed for use in your ve-
hicle model. For additional information,
see a NISSAN dealer.
● Properly position the mats in the floor-
well using the floor mat positioning aid.
For additional information, refer to
�Floor mat positioning aid� in this
section.
CLEANING INTERIOR
7-4Appearance and care
Page:
< prev 1-8 9-16 17-24