Page 227 of 370

∙ Make sure the area around the vehicle isclear.
∙ Check fluid levels such as engine oil, coolant, brake fluid, and windshield-
washer fluid as frequently as possible,
or at least whenever you refuel.
∙ Check that all windows and lights are clean.
∙ Visually inspect tires for their appear- ance and condition. Also check tires for
proper inflation.
∙ Check that all doors are closed.
∙ Position seat and adjust head restraints/headrests.
∙ Adjust inside and outside mirrors.
∙ Fasten seat belts and ask all passen- gers to do likewise.
∙ Check the operation of warning lights when the ignition switch is placed in the
ON position. For additional information,
refer to “Warning lights, indicator lights
and audible reminders” in the “Instru-
ments and controls” section of this
manual. 1. Apply the parking brake.
2. Move the shif t lever to P (Park) or N
(Neutral). P (Park) is recommended.
The shif t lever cannot be moved out
of P (Park) and into any of the other
gear positions if the ignition switch
is turned to the OFF position or if the
key is removed from the ignition
switch.
The starter is designed not to oper-
ate if the shif t lever is in any of the
driving positions.
3. Crank the engine with your foot off
the accelerator pedal by placing the
ignition switch in the START position.
Release the key when the engine
starts. If the engine starts, but fails to
run, repeat the above procedure.
∙ If the engine is very hard to start in extremely cold weather or when re-
starting, depress the accelerator
pedal a little (approximately 1/3 to the
floor) and hold it and then crank the
engine. Release the key and the ac-
celerator pedal when the engine
starts.
∙ If the engine is very hard to start be- cause it is flooded, depress the accel- erator pedal all the way to the floor
and hold it. Crank the engine for
5–6 seconds. Af ter cranking the en-
gine, release the accelerator pedal.
Crank the engine
with your foot off
the accelerator pedal by turning the
ignition key to the START position. Re-
lease the key when the engine starts.
If the engine starts, but fails to run,
repeat the above procedure.
Page 239 of 370

WARNING
∙ Do not stop or park the vehicle overflammable materials such as dry
grass, waste paper or rags. They may
ignite and cause a fire. ∙ Safe parking procedures require that
both the parking brake be set and the
transmission placed into P (Park). Fail-
ure to do so could cause the vehicle to
move unexpectedly or roll away and
result in an accident. Make sure the
shif t lever has been pushed as far for-
ward as it can go and cannot be
moved without depressing the foot
brake pedal.
∙ Never leave the engine running while the vehicle is unattended. ∙ To help avoid risk of injury or death
through unintended operation of the
vehicle and/or its systems, do not
leave children, people who require the
assistance of others or pets unat-
tended in your vehicle. Additionally,
the temperature inside a closed ve-
hicle on a warm day can quickly be-
come high enough to cause a signifi-
cant risk of injury or death to people
and pets.
1. Firmly apply the parking brake.
2. Move the shif t lever to the P (Park) po- sition.
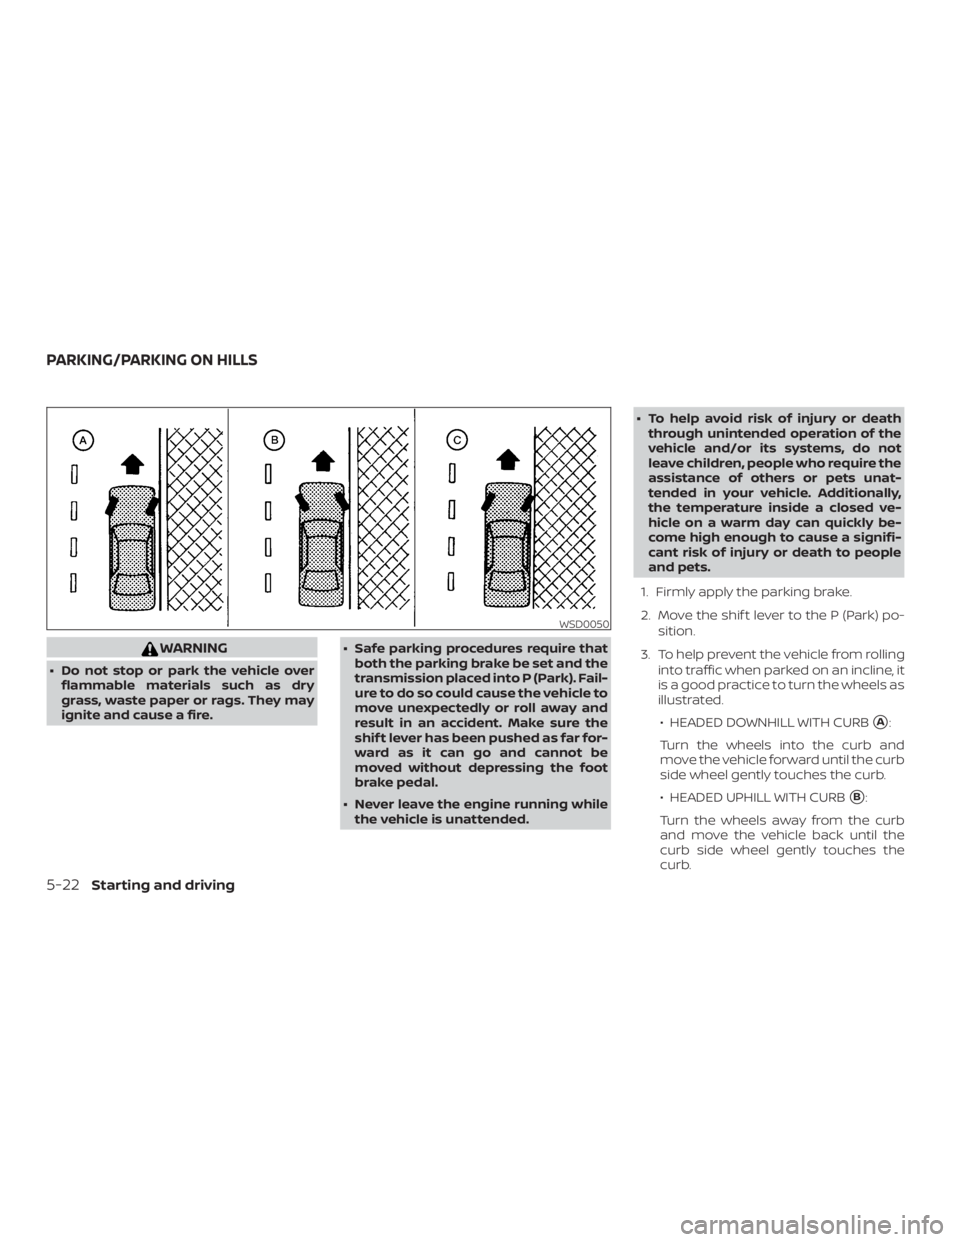
3. To help prevent the vehicle from rolling into traffic when parked on an incline, it
is a good practice to turn the wheels as
illustrated.
∙ HEADED DOWNHILL WITH CURB
�A:
Turn the wheels into the curb and
move the vehicle forward until the curb
side wheel gently touches the curb.
∙ HEADED UPHILL WITH CURB
�B:
Turn the wheels away from the curb
and move the vehicle back until the
curb side wheel gently touches the
curb.
Page 256 of 370

∙ If the low tire pressure warning lightilluminates while driving, avoid sud-
den steering maneuvers or abrupt
braking, reduce vehicle speed, pull off
the road to a safe location and stop
the vehicle as soon as possible. Driv-
ing with under-inflated tires may per-
manently damage the tires and in-
crease the likelihood of tire failure.
Serious vehicle damage could occur
and may lead to an accident and could
result in serious personal injury.
Check the tire pressure for all four
tires. Adjust the tire pressure to the
recommended COLD tire pressure
shown on the Tire and Loading Infor-
mation label to turn the low tire pres-
sure warning light OFF. If you have a
flat tire, replace it with a spare tire as
soon as possible.
∙ When replacing a wheel without TPMS such as the spare tire, the TPMS will
not function and the low tire pressure
warning light will flash for approxi-
mately 1 minute. The light will remain
on af ter 1 minute. Have your tires re-
placed and/or TPMS system reset as
soon as possible. It is recommended
that you visit a NISSAN dealer for
these services. ∙ Replacing tires with those not origi-
nally specified by NISSAN could affect
the proper operation of the TPMS.
∙ Do not inject any tire liquid or aerosol tire sealant into the tires, as this may
cause a malfunction of the tire pres-
sure sensors.
CHANGING A FLAT TIRE
If you have a flat tire, follow the instructions
below:
Stopping the vehicle
1. Safely move the vehicle off the road and
away from traffic.
2. Turn on the hazard warning flashers.
3. Park on a level surface and apply the parking brake. Move the shif t lever to P
(Park).
4. Turn off the engine.
5. Raise the hood to warn other traffic and to signal professional road assis-
tance personnel that you need assis-
tance.
6. Have all passengers get out of the ve- hicle and stand in a safe place, away
from traffic and clear of the vehicle.
Page 264 of 370
WARNING
Always follow the instructions below.
Failure to do so could result in damage
to the charging system and cause per-
sonal injury.1. If the booster battery is in another ve- hicle, position the two vehicles to bring
their batteries near each other.
Do not allow the two vehicles to
touch. 2. Apply the parking brake. Move the shif t
lever to P (Park). Switch off all unneces-
sary electrical systems (lights, heater,
air conditioner, etc.).
3. Ensure the vent caps are level and tight.
4. Connect jumper cables in the se- quence illustrated (
�A,�B,�C,�D).
Page 275 of 370

When installing Genuine NISSAN floor mats,
follow the installation instructions provided
with the mat and the following:1. With the ignition in the OFF position, the shif t lever in P (Park) position and with
the parking brake fully applied, position
the floor mat in the floorwell so that the
floor mat grommet holes are aligned
with the hook(s).
2. Secure the grommet holes into the hook(s) and ensure that the floor mat is
properly positioned.
3. Make sure the floor mat does not inter- fere with pedal operation. With the igni-
tion still in the OFF position, the shif t
lever in the P (Park) position and with
the parking brake applied, fully apply
and release all pedals. The floor mat
must not interfere with pedal opera-
tion or prevent the pedal from return-
ing to its normal position.
It is recommended that you visit a NISSAN
dealer for details about installing the floor
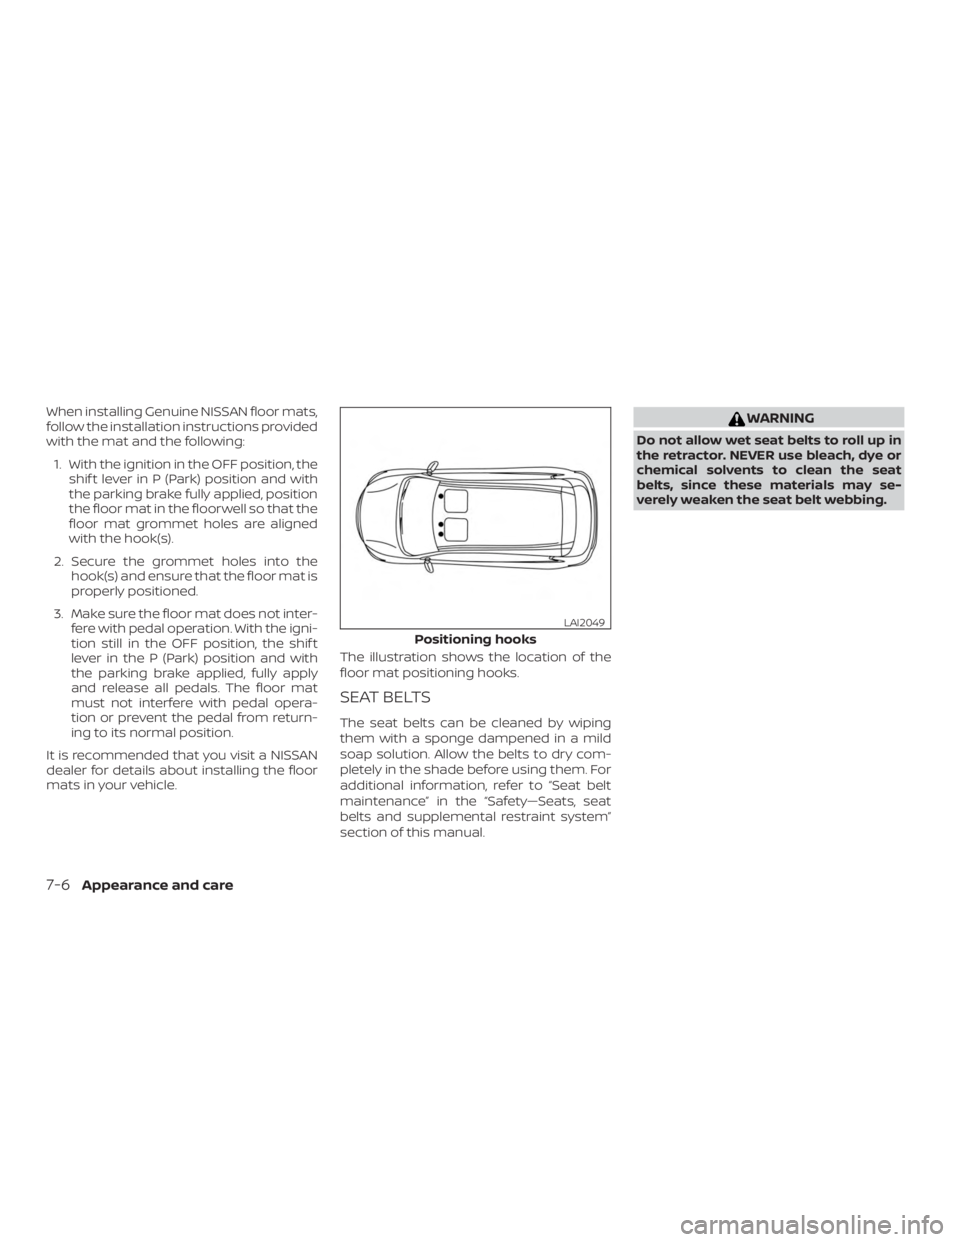
mats in your vehicle. The illustration shows the location of the
floor mat positioning hooks.
SEAT BELTS
The seat belts can be cleaned by wiping
them with a sponge dampened in a mild
soap solution. Allow the belts to dry com-
pletely in the shade before using them. For
additional information, refer to “Seat belt
maintenance” in the “Safety—Seats, seat
belts and supplemental restraint system”
section of this manual.
Page 284 of 370
CHECKING ENGINE OIL LEVEL
1. Park the vehicle on a level surface andapply the parking brake.
2. Start the engine and let it idle until it reaches operating temperature.
3. Turn off the engine. Wait more than
10 minutes for the oil to drain back
into the oil pan.
4. Remove the dipstick and wipe it clean. Reinsert it all the way. 5. Remove the dipstick again and check
the oil level. It should be between the H
(High) and L (Low) marks�B. This is the
normal operating oil level range. If the
oil level is below the L (Low) mark
�A,
remove the oil filler cap and pour rec-
ommended oil through the opening.
Do not overfill
�C.
6. Recheck oil level with the dipstick.
It is normal to add some oil between oil
maintenance intervals or during the
break-in period, depending on the sever-
ity of operating conditions.
Page 285 of 370
CHANGING ENGINE OIL
1. Park the vehicle on a level surface andapply the parking brake. 2. Start the engine and let it idle until it
reaches operating temperature, then
turn it off.
3. Remove the oil filler cap
�Bby turning it
counterclockwise.
4. Place a large drain pan under the drain plug
�A.
5. Remove the drain plug
�Awith a
wrench by turning it counterclockwise
and completely drain the oil.
If the oil filter is to be changed, remove
and replace it at this time. For addi-
tional information, refer to “Changing
engine oil filter” in this section.
∙ Waste oil must be disposed of prop-
erly.
∙ Check your local regulations.
Page 286 of 370
8. Start the engine. Check for leakagearound the drain plug and oil filter. Cor-
rect as required.
9. Turn the engine off and wait more than 10 minutes. Check the oil level with the
dipstick. Add engine oil if necessary.
CHANGING ENGINE OIL FILTER
1. Park the vehicle on a level surface and
apply the parking brake.
2. Turn the engine off. 3. Place a large drain pan under the oil
filter
�B.
4. Loosen the oil filter with an oil filter wrench by turning it counterclockwise.
Then remove the oil filter by turning it
by hand.