Page 96 of 424
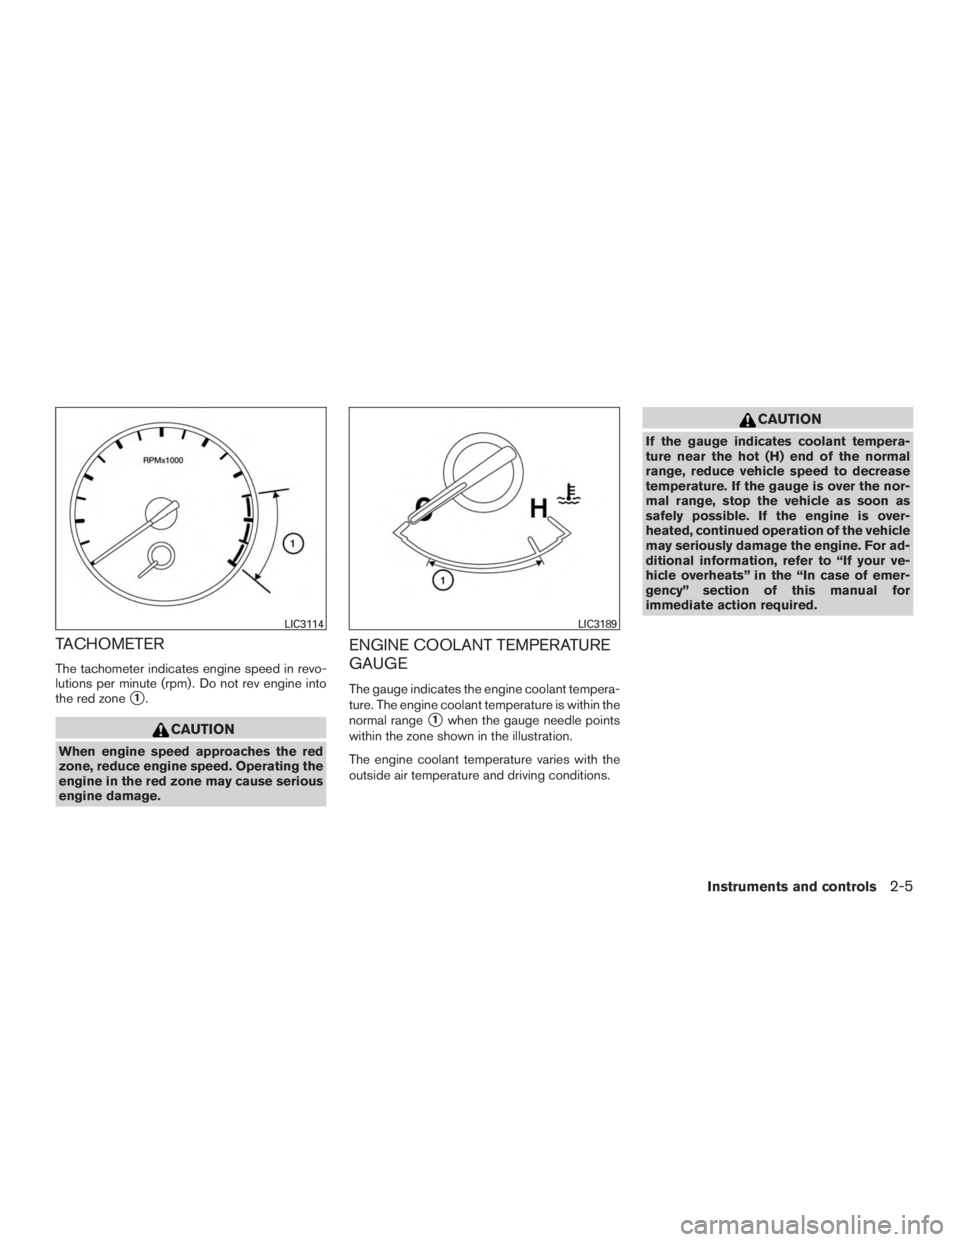
TACHOMETER
The tachometer indicates engine speed in revo-
lutions per minute (rpm) . Do not rev engine into
the red zone
�1.
Page 100 of 424
pull off the road in a safe area, stop the engine
immediatelyand call a NISSAN dealer or other
authorized repair shop.
The engine oil pressure warning light is not
designed to indicate a low oil level. Use the
dipstick to check the oil level. For additional in-
formation, refer to “Engine oil” in the “Mainte-
nance and do-it-yourself” section of this manual.
Page 109 of 424
select ”Locking” then “Selective Unlock”. Use the
OK button to toggle between on and off. When
“ON” is highlighted, “Selective Unlock” is turned
on. When “ON” is greyed-out, this item is turned
off.
Wipers
The speed dependent feature can be set to be
ON or OFF. From the Wipers menu, select
“Speed Dependent”. Use the OK button to turn
this feature ON or OFF.
Driving Position (if so equipped)
The driving position has two features that can be
set to be ON or OFF. From the Driving position
menu, select “Exit Seat Slide” or “Exit Steering
Up”. Use the OK button to turn this feature ON or
OFF.
Remote engine start (if so equipped)
The remote engine start feature can be set to be
ON or OFF. From the Remote engine start menu,
use the OK button to turn this feature ON or OFF.Maintenance
The maintenance mode allows you to set alerts
for the reminding of maintenance intervals. To
change an item:1. Push the
Page 121 of 424
To defrost the rear window glass and outside
mirrors (if so equipped) , start the engine and
push the rear window defroster switch on. The
rear window defroster indicator light on the
switch comes on. Push the switch again to turn
the defroster off.
The rear window defroster automatically turns off
after approximately 15 minutes.
Page 122 of 424

CAUTION
Use the headlights only with the engine
running to avoid discharging the vehicle
battery.
Autolight system
The autolight system allows the headlights to turn
on and off automatically. The autolight system
can:● Turn on the headlights, front parking, tail,
license plate and instrument panel lights au-
tomatically when it is dark.
● Turn off all the lights (except daylight running
lights) when it is light.
● Keep all the lights on for a period of time after
you place the ignition switch in the OFF
position and all doors are closed. NOTE:
Autolight activation sensitivity and the time
delay for autolight shutoff can be adjusted.
For additional information, refer to “Ve-
hicle information display” in this section.
To turn on the autolight system:
1. Turn the headlight switch to the AUTO posi- tion
�1.
2. Turn the ignition switch to ON.
3. The autolight system automatically turns the headlights on and off.
Initially, if the ignition switch is turned OFF and a
door is opened and left open, the headlights
remain ON for a period of time. If another door is
opened while the headlights are on, then the
timer is reset.
To turn the autolight system off, turn the switch to
the OFF,
Page 123 of 424
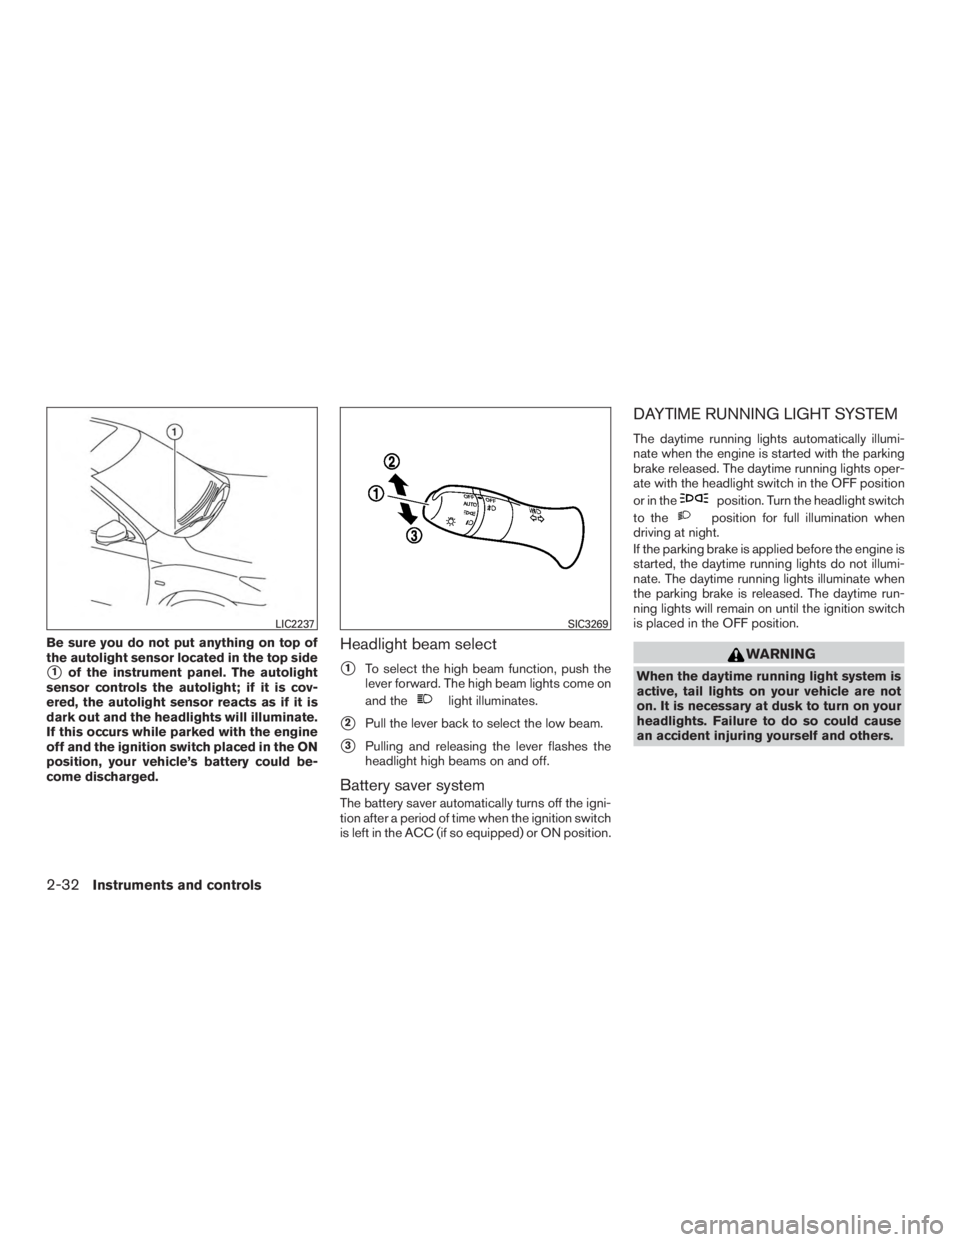
Be sure you do not put anything on top of
the autolight sensor located in the top side
�1of the instrument panel. The autolight
sensor controls the autolight; if it is cov-
ered, the autolight sensor reacts as if it is
dark out and the headlights will illuminate.
If this occurs while parked with the engine
off and the ignition switch placed in the ON
position, your vehicle’s battery could be-
come discharged.
Headlight beam select
�1To select the high beam function, push the
lever forward. The high beam lights come on
and the
Page 126 of 424
NOTE:
If the surface temperature of the steering
wheel is above 68°F (20°C) when the switch
is turned on, the system will not heat the
steering wheel. This is not a malfunction.The front seats are warmed by built-in heaters.1. Start the engine.
2. Push the LO or HI position of the switch, as desired. The indicator light in the switch will
illuminate.
The heater is controlled by a thermostat,
automatically turning the heater on and off.
The indicator light will remain on as long as
the switch is on.
3. When the seat is warmed or before you leave the vehicle, be sure to turn the switch
off.
Page 143 of 424

WARNING
●Do not use the HomeLink® Universal
Transceiver with any garage door
opener that lacks safety stop and re-
verse features as required by federal
safety standards. (These standards be-
came effective for opener models
manufactured after April 1, 1982) . A ga-
rage door opener which cannot detect
an object in the path of a closing garage
door and then automatically stop and
reverse, does not meet current federal
safety standards. Using a garage door
opener without these features in-
creases the risk of serious injury or
death.
● During the programming procedure
your garage door or security gate will
open and close (if the transmitter is
within range) . Make sure that people or
objects are clear of the garage door,
gate, etc. that you are programming.
● Your vehicle’s engine should be turned
off while programming the HomeLink®
Universal Transceiver.
PROGRAMMING HOMELINK®
If you have any questions or are having difficulty
programming your HomeLink® buttons, refer to
the HomeLink® web site at: www.homelink.com
or call 1-800-355-3515.
NOTE:
Place the ignition switch in the ACC posi-
tion (if so equipped) when programming
HomeLink®. It is also recommended that a
new battery be placed in the hand-held
transmitter of the device being pro-
grammed to HomeLink® for quicker pro-
gramming and accurate transmission of
the radio-frequency.
1. Position the end of your hand-held transmit- ter 1–3 in (2–8 cm) away from the
HomeLink® surface, keeping the
HomeLink® indicator light
�1in view. 2. Using both hands, simultaneously press and
hold the desired HomeLink® button and
hand-held transmitter button. DO NOT re-
lease until the HomeLink® indicator light
�1
flashes slowly and then rapidly. When the
indicator light flashes rapidly, both buttons
may be released. (The rapid flashing indi-
cates successful programming.)
NOTE:
Some devices may require you to replace
Step 2 with the cycling procedure noted in
“Programming HomeLink® for Canadian
customers and gate openers” in this sec-
tion.


 , start the engine and
push the rear window defroster switch on. The
rear window defroster indicator light on the
switch comes on.")
 when the switch
is turned on, the system will not heat the
steering wheel. This is not a malfunction.The front seats are w")