Page 104 of 424
Operation
The MIL will come on in one of two ways:● MIL on steady — An emission control system
malfunction has been detected. Check the
fuel-filler cap if the LOOSE FUEL CAP
warning appears in the vehicle information
display. If the fuel-filler cap is loose or miss-
ing, tighten or install the cap and continue to
drive the vehicle. The
Page 120 of 424
WARNING
In freezing temperatures the washer solu-
tion may freeze on the window and ob-
scure your vision. Warm the rear window
with the defroster before you wash the
rear window.
Page 143 of 424

WARNING
●Do not use the HomeLink® Universal
Transceiver with any garage door
opener that lacks safety stop and re-
verse features as required by federal
safety standards. (These standards be-
came effective for opener models
manufactured after April 1, 1982) . A ga-
rage door opener which cannot detect
an object in the path of a closing garage
door and then automatically stop and
reverse, does not meet current federal
safety standards. Using a garage door
opener without these features in-
creases the risk of serious injury or
death.
● During the programming procedure
your garage door or security gate will
open and close (if the transmitter is
within range) . Make sure that people or
objects are clear of the garage door,
gate, etc. that you are programming.
● Your vehicle’s engine should be turned
off while programming the HomeLink®
Universal Transceiver.
PROGRAMMING HOMELINK®
If you have any questions or are having difficulty
programming your HomeLink® buttons, refer to
the HomeLink® web site at: www.homelink.com
or call 1-800-355-3515.
NOTE:
Place the ignition switch in the ACC posi-
tion (if so equipped) when programming
HomeLink®. It is also recommended that a
new battery be placed in the hand-held
transmitter of the device being pro-
grammed to HomeLink® for quicker pro-
gramming and accurate transmission of
the radio-frequency.
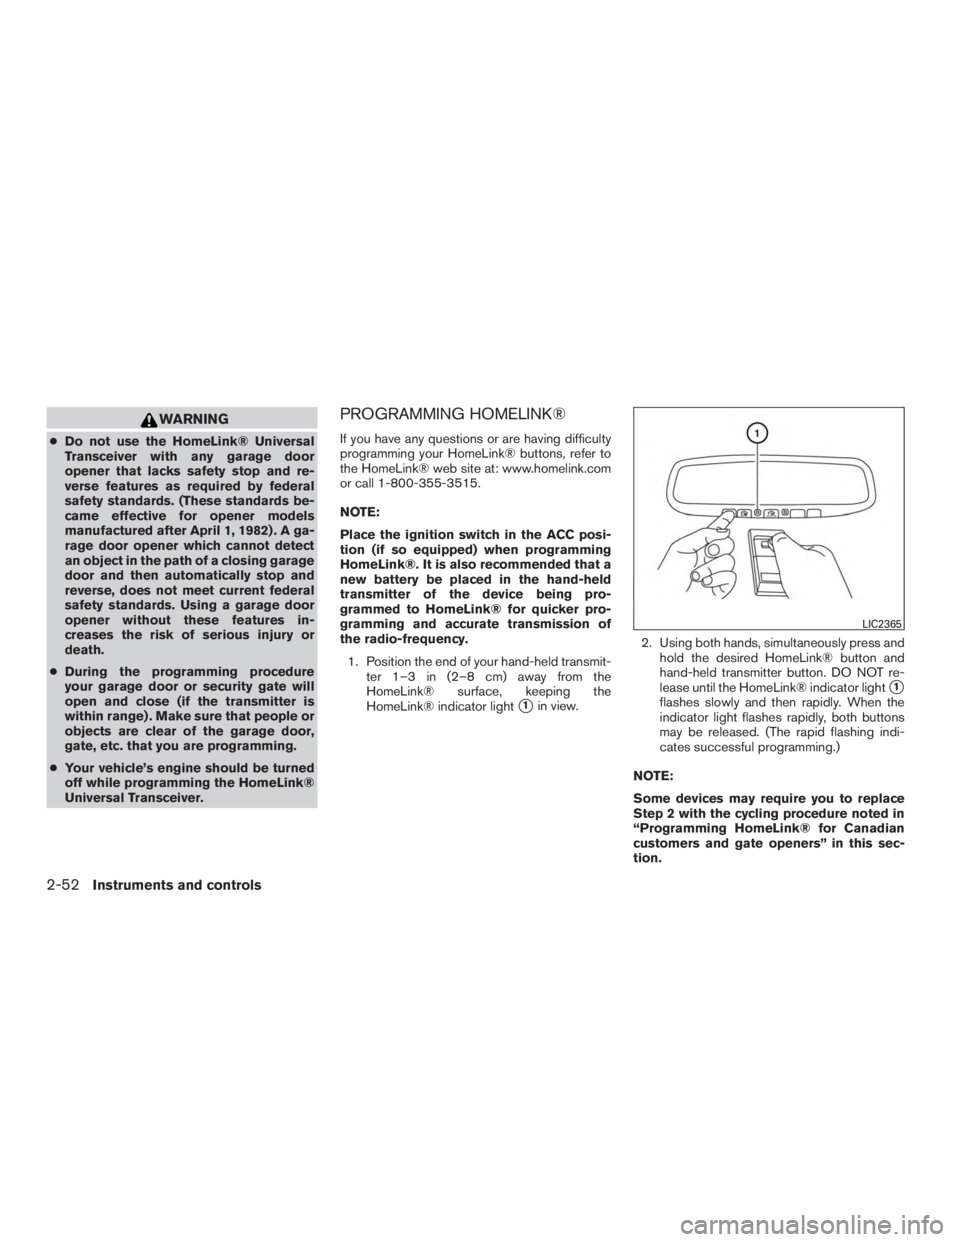
1. Position the end of your hand-held transmit- ter 1–3 in (2–8 cm) away from the
HomeLink® surface, keeping the
HomeLink® indicator light
�1in view. 2. Using both hands, simultaneously press and
hold the desired HomeLink® button and
hand-held transmitter button. DO NOT re-
lease until the HomeLink® indicator light
�1
flashes slowly and then rapidly. When the
indicator light flashes rapidly, both buttons
may be released. (The rapid flashing indi-
cates successful programming.)
NOTE:
Some devices may require you to replace
Step 2 with the cycling procedure noted in
“Programming HomeLink® for Canadian
customers and gate openers” in this sec-
tion.
Page 157 of 424

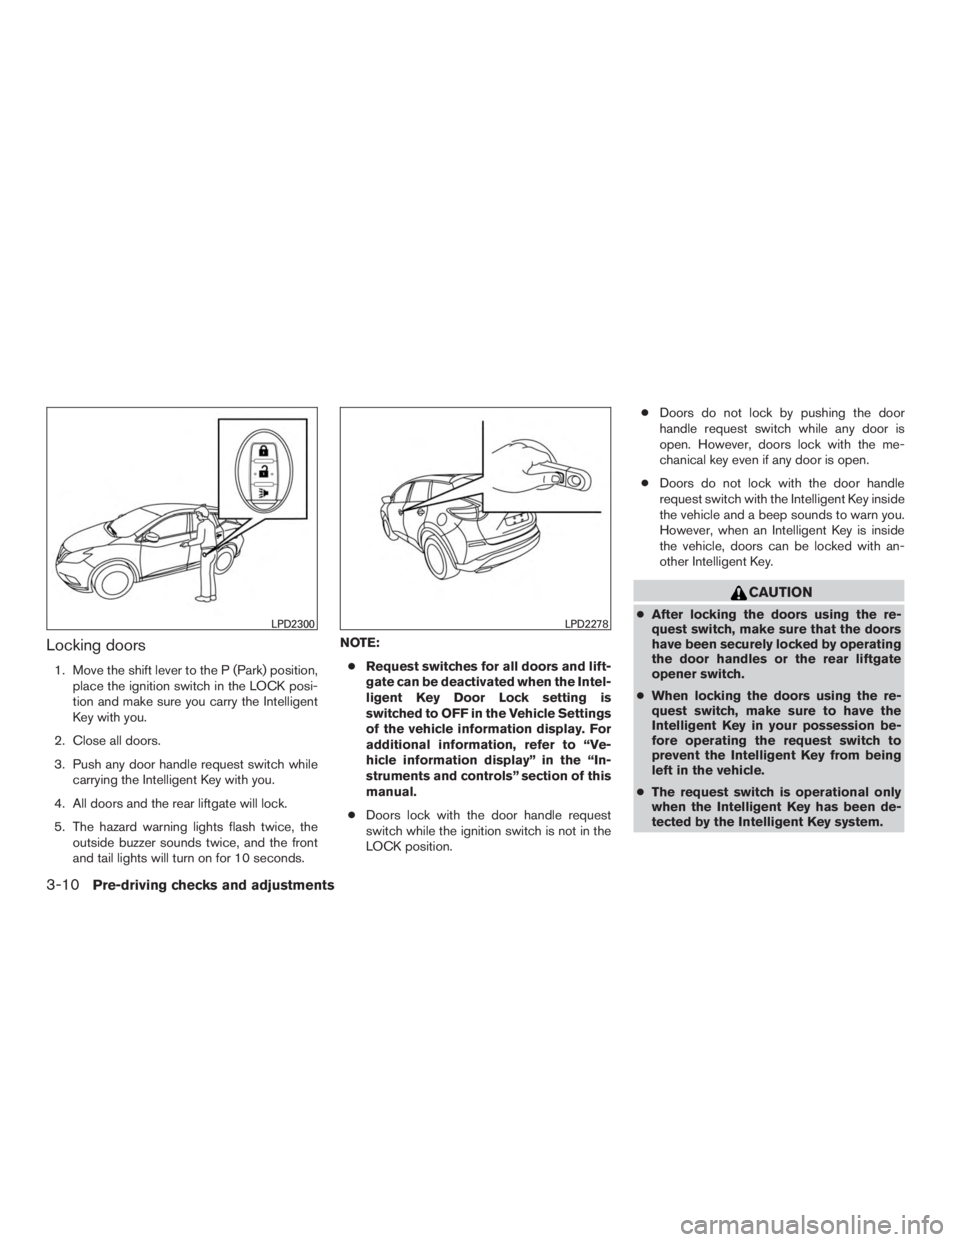
Locking doors
1. Move the shift lever to the P (Park) position,place the ignition switch in the LOCK posi-
tion and make sure you carry the Intelligent
Key with you.
2. Close all doors.
3. Push any door handle request switch while carrying the Intelligent Key with you.
4. All doors and the rear liftgate will lock.
5. The hazard warning lights flash twice, the outside buzzer sounds twice, and the front
and tail lights will turn on for 10 seconds. NOTE:
● Request switches for all doors and lift-
gate can be deactivated when the Intel-
ligent Key Door Lock setting is
switched to OFF in the Vehicle Settings
of the vehicle information display. For
additional information, refer to “Ve-
hicle information display” in the “In-
struments and controls” section of this
manual.
● Doors lock with the door handle request
switch while the ignition switch is not in the
LOCK position. ●
Doors do not lock by pushing the door
handle request switch while any door is
open. However, doors lock with the me-
chanical key even if any door is open.
● Doors do not lock with the door handle
request switch with the Intelligent Key inside
the vehicle and a beep sounds to warn you.
However, when an Intelligent Key is inside
the vehicle, doors can be locked with an-
other Intelligent Key.
Page 176 of 424
LOOSE FUEL CAP warning
The LOOSE FUEL CAP warning message ap-
pears in the vehicle information display when the
fuel-filler cap is not tightened correctly after the
vehicle has been refueled. It may take a few
driving trips for the message to be displayed. To
turn off the warning message, perform the follow-
ing:1. Remove and install the fuel-filler cap as soon as possible. For additional information, refer
to “Fuel-filler cap” in this section.
2. Tighten the fuel-filler cap until it clicks. 3. Press the
Page 187 of 424
WARNING
●Positioning of the heating or air condi-
tioning controls and display controls
should not be done while driving in or-
der that full attention may be given to
the driving operation.
● Do not disassemble or modify this sys-
tem. If you do, it may result in accidents,
fire, or electrical shock.
● Do not use this system if you notice any
abnormality, such as a frozen screen or
lack of sound. Continued use of the
system may result in accident, fire or
electric shock.
● In case you notice any foreign object in
the system hardware, spill liquid on it,
or notice smoke or smell coming from it,
stop using the system immediately and
contact a NISSAN dealer. Ignoring such
conditions may lead to accidents, fire or
electrical shock.
1. ENTER/SETTING button/TUNE-SCROLLcontrol knob
When the shift lever is shifted into the R (Re-
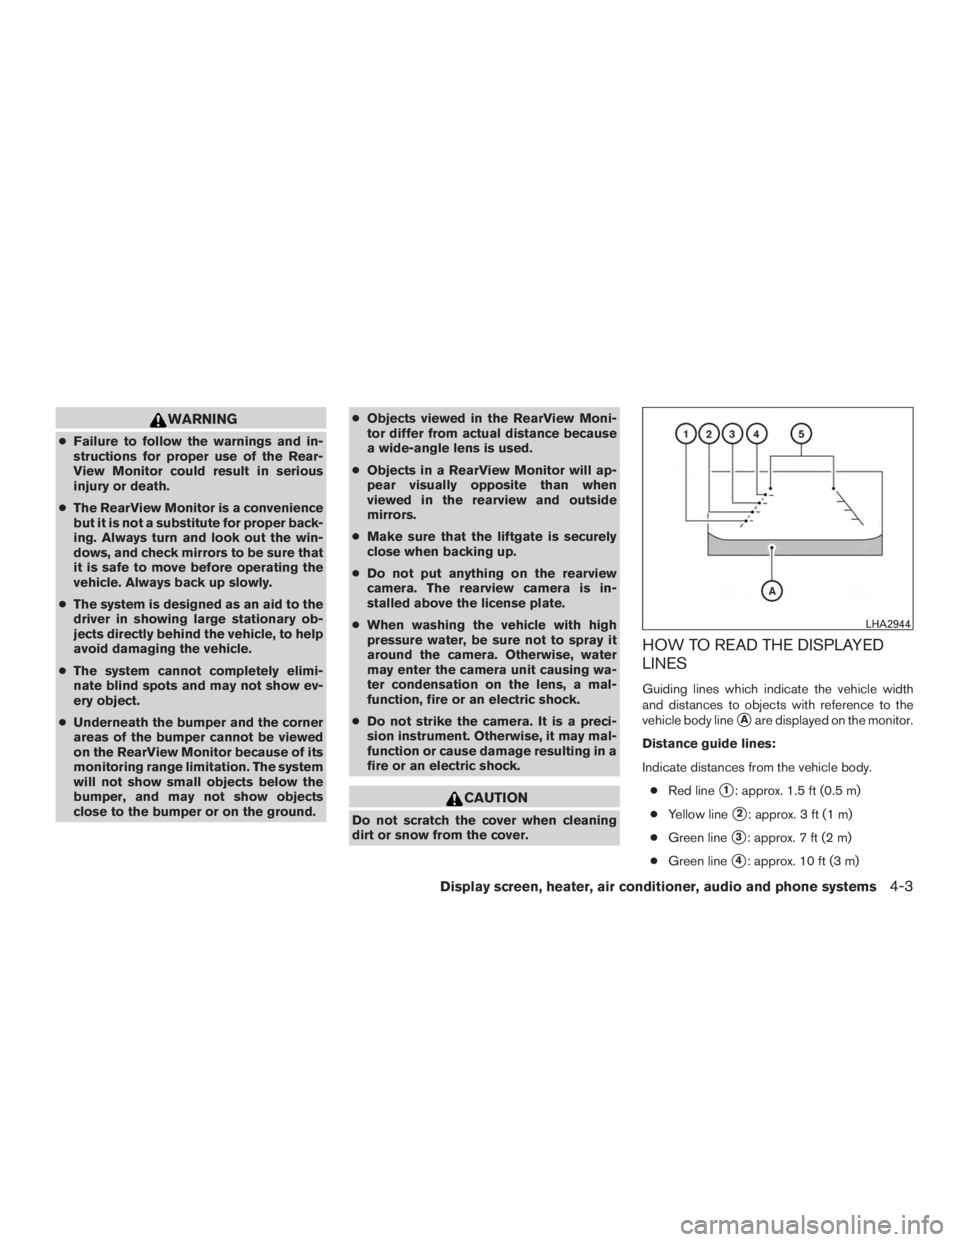
verse) position, the monitor display shows the
view to the rear of the vehicle.
Page 188 of 424

WARNING
●Failure to follow the warnings and in-
structions for proper use of the Rear-
View Monitor could result in serious
injury or death.
● The RearView Monitor is a convenience
but it is not a substitute for proper back-
ing. Always turn and look out the win-
dows, and check mirrors to be sure that
it is safe to move before operating the
vehicle. Always back up slowly.
● The system is designed as an aid to the
driver in showing large stationary ob-
jects directly behind the vehicle, to help
avoid damaging the vehicle.
● The system cannot completely elimi-
nate blind spots and may not show ev-
ery object.
● Underneath the bumper and the corner
areas of the bumper cannot be viewed
on the RearView Monitor because of its
monitoring range limitation. The system
will not show small objects below the
bumper, and may not show objects
close to the bumper or on the ground. ●
Objects viewed in the RearView Moni-
tor differ from actual distance because
a wide-angle lens is used.
● Objects in a RearView Monitor will ap-
pear visually opposite than when
viewed in the rearview and outside
mirrors.
● Make sure that the liftgate is securely
close when backing up.
● Do not put anything on the rearview
camera. The rearview camera is in-
stalled above the license plate.
● When washing the vehicle with high
pressure water, be sure not to spray it
around the camera. Otherwise, water
may enter the camera unit causing wa-
ter condensation on the lens, a mal-
function, fire or an electric shock.
● Do not strike the camera. It is a preci-
sion instrument. Otherwise, it may mal-
function or cause damage resulting in a
fire or an electric shock.
Page 206 of 424
WARNING
●The MOD system is not a substitute for
proper vehicle operation and is not de-
signed to prevent contact with the ob-
jects surrounding the vehicle. When
maneuvering, always use the outside
mirrors and rearview mirror and turn
and check the surrounding to ensure it
is safe to maneuver.
● The system is deactivated at speeds
above 6 mph (10 km/h). It is reactivated
at lower speeds.
● The system is not designed to prevent
contact with all objects.
● The MOD system does not have the
function to detect the surrounding sta-
tionary objects.
Display screen, heater, air conditioner, audio and phone systems4-21