Page 90 of 424
Repair and replacement procedure
The front air bags, side air bags, curtain air bags,
knee air bag and pretensioners are designed to
inflate on a one-time-only basis. As a reminder,
unless it is damaged, the supplemental air bag
warning light remains illuminated after inflation
has occurred. Repair and replacement of these
supplemental air bag systems should be done
only by a NISSAN dealer.
When maintenance work is required on the ve-
hicle, the front air bags, side air bags, curtain air
bags, knee air bag, pretensioners and related
parts should be pointed out to the person per-
forming the maintenance. The ignition switch
should always be in the LOCK position when
working under the hood or inside the vehicle.
Page 97 of 424
FUEL GAUGE
The gauge indicates theapproximatefuel level
in the tank.
The gauge may move slightly during braking,
turning, acceleration, or going up or down hills.
The gauge needle returns to 0 (Empty) after the
ignition switch is placed in the OFF position.
The low fuel warning light comes on when the
amount of fuel in the tank is getting low.
Refill the fuel tank before the gauge regis-
ters 0 (Empty) . The
Page 100 of 424
pull off the road in a safe area, stop the engine
immediatelyand call a NISSAN dealer or other
authorized repair shop.
The engine oil pressure warning light is not
designed to indicate a low oil level. Use the
dipstick to check the oil level. For additional in-
formation, refer to “Engine oil” in the “Mainte-
nance and do-it-yourself” section of this manual.
Page 101 of 424

WARNING
●Radio waves could adversely affect
electric medical equipment. Those who
use a pacemaker should contact the
electric medical equipment manufac-
turer for the possible influences before
use.
● If the light does not illuminate with the
ignition switch placed in the ON posi-
tion, have the vehicle checked by a
NISSAN dealer as soon as possible. ●
If the light illuminates while driving,
avoid sudden steering maneuvers or
abrupt braking, reduce vehicle speed,
pull off the road to a safe location and
stop the vehicle as soon as possible.
Driving with under-inflated tires may
permanently damage the tires and in-
crease the likelihood of tire failure. Se-
rious vehicle damage could occur and
may lead to an accident and could result
in serious personal injury or death.
Check the tire pressure for all four tires.
Adjust the tire pressure to the recom-
mended COLD tire pressure shown on
the Tire and Loading Information label
located in the driver’s door opening to
turn the low tire pressure warning light
OFF. If the light still illuminates while
driving after adjusting the tire pressure,
a tire may be flat. If you have a flat tire,
replace it with a spare tire as soon as
possible. ●
When a spare tire is mounted or a wheel
is replaced tire pressure will not be in-
dicated, the TPMS will not function and
the low tire pressure warning light will
flash for approximately 1 minute. The
light will remain on after 1 minute. Con-
tact a NISSAN dealer as soon as pos-
sible for tire replacement and/or sys-
tem resetting.
● Replacing tires with those not originally
specified by NISSAN could affect the
proper operation of the TPMS.
Page 102 of 424
Low windshield-washer fluidwarning light
This light comes on when the windshield-washer
fluid is at a low level. Add windshield-washer
fluid, as necessary. For additional information,
refer to “Windshield-washer fluid” in the “Mainte-
nance and do-it-yourself” section of this manual.
Page 103 of 424
If any of the following conditions occur, the front
air bag, side air bag, curtain air bag, knee air bag,
and pretensioner systems need servicing and
your vehicle must be taken to a NISSAN dealer:● The supplemental air bag warning light re-
mains on after approximately 7 seconds.
● The supplemental air bag warning light
flashes intermittently.
● The supplemental air bag warning light does
not come on at all.
Unless checked and repaired, the supplemental
restraint system (air bag system) and/or the seat
belts with pretensioner system may not function
properly. For additional information, refer to
“Supplemental restraint system (SRS)” in the
“Safety—Seats, seat belts and supplemental re-
straint system” section of this manual.
Page 143 of 424

WARNING
●Do not use the HomeLink® Universal
Transceiver with any garage door
opener that lacks safety stop and re-
verse features as required by federal
safety standards. (These standards be-
came effective for opener models
manufactured after April 1, 1982) . A ga-
rage door opener which cannot detect
an object in the path of a closing garage
door and then automatically stop and
reverse, does not meet current federal
safety standards. Using a garage door
opener without these features in-
creases the risk of serious injury or
death.
● During the programming procedure
your garage door or security gate will
open and close (if the transmitter is
within range) . Make sure that people or
objects are clear of the garage door,
gate, etc. that you are programming.
● Your vehicle’s engine should be turned
off while programming the HomeLink®
Universal Transceiver.
PROGRAMMING HOMELINK®
If you have any questions or are having difficulty
programming your HomeLink® buttons, refer to
the HomeLink® web site at: www.homelink.com
or call 1-800-355-3515.
NOTE:
Place the ignition switch in the ACC posi-
tion (if so equipped) when programming
HomeLink®. It is also recommended that a
new battery be placed in the hand-held
transmitter of the device being pro-
grammed to HomeLink® for quicker pro-
gramming and accurate transmission of
the radio-frequency.
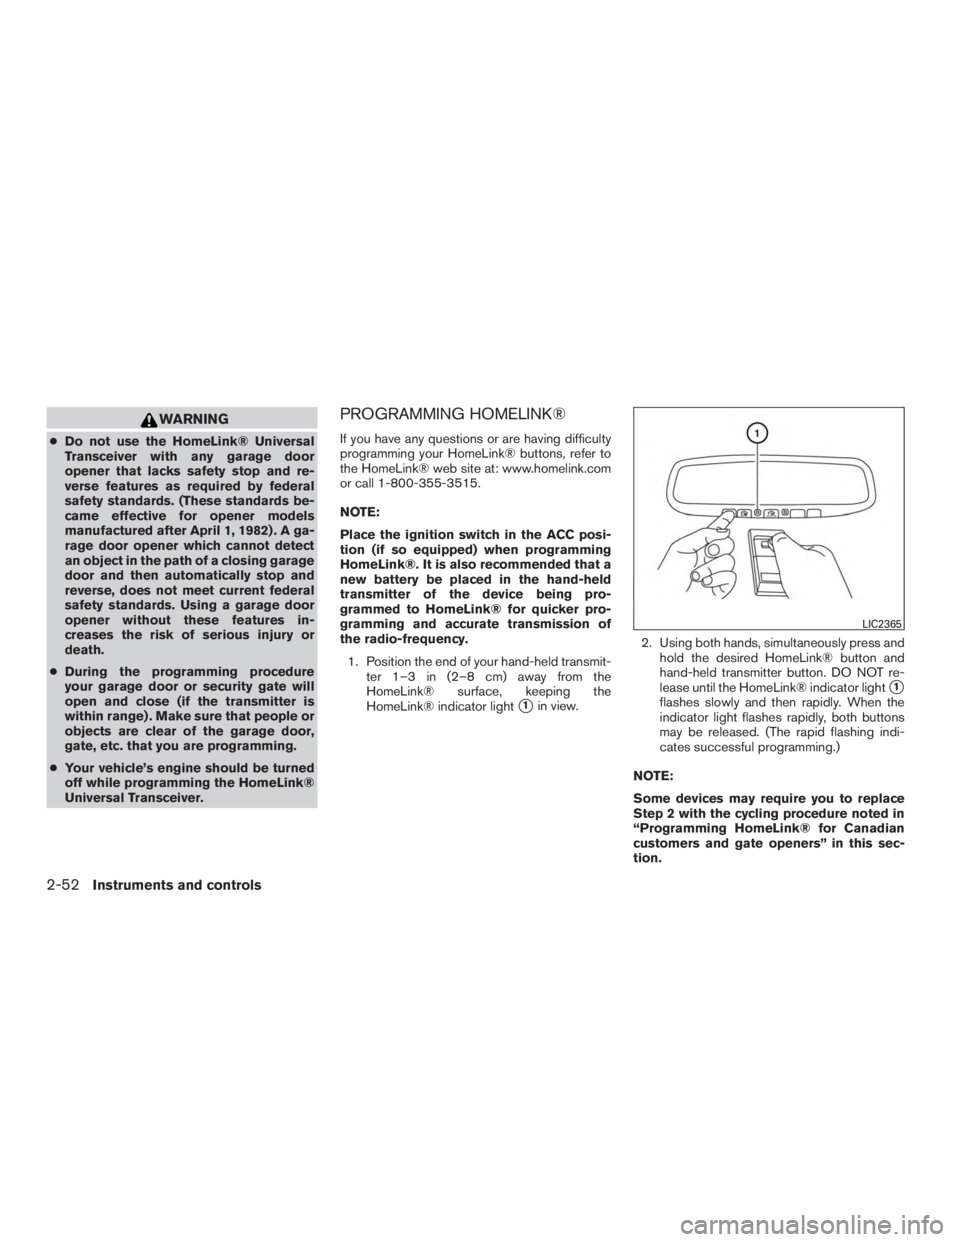
1. Position the end of your hand-held transmit- ter 1–3 in (2–8 cm) away from the
HomeLink® surface, keeping the
HomeLink® indicator light
�1in view. 2. Using both hands, simultaneously press and
hold the desired HomeLink® button and
hand-held transmitter button. DO NOT re-
lease until the HomeLink® indicator light
�1
flashes slowly and then rapidly. When the
indicator light flashes rapidly, both buttons
may be released. (The rapid flashing indi-
cates successful programming.)
NOTE:
Some devices may require you to replace
Step 2 with the cycling procedure noted in
“Programming HomeLink® for Canadian
customers and gate openers” in this sec-
tion.
Page 157 of 424

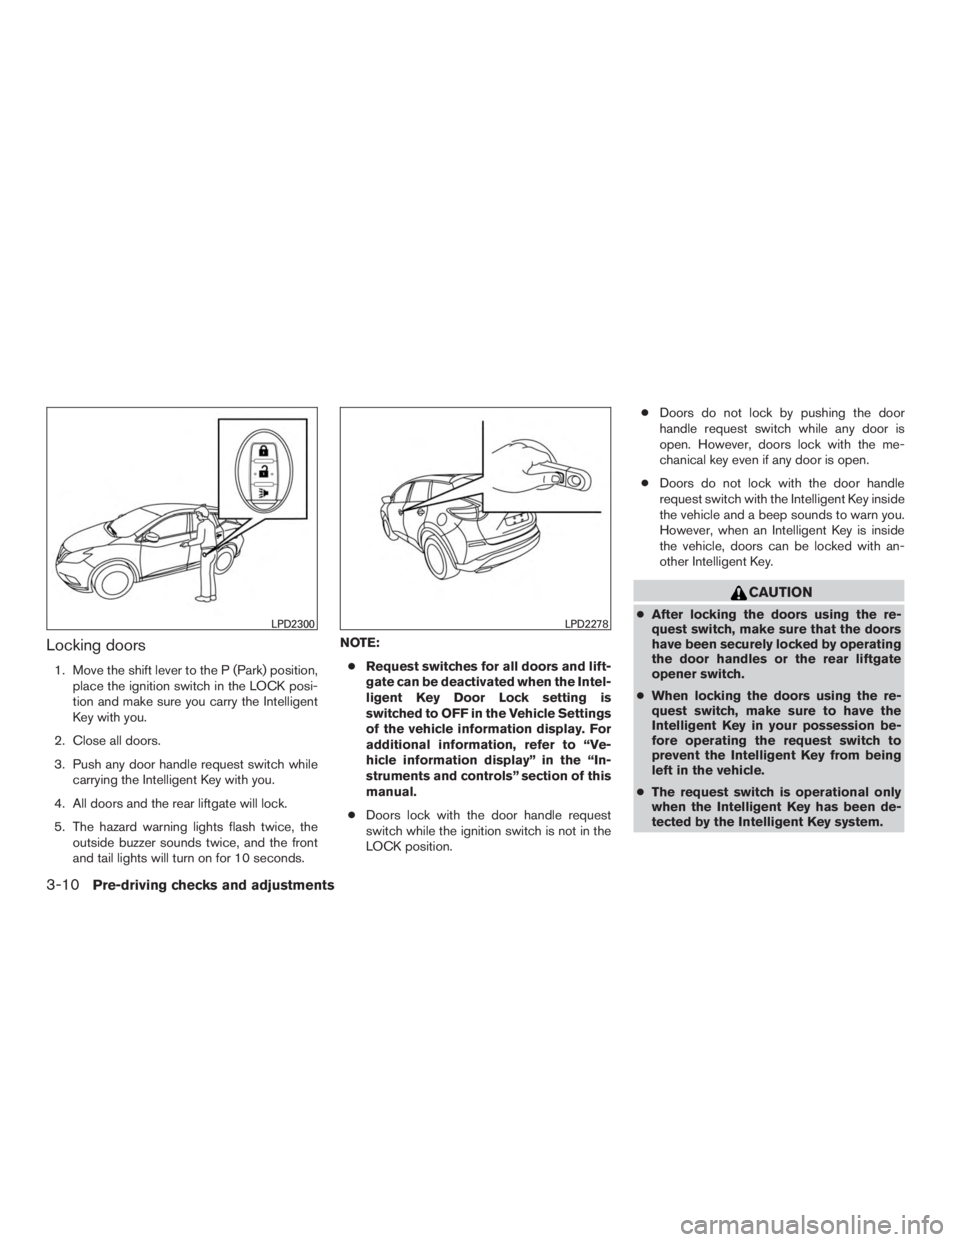
Locking doors
1. Move the shift lever to the P (Park) position,place the ignition switch in the LOCK posi-
tion and make sure you carry the Intelligent
Key with you.
2. Close all doors.
3. Push any door handle request switch while carrying the Intelligent Key with you.
4. All doors and the rear liftgate will lock.
5. The hazard warning lights flash twice, the outside buzzer sounds twice, and the front
and tail lights will turn on for 10 seconds. NOTE:
● Request switches for all doors and lift-
gate can be deactivated when the Intel-
ligent Key Door Lock setting is
switched to OFF in the Vehicle Settings
of the vehicle information display. For
additional information, refer to “Ve-
hicle information display” in the “In-
struments and controls” section of this
manual.
● Doors lock with the door handle request
switch while the ignition switch is not in the
LOCK position. ●
Doors do not lock by pushing the door
handle request switch while any door is
open. However, doors lock with the me-
chanical key even if any door is open.
● Doors do not lock with the door handle
request switch with the Intelligent Key inside
the vehicle and a beep sounds to warn you.
However, when an Intelligent Key is inside
the vehicle, doors can be locked with an-
other Intelligent Key.