Page 51 of 424
– Inspect the lower anchors by insert-ing your fingers into the lower anchor
area. Feel to make sure there are no
obstructions over the anchors such
as seat belt webbing or seat cushion
material. The child restraint will not
be secured properly if the lower an-
chors are obstructed.
– Child restraint anchorages are de- signed to withstand only those loads
imposed by correctly fitted child re-
straints. Under no circumstances are
they to be used to attach adult seat
belts, or other items or equipment to
the vehicle. Doing so could damage
the child restraint anchorages. The
child restraint will not be properly
installed using the damaged anchor-
ages, and a child could be seriously
injured or killed in a collision.
LATCH lower anchor location
The LATCH lower anchors are located at the rear
of the seat cushion near the seatback. A label is
attached to the seatback to help you locate the
LATCH lower anchors.
Page 52 of 424
Installing child restraint LATCH lower
anchor attachments
LATCH compatible child restraints include two
rigid or webbing-mounted attachments that can
be connected to two anchors located at certain
seating positions in your vehicle. With this sys-
tem, you do not have to use a vehicle seat belt to
secure the child restraint. Check your child re-
straint for a label stating that it is compatible with
LATCH. This information may also be in the in-
structions provided by the child restraint manu-
facturer.When installing a child restraint, carefully read
and follow the instructions in this manual and
those supplied with the child restraint.
Top tether anchor
Page 55 of 424
5. Check to make sure the child restraint isproperly secured prior to each use. If the
child restraint is loose, repeat steps 2
through 4.
REAR-FACING CHILD RESTRAINT
INSTALLATION USING THE SEAT
BELTS
Page 61 of 424

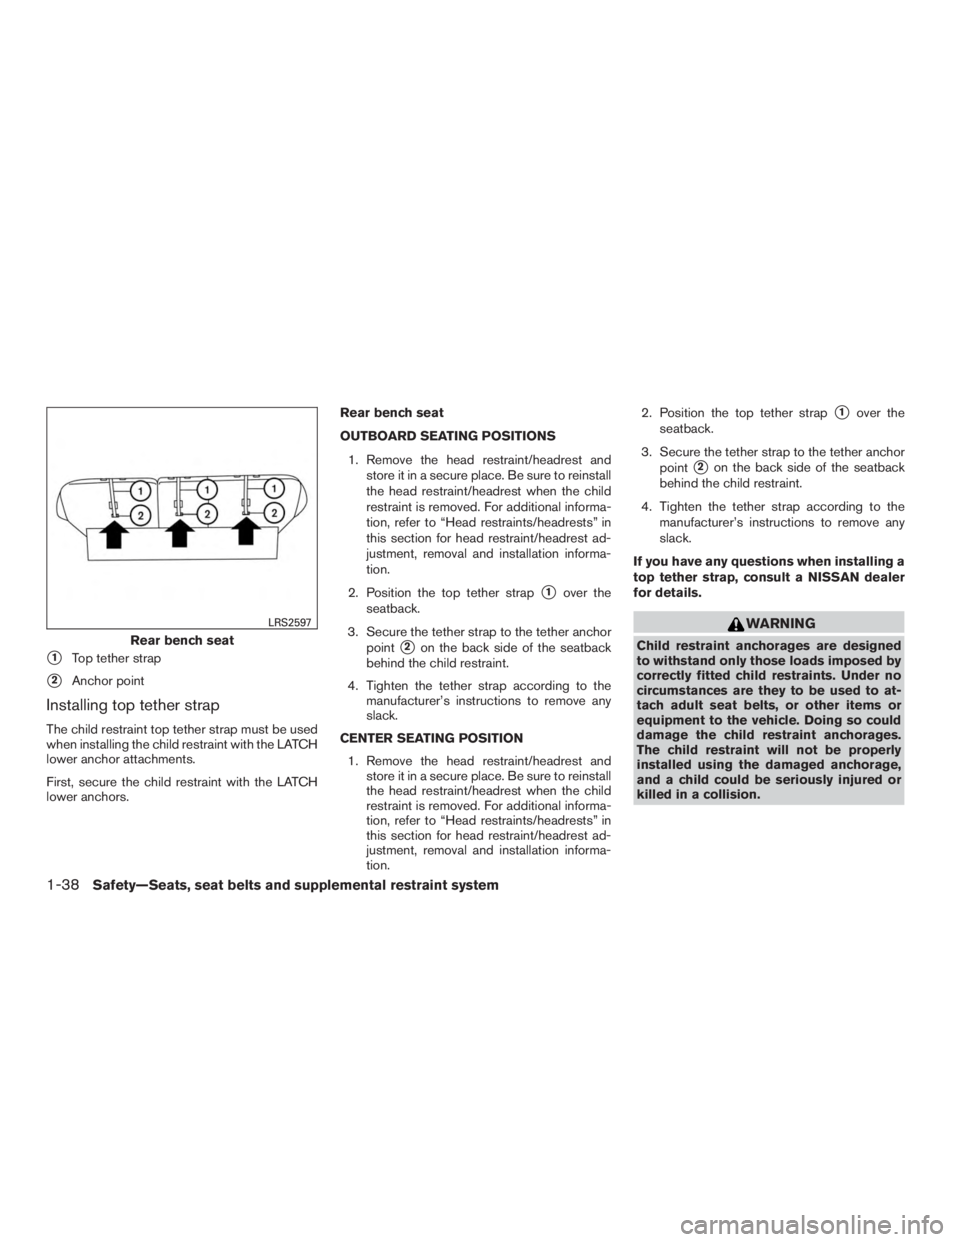
�1Top tether strap
�2Anchor point
Installing top tether strap
The child restraint top tether strap must be used
when installing the child restraint with the LATCH
lower anchor attachments.
First, secure the child restraint with the LATCH
lower anchors.Rear bench seat
OUTBOARD SEATING POSITIONS
1. Remove the head restraint/headrest and store it in a secure place. Be sure to reinstall
the head restraint/headrest when the child
restraint is removed. For additional informa-
tion, refer to “Head restraints/headrests” in
this section for head restraint/headrest ad-
justment, removal and installation informa-
tion.
2. Position the top tether strap
�1over the
seatback.
3. Secure the tether strap to the tether anchor point
�2on the back side of the seatback
behind the child restraint.
4. Tighten the tether strap according to the manufacturer’s instructions to remove any
slack.
CENTER SEATING POSITION 1. Remove the head restraint/headrest and store it in a secure place. Be sure to reinstall
the head restraint/headrest when the child
restraint is removed. For additional informa-
tion, refer to “Head restraints/headrests” in
this section for head restraint/headrest ad-
justment, removal and installation informa-
tion. 2. Position the top tether strap
�1over the
seatback.
3. Secure the tether strap to the tether anchor point
�2on the back side of the seatback
behind the child restraint.
4. Tighten the tether strap according to the manufacturer’s instructions to remove any
slack.
If you have any questions when installing a
top tether strap, consult a NISSAN dealer
for details.
Page 62 of 424
FORWARD-FACING CHILD
RESTRAINT INSTALLATION USING
THE SEAT BELTS
Page 66 of 424

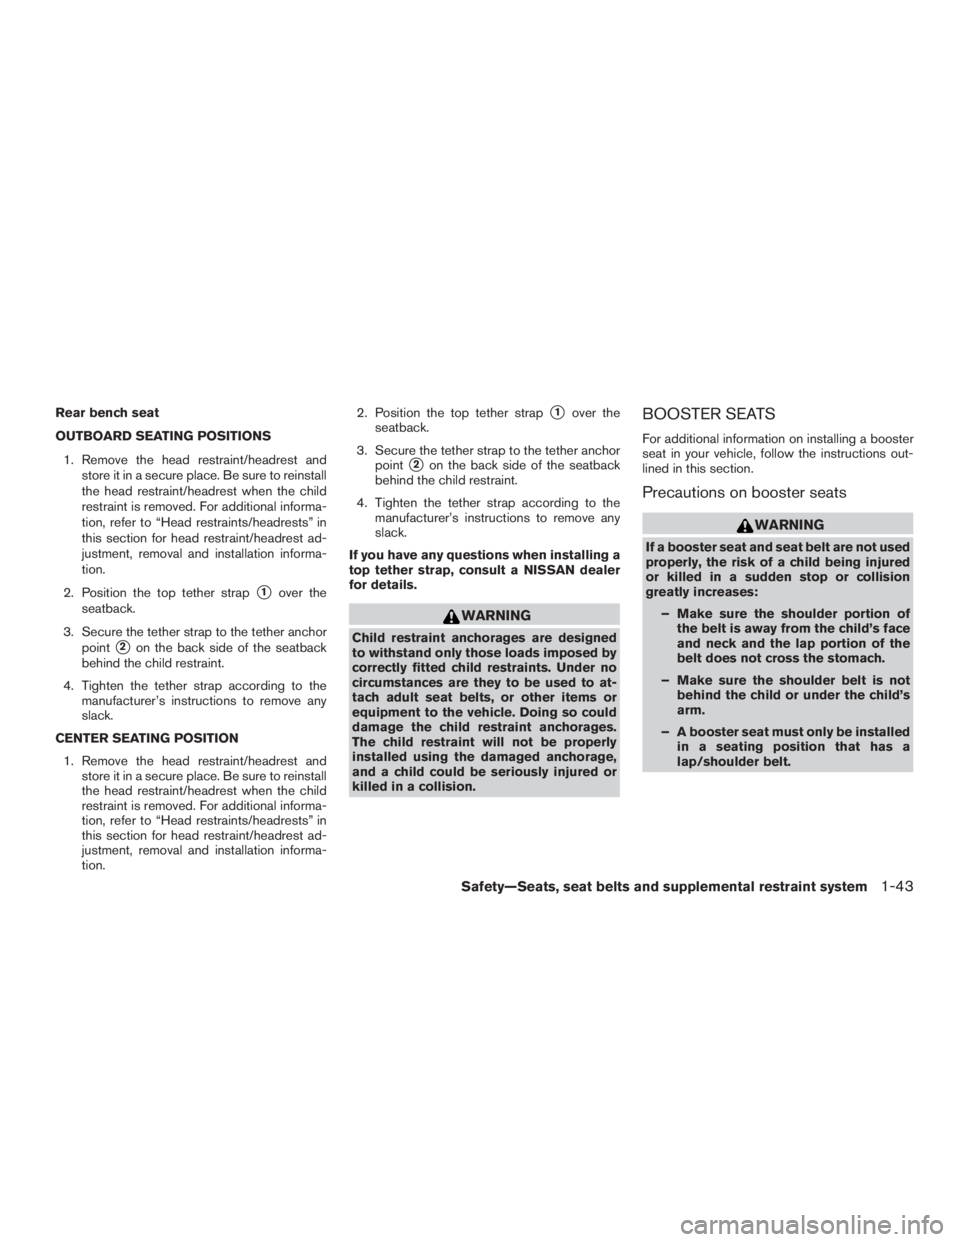
Rear bench seat
OUTBOARD SEATING POSITIONS1. Remove the head restraint/headrest and store it in a secure place. Be sure to reinstall
the head restraint/headrest when the child
restraint is removed. For additional informa-
tion, refer to “Head restraints/headrests” in
this section for head restraint/headrest ad-
justment, removal and installation informa-
tion.
2. Position the top tether strap
�1over the
seatback.
3. Secure the tether strap to the tether anchor point
�2on the back side of the seatback
behind the child restraint.
4. Tighten the tether strap according to the manufacturer’s instructions to remove any
slack.
CENTER SEATING POSITION 1. Remove the head restraint/headrest and store it in a secure place. Be sure to reinstall
the head restraint/headrest when the child
restraint is removed. For additional informa-
tion, refer to “Head restraints/headrests” in
this section for head restraint/headrest ad-
justment, removal and installation informa-
tion. 2. Position the top tether strap
�1over the
seatback.
3. Secure the tether strap to the tether anchor point
�2on the back side of the seatback
behind the child restraint.
4. Tighten the tether strap according to the manufacturer’s instructions to remove any
slack.
If you have any questions when installing a
top tether strap, consult a NISSAN dealer
for details.
Page 68 of 424
All U.S. states and Canadian provinces or
territories require that infants and small
children be restrained in an approved child
restraint at all times while the vehicle is
being operated.
The instructions in this section apply to booster
seat installation in the rear seats or the front
passenger seat.
Booster seat installation
Page 74 of 424
WARNING
●Children may be severely injured or
killed when the front air bags, side air
bags or curtain air bags inflate if they
are not properly restrained. Pre-teens
and children should be properly re-
strained in the rear seat, if possible.
● Even with the NISSAN Advanced Air
Bag System, never install a rear-facing
child restraint in the front seat. An in-
flating front air bag could seriously in-
jure or kill your child. For additional
information, refer to “Child restraints”
in this section.