Page 90 of 293
To defrost the rear window glass, start the engine
and push the rear window defroster switch on.
The rear window defroster indicator light on the
switch comes on. Push the switch again to turn
the defroster off.
The rear window defroster automatically turns off
after approximately 15 minutes.
CAUTION
When cleaning the inner side of the rear
window, be careful not to scratch or dam-
age the rear window defroster.
HEADLIGHT CONTROL SWITCH
Lighting
�1When turning the switch to theposi-
tion, the front parking, tail, license plate and
instrument panel lights come on.
�2When turning the switch to theposi-
tion, the headlights come on and all the other
lights remain on.
CAUTION
Use the headlights with the engine run-
ning to avoid discharging the vehicle
battery.
Type B (if so equipped)
LIC2110LIC2127
HEADLIGHT AND TURN SIGNAL
SWITCH
Instruments and controls2-17
Page 91 of 293

Headlight beam select
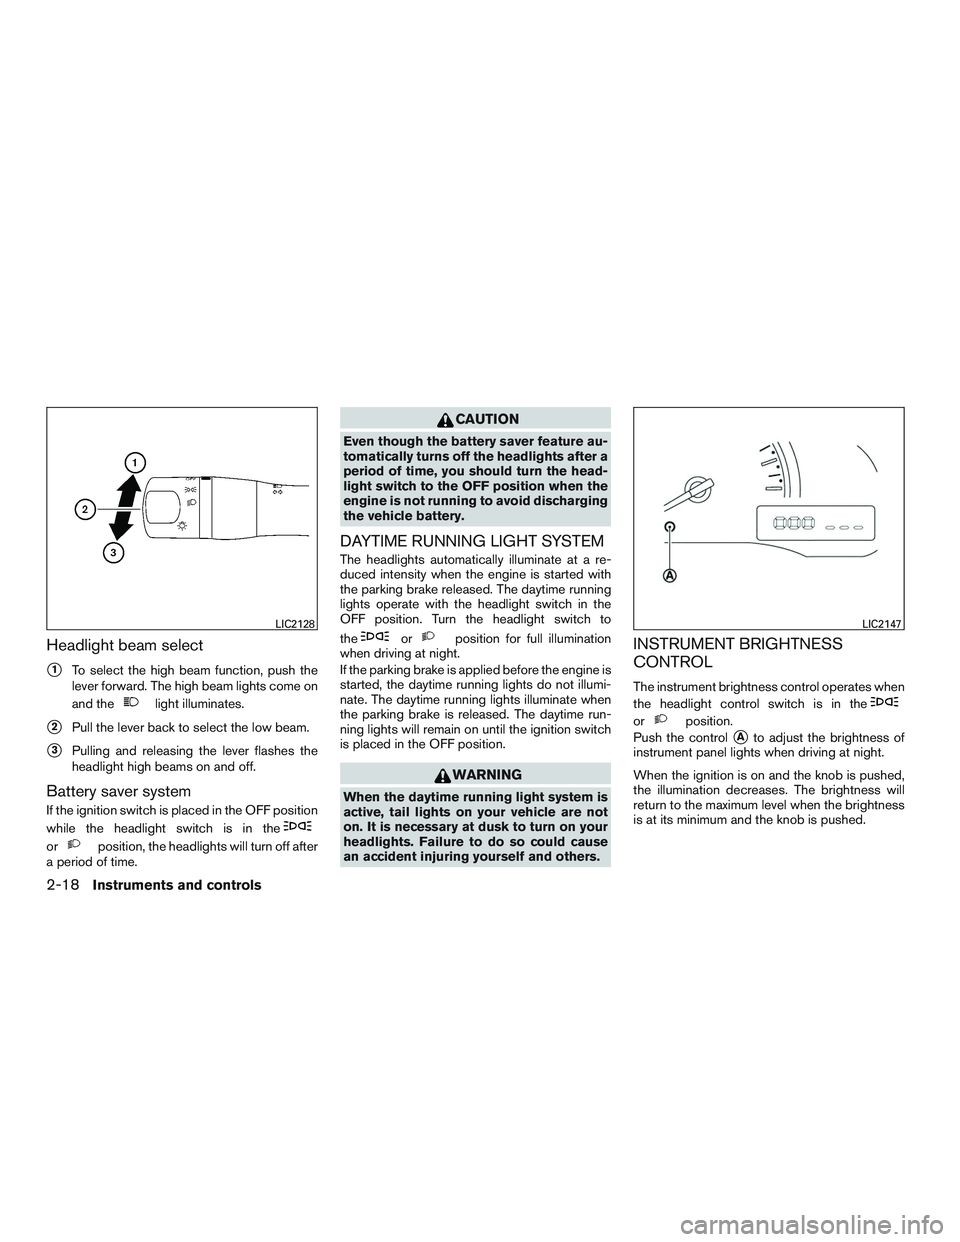
�1To select the high beam function, push the
lever forward. The high beam lights come on
and the
light illuminates.
�2Pull the lever back to select the low beam.
�3Pulling and releasing the lever flashes the
headlight high beams on and off.
Battery saver system
If the ignition switch is placed in the OFF position
while the headlight switch is in the
orposition, the headlights will turn off after
a period of time.
CAUTION
Even though the battery saver feature au-
tomatically turns off the headlights after a
period of time, you should turn the head-
light switch to the OFF position when the
engine is not running to avoid discharging
the vehicle battery.
DAYTIME RUNNING LIGHT SYSTEM
The headlights automatically illuminate at a re-
duced intensity when the engine is started with
the parking brake released. The daytime running
lights operate with the headlight switch in the
OFF position. Turn the headlight switch to
the
orposition for full illumination
when driving at night.
If the parking brake is applied before the engine is
started, the daytime running lights do not illumi-
nate. The daytime running lights illuminate when
the parking brake is released. The daytime run-
ning lights will remain on until the ignition switch
is placed in the OFF position.
WARNING
When the daytime running light system is
active, tail lights on your vehicle are not
on. It is necessary at dusk to turn on your
headlights. Failure to do so could cause
an accident injuring yourself and others.
INSTRUMENT BRIGHTNESS
CONTROL
The instrument brightness control operates when
the headlight control switch is in the
orposition.
Push the control
�Ato adjust the brightness of
instrument panel lights when driving at night.
When the ignition is on and the knob is pushed,
the illumination decreases. The brightness will
return to the maximum level when the brightness
is at its minimum and the knob is pushed.
LIC2128LIC2147
2-18Instruments and controls
Page 92 of 293
TURN SIGNAL SWITCH
Turn signal
�1Move the lever up or down to signal the
turning direction. When the turn is com-
pleted, the turn signal cancels automatically.
Lane change signal
�2Move the lever up or down until the turn
signal begins to flash, but the lever does not
latch, to signal a lane change. Hold the lever
until the lane change is completed.
Move the lever up or down until the turn
signal begins to flash, but the lever does not
latch, and release the lever. The turn signal
will automatically flash three times.
Choose the appropriate method to signal a lane
change based on road and traffic conditions.
FRONT FOG LIGHTS (if so equipped)
To turn the front fog lights on, turn the headlight
switch to the
orposition, then turn
the fog light switch to the
position.
To turn them off, turn the fog light switch to the
OFF position.
WIC1512WIC1440
Instruments and controls2-19
Page 94 of 293

The power outlet is for powering electrical acces-
sories such as cellular telephones. The outlet is
rated at 12 volt, 120W (10A) maximum.
CAUTION
●The outlet and plug may be hot during
or immediately after use.
● Only certain power outlets are designed
for use with a cigarette lighter unit. Do
not use any other power outlet for an
accessory lighter. See your NISSAN
dealer for additional information. ●
Do not use with accessories that exceed
a 12 volt, 120W (10A) power draw. Do
not use double adapters or more than
one electrical accessory.
● Use power outlets with the engine run-
ning to avoid discharging the vehicle
battery.
● Avoid using power outlets when the air
conditioner (if so equipped) , headlights
or rear window defroster (if so
equipped) is on.
● Before inserting or disconnecting a
plug, be sure the electrical accessory
being used is turned OFF.
● Push the plug in as far as it will go. If
good contact is not made, the plug may
overheat or the internal temperature
fuse may open.
● When not in use, be sure to close the
cap. Do not allow water or any other
liquid to contact the outlet.
MAP POCKETS
LIC2715LIC0799
POWER OUTLET STORAGE
Instruments and controls2-21
Page 100 of 293

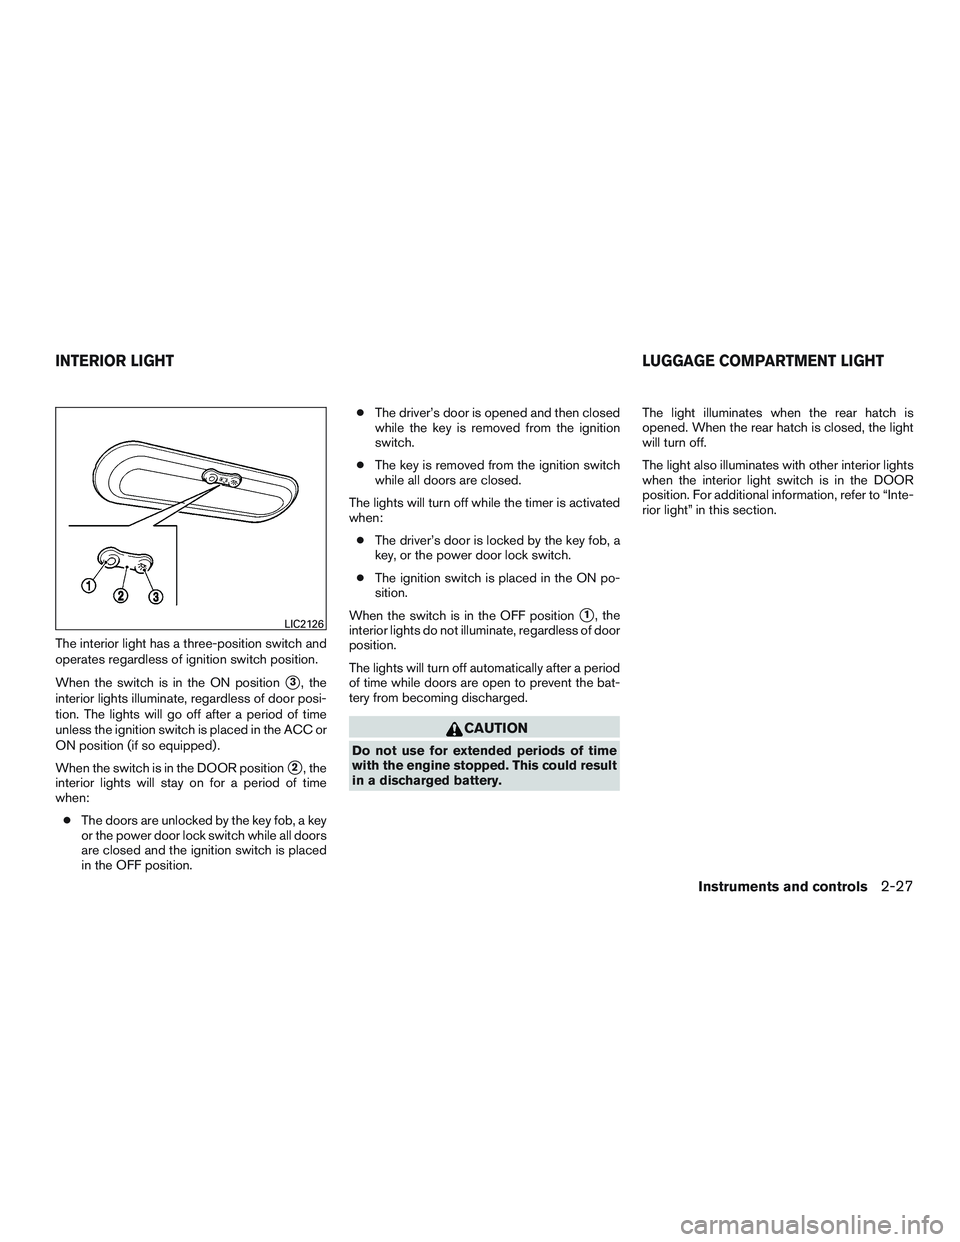
The interior light has a three-position switch and
operates regardless of ignition switch position.
When the switch is in the ON position
�3, the
interior lights illuminate, regardless of door posi-
tion. The lights will go off after a period of time
unless the ignition switch is placed in the ACC or
ON position (if so equipped) .
When the switch is in the DOOR position
�2, the
interior lights will stay on for a period of time
when:
● The doors are unlocked by the key fob, a key
or the power door lock switch while all doors
are closed and the ignition switch is placed
in the OFF position. ●
The driver’s door is opened and then closed
while the key is removed from the ignition
switch.
● The key is removed from the ignition switch
while all doors are closed.
The lights will turn off while the timer is activated
when: ● The driver’s door is locked by the key fob, a
key, or the power door lock switch.
● The ignition switch is placed in the ON po-
sition.
When the switch is in the OFF position
�1, the
interior lights do not illuminate, regardless of door
position.
The lights will turn off automatically after a period
of time while doors are open to prevent the bat-
tery from becoming discharged.
CAUTION
Do not use for extended periods of time
with the engine stopped. This could result
in a discharged battery. The light illuminates when the rear hatch is
opened. When the rear hatch is closed, the light
will turn off.
The light also illuminates with other interior lights
when the interior light switch is in the DOOR
position. For additional information, refer to “Inte-
rior light” in this section.
LIC2126
INTERIOR LIGHT
LUGGAGE COMPARTMENT LIGHT
Instruments and controls2-27
Page 106 of 293

AUTOMATIC DOOR LOCKS (if so
equipped)
All doors lock automatically when the vehicle
speed reaches 24 km/h (15 MPH) .
Unlocking any of the doors while driving will
disable the automatic door lock mechanism and
the unlocked door will not lock automatically
again until one of the following is performed:● Opening any door
● Placing the ignition switch in the OFF posi-
tion
The automatic lock and unlock functions
can be deactivated or activated indepen-
dently of each other. To deactivate or activate
the automatic door lock or unlock system, per-
form the following procedure:
1. Close all doors.
2. Place the ignition switch in the ON position.
3. Do one of the following within 20 seconds of performing Step 2:
● To change AUTO UNLOCK settings:
push and hold the power door lock switch
to the
position (UNLOCK) for more
than 5 seconds. ●
To change AUTO LOCK settings: push
and hold the power door lock switch to
the
position (LOCK) for more
than 5 seconds.
4. When activated, the hazard warning lights will flash twice. When deactivated, the haz-
ard warning lights will flash once.
5. The ignition switch must be placed in the OFF and ON position again between each
setting change.
CHILD SAFETY REAR DOOR LOCK
Child safety locks help prevent the rear doors
from being opened accidentally, especially when
small children are in the vehicle.
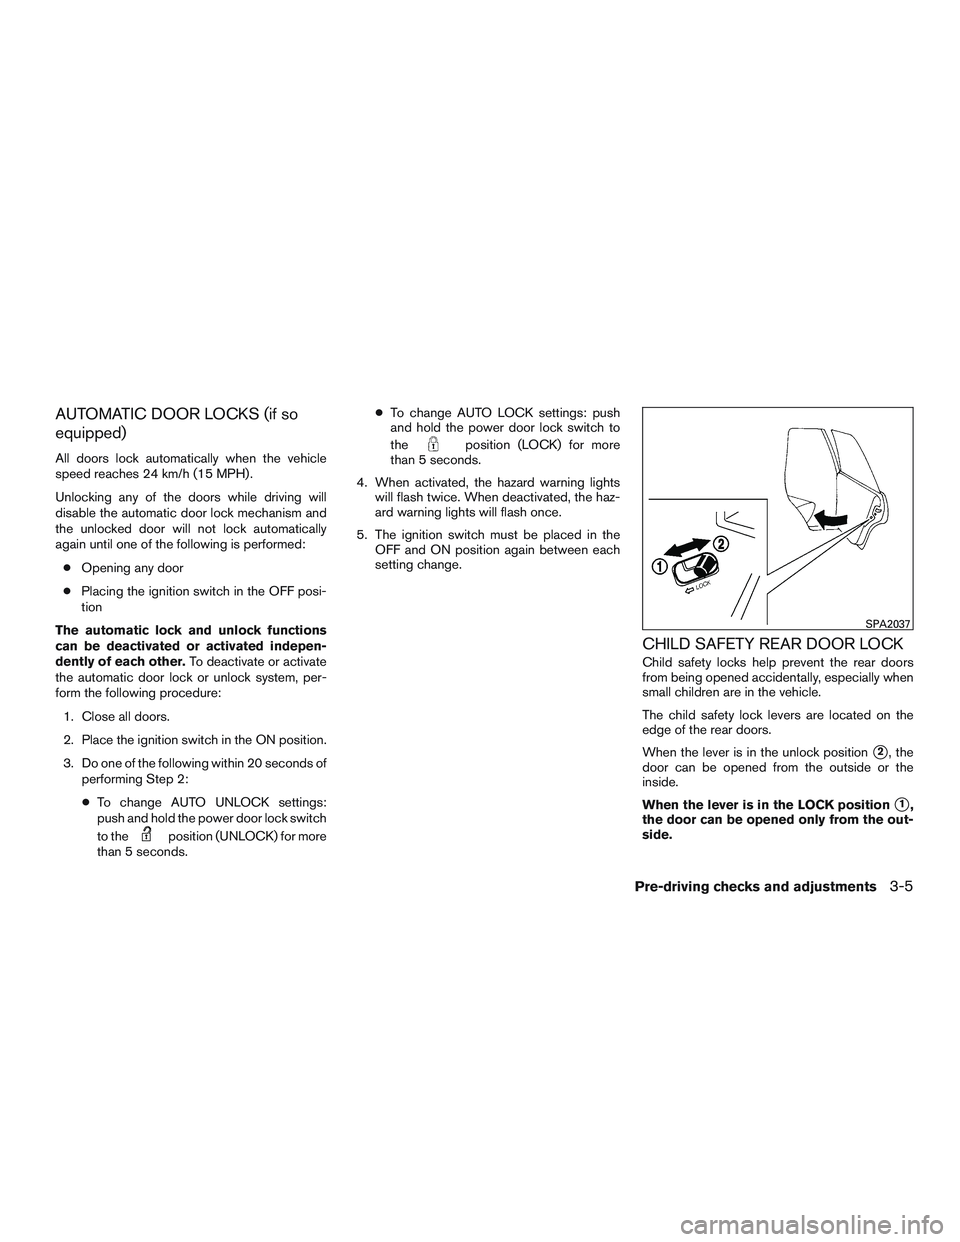
The child safety lock levers are located on the
edge of the rear doors.
When the lever is in the unlock position
�2, the
door can be opened from the outside or the
inside.
When the lever is in the LOCK position
�1,
the door can be opened only from the out-
side.
SPA2037
Pre-driving checks and adjustments3-5
Page 109 of 293
Using the panic alarm (if so equipped)
If you are near your vehicle and feel threatened,
you may activate the panic alarm to call attention
by pressing and holding the
button on the
key fob for longer than 0.5 seconds.
The panic alarm will stay on for a period of time.
The panic alarm stops when:
● It has run for a period of time, or
● Any button is pressed on the key fob.
Using the interior light
Press thebutton on the key fob once to
turn on the interior lights.
For additional information, refer to “Interior light”
in the “Instruments and controls” section in this
manual.
LPD2041
3-8Pre-driving checks and adjustments
Page 115 of 293
VANITY MIRRORS (if so equipped)
To access the vanity mirror, pull the sun visor
down and flip open the mirror cover.
CARD HOLDER (driver’s side only – if
so equipped)
To access the card holder, pull the sun visor
down and slide card in the card holder
�A.Donot
view information while operating the vehicle.
REARVIEW MIRROR
The night position�1reduces glare from the
headlights of vehicles behind you at night.
Use the day position
�2when driving in daylight
hours.
WARNING
Use the night position only when neces-
sary, because it reduces rear view clarity.
SPA2192JVI0018XWPD0126
MIRRORS
3-14Pre-driving checks and adjustments