2015 NISSAN LEAF headrest
[x] Cancel search: headrestPage 117 of 412
If the seating position does not have a remov-
able head restraint/headrest and it is interfer-
ing with the proper child restraint fit, try an-
other seating position or a different child
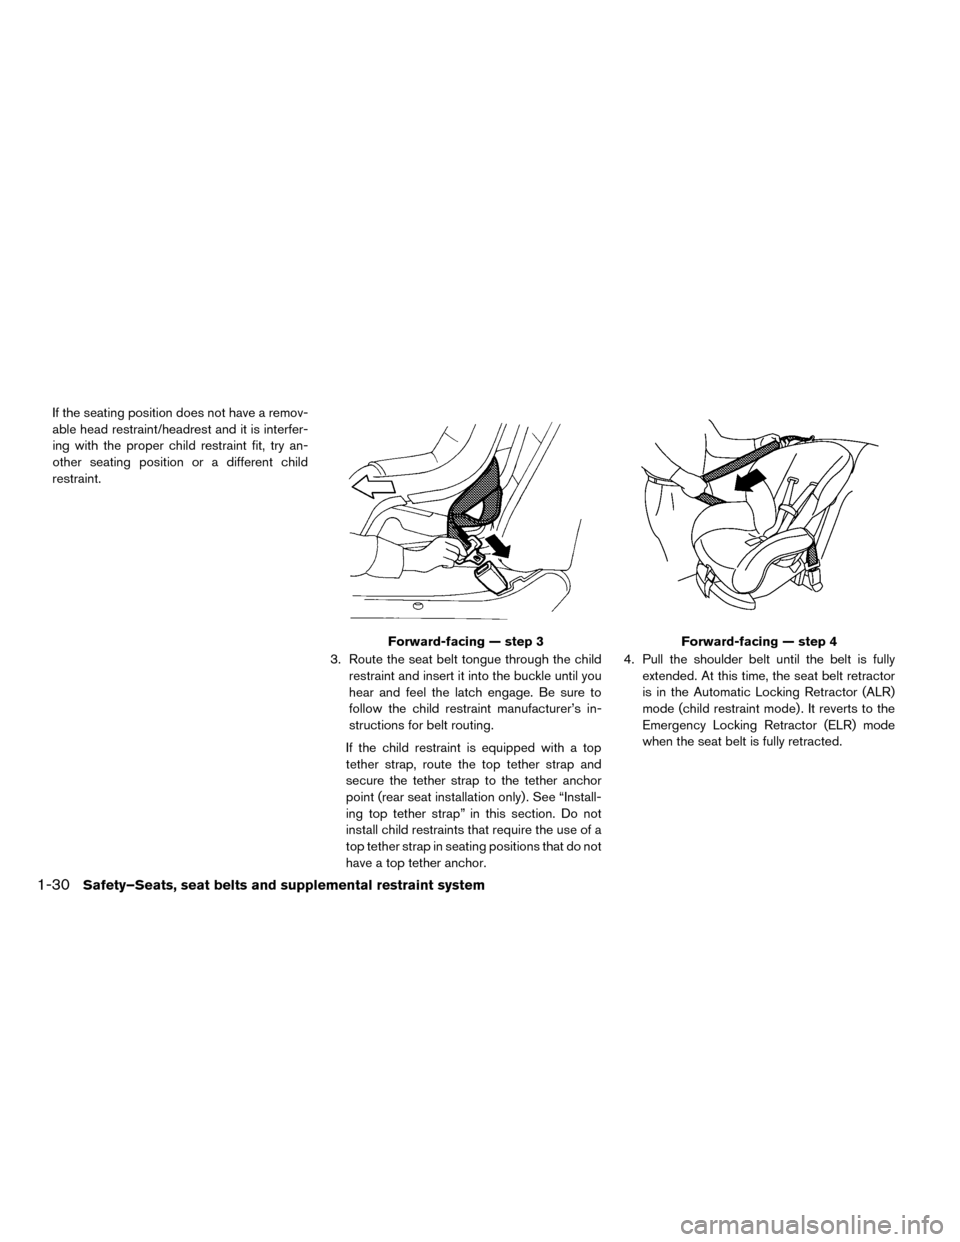
restraint.3. Route the seat belt tongue through the childrestraint and insert it into the buckle until you
hear and feel the latch engage. Be sure to
follow the child restraint manufacturer’s in-
structions for belt routing.
If the child restraint is equipped with a top
tether strap, route the top tether strap and
secure the tether strap to the tether anchor
point (rear seat installation only) . See “Install-
ing top tether strap” in this section. Do not
install child restraints that require the use of a
top tether strap in seating positions that do not
have a top tether anchor. 4. Pull the shoulder belt until the belt is fully
extended. At this time, the seat belt retractor
is in the Automatic Locking Retractor (ALR)
mode (child restraint mode) . It reverts to the
Emergency Locking Retractor (ELR) mode
when the seat belt is fully retracted.
Forward-facing — step 3Forward-facing — step 4
1-30Safety–Seats, seat belts and supplemental restraint system
Page 119 of 412
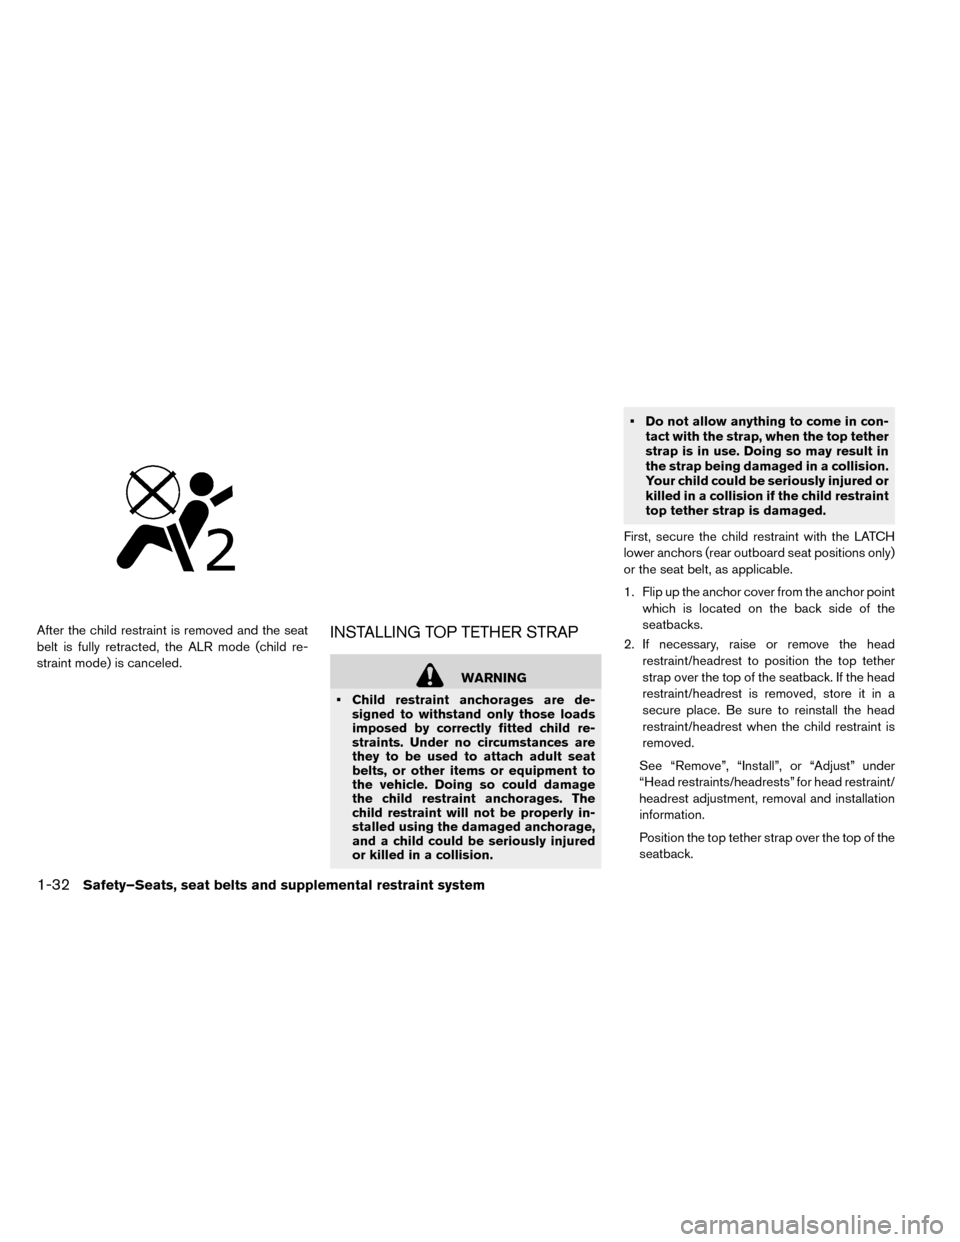
After the child restraint is removed and the seat
belt is fully retracted, the ALR mode (child re-
straint mode) is canceled.INSTALLING TOP TETHER STRAP
WARNING
• Child restraint anchorages are de- signed to withstand only those loads
imposed by correctly fitted child re-
straints. Under no circumstances are
they to be used to attach adult seat
belts, or other items or equipment to
the vehicle. Doing so could damage
the child restraint anchorages. The
child restraint will not be properly in-
stalled using the damaged anchorage,
and a child could be seriously injured
or killed in a collision. • Do not allow anything to come in con-
tact with the strap, when the top tether
strap is in use. Doing so may result in
the strap being damaged in a collision.
Your child could be seriously injured or
killed in a collision if the child restraint
top tether strap is damaged.
First, secure the child restraint with the LATCH
lower anchors (rear outboard seat positions only)
or the seat belt, as applicable.
1. Flip up the anchor cover from the anchor point which is located on the back side of the
seatbacks.
2. If necessary, raise or remove the head restraint/headrest to position the top tether
strap over the top of the seatback. If the head
restraint/headrest is removed, store it in a
secure place. Be sure to reinstall the head
restraint/headrest when the child restraint is
removed.
See “Remove”, “Install”, or “Adjust” under
“Head restraints/headrests” for head restraint/
headrest adjustment, removal and installation
information.
Position the top tether strap over the top of the
seatback.
1-32Safety–Seats, seat belts and supplemental restraint system
Page 122 of 412
BOOSTER SEAT INSTALLATION
CAUTION
Do not use the lap/shoulder belt Auto-
matic Locking Retractor (ALR) mode
when using a booster seat with the seat
belts.
Refer to all Warnings and Cautions in “Child
safety”, “Child restraints” and “Booster seats” in
this section before installing a child restraint.
Follow these steps to install a booster seat on the
rear seat or on the front passenger seat:
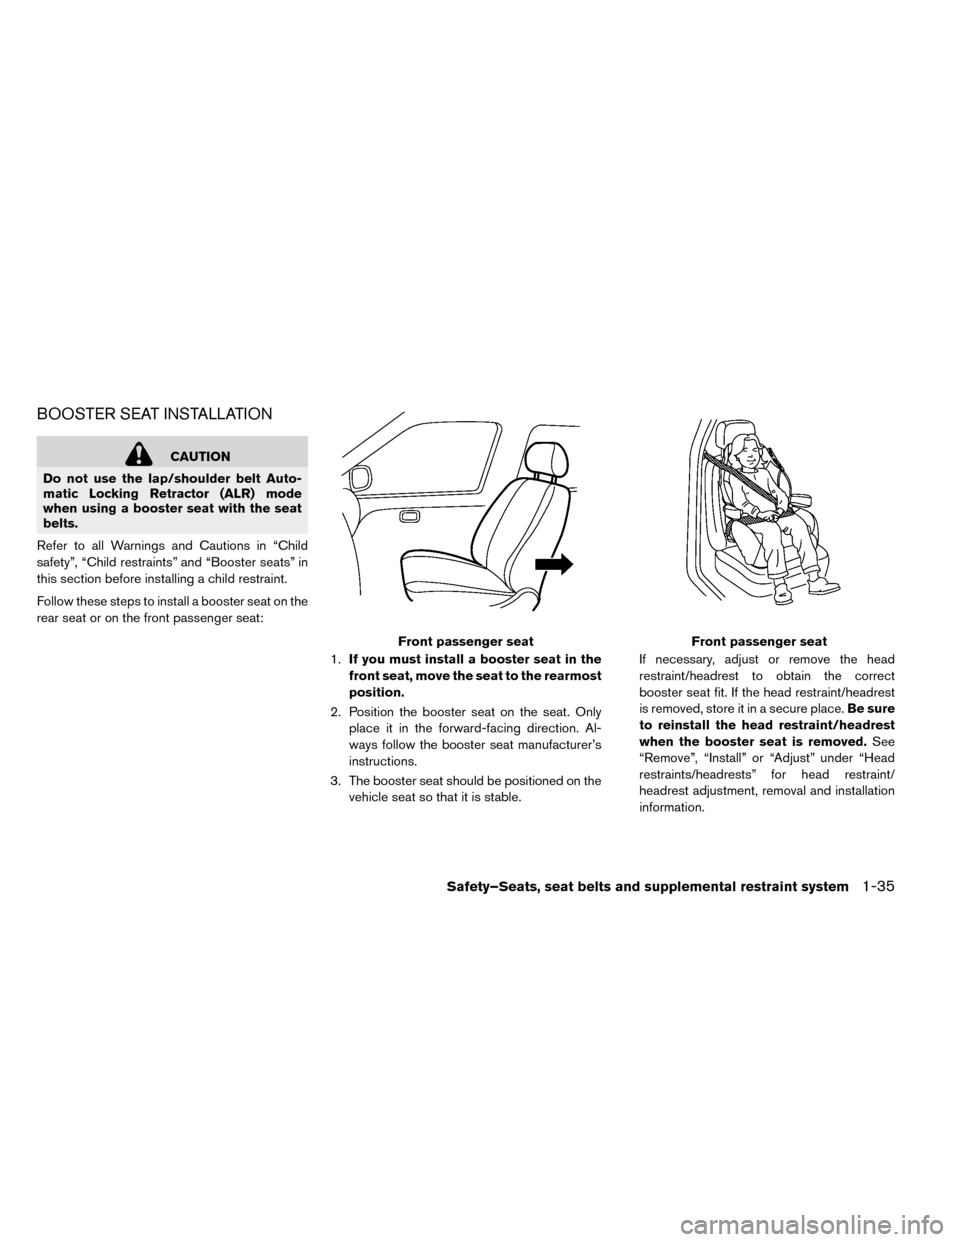
1.If you must install a booster seat in the
front seat, move the seat to the rearmost
position.
2. Position the booster seat on the seat. Only place it in the forward-facing direction. Al-
ways follow the booster seat manufacturer’s
instructions.
3. The booster seat should be positioned on the vehicle seat so that it is stable. If necessary, adjust or remove the head
restraint/headrest to obtain the correct
booster seat fit. If the head restraint/headrest
is removed, store it in a secure place.
Be sure
to reinstall the head restraint/headrest
when the booster seat is removed. See
“Remove”, “Install” or “Adjust” under “Head
restraints/headrests” for head restraint/
headrest adjustment, removal and installation
information.
Front passenger seatFront passenger seat
Safety–Seats, seat belts and supplemental restraint system1-35
Page 123 of 412
If the seating position does not have an adjust-
able head restraint/headrest and it is interfer-
ing with the proper booster seat fit, try another
seating position or a different booster seat.
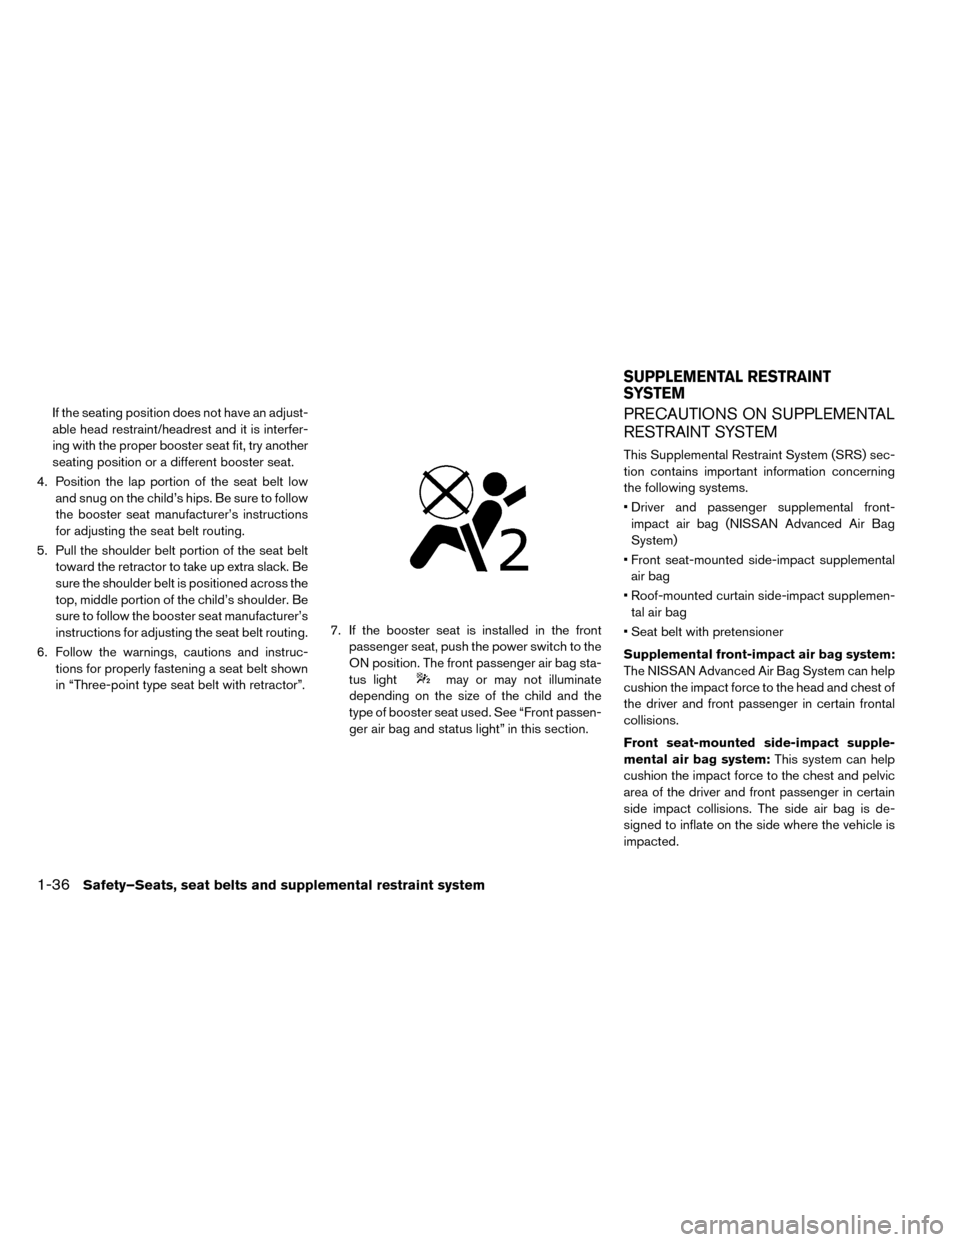
4. Position the lap portion of the seat belt low and snug on the child’s hips. Be sure to follow
the booster seat manufacturer’s instructions
for adjusting the seat belt routing.
5. Pull the shoulder belt portion of the seat belt toward the retractor to take up extra slack. Be
sure the shoulder belt is positioned across the
top, middle portion of the child’s shoulder. Be
sure to follow the booster seat manufacturer’s
instructions for adjusting the seat belt routing.
6. Follow the warnings, cautions and instruc- tions for properly fastening a seat belt shown
in “Three-point type seat belt with retractor”. 7. If the booster seat is installed in the front
passenger seat, push the power switch to the
ON position. The front passenger air bag sta-
tus light
may or may not illuminate
depending on the size of the child and the
type of booster seat used. See “Front passen-
ger air bag and status light” in this section.
PRECAUTIONS ON SUPPLEMENTAL
RESTRAINT SYSTEM
This Supplemental Restraint System (SRS) sec-
tion contains important information concerning
the following systems.
• Driver and passenger supplemental front- impact air bag (NISSAN Advanced Air Bag
System)
• Front seat-mounted side-impact supplemental air bag
• Roof-mounted curtain side-impact supplemen- tal air bag
• Seat belt with pretensioner
Supplemental front-impact air bag system:
The NISSAN Advanced Air Bag System can help
cushion the impact force to the head and chest of
the driver and front passenger in certain frontal
collisions.
Front seat-mounted side-impact supple-
mental air bag system: This system can help
cushion the impact force to the chest and pelvic
area of the driver and front passenger in certain
side impact collisions. The side air bag is de-
signed to inflate on the side where the vehicle is
impacted.
SUPPLEMENTAL RESTRAINT
SYSTEM
1-36Safety–Seats, seat belts and supplemental restraint system
Page 129 of 412
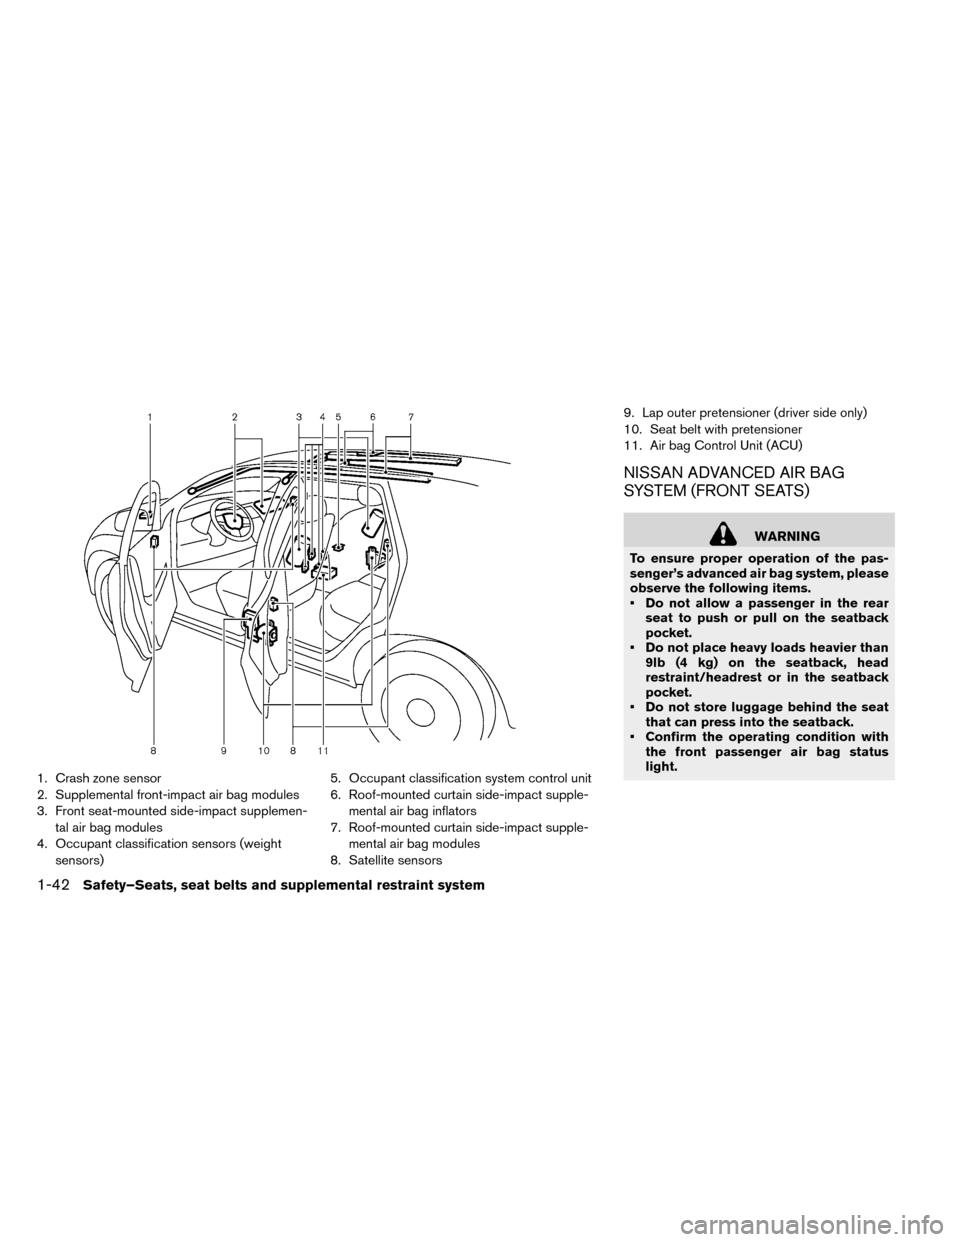
1. Crash zone sensor
2. Supplemental front-impact air bag modules
3. Front seat-mounted side-impact supplemen-tal air bag modules
4. Occupant classification sensors (weight sensors) 5. Occupant classification system control unit
6. Roof-mounted curtain side-impact supple-
mental air bag inflators
7. Roof-mounted curtain side-impact supple- mental air bag modules
8. Satellite sensors 9. Lap outer pretensioner (driver side only)
10. Seat belt with pretensioner
11. Air bag Control Unit (ACU)
NISSAN ADVANCED AIR BAG
SYSTEM (FRONT SEATS)
WARNING
To ensure proper operation of the pas-
senger’s advanced air bag system, please
observe the following items.
• Do not allow a passenger in the rear seat to push or pull on the seatback
pocket.
• Do not place heavy loads heavier than 9lb (4 kg) on the seatback, head
restraint/headrest or in the seatback
pocket.
• Do not store luggage behind the seat that can press into the seatback.
• Confirm the operating condition with the front passenger air bag status
light.
1-42Safety–Seats, seat belts and supplemental restraint system
Page 343 of 412
head restraints/headrests move up and down
smoothly and that the locks (if so equipped) hold
securely in all latched positions.
Seat belts:Check that all parts of the seat belt
system (for example, buckles, anchors, adjusters
and retractors) operate properly and smoothly,
and are installed securely. Check the belt web-
bing for cuts, fraying, wear or damage.
Steering wheel: Check for changes in the
steering conditions, such as excessive free play,
hard steering or strange noises.
Warning lights and chimes: Make sure that all
warning lights and chimes are operating properly.
Windshield defroster: Check that the air emits
from the defroster outlets properly and in suffi-
cient quantity when operating the heater or air
conditioner.
Windshield wiper and washer*: Check that
the wipers and washers operate properly and
that the wipers do not streak.
Under hood and vehicle
The maintenance items listed here should be
checked periodically. 12-volt battery (for serviceable battery)*:
Check the fluid level in each cell. It should be
between the MAX and MIN lines. Vehicles oper-
ated in high temperatures or under severe condi-
tions require frequent checks of the 12–volt bat-
tery fluid level.
NOTE:
Care should be taken to avoid situations
that can lead to potential battery discharge
and potential no-start conditions such as:
1. Installation or extended use of electronic ac-
cessories that consume battery power when
the engine is not running (Phone chargers,
GPS, DVD players, etc.)
2. Vehicle is not driven regularly and/or only driven short distances.
In these cases, the battery may need to be
charged to maintain battery health.
Brake fluid level*: Make sure that the brake
fluid level is between the “MAX” and “MIN” lines
on the reservoir.
Coolant level*: Check the coolant level when
the motor compartment is cold. Fluid leaks:
Check under the vehicle for water
or other fluid leaks after the vehicle has been
parked for a while. Water dripping from the air
conditioner after use is normal. If you should
notice any leaks, check for cause and have it
corrected immediately.
Radiator and hoses: Check the front of the
radiator and clean off any dirt, insects, leaves,
etc., that may have accumulated. Make sure that
the hoses have no cracks, deformation, rot or
loose connections.
Underbody: The underbody is frequently ex-
posed to corrosive substances such as those
used on icy roads or to control dust. It is very
important to remove these substances, other-
wise rust will form on the floor pan and frame. At
the end of winter, the underbody should be thor-
oughly flushed with plain water, being careful to
clean those areas where mud and dirt may accu-
mulate. For additional information, see “Cleaning
exterior” in the “Appearance and care” section.
Windshield washer fluid*: Check that there is
an adequate amount of fluid in the reservoir.
8-4Maintenance and do-it yourself