2015 NISSAN FRONTIER instrument panel
[x] Cancel search: instrument panelPage 2 of 24
*See your Owner’s Manual for information.
1
2
3
4
5
10
11
12
13
14
15
16
17
18
19
20
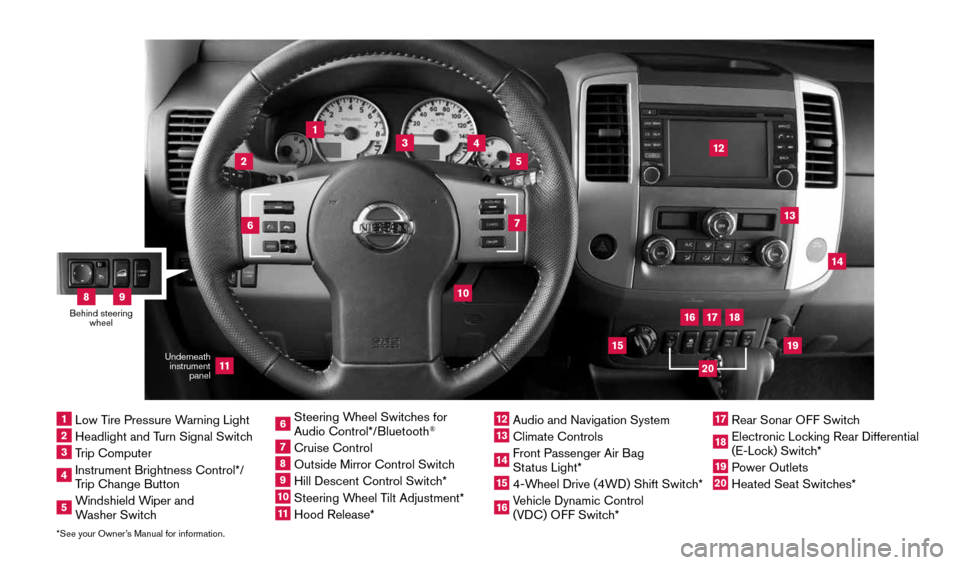
1 Low Tire Pressure Warning Light2 Headlight and Turn Signal Switch3 Trip Computer4 Instrument Brightness Control*/
Trip Change Button5 Windshield Wiper and
Washer Switch
6
Steering Wheel Switches for
Audio Control*/Bluetooth
®
7
Cruise Control8 Outside Mirror Control Switch9 Hill Descent Control Switch*10 Steering Wheel Tilt Adjustment*11 Hood Release*
12 Audio and Navigation System13 Climate Controls14 Front Passenger Air Bag
Status Light*15
4-Wheel Drive (4WD) Shift Switch*16 Vehicle Dynamic Control
(VDC) OFF Switch*
17
Rear Sonar OFF Switch18 Electronic Locking Rear Differential
(E-Lock) Switch*19
Power Outlets20 Heated Seat Switches*
6
7
Underneath
instrument panel
Behind steering wheel8
9
1912900_15c_Frontier_QRG_030215.indd 43/2/15 4:04 PM
Page 10 of 24
8
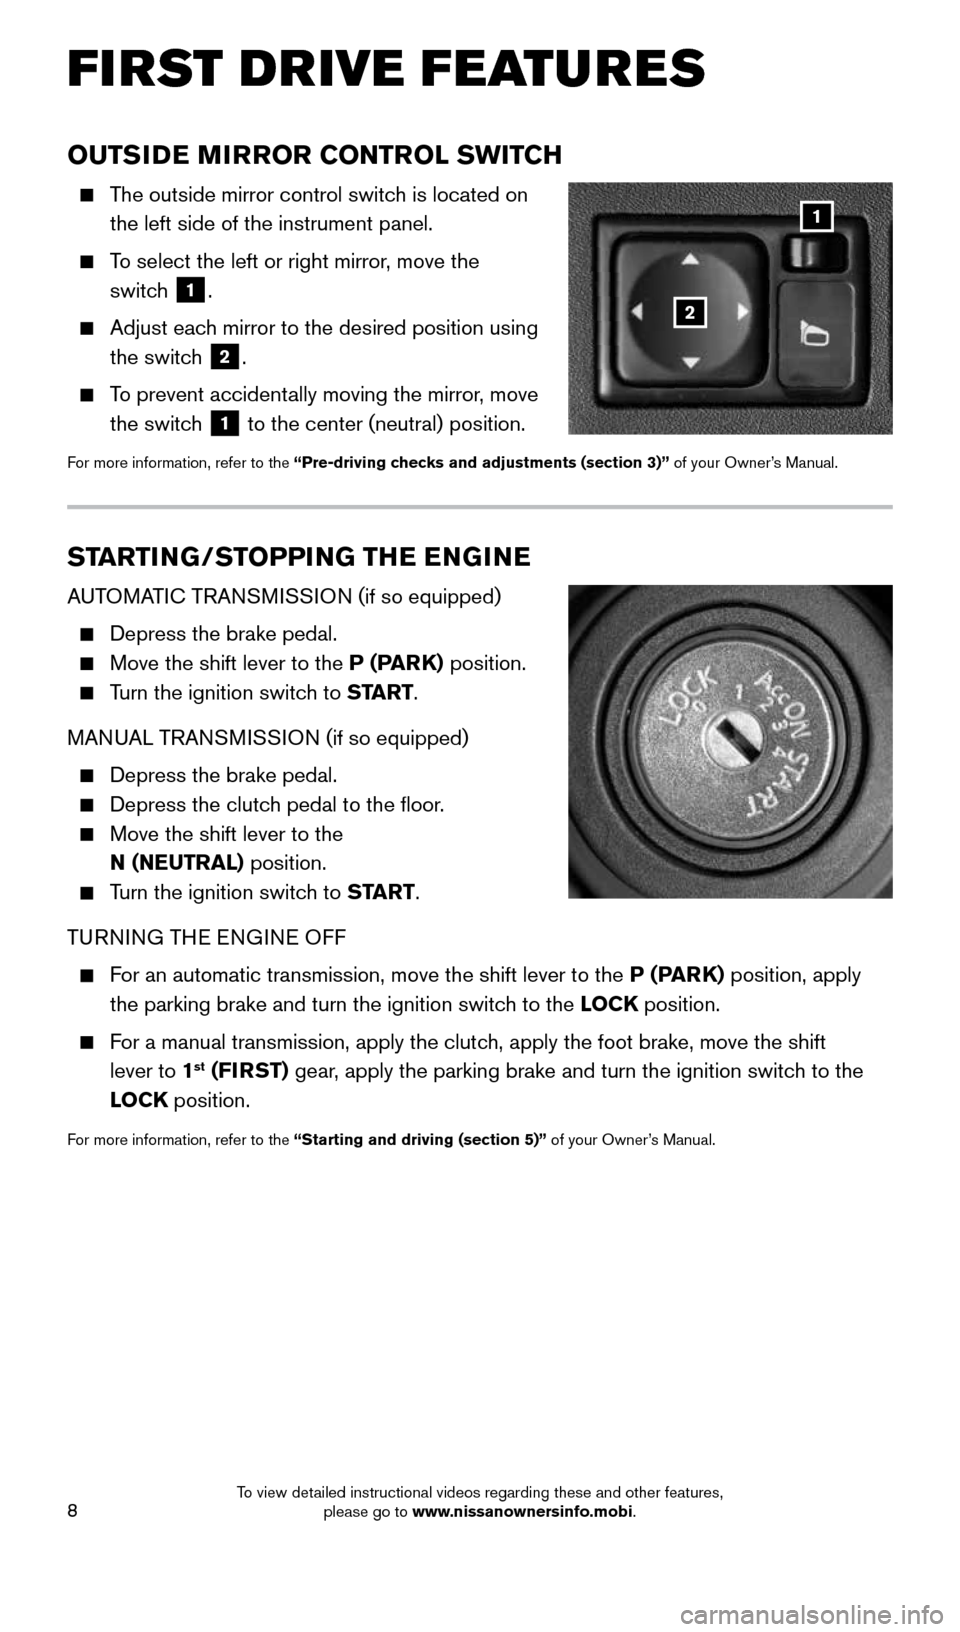
OUTSIDE MIRROR CONTROL SWITCH
The outside mirror control switch is located on
the left side of the instrument panel.
To select the left or right mirror, move the
switch
1.
Adjust each mirror to the desired position using
the switch
2.
To prevent accidentally moving the mirror, move
the switch
1 to the center (neutral) position.
For more information, refer to the “Pre-driving checks and adjustments (section 3)” of your Owner’s Manual.
STARTING/STOPPING THE ENGINE
AUTOMATIC TRANSMISSION (if so equipped)
Depress the brake pedal.
Move the shift lever to the P (PARK) position.
Turn the ignition switch to START.
MANUAL TRANSMISSION (if so equipped)
Depress the brake pedal.
Depress the clutch pedal to the floor.
Move the shift lever to the
N ( NEUTRAL ) position.
Turn the ignition switch to START .
TURNING THE ENGINE OFF
For an automatic transmission, move the shift lever to the P (PARK) position, apply
the parking brake and turn the ignition switch to the LOCK position.
For a manual transmission, apply the clutch, apply the foot brake, move the shift
lever to 1st (FIRST) gear, apply the parking brake and turn the ignition switch to the
LOCK position.
For more information, refer to the “Starting and driving (section 5)” of your Owner’s Manual.
1
2
FI RST DRIVE FEATURES
1912900_15c_Frontier_QRG_030215.indd 83/2/15 4:04 PM
To view detailed instructional videos regarding these and other features, please go to www.nissanownersinfo.mobi.
Page 11 of 24
9
HEADLIGHT CONTROL SWITCH
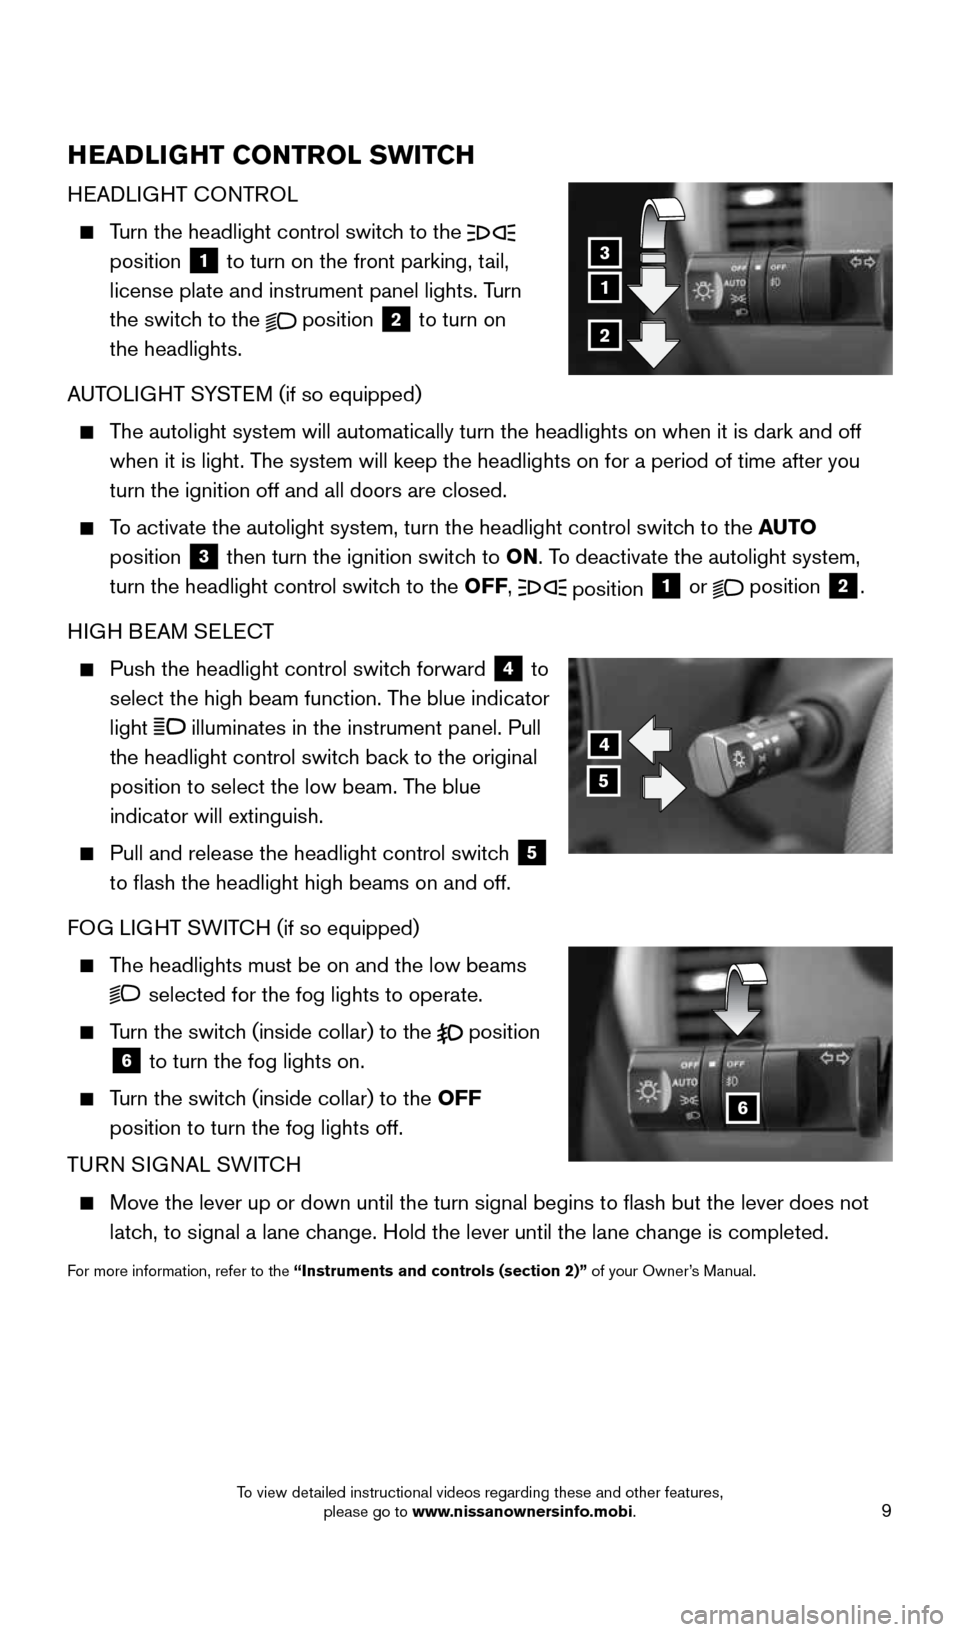
HEADLIGHT CONTROL
Turn the headlight control switch to the
position 1 to turn on the front parking, tail,
license plate and instrument panel lights. Turn
the switch to the
position
2 to turn on
the headlights.
AUTOLIGHT SYSTEM (if so equipped)
The autolight system will automatically turn the headlights on when it is\
dark and off
when it is light. The system will keep the headlights on for a period of time after you
turn the ignition off and all doors are closed.
To activate the autolight system, turn the headlight control switch to the AUTO
position
3 then turn the ignition switch to ON. To deactivate the autolight system,
turn the headlight control switch to the OFF, position 1 or
position
2.
HIGH BEAM SELECT
Push the headlight control switch forward
4 to
select the high beam function. The blue indicator
light
illuminates in the instrument panel. Pull
the headlight control switch back to the original
position to select the low beam. The blue
indicator will extinguish.
Pull and release the headlight control switch
5
to flash the headlight high beams on and off.
FOG LIGHT SWITCH (if so equipped)
The headlights must be on and the low beams
selected for the fog lights to operate.
Turn the switch (inside collar) to the
position
6 to turn the fog lights on.
Turn the switch (inside collar)
to the OFF
position to turn the fog lights off.
TURN SIGNAL SWITCH
Move the lever up or down until the turn signal begins to flash but th\
e lever does not
latch, to signal a lane change. Hold the lever until the lane change is completed.
For more information, refer to the “Instruments and controls (section 2)” of your Owner’s Manual.
4
5
6
1
3
2
1912900_15c_Frontier_QRG_030215.indd 93/2/15 4:04 PM
To view detailed instructional videos regarding these and other features, please go to www.nissanownersinfo.mobi.
Page 15 of 24
13
CRUISE CONTROL (if so equipped)
The cruise control system enables you to set a
constant cruising speed once the vehicle has
reached 25 mph (40 km/h).
The system will automatically maintain the set
speed until you tap the brake pedal, accelerate,
cancel or turn the system off.
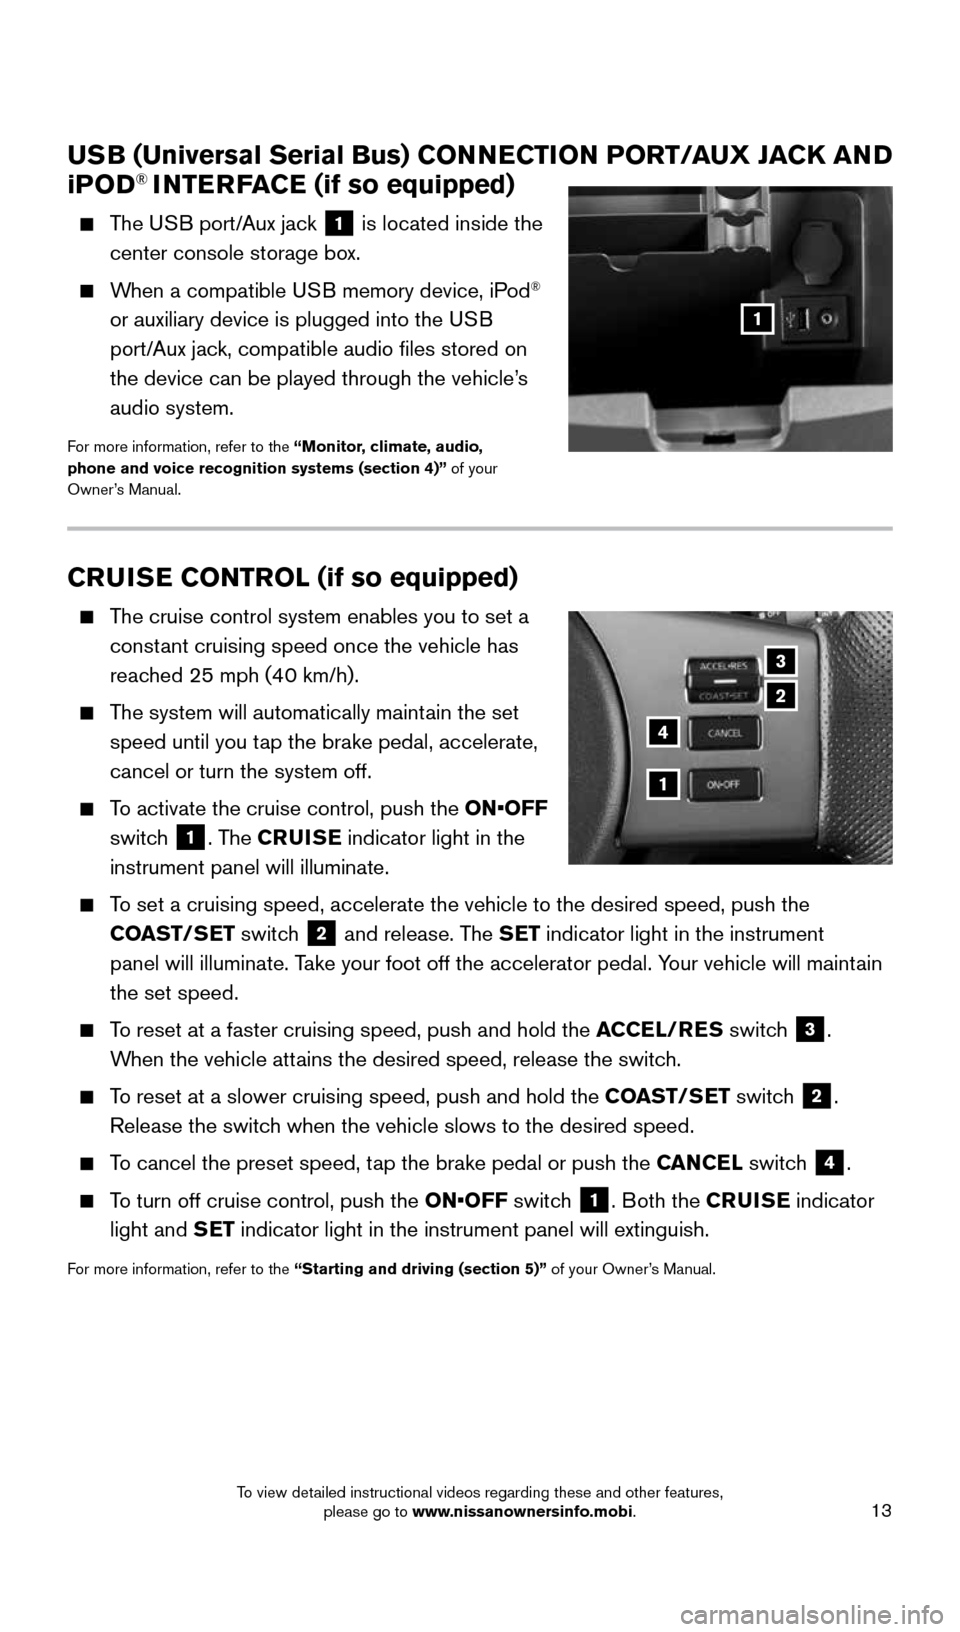
To activate the cruise control, push the ON•OFF
switch
1. The CRUISE indicator light in the
instrument panel will illuminate.
To set a cruising speed, accelerate the vehicle to the desired speed, pus\
h the
COAST/SET switch
2 and release. The SET indicator light in the instrument
panel will illuminate. Take your foot off the accelerator pedal. Your vehicle will maintain
the set speed.
To reset at a faster cruising speed, push and hold the ACCEL/RES switch
3.
When the vehicle attains the desired speed, release the switch.
To reset at a slower cruising speed, push and hold the COAST/SET switch
2.
Release the switch when the vehicle slows to the desired speed.
To cancel the preset speed, tap the brake pedal or push the CANCEL switch
4.
To turn off cruise control, push the ON•OFF switch
1. Both the CRUISE indicator
light and SET indicator light in the instrument panel will extinguish.
For more information, refer to the “Starting and driving (section 5)” of your Owner’s Manual.
3
2
1
4
USB (Universal Serial Bus) CONNECTION PORT/AUX JACK AND
i POD® INTERFACE (if so equipped)
The USB port/Aux jack
1 is located inside the
center console storage box.
When a compatible USB memory device, iPod®
or auxiliary device is plugged into the USB
port/Aux jack, compatible audio files stored on
the device can be played through the vehicle’s
audio system.
For more information, refer to the “Monitor, climate, audio,
phone and voice recognition systems (section 4)” of your
Owner’s Manual.
1
1912900_15c_Frontier_QRG_030215.indd 133/2/15 4:04 PM
To view detailed instructional videos regarding these and other features, please go to www.nissanownersinfo.mobi.
Page 16 of 24
14
TRIP COMPUTER
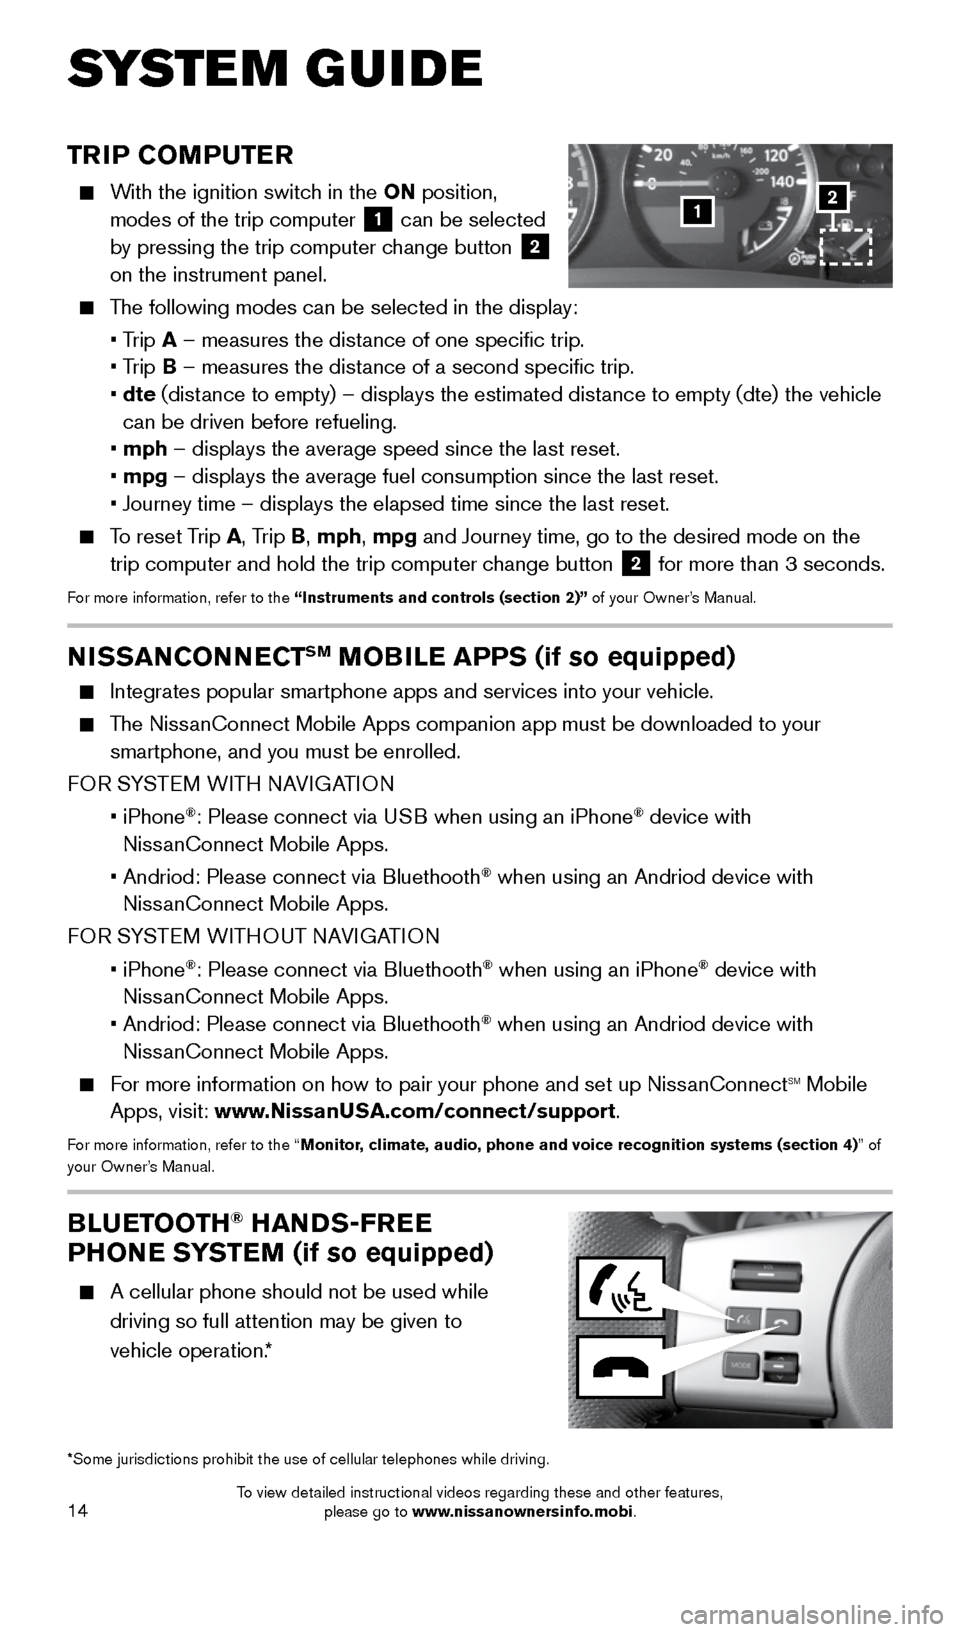
With the ignition switch in the ON position,
modes of the trip computer
1 can be selected
by pressing the trip computer change button 2
on the instrument panel.
The following modes can be selected in the display:
• Trip A – measures the distance of one specific trip.
• Trip B – measures the distance of a second specific trip.
• dte (distance to empty) – displays the estimated distance to empty (dte) the vehicle
can be driven before refueling.
• mph – displays the average speed since the last reset.
• mpg – displays the average fuel consumption since the last reset.
• Journey time – displays the elapsed time since the last reset.
To reset Trip A, Trip B, mph, mpg and Journey time, go to the desired mode on the
trip computer and hold the trip computer change button 2 for more than 3 seconds.For more information, refer to the “Instruments and controls (section 2)” of your Owner’s Manual.
1
BLUETOOTH® HANDS-FREE
PHONE SYSTEM (if so equipped)
A cellular phone should not be used while
driving so full attention may be given to
vehicle operation.*
SYS T E M GUIDE
*Some jurisdictions prohibit the use of cellular telephones while drivin\
g.
2
NISSANCONNECTSM MOBILE APPS (if so equipped)
Integrates popular smartphone apps and services into your vehicle.
The NissanConnect Mobile Apps companion app must be downloaded to your
smartphone, and you must be enrolled.
FOR SYSTEM WITH NAVIGATION
• iPhone
®: Please connect via USB when using an iPhone® device with
NissanConnect Mobile Apps.
• Andriod: Please connect via Bluethooth
® when using an Andriod device with
NissanConnect Mobile Apps.
FOR SYSTEM WITHOUT NAVIGATION
• iPhone
®: Please connect via Bluethooth® when using an iPhone® device with
NissanConnect Mobile Apps.
• Andriod: Please connect via Bluethooth
® when using an Andriod device with
NissanConnect Mobile Apps.
For more information on how to pair your phone and set up NissanConnectsm mobile
Apps, visit: www.NissanUSA.com/connect/support.
For more information, refer to the “Monitor, climate, audio, phone and voice recognition systems (section 4) ” of
your Owner’s Manual.
1912900_15c_Frontier_QRG_030215.indd 143/2/15 4:04 PM
To view detailed instructional videos regarding these and other features, please go to www.nissanownersinfo.mobi.
Page 20 of 24
18
SYSTEM GUIDE
VEHICLE PHONEBOOK
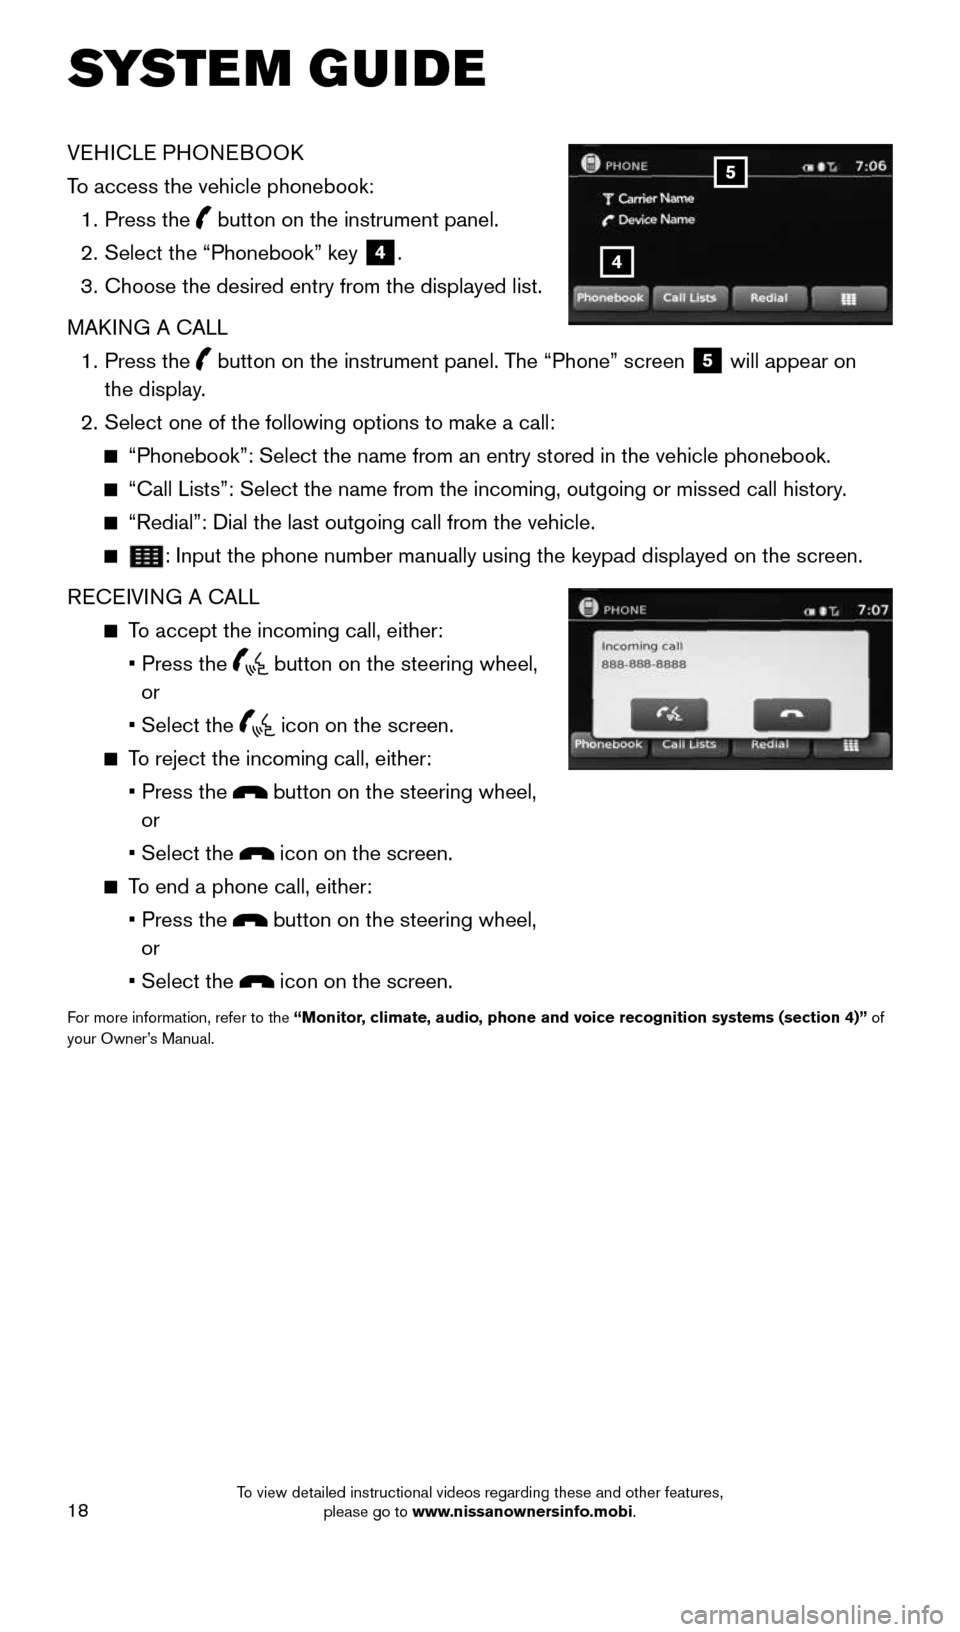
To access the vehicle phonebook:
1. Press the
button on the instrument panel.
2. Select the “Phonebook” key
4.
3. Choose the desired entry from the displayed list.
MAKING A CALL
1. Press the
button on the instrument panel. The “Phone” screen
5 will appear on
the display.
2. Select one of the following options to make a call:
“Phonebook”: Select the name from an entry stored in the vehicle p\
honebook.
“Call Lists”: Select the name from the incoming, outgoing or misse\
d call history.
“Redial”: Dial the last outgoing call from the vehicle.
: Input the phone number manually using the keypad displayed on the scre\
en.
RECEIVING A CALL
To accept the incoming call, either:
• Press the
button on the steering wheel,
or
• Select the
icon on the screen.
To reject the incoming call, either:
• Press the
button on the steering wheel,
or
• Select the
icon on the screen.
To end a phone call, either:
• Press the
button on the steering wheel,
or
• Select the
icon on the screen.
For more information, refer to the “Monitor, climate, audio, phone and voice recognition systems (section 4)” of
your Owner’s Manual.
4
5
1912900_15c_Frontier_QRG_030215.indd 183/2/15 4:04 PM
To view detailed instructional videos regarding these and other features, please go to www.nissanownersinfo.mobi.