Page 29 of 510

●Head restraints/headrests should be
adjusted properly as they may provide
significant protection against injury in
an accident. Always replace and adjust
them properly if they have been re-
moved for any reason.
● If the head restraints/headrests are re-
moved for any reason, they should be
securely stored to prevent them from
causing injury to passengers or damage
to the vehicle in case of sudden braking
or an accident.
● When returning the seatbacks to the
upright position, be certain they are
completely secured in the latched posi-
tion. If they are not completely secured,
passengers may be injured in an acci-
dent or sudden stop.
● Properly secure all cargo to help pre-
vent it from sliding or shifting. Do not
place cargo higher than the seatbacks.
In a sudden stop or collision, unsecured
cargo could cause personal injury.
Folding the 2nd row bench seat (if so
equipped)
To fold the 2nd row bench seat flat for maximum
cargo hauling:
�1Pull the strap forward, located in the center
of each seat cushion, and fold each seat
cushion toward the front of the vehicle. 2. Pull the strap to release the head
restraint/headrest rearward.
Page 31 of 510
8. Rotate the head restraint/headrest forwardto return it to the normal seating position.
Page 32 of 510
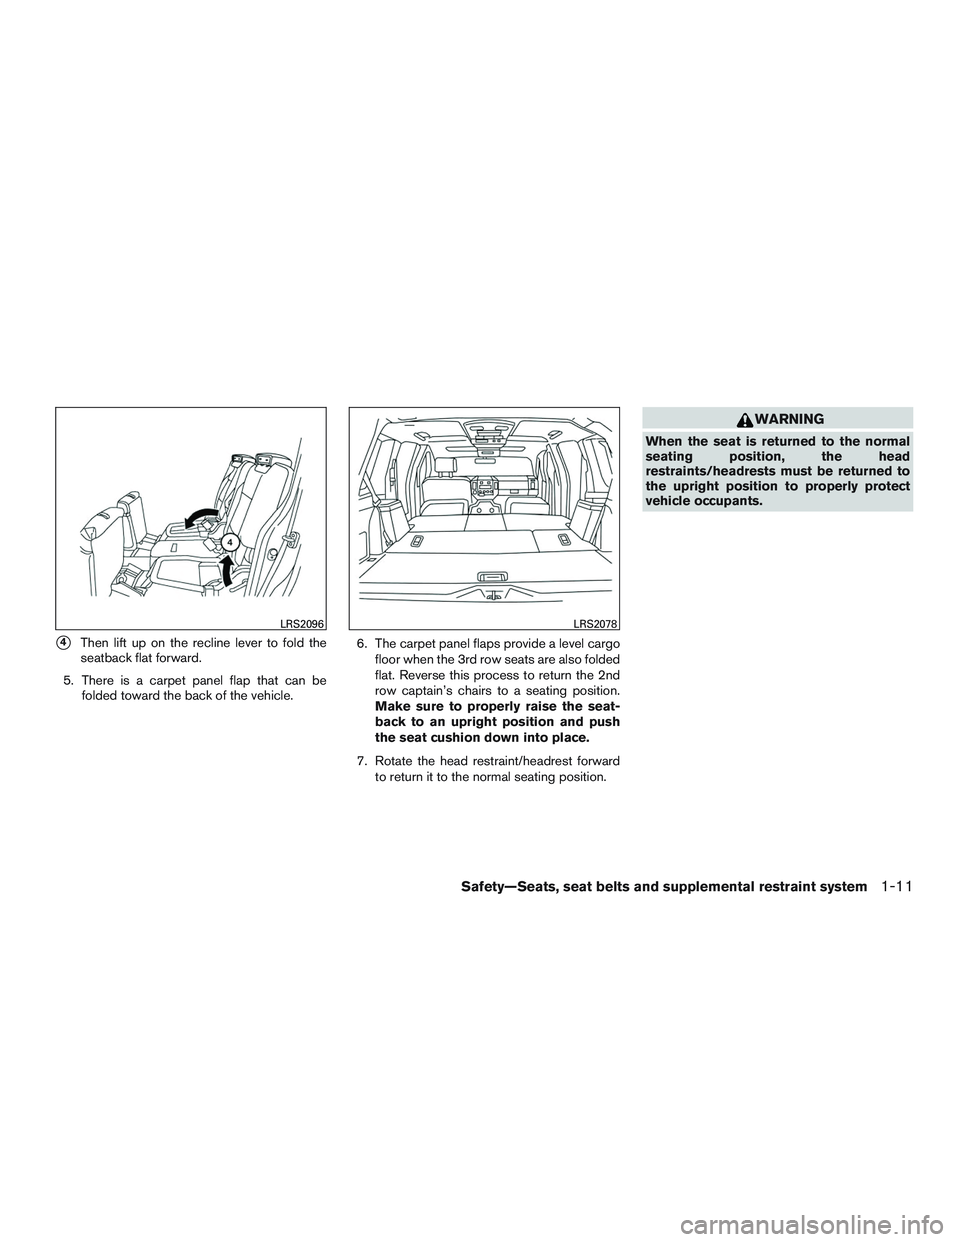
�4Then lift up on the recline lever to fold the
seatback flat forward.
5. There is a carpet panel flap that can be folded toward the back of the vehicle. 6. The carpet panel flaps provide a level cargo
floor when the 3rd row seats are also folded
flat. Reverse this process to return the 2nd
row captain’s chairs to a seating position.
Make sure to properly raise the seat-
back to an upright position and push
the seat cushion down into place.
7. Rotate the head restraint/headrest forward to return it to the normal seating position.
Page 33 of 510
3rd row manual folding seats (if so
equipped)
To fold the 3rd row split bench seat flat for
maximum cargo capacity:1. Disconnect and secure the center seat belt and tongues into the retractor base. For
additional information, refer to “Stowing the
3rd row center seat belt” in this section.
2. Lower the head restraints/headrests to the full down position.
3. Then pull up on the latch located on the outside corner of each seatback and fold the
seatback forward over the seat base. To return the 3rd row split bench seat to a seating
position, unfold the seatback and push it back
until it latches into position.
Page 35 of 510

WARNING
Head restraints/headrests supplement
the other vehicle safety systems. They may
provide additional protection against in-
jury in certain rear end collisions. Adjust-
able head restraints/headrests must be
adjusted properly, as specified in this sec-
tion. Check the adjustment after someone
else uses the seat. Do not attach anything
to the head restraint/headrest stalks or
remove the head restraint/headrest. Do
not use the seat if the head
restraint/headrest has been removed. If
the head restraint/headrest was removed,
reinstall and properly adjust the head
restraint/headrest before an occupant
uses the seating position. Failure to fol-
low these instructions can reduce the ef-
fectiveness of the head
restraints/headrests. This may increase
the risk of serious injury or death in a
collision.The illustration shows the seating positions
equipped with head restraints/headrests.
�
Indicates the seating position is equipped with
a head restraint.
� Indicates the seating position is equipped with
a headrest.
+ Indicates the seating position is not equipped
with a head restraint or headrest (if applicable) . ●
Your vehicle is equipped with a head
restraint/headrest that may be integrated,
adjustable or non-adjustable.
● Adjustable head restraints/headrests have
multiple notches along the stalk(s) to lock
them in a desired adjustment position.
● The non-adjustable head
restraints/headrests have a single locking
notch to secure them to the seat frame.
Page 37 of 510
REMOVE
Use the following procedure to remove the head
restraint/headrest:1. Pull the head restraint/headrest up to the highest position.
2. Push and hold the lock knob.
3. Remove the head restraint/headrest from the seat.
4. Store the head restraint/headrest properly in a secure place so it is not loose in the
vehicle. 5. Reinstall and properly adjust the head
restraint/headrest before an occupant uses
the seating position.
REMOVABLE (without Dual head
restraint/headrest DVD system only)
Page 40 of 510
WARNING
When the seat is returned to the normal
seating position, the head
restraint/headrest must be returned to the
upright position to properly protect ve-
hicle occupants.
FRONT-SEAT ACTIVE HEAD
RESTRAINTS
Page 366 of 510

●Make sure the area around the vehicle is
clear.
● Check fluid levels such as engine oil, cool-
ant, brake fluid, and windshield-washer fluid
as frequently as possible, or at least when-
ever you refuel.
● Check that all windows and lights are clean.
● Visually inspect tires for their appearance
and condition. Also check tires for proper
inflation.
● Check that all doors are closed.
● Position seat and adjust head
restraints/headrests.
● Adjust inside and outside mirrors.
● Fasten seat belts and ask all passengers to
do likewise.
● Check the operation of warning lights when
the ignition switch is placed in the ON posi-
tion. For additional information, refer to
“Warning lights, indicator lights and audible
reminders” in the “Instruments and controls”
section of this manual. 1. Apply the parking brake.
2. Move the shift lever to P (Park) or N (Neu-
tral) . P (Park) is recommended.
The shift lever cannot be moved out of
P (Park) and into any of the other gear
positions if the ignition switch is
turned to the OFF position or if the key
is removed from the ignition switch.
The starter is designed not to operate if
the shift lever is in any of the driving
positions.
3. Crank the engine with your foot off the
accelerator pedal by placing the ignition
switch in the START position. Release the
key when the engine starts. If the engine
starts, but fails to run, repeat the above
procedure.
● If the engine is very hard to start in ex-
tremely cold weather or when restarting,
depress the accelerator pedal a little (ap-
proximately 1/3 to the floor) and hold it
and then crank the engine. Release the
key and the accelerator pedal when the
engine starts. ●
If the engine is very hard to start because
it is flooded, depress the accelerator
pedal all the way to the floor and hold it.
Crank the engine for 5–6 seconds. After
cranking the engine, release the accel-
erator pedal. Crank the engine with your
foot off the accelerator pedal by turn-
ing the ignition key to START. Release the
key when the engine starts. If the engine
starts, but fails to run, repeat the above
procedure.


To fold the 3rd row split bench seat flat for
maximum cargo capacity:1. Disconnect and secure the center seat belt and tongues into the retractor base. Fo")

