Page 157 of 510

The interior light has a three-position switch and
operates regardless of ignition switch position.
When the switch is in the ON position
�1, the
interior lights illuminate, regardless of door posi-
tion. The lights will go off after a period of time
unless the ignition switch is in the ON position.
When the switch is in the DOOR position
�2, the
interior lights and puddle lights (if so equipped)
will stay on for a period of time when:
● The doors are unlocked by the keyfob, a key
or the power door lock switch while all doors
are closed and the ignition switch is in the
OFF position. ●
The driver’s door is opened and then closed
while the key is removed from the ignition
switch.
● The key is removed from the ignition switch
while all doors are closed.
The lights will turn off while the timer is activated
when: ● The driver’s door is locked by the keyfob, a
key, or the power door lock switch.
● The ignition switch is placed in the ON po-
sition.
When the switch is in the OFF position
�3, the
interior lights do not illuminate, regardless of door
position. The puddle lights (if so equipped) come
on when any front or rear passenger door is
opened.
The lights will turn off automatically after a period
of time while doors are open to prevent the bat-
tery from becoming discharged. NOTE:
The footwell lights (if so equipped) and
door step lights illuminate when the driver
and passenger doors are open regardless
of the interior light switch position. These
lights will turn off automatically after a
period of time while doors are open to
prevent the battery from becoming dis-
charged.
Page 158 of 510
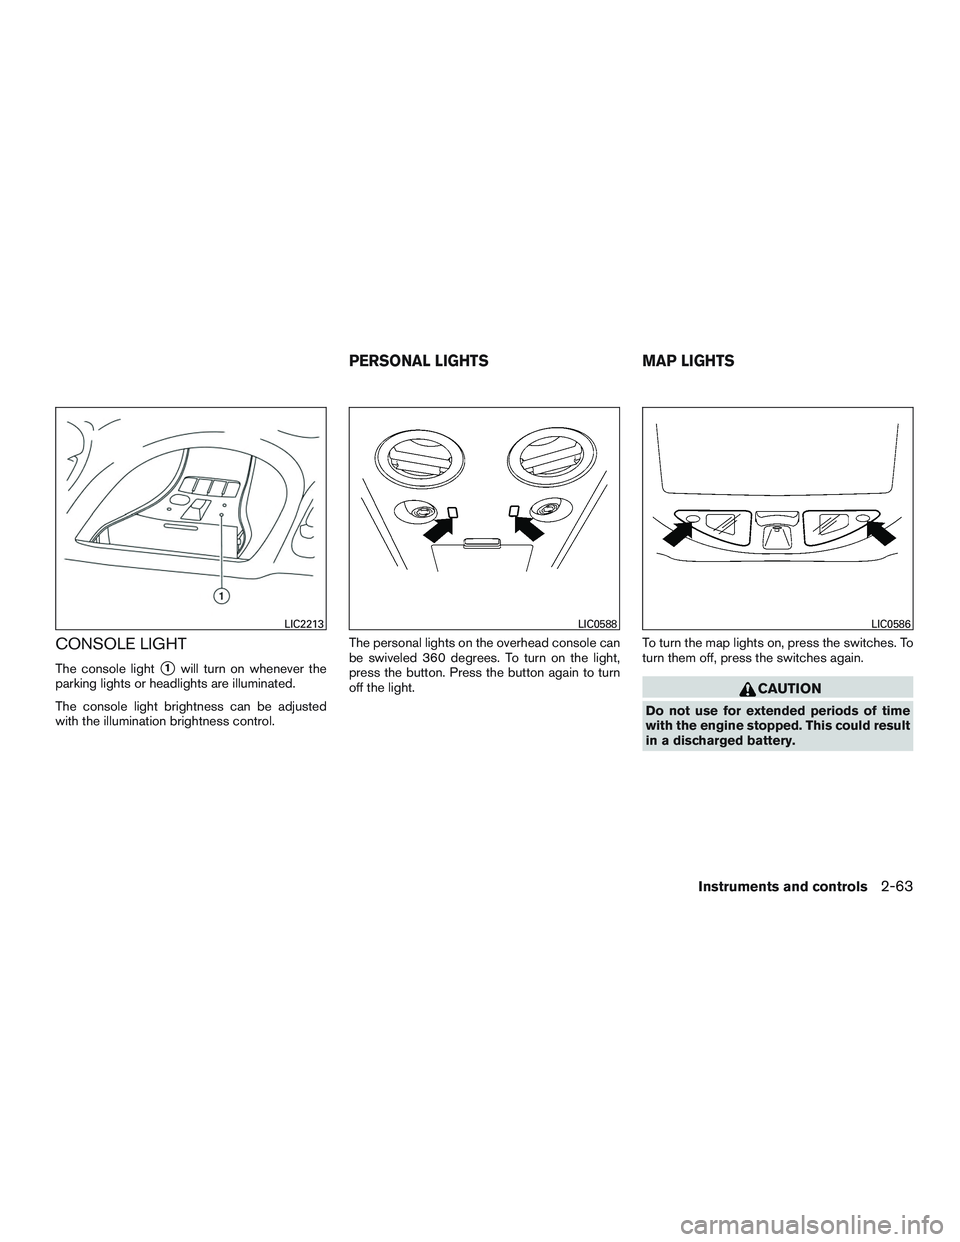
CONSOLE LIGHT
The console light�1will turn on whenever the
parking lights or headlights are illuminated.
The console light brightness can be adjusted
with the illumination brightness control. The personal lights on the overhead console can
be swiveled 360 degrees. To turn on the light,
press the button. Press the button again to turn
off the light.
To turn the map lights on, press the switches. To
turn them off, press the switches again.
Page 159 of 510
 position: The light illuminates
wh")
The cargo light on the overhead trim has a three-
position switch. To operate, push the switch to
the desired position.
ON: The light is illuminated.
Normal (center) position: The light illuminates
when the liftgate or glass hatch is opened. The
light turns off when the liftgate or glass hatch is
closed.
OFF: The light does not illuminate regardless of
liftgate position or lock status.The HomeLink® Universal Transceiver provides
a convenient way to consolidate the functions of
up to three individual hand-held transmitters into
one built-in device.
HomeLink® Universal Transceiver:
● Will operate most Radio Frequency devices
such as garage doors, gates, home and of-
fice lighting, entry door locks and security
systems.
● Is powered by your vehicle’s battery. No
separate batteries are required. If the vehi-
cle’s battery is discharged or is discon-
nected, HomeLink® will retain all program-
ming.
When the HomeLink® Universal Trans-
ceiver is programmed, retain the original
transmitter for future programming proce-
dures (Example: new vehicle purchases) .
Upon sale of the vehicle, the programmed
HomeLink® Universal Transceiver buttons
should be erased for security purposes. For
additional information, refer to “Program-
ming HomeLink®” in this section.
Page 175 of 510
WARNING
●Radio waves could adversely affect
electric medical equipment. Those who
use a pacemaker should contact the
electric medical equipment manufac-
turer for the possible influences before
use.
● The Intelligent Key transmits radio
waves when the buttons are pressed.
The FAA advises the radio waves may
affect aircraft navigation and communi-
cation systems. Do not operate the In-
telligent Key while on an airplane. Make
sure the buttons are not operated unin-
tentionally when the unit is stored for a
flight.
The Intelligent Key can operate all the door locks
using the remote control function or pushing the
request switch on the vehicle without taking the
key out from a pocket or purse. The operating
environment and/or conditions may affect the
Intelligent Key operation.
Be sure to read the following before using the
Intelligent Key.
Page 186 of 510
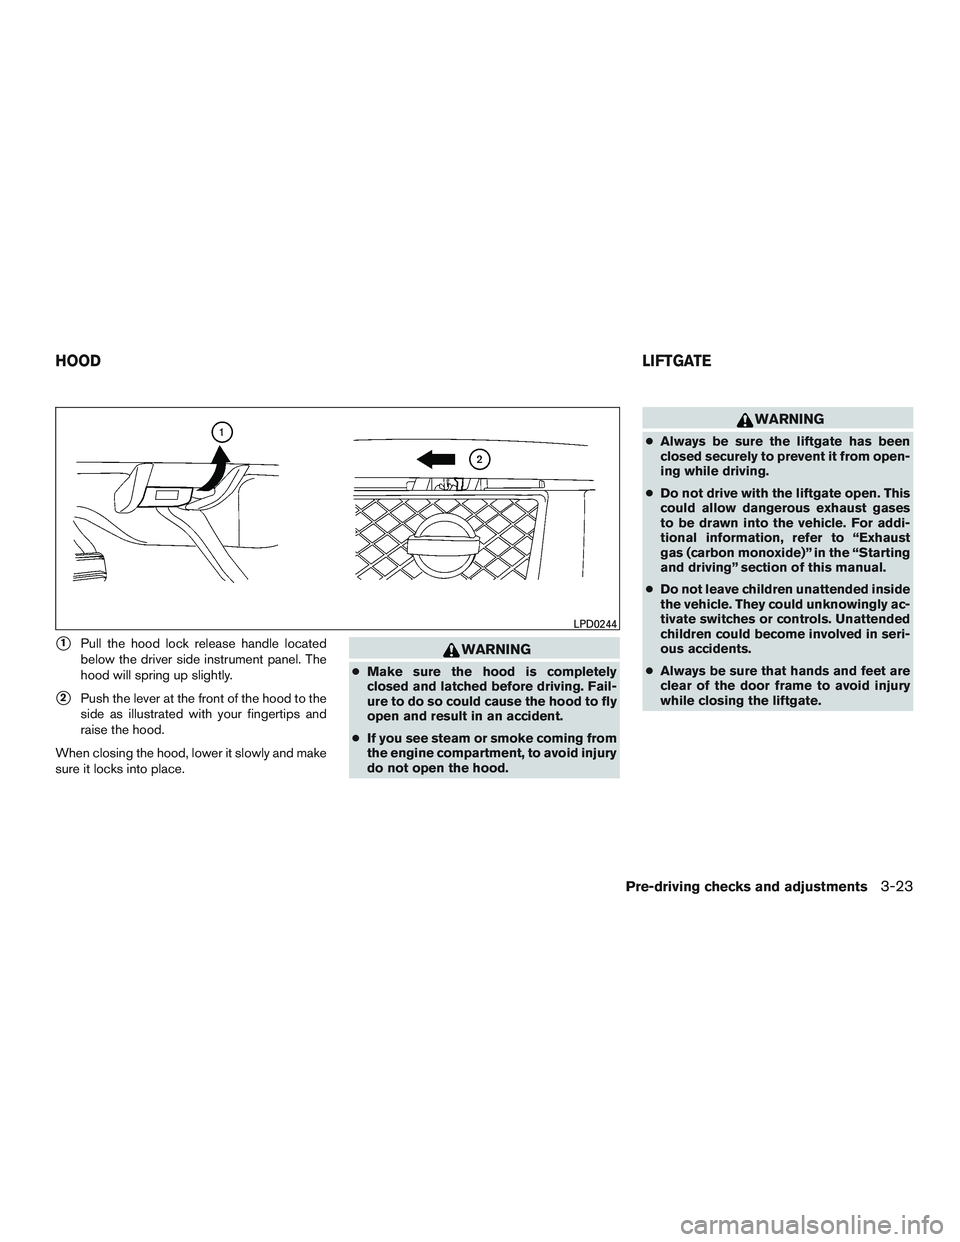
�1Pull the hood lock release handle located
below the driver side instrument panel. The
hood will spring up slightly.
�2Push the lever at the front of the hood to the
side as illustrated with your fingertips and
raise the hood.
When closing the hood, lower it slowly and make
sure it locks into place.
Page 188 of 510

●The keyfob button must be held for 0.5 sec-
onds before the liftgate opens.
● The liftgate must be unlocked to open it with
the outside opener handle.
● The switch on the rear pillar cannot be used
to open the liftgate.
A warning chime will sound if the shift lever is
moved out of P (Park) during a power open
operation.
Power Close:
The power liftgate automatically moves from the
fully open position to the secondary position.
When the liftgate reaches the secondary posi-
tion, the cinching motor engages and pulls the
liftgate to its primary latch position. Power close
takes approximately seven to ten seconds. The
power close feature can be activated by the
switch on the keyfob, the instrument panel and
the rear pillar. The hazard lights flash and a chime
sounds to indicate the power close sequence
has been started. ● If the outside opener handle is activated
while the cinching motor is engaged, the
cinching motor will disengage and release
the latch. ●
The keyfob button must be held for 0.5 sec-
onds before the liftgate closes.
● The switch on the rear pillar can only be used
to close the liftgate if the cancel switch is not
in the on position.
Reverse:
The power liftgate will reverse direction immedi-
ately during power open or power close if the
keyfob, instrument panel or rear pillar switch is
pushed or if the outside handle is lifted. A chime
will sound to announce the reversal.
Auto Reverse:
If an obstacle is detected during power open or
power close, a warning chime will sound and the
liftgate will reverse direction and return to the full
open or full close position. If a second obstacle is
detected, the liftgate motion will stop and the
drive motor will disengage. The liftgate will enter
manual mode.
A pinch strip is mounted on each side of the
liftgate. If an obstacle is detected by a pinch strip
during power close, the liftgate will reverse direc-
tion and return to the full open position. NOTE:
If the pinch strip is damaged or removed,
the power close function will not operate.
Page 196 of 510
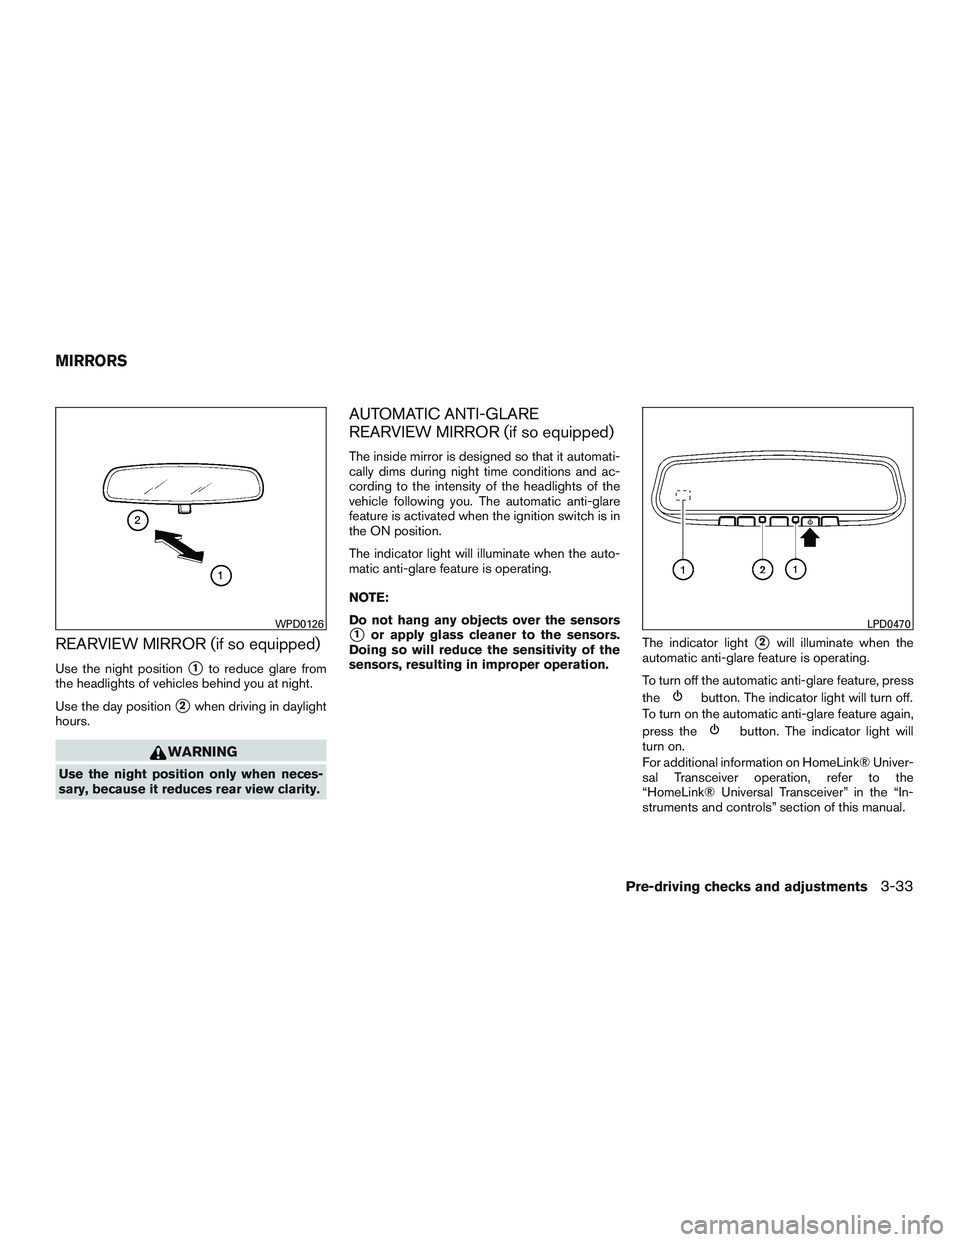
REARVIEW MIRROR (if so equipped)
Use the night position�1to reduce glare from
the headlights of vehicles behind you at night.
Use the day position
�2when driving in daylight
hours.
Page 212 of 510
 button (P. 4-11)
11. STATUS button (P. 4-14)
12. MAP button*
*For additional information, refer to the separate
Navigation System Owner’s Manual regarding
Naviga")
9. VOICE button*
10. BACK (previous) button (P. 4-11)
11. STATUS button (P. 4-14)
12. MAP button*
*For additional information, refer to the separate
Navigation System Owner’s Manual regarding
Navigation system control buttons.
**For additional information, refer to “Bluetooth®
Hands-Free Phone System with Navigation Sys-
tem” regarding the PHONE button in this section.
When you use this system, make sure the engine
is running.
If you use the system with the engine not
running (ignition ON or ACC) for a long
time, it will discharge the battery, and the
engine will not start.
Reference symbols:
ENTER button — This is a button on the control
panel.
“Example” — Words marked in quotes refer to a
key shown only on the display. These keys can be
selected by touching the screen or using the
NISSAN controller.
HOW TO USE THE NISSAN
CONTROLLER
Use the NISSAN controller to choose an item on
the display screen. Highlight an item on the dis-
play using the main directional buttons
�3(cer-
tain Navigation System functions use the addi-
tional directional buttons) or the center dial
�1.
Then press the ENTER button
�2to select the
item or perform the action.
The BACK button
�5has two functions:
● Go back to the previous display (cancel) .
If you press the BACK button
�5during setup,
the setup will be canceled and/or the display will
return to the previous screen. ●
Finish setup.
In some screens, pressing the BACK button
�5
accepts the changes made during setup.
For the VOICE button
�4functions, refer to the
separate Navigation System Owner’s Manual.
HOW TO USE THE TOUCH-
SCREEN