2015 NISSAN ARMADA turn signal
[x] Cancel search: turn signalPage 284 of 510
WARNING
●The Mobile Entertainment System is
designed for rear seat passenger view-
ing only.
● It is unlawful in most jurisdictions for a
person to drive a motor vehicle which is
equipped with a television viewer or
screen that is located in the motor ve-
hicle at any point forward of the back of
the driver’s seat, or that is visible, di-
rectly or indirectly, to the driver while
operating the vehicle.
● In the interest of safety, the monitors
should never be installed where they
will be visible, directly or indirectly, by
the operator of the motor vehicle.
● If your vehicle is equipped with a wire-
less rear seat audio system or any other
wireless infrared device, make sure it is
powered off when operating the Rear
Seat Entertainment System. If both sys-
tems are powered on at the same time,
the two systems may obstruct each
other, possibly creating undesirable au-
dio interference through the wireless
headphones. ●
For safety reasons, when changing
video discs it is recommended that the
vehicle is not in motion, and that you do
not allow children to unfasten safety
belts to change discs or make any ad-
justments to the system. System adjust-
ments can be accomplished using the
remote control unit, while safety belts
remain fastened.
CAUTION
● Be sure to run the vehicle engine while
using the system. Using this system
without running the engine can result in
a battery drain. To avoid the risk of
battery drain, please remember to turn
off the system when the vehicle is not in
use. Do not touch the inner pins of the
jacks on the front panel. Electrostatic
discharge may cause permanent dam-
age to the system. NOTE:
Depending on the USB device, it may or
may not charge when connected to the USB
connection port. Not all devices are able to
charge when connected to the USB connec-
tion port.
Each monitor includes a built-in dual channel
infrared transmitter for use with wireless head-
phones. The wireless headphones must be used
within a line of sight from the transmitter as infra-
red transmission, like visible light, travels only in a
straight line.
When placing the headphones on your head,
make sure to observe the Left and Right orienta-
tion. The headphones must be oriented correctly
(facing forward) in order to receive the audio
signal. Press the power button on the head-
phones, then select channel “A” to listen to moni-
tor A, or channel “B” to listen to monitor B. Adjust
the audio level using the volume control on each
headphone.
There is a 3.5mm stereo headphone output jack
on each monitor which can be used with any
standard stereo headphone with an in-line vol-
ume control (wired headphones sold separately) .
NISSAN MOBILE ENTERTAINMENT
SYSTEM (MES) (if so equipped)
Monitor, climate, audio, phone and voice recognition systems4-83
Page 305 of 510
The system provides priority for each of the fol-
lowing device inputs:1. External RCA A/V input
2. USB port
3. Disc playback
For example if a disc is playing and a USB device
is plugged in, the USB device will take priority
over disc playback. The external RCA A/V input
connections have priority over both USB port and
disc playback.
CONNECTING AN EXTERNAL A/V
MONITOR — OUTPUT
An external audio/video monitor may be con-
nected to the 3.5mm A/V connector (sold sepa-
rately) .
NOTE:
Use the 3.5mm A/V cable made specifically
for the device. An optional adapter (sold
separately) may be used to convert the
3.5mm A/V output to the standard RCA
jacks.
SELECTING MONITOR A OR B AS
THE SOURCE
It is possible to select monitor B as the source
from monitor A and vice versa. This will allow
content that is playing on monitor B to be dis-
played on monitor A.
Monitor A:
To select monitor B as the source for monitor A,
press the source button on the front panel or the
remote control until “MONITOR B” is displayed.
Monitor B:
To select monitor A as the source for monitor B,
press the source button on the front panel or the
remote control until “MONITOR A” is displayed.
TROUBLESHOOTING GUIDE
Symptom Remedy
Monitor does
not power on. Is ignition switch turned to the on or
ACC position?
Are batteries installed in the remote
control?
Check the remote control to make
sure “DVD-A” button is pressed for
controlling monitor A and “DVD-B”
button is pressed for controlling
monitor B.
Symptom Remedy
Remote control
does not
function.
Verify that the batteries in the remote
control are good.
Verify that the remote sensor lens is
not obstructed.
Disc will not
play. Insert the disc with label side facing
the rear of the vehicle.
Check if the disc is defective by try-
ing another disc.
Check the type of disc being played.
This unit only plays DVD (Single,
Dual Layer) , DVD-R/+R, DVD+R
Dual layer, DVD-RW/+RW, CD,
CD-R, and CD-RW.
Both the unit and DVD discs are
coded by region. If the region codes
don’t match, the DVD can’t be
played.
Disc plays, but
stops
intermittently. The disc is dirty and needs cleaning.
Condensation has formed inside the
unit. Remove the disc and allow unit
to dry out.
No picture. Check the signal source is
connected.
Check the menu source setting.
Match your monitor mode with the
source correctly.
Distorted
picture. Check the disc for fingerprints and
clean with a soft cloths, wiping from
center to edge.
4-104Monitor, climate, audio, phone and voice recognition systems
Page 306 of 510
Symptom Remedy
Cannot advance
through a DVD
movie.You cannot advance through the
opening credits and warning infor-
mation that appears at the beginning
of DVDs because the disc is pro-
grammed to prohibit these actions.
No sound or
distorted sound. Make sure that the external media
device is connected properly, and all
cables are securely inserted into the
appropriate jacks.
Verify that the batteries in the head-
phones are good.
If you are using the wireless
headphones, make sure you turn on
the power and select the correct
monitor(AorB).
Is volume turned on the head-
phones?
Is anything blocking the path be-
tween the monitor IR sensor and
headphones?
When placing the headphones on
your head, make sure to observe the
Left and Right orientation. The head-
phones must be oriented correctly
(facing forward) in order to receive
the audio signal.
Monitor feels
warm. When the monitor is in use for a
long period of time, the surface will
be warm. This is normal.Symptom Remedy
Player does not
respond to all
commands dur-
ing playback.Some operations are not permitted
by the DVD.
Refer to the specific instructions
included with the DVD for more
information.
When a DVD is
inserted, a Pa-
rental Setting
message is
displayed, pro-
hibiting DVD
movie playback. Using the remote control, enter the
4–digit Parental Password (0000)
and then press Enter.
After the Paren-
tal Password is
entered, a Pass-
word Incorrect
message is dis-
played and DVD
movie will not
play. If the incorrect Parental Password is
entered more than two times, the
until will stop playback and return to
the splashscreen. Using the remote
control, press Play to initiate play-
back and display the Parental Set-
ting message. Using the remote
control, enter the 4–digit Parental
Password (0000) and then press
Enter.
SPECIFICATIONS
LCD Backlight LED
Resolution
480x3(RGB) x234
Display 7”TFT LCD Panel
DVD Mechanism Slot-In Loader
LCD Backlight LED
Supported Disc DVD (Single, Dual Layer) ,
DVD-R/+R, DVD-R/+R Dual
layer, DVD-RW/+RW, CD,
CD-R, CD-RW
Sources Internal CD/DVD, USB Flash
Memory, External A/V Input
I/O Ports USB 2.0 port, 3.5mm A/V Out-
put Jack, 3.5mm Headphone
Jack, RCA Type A/V Input Jacks
Frequency Response 20Hz — 20kHz
Headphone (Audio
Out) Output Level: 2Vpp (input 0dB
1kHz)
Load Impedance: 10k
Video Display Sys-
tem NTSC/PAL
Video Out Output Level: 1Vpp (±20%)
Load Impedance: 75
Wireless Audio Dual channel infrared audio
transmitter, supports stereo
headphone operation
IR Channels Channels
A :2.3/2.8 MHz
B: 3.2/3.8 MHz
Monitor, climate, audio, phone and voice recognition systems4-105
Page 324 of 510
phone module when the ignition switch is placed
in the ON position with the connected cellular
phone turned on and carried in the vehicle.
You can register up to five different Bluetooth®
cellular phones to the in-vehicle phone module.
However, you can talk on only one cellular phone
at a time.
NISSAN Voice Recognition system supports the
phone commands, so dialing a phone number
using your voice is possible. For additional infor-
mation, refer to “NISSAN Voice Recognition Sys-
tem” in this section.
Before using the Bluetooth® Hands-Free Phone
System, refer to the following notes.● Set up the wireless connection between a
cellular phone and the in-vehicle phone
module before using the hands-free phone
system.
● Some Bluetooth® enabled cellular phones
may not be recognized by the in-vehicle
phone module. Please visit
www.nissanusa.com/bluetooth or
www.nissan.ca/bluetooth for a recom-
mended phone list and connecting instruc-
tions. ●
You will not be able to use a hands-free
phone under the following conditions:
– Your vehicle is outside of the cellular ser- vice area.
– Your vehicle is in an area where it is difficult to receive cellular signal; such as
in a tunnel, in an underground parking
garage, near a tall building or in a moun-
tainous area.
– Your cellular phone is locked to prevent it from being dialed.
● When the radio wave condition is not ideal
or ambient sound is too loud, it may be
difficult to hear the other person’s voice dur-
ing a call.
● Immediately after the ignition switch is
placed in the ON position, it may be impos-
sible to receive a call for a short period of
time.
● Do not place the cellular phone in an area
surrounded by metal or far away from the
in-vehicle phone module to prevent tone
quality degradation and wireless connection
disruption. ●
While a cellular phone is connected through
the Bluetooth® wireless connection, the
battery power of the cellular phone may dis-
charge quicker than usual. The Bluetooth®
Hands-Free Phone System cannot charge
cellular phones.
● If the hands-free phone system seems to be
malfunctioning, refer to “Troubleshooting
guide” in this section. You can also visit
www.nissanusa.com/bluetooth or
www.nissan.ca/bluetooth for troubleshoot-
ing help.
● Some cellular phones or other devices may
cause interference or a buzzing noise to
come from the audio system speakers. Stor-
ing the device in a different location may
reduce or eliminate the noise.
● Refer to the cellular phone owner’s manual
regarding the telephone charges, cellular
phone antenna and body, etc.
● The signal strength display on the monitor
will not coincide with the signal strength
display of some cellular phones.
Monitor, climate, audio, phone and voice recognition systems4-123
Page 357 of 510
●The low tire pressure warning light does not
automatically turn off when the tire pressure
is adjusted in all 4 tires. After the tire is
inflated to the recommended pressure, the
vehicle must be driven at speeds above
16 MPH (25 km/h) to activate the TPMS and
turn off the low tire pressure warning light.
Use a tire pressure gauge to check the tire
pressure.
● Tire pressure rises and falls depending on
the heat caused by the vehicle’s operation
and the outside temperature. Low outside
temperature can lower the temperature of
the air inside the tire which can cause a
lower tire inflation pressure. This may cause
the low tire pressure warning light to illumi-
nate. If the warning light illuminates, check
the tire pressure for all 4 tires.
● The Tire and Loading Information label (also
referred to as the vehicle placard or tire
inflation pressure label) is located in the
driver’s door opening.
For additional information, refer to “Low tire pres-
sure warning light” in the “Instruments and con-
trols” section and “Tire Pressure Monitoring Sys-
tem (TPMS)” in the “In case of emergency” section.
WARNING
● If the low tire pressure warning light
illuminates while driving, avoid sudden
steering maneuvers or abrupt braking,
reduce vehicle speed, pull off the road
to a safe location and stop the vehicle
as soon as possible. Driving with under-
inflated tires may permanently damage
the tires and increase the likelihood of
tire failure. Serious vehicle damage
could occur and may lead to an accident
and could result in serious personal in-
jury. Check the tire pressure for all four
tires. Adjust the tire pressure to the
recommended COLD tire pressure
shown on the Tire and Loading Informa-
tion label to turn the low tire pressure
warning light OFF. If you have a flat tire,
replace it with a spare tire as soon as
possible. For additional information, re-
fer to “Flat tire” in the “In case of emer-
gency” section for changing a flat tire. ●
When a spare tire is mounted or a wheel
is replaced, tire pressure will not be
indicated, the TPMS will not function
and the low tire pressure warning light
will flash for approximately 1 minute.
The light will remain on after 1 minute.
Contact your NISSAN dealer as soon as
possible for tire replacement and/or
system resetting.
● Replacing tires with those not originally
specified by NISSAN could affect the
proper operation of the TPMS.
● Do not inject any tire liquid or aerosol
tire sealant into the tires, as this may
cause a malfunction of the tire pressure
sensors.
CAUTION
Do not place metalized film or any metal
parts (antenna, etc.) on the windows. This
may cause poor reception of the signals
from the tire pressure sensors, and the
TPMS will not function properly.
Some devices and transmitters may temporarily
interfere with the operation of the TPMS and
cause the low tire pressure warning light to illu-
minate.
5-4Starting and driving
Page 395 of 510
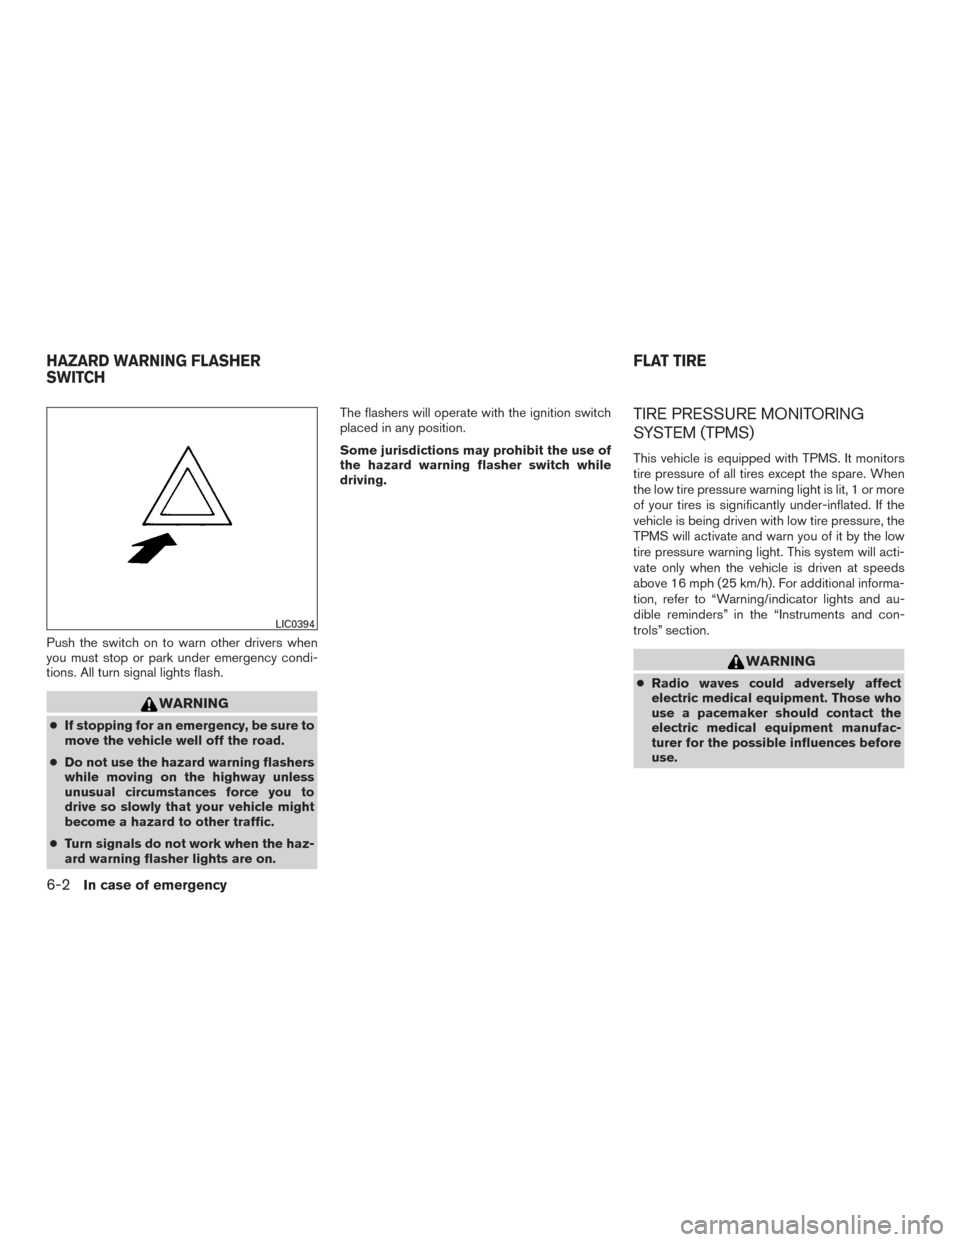
Push the switch on to warn other drivers when
you must stop or park under emergency condi-
tions. All turn signal lights flash.
WARNING
●If stopping for an emergency, be sure to
move the vehicle well off the road.
● Do not use the hazard warning flashers
while moving on the highway unless
unusual circumstances force you to
drive so slowly that your vehicle might
become a hazard to other traffic.
● Turn signals do not work when the haz-
ard warning flasher lights are on. The flashers will operate with the ignition switch
placed in any position.
Some jurisdictions may prohibit the use of
the hazard warning flasher switch while
driving.
TIRE PRESSURE MONITORING
SYSTEM (TPMS)
This vehicle is equipped with TPMS. It monitors
tire pressure of all tires except the spare. When
the low tire pressure warning light is lit, 1 or more
of your tires is significantly under-inflated. If the
vehicle is being driven with low tire pressure, the
TPMS will activate and warn you of it by the low
tire pressure warning light. This system will acti-
vate only when the vehicle is driven at speeds
above 16 mph (25 km/h). For additional informa-
tion, refer to “Warning/indicator lights and au-
dible reminders” in the “Instruments and con-
trols” section.
WARNING
●
Radio waves could adversely affect
electric medical equipment. Those who
use a pacemaker should contact the
electric medical equipment manufac-
turer for the possible influences before
use.
LIC0394
HAZARD WARNING FLASHER
SWITCH FLAT TIRE
6-2In case of emergency
Page 396 of 510
●If the low tire pressure warning light
illuminates while driving, avoid sudden
steering maneuvers or abrupt braking,
reduce vehicle speed, pull off the road
to a safe location and stop the vehicle
as soon as possible. Driving with under-
inflated tires may permanently damage
the tires and increase the likelihood of
tire failure. Serious vehicle damage
could occur and may lead to an accident
and could result in serious personal in-
jury. Check the tire pressure for all four
tires. Adjust the tire pressure to the
recommended COLD tire pressure
shown on the Tire and Loading Informa-
tion label to turn the low tire pressure
warning light OFF. If you have a flat tire,
replace it with a spare tire as soon as
possible.
● When a spare tire is mounted or a wheel
is replaced, tire pressure will not be
indicated, the TPMS will not function
and the low tire pressure warning light
will flash for approximately 1 minute.
The light will remain on after 1 minute.
Have your tires replaced and/or TPMS
system reset as soon as possible. It is
recommended you visit a NISSAN
dealer for these services. ●
Replacing tires with those not originally
specified by NISSAN could affect the
proper operation of the TPMS.
● Do not inject any tire liquid or aerosol
tire sealant into the tires, as this may
cause a malfunction of the tire pressure
sensors.
CHANGING A FLAT TIRE
If you have a flat tire, follow the instructions be-
low:
Stopping the vehicle
1. Safely move the vehicle off the road and
away from traffic.
2. Turn on the hazard warning flashers.
3. Park on a level surface and apply the parking brake. Move the shift lever to P (Park) .
4. Turn off the engine.
5. Raise the hood to warn other traffic and to signal professional road assistance person-
nel that you need assistance.
6. Have all passengers get out of the vehicle and stand in a safe place, away from traffic
and clear of the vehicle.
WARNING
●Make sure the parking brake is securely
applied and the shift lever is shifted into
P (Park) .
● Never change tires when the vehicle is
on a slope, ice or slippery areas. This is
hazardous.
● Never change tires if oncoming traffic is
close to your vehicle. Wait for profes-
sional road assistance.
In case of emergency6-3
Page 418 of 510
When driving in areas using road salt or other
corrosive materials, check lubrication frequently.
Lights*Clean the headlights on a regular basis.
Make sure that the headlights, stop lights, tail
lights, turn signal lights, and other lights are all
operating properly and installed securely. Also
check headlight aim.
Road wheel nuts (lug nuts)* When checking
the tires, make sure no wheel nuts are missing,
and check for any loose wheel nuts. Tighten if
necessary.
Tire rotation* Tires should be rotated every
5,000 miles (8,000 km).
Tires* Check the pressure with a gauge often
and always prior to long distance trips. If neces-
sary, adjust the pressure in all tires, including the
spare, to the pressure specified. Check carefully
for damage, cuts or excessive wear.
Tire Pressure Monitoring System (TPMS)
transmitter components Replace the TPMS
transmitter grommet seal, valve core and cap
when the tires are replaced due to wear or age.
Wheel alignment and balance If the vehicle
should pull to either side while driving on a
straight and level road, or if you detect uneven or
abnormal tire wear, there may be a need for wheel alignment. If the steering wheel or seat vibrates at
normal highway speeds, wheel balancing may be
needed.
● For additional information regarding tires,
refer to “Important Tire Safety Information”
(US) or “Tire Safety Information” (Canada) in
the Warranty Information Booklet.
Windshield Clean the windshield on a regular
basis. Check the windshield at least every six
months for cracks or other damage. Have a dam-
aged windshield repaired by a qualified repair
facility.
Windshield wiper blades* Check for cracks or
wear if they do not wipe properly.
Inside the vehicle
The maintenance items listed here should be
checked on a regular basis, such as when per-
forming periodic maintenance, cleaning the ve-
hicle, etc.
Additional information on the following
items with an “*” is found in this section.
Accelerator pedal Check the pedal for smooth
operation and make sure the pedal does not bind
or require uneven effort. Keep the floor mat away
from the pedal.
Automatic transmission P (Park) position
mechanism On a fairly steep hill check that your vehicle is held securely with the shift lever in the P
(Park) position without applying any brakes.
Brake pedal
Check the pedal for smooth opera-
tion. If the brake pedal suddenly goes down fur-
ther than normal, the pedal feels spongy or the
vehicle seems to take longer to stop, see a
NISSAN dealer immediately. Keep the floor mat
away from the pedal.
Brakes Check that the brakes do not pull the
vehicle to one side when applied.
Parking brake Check the parking brake opera-
tion regularly. The vehicle should be securely held
on a fairly steep hill with only the parking brake
applied. If the parking brake needs adjustment,
see a NISSAN dealer.
Seats Check seat position controls such as seat
adjusters, seatback recliner, etc. to ensure they
operate smoothly and all latches lock securely in
every position. Check that the head
restraints/headrests move up and down
smoothly and the locks (if so equipped) hold
securely in all latched positions.
Seat belts Check that all parts of the seat belt
system (for example, buckles, anchors, adjusters
and retractors) operate properly and smoothly,
and are installed securely. Check the belt web-
bing for cuts, fraying, wear or damage.
Maintenance and do-it-yourself8-3