2015 NISSAN ALTIMA SEDAN audio
[x] Cancel search: audioPage 105 of 441
Units
The units that are shown in the vehicle informa-
tion display can be changed:● Mileage
● Tire pressures
● Temperature
Use the
,, and the ENTER buttons to
select and change the units of the vehicle infor-
mation display. The units of the navigation screen
can be changed independently of the vehicle
information display. For vehicles equipped with
Navigation, refer to “System” in the “Monitor,
climate, audio, phone and voice recognition sys-
tems” section of this manual.
Mileage
The unit for the mileage that displays in the ve-
hicle information display can be changed to:
● miles, MPG, Inch
● km/h, l/100km, cm
● km/h, km/l, cm
Use the
and the ENTER buttons to select
and change the unit.
Tire Pressures (if so equipped)
The unit for tire pressure that displays in the
vehicle information display can be changed to: ●
psi
● kPa
● bar
● Kgf/cm
2
Use theand the ENTER buttons to select
and change the unit.
Temperature
The temperature that displays in the vehicle infor-
mation display can be changed from:
● °F (Fahrenheit)
● °C (Celsius)
Use the ENTER button to toggle choices.
Welcome Effects
The welcome screen display can be turned
ON/OFF to display when the ignition switch is
placed in the ACC or ON position. To
enable/disable the welcome screen:
1. Press the
button.
2. Use the
buttons to select “Settings”,
and press ENTER.
3. Select “Welcome Effects” using the
buttons and press ENTER to turn this func-
tion ON or OFF.
Factory Reset
The settings in the vehicle information display can
be reset back to the factory default. To reset the
vehicle information display: 1. Press the
button.
2. Use the
buttons to select “Settings”,
and press the ENTER button.
3. Select “Factory Reset” using the
but-
tons and press the ENTER button.
4. Select “YES” to return all settings back to default by pressing the ENTER button.
Instruments and controls2-23
Page 113 of 441
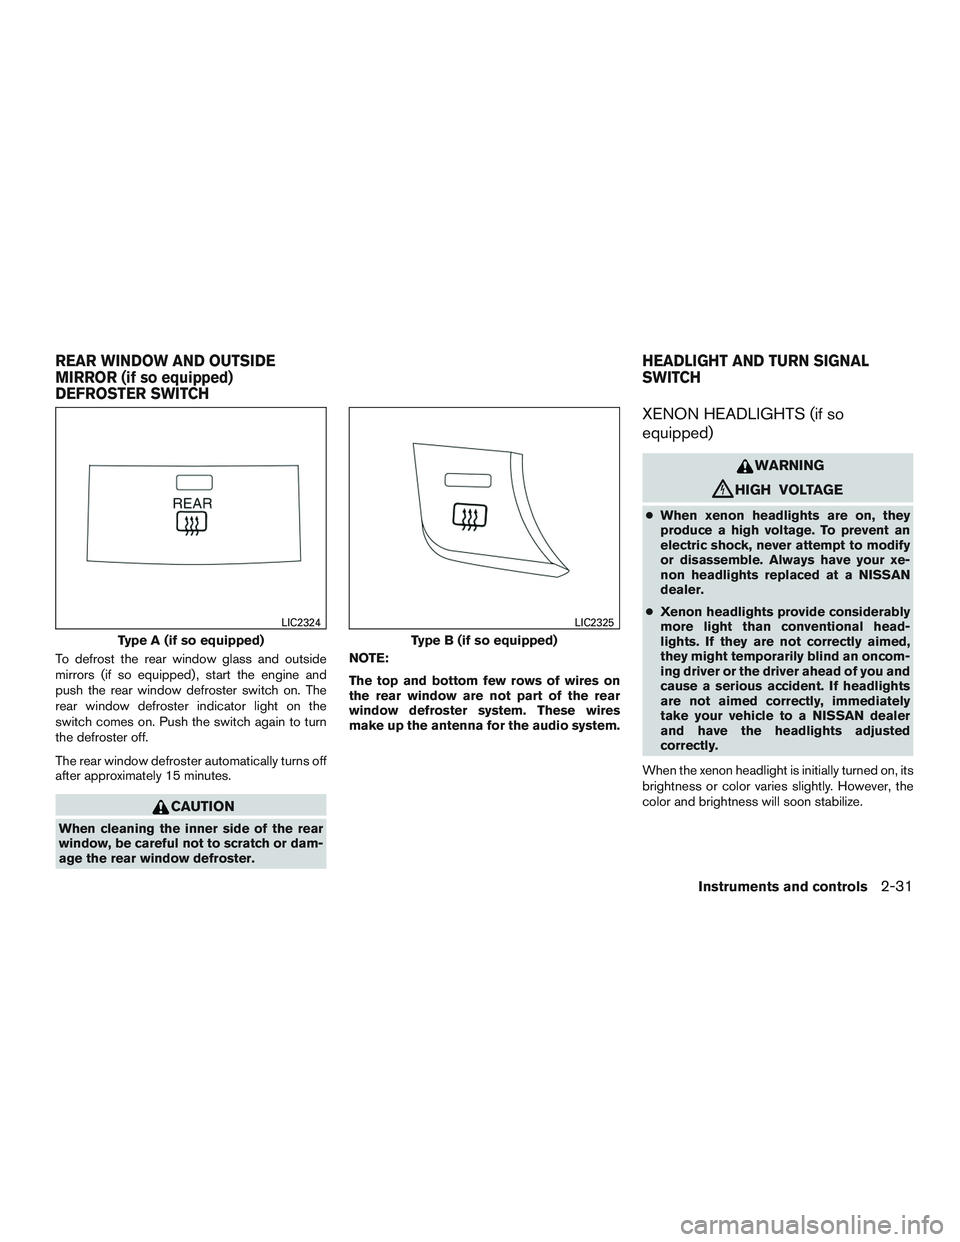
To defrost the rear window glass and outside
mirrors (if so equipped) , start the engine and
push the rear window defroster switch on. The
rear window defroster indicator light on the
switch comes on. Push the switch again to turn
the defroster off.
The rear window defroster automatically turns off
after approximately 15 minutes.
CAUTION
When cleaning the inner side of the rear
window, be careful not to scratch or dam-
age the rear window defroster.NOTE:
The top and bottom few rows of wires on
the rear window are not part of the rear
window defroster system. These wires
make up the antenna for the audio system.
XENON HEADLIGHTS (if so
equipped)
WARNING
cHIGH VOLTAGE
●
When xenon headlights are on, they
produce a high voltage. To prevent an
electric shock, never attempt to modify
or disassemble. Always have your xe-
non headlights replaced at a NISSAN
dealer.
● Xenon headlights provide considerably
more light than conventional head-
lights. If they are not correctly aimed,
they might temporarily blind an oncom-
ing driver or the driver ahead of you and
cause a serious accident. If headlights
are not aimed correctly, immediately
take your vehicle to a NISSAN dealer
and have the headlights adjusted
correctly.
When the xenon headlight is initially turned on, its
brightness or color varies slightly. However, the
color and brightness will soon stabilize.
Type A (if so equipped)
LIC2324
Type B (if so equipped)
LIC2325
REAR WINDOW AND OUTSIDE
MIRROR (if so equipped)
DEFROSTER SWITCH HEADLIGHT AND TURN SIGNAL
SWITCH
Instruments and controls2-31
Page 139 of 441
●Do not place the Intelligent Key near
equipment that produces a magnetic
field, such as a TV, audio equipment and
personal computers.
If an Intelligent Key is lost or stolen,
NISSAN recommends erasing the ID code
of that Intelligent Key from the vehicle.
This may prevent the unauthorized use of
the Intelligent Key to operate the vehicle.
For information regarding the erasing
procedure, contact a NISSAN dealer.
Mechanical key
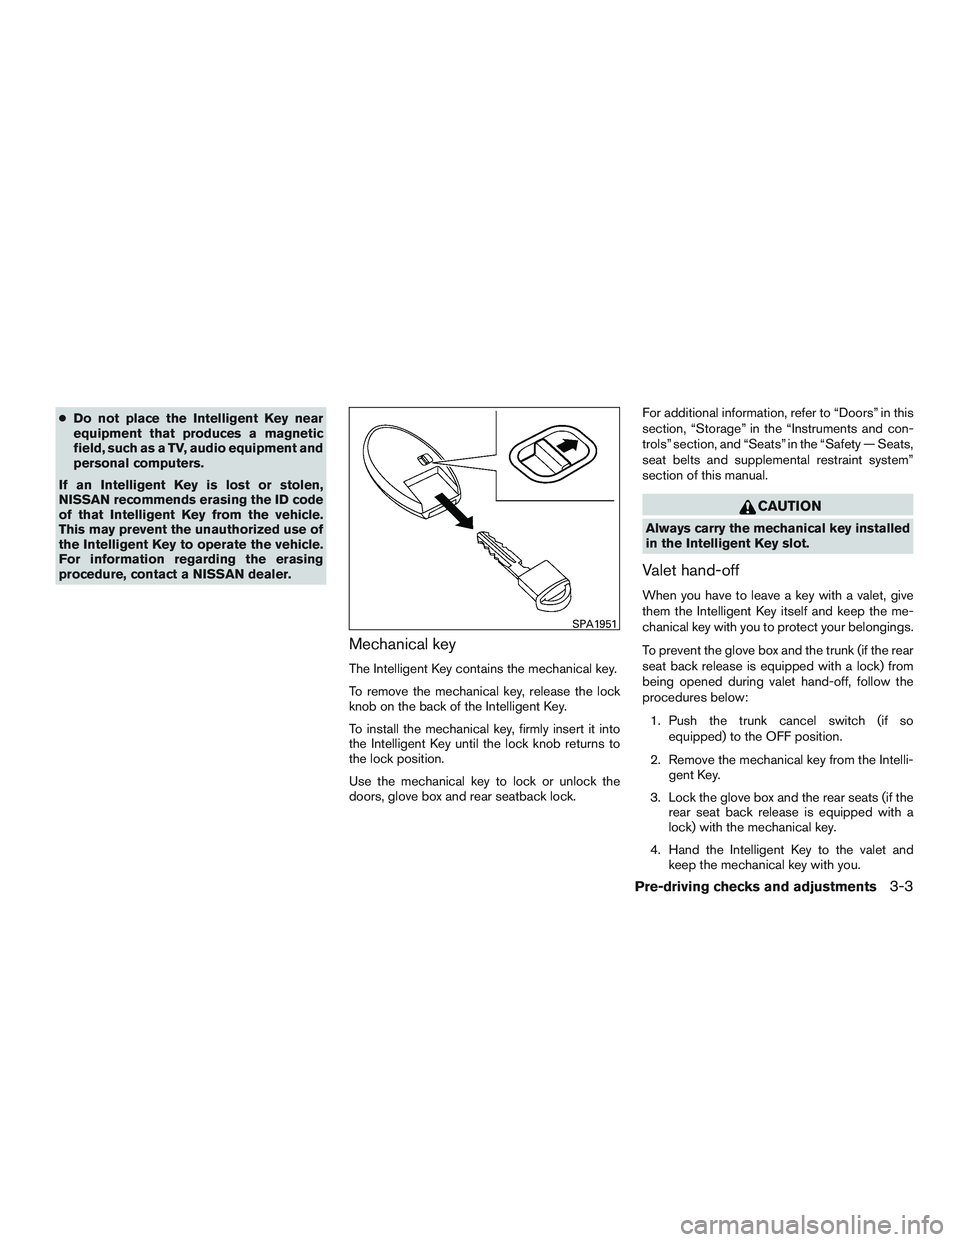
The Intelligent Key contains the mechanical key.
To remove the mechanical key, release the lock
knob on the back of the Intelligent Key.
To install the mechanical key, firmly insert it into
the Intelligent Key until the lock knob returns to
the lock position.
Use the mechanical key to lock or unlock the
doors, glove box and rear seatback lock. For additional information, refer to “Doors” in this
section, “Storage” in the “Instruments and con-
trols” section, and “Seats” in the “Safety — Seats,
seat belts and supplemental restraint system”
section of this manual.
CAUTION
Always carry the mechanical key installed
in the Intelligent Key slot.
Valet hand-off
When you have to leave a key with a valet, give
them the Intelligent Key itself and keep the me-
chanical key with you to protect your belongings.
To prevent the glove box and the trunk (if the rear
seat back release is equipped with a lock) from
being opened during valet hand-off, follow the
procedures below:
1. Push the trunk cancel switch (if so equipped) to the OFF position.
2. Remove the mechanical key from the Intelli- gent Key.
3. Lock the glove box and the rear seats (if the rear seat back release is equipped with a
lock) with the mechanical key.
4. Hand the Intelligent Key to the valet and keep the mechanical key with you.
SPA1951
Pre-driving checks and adjustments3-3
Page 144 of 441
In such cases, correct the operating conditions
before using the Intelligent Key function or use
the mechanical key.
Although the life of the battery varies depending
on the operating conditions, the battery’s life is
approximately 2 years. If the battery is dis-
charged, replace it with a new one.
When the Intelligent Key battery is low, an indi-
cator illuminates in the Vehicle Information Dis-
play. For additional information, refer to “Vehicle
Information Display” in the “Instruments and con-
trols” section.
Since the Intelligent Key is continuously receiving
radio waves, if the key is left near equipment
which transmits strong radio waves, such as sig-
nals from a TV and personal computer, the bat-
tery life may become shorter.
For additional information regarding replacement
of a battery, refer to “Battery replacement” in the
“Maintenance and do-it-yourself” section.
As many as 4 Intelligent Keys can be registered
and used with one vehicle. For information about
the purchase and use of additional Intelligent
Keys, contact a NISSAN dealer.CAUTION
Listed below are conditions or occur-
rences which will damage the Intelligent
Key:
●Do not allow the Intelligent Key, which
contains electrical components, to
come into contact with water or salt
water. This could affect the system
function.
● Do not drop the Intelligent Key.
● Do not strike the Intelligent Key sharply
against another object.
● Do not change or modify the Intelligent
Key.
● Wetting may damage the Intelligent
Key. If the Intelligent Key gets wet, im-
mediately wipe until it is completely dry.
● Do not place the Intelligent Key for an
extended period in an area where tem-
peratures exceed 140°F (60°C) .
● Do not attach the Intelligent Key with a
key holder that contains a magnet.
● Do not place the Intelligent Key near
equipment that produces a magnetic
field, such as a TV, audio equipment and
personal computers. If an Intelligent Key is lost or stolen, NISSAN
recommends erasing the ID code of that Intelli-
gent Key from the vehicle. This may prevent the
unauthorized use of the Intelligent Key to operate
the vehicle. For information regarding the erasing
procedure, contact a NISSAN dealer.
3-8Pre-driving checks and adjustments
Page 157 of 441
CAUTION
Listed below are conditions or occur-
rences which will damage the Intelligent
Key:
●Do not allow the Intelligent Key, which
contains electrical components, to
come into contact with water or salt
water. This could affect the system
function.
● Do not drop the Intelligent Key.
● Do not strike the Intelligent Key sharply
against another object.
● Do not change or modify the Intelligent
Key.
● Wetting may damage the Intelligent
Key. If the Intelligent Key gets wet, im-
mediately wipe until it is completely dry.
● Do not place the Intelligent Key for an
extended period in an area where tem-
peratures exceed 140°F (60°C) .
● Do not attach the Intelligent Key with a
key holder that contains a magnet.
● Do not place the Intelligent Key near
equipment that produces a magnetic
field, such as a TV, audio equipment and
personal computers. If an Intelligent Key is lost or stolen, NISSAN
recommends erasing the ID code of that Intelli-
gent Key from the vehicle. This may prevent the
unauthorized use of the Intelligent Key to operate
the vehicle. For information regarding the erasing
procedure, contact a NISSAN dealer.
OPERATING RANGE
The Intelligent Key functions can only be used
when the Intelligent Key is within the specified
operating range.
When the Intelligent Key battery is discharged or
strong radio waves are present near the operat-
ing location, the Intelligent Key system’s operat-
ing range becomes narrower, and the Intelligent
Key may not function properly.
The operating range is within 33 ft (10 m) of the
vehicle.
HOW TO USE THE REMOTE
KEYLESS ENTRY FUNCTION
The remote keyless entry function can operate all
door locks using the remote keyless function of
the Intelligent Key. The remote keyless function
can operate at a distance of 33 ft (10 m) away
from the vehicle. The operating distance de-
pends upon the conditions around the vehicle.
The remote keyless entry function will not func-
tion under the following conditions:
● When the Intelligent Key is not within the
operational range.
● When the doors or the trunk are open or not
closed securely.
● When the Intelligent Key battery is dis-
charged.
CAUTION
When locking the doors using the Intelli-
gent Key, be sure not to leave the key in
the vehicle.
Pre-driving checks and adjustments3-21
Page 163 of 441
Thebutton will be on the NISSAN Intelli-
gent Key® if the vehicle has remote engine start.
This feature allows the engine to start from out-
side the vehicle.
The following features may be affected when the
remote start feature is used:
● Vehicles with a manual climate control sys-
tem will default to the last used heating or
cooling mode. ●
Vehicles with an automatic climate control
system will default to either a heating or
cooling mode depending on outside and
cabin temperatures. For additional informa-
tion, refer to “Remote start logic” in the
“Monitor, climate, audio, phone and voice
recognition systems” section of the manual.
● Vehicle equipped with heated seats may
have this feature come on during a remote
start. For additional information, refer to
“Heated seats” in the “Instruments and con-
trols” section of the manual.
Laws in some local communities may restrict the
use of remote starters. For example, some laws
require a person using remote start to have the
vehicle in view. Check local regulations for any
requirements.
Other conditions may affect the function of the
Remote Engine Start feature. For additional infor-
mation, refer to “Conditions the remote start will
not work” in this section of the manual.
Other conditions can affect the performance of
the Intelligent Key transmitter. For additional in-
formation, refer to “NISSAN Intelligent Key®
System” in this section of the manual.
REMOTE ENGINE START
OPERATING RANGE
The remote engine start function can only be
used when the Intelligent Key is within the speci-
fied operating range from the vehicle.
When the Intelligent Key battery is discharged or
strong radio waves are present near the operat-
ing location, the Intelligent Key operating range
becomes narrower, and the Intelligent Key may
not function properly.
The remote engine start operating range is ap-
proximately 197 ft (60 m) from the vehicle.
REMOTE STARTING THE VEHICLE
To use the remote start feature to start the engine
perform the following: 1. Aim the Intelligent Key at the vehicle.
2. Press the
LOCK button to lock all
doors.
3. Within 5 seconds press and hold the
remote start button until the turn signal lights
flash and the tail lamps turn on. If the vehicle
is not within view press and hold the
remote start button for at least 2 seconds.
LPD2078
REMOTE ENGINE START (if so
equipped)
Pre-driving checks and adjustments3-27
Page 175 of 441
4 Monitor, climate, audio, phone and voice
recognition systems
Control panel buttons — color screen with
Navigation System (if so equipped)..................4-4
How to use the touch-screen . . ..................4-5
How to use the
BACK button ..............4-7
How to use the [
] button ..................4-7
button...................................4-9
RearView Monitor (if so equipped) ..................4-10
How to read the displayed lines .................4-11
Difference between predicted and actual
distances ..................................... 4-11
Adjusting the screen ........................... 4-13
Operating tips ................................. 4-14
Rear and rear-wide view monitor with moving
object detection (MOD) (if so equipped) ............4-15
How to switch the display ......................4-16
How to park with predicted course lines ..........4-18
How to adjust the screen .......................4-21
Operating tips ................................. 4-21
Moving Object Detection (MOD)
(if so equipped) ............................... 4-22
Vents ........................................... 4-24
Heater and Air Conditioner (manual)
(if so equipped) .................................. 4-25Controls
...................................... 4-26
Heater operation .............................. 4-27
Air conditioner operation .......................4-28
Air flow charts ................................. 4-29
Heater and Air Conditioner (automatic)
(if so equipped) .................................. 4-32
Automatic operation ........................... 4-33
Manual operation .............................. 4-34
Operating tips ................................. 4-34
Servicing air conditioner ........................... 4-35
Audio system .................................... 4-35
Radio ........................................ 4-35
FM radio reception ............................ 4-35
AM radio reception ............................ 4-36
Satellite radio reception (if so equipped) .........4-36
Audio operation precautions ....................4-36
FM/AM radio with compact disc (CD) player
(Type A) (if so equipped) .......................4-43
FM/AM radio with compact disc (CD) player
(Type B) (if so equipped) .......................4-47
FM/AM radio with compact disc (CD) player
(Type C) (if so equipped) .......................4-51
FM/AM/SA Tradio
with compact disc (CD)
player (Type A) (if so equipped) .................4-56
Page 176 of 441
FM/AM/SAT radio with compact disc (CD)
player (Type B) (if so equipped).................4-62
USB (Universal Serial Bus) connection port
(models without Navigation System)
(if so equipped) ............................... 4-68
USB (Universal Serial Bus) connection port
(models with Navigation System)
(if so equipped) ............................... 4-70
iPod®* player operation without Navigation
System (if so equipped) ........................ 4-73
iPod®* player operation with Navigation
System (if so equipped) ........................ 4-75
Bluetooth® streaming audio without
Navigation System (Type A) (if so equipped) ......4-78
Bluetooth® streaming audio without
Navigation System (Type B) (if so equipped) ......4-79
Bluetooth® streaming audio with Navigation
System ....................................... 4-79
CD care and cleaning .......................... 4-81
Steering wheel switch for audio control ..........4-81
Antenna ...................................... 4-82
NissanConnect
SMMobile Apps (if so equipped) .....4-83
Registering with NissanConnectSMMobile
Apps ......................................... 4-83Connect Phone
............................... 4-83
Application Download .......................... 4-84
Car phone or CB radio ............................ 4-84
Bluetooth® Hands-Free Phone System without
Navigation System (Type A) (if so equipped) .........4-85
Regulatory Information ......................... 4-86
Using the system .............................. 4-87
Control buttons ............................... 4-89
Getting started ................................ 4-89
List of voice commands ........................ 4-91
Voice Adaptation (VA) mode ....................4-96
Manual control . . .............................. 4-97
Troubleshooting guide ......................... 4-98
Bluetooth® Hands-Free Phone System without
Navigation System (Type B) (if so equipped) .........4-99
Regulatory Information ........................ 4-100
Using the system ............................. 4-101
Control buttons .............................. 4-102
Connecting procedure ........................ 4-103
Voice commands ............................. 4-104
Making a call . ................................ 4-105
Receiving a call .............................. 4-106
During a call ................................. 4-106