Page 390 of 441
How to remove the extended storage switch:1. To remove the extended storage switch, be sure the ignition switch is in the OFF or
LOCK position.
2. Be sure the headlight switch is in the OFF position.
3. Remove the fuse box cover.
4. Pinch the locking tabs
�1found on each
side of the storage switch.
5. Pull the storage switch straight out from the fuse box
�2.
CAUTION
Be careful not to allow children to swallow
the battery or removed parts.
LDI2001
BATTERY REPLACEMENT
8-28Maintenance and do-it-yourself
Page 391 of 441

NISSAN INTELLIGENT KEY®
Replace the battery in the Intelligent Key as fol-
lows:1. Remove the mechanical key from the Intelli- gent Key.
2. Insert a small screwdriver
�Ainto the slit�B
of the corner and twist it to separate the
upper part from the lower part. Use a cloth to
protect the casing.
3. Replace the battery with a new one. Recommended battery: CR2032 or equiva-
lent.
●Do not touch the internal circuit and elec-
tric terminals as doing so could cause a
malfunction.
● Hold the battery by the edges. Holding
the battery across the contact points will
seriously deplete the storage capacity.
● Make sure that the + side faces the bot-
tom of the case. 4. Close the lid securely as illustrated with
�C
and�D.
5. Operate the buttons to check the operation.
See a NISSAN dealer if you need assistance for
replacement.
FCC Notice:
For USA:
This device complies with Part 15 of the
FCC Rules. Operation is subject to the fol-
lowing two conditions: (1) This device may
not cause harmful interference, and (2) this
device must accept any interference re- ceived, including interference that may
cause undesired operation.
Note: Changes or modifications not ex-
pressly approved by the party responsible
for compliance could void the user’s au-
thority to operate the equipment.
For Canada:
This device complies with Industry Canada
licence-exempt RSS standard(s) . Opera-
tion is subject to the following two condi-
tions: (1) this device may not cause inter-
ference, and (2) this device must accept any
interference, including interference that
may cause undesired operation of the de-
vice.
WDI0568
Maintenance and do-it-yourself8-29
Page 392 of 441

WARNING
When xenon headlights are on, they pro-
duce a high voltage. To prevent an electric
shock, never attempt to modify or disas-
semb")
HEADLIGHTS
Replacing the xenon headlight bulb (if
so equipped)
WARNING
When xenon headlights are on, they pro-
duce a high voltage. To prevent an electric
shock, never attempt to modify or disas-
semble. Always have your xenon head-
lights replaced at a NISSAN dealer. For
additional information, refer “Headlight
and turn signal switch” in the “Instru-
ments and controls” section.
Replacing the halogen headlight bulb
(if so equipped)
If bulb replacement is required, see your NISSAN
dealer.
CAUTION
●Aiming is not necessary after replacing
the bulb. When aiming adjustment is
necessary, contact a NISSAN dealer. ●
Do not leave the headlight assembly
open without a bulb installed for a long
period of time. Dust, moisture, smoke,
etc. entering the headlight body may
affect bulb performance. Remove the
bulb from the headlight assembly just
before a replacement bulb is installed.
● Only touch the base when handling the
bulb. Never touch the glass envelope.
Touching the glass could significantly
affect bulb life and/or headlight
performance.
● High pressure halogen gas is sealed
inside the halogen bulb. The bulb may
break if the glass envelope is scratched
or the bulb is dropped.
● Use the same number and wattage as
shown in the chart.
Fog may temporarily form inside the lens of the
exterior lights in the rain or in a car wash. A
temperature difference between the inside and
the outside of the lens causes the fog. This is not
a malfunction. If large drops of water collect
inside the lens, contact a NISSAN dealer.
FOG LIGHTS (if so equipped)
Replacing the fog light bulb
LIGHTS
8-30Maintenance and do-it-yourself
Page 393 of 441
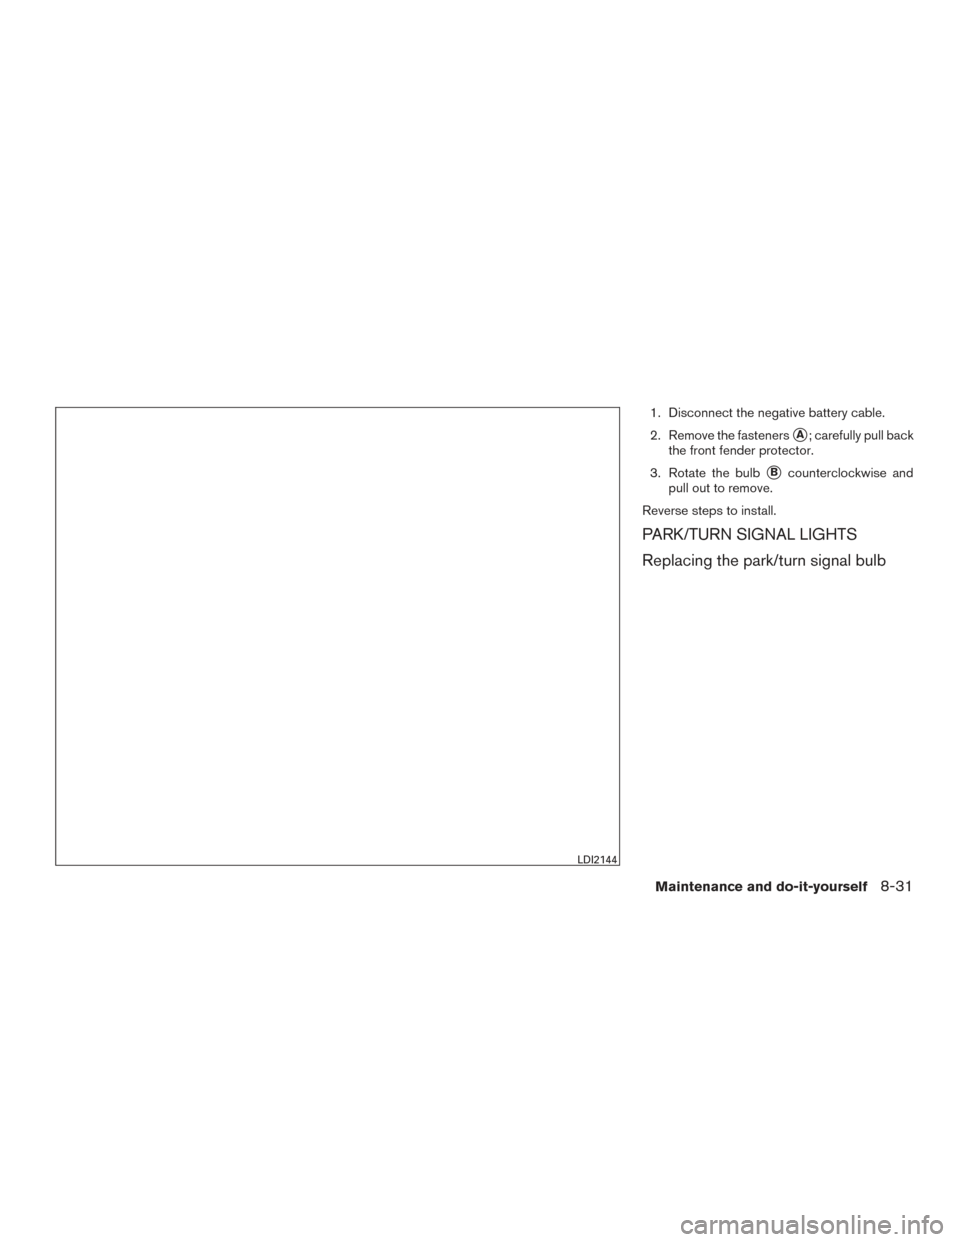
1. Disconnect the negative battery cable.
2. Remove the fasteners
�A; carefully pull back
the front fender protector.
3. Rotate the bulb
�Bcounterclockwise and
pull out to remove.
Reverse steps to install.
PARK/TURN SIGNAL LIGHTS
Replacing the park/turn signal bulb
LDI2144
Maintenance and do-it-yourself8-31
Page 394 of 441
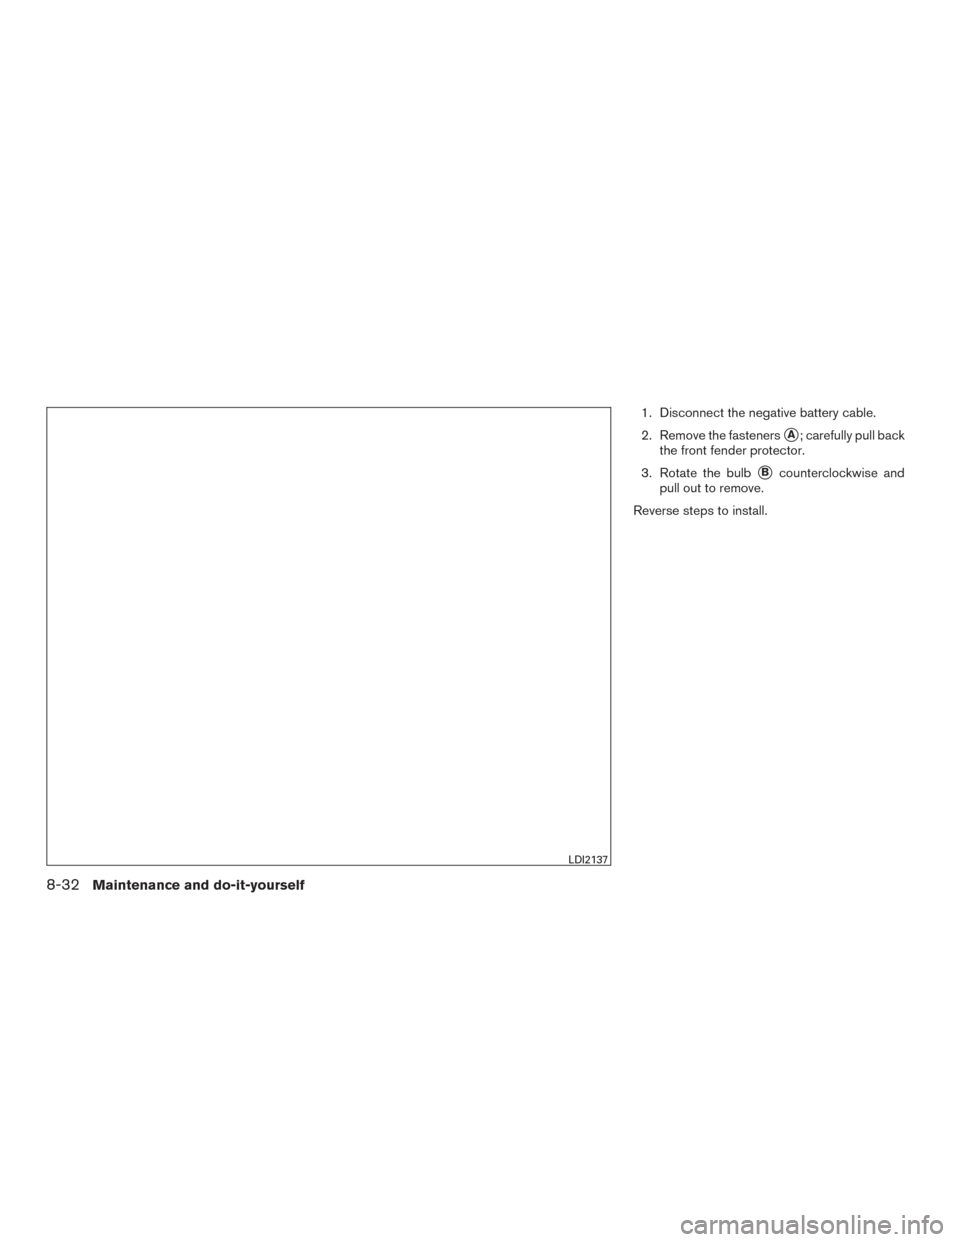
1. Disconnect the negative battery cable.
2. Remove the fasteners
�A; carefully pull back
the front fender protector.
3. Rotate the bulb
�Bcounterclockwise and
pull out to remove.
Reverse steps to install.
LDI2137
8-32Maintenance and do-it-yourself
Page 395 of 441
EXTERIOR AND INTERIOR LIGHTS
ItemWattage (W)Bulb No.*
Headlight assembly * Low (Halogen) 55H11
Low (Xenon) 35D2S
High 65H9
Side marker 5W5W
Door mirror turn signal light (if so equipped) * ——
Park/turn signal light 28/87444A
Front fog light (if so equipped) 55H11
Day time running lights (Canada only) 19PS19W
Step light 3.8194 C HTEI
Rear combination light * Tail/Stop — /21/5— /3156AK
Turn 273157A
Rear sidemarker ——
Backup (reversing) 16921
License plate light * 5W5W
High-mounted stop light * Inside ——
Spoiler ——
Front map light * ——
Rear personal light 8U88
Trunk light 3.4158
Vanity mirror light (if so equipped) —HTU–14v
Glove box light * ——
Console light * ——
* Always check with the Parts Department at a NISSAN dealer for the latest parts information.
* See a NISSAN dealer for assistance.
Maintenance and do-it-yourself8-33
Page 396 of 441
1. Front map light
2. Headlamp assembly
3. Park/Turn signal light
4. Fog light (if so equipped)/Day timerunning light (Canada only)
5. Step light
6. Door mirror turn signal light
(if so equipped)
7. Personal light
8. High-mount stoplight
9. Trunk light
10. Spoiler-mount stop light
11. Rear combination light
12. License plate light
LDI2100
8-34Maintenance and do-it-yourself
Page 397 of 441
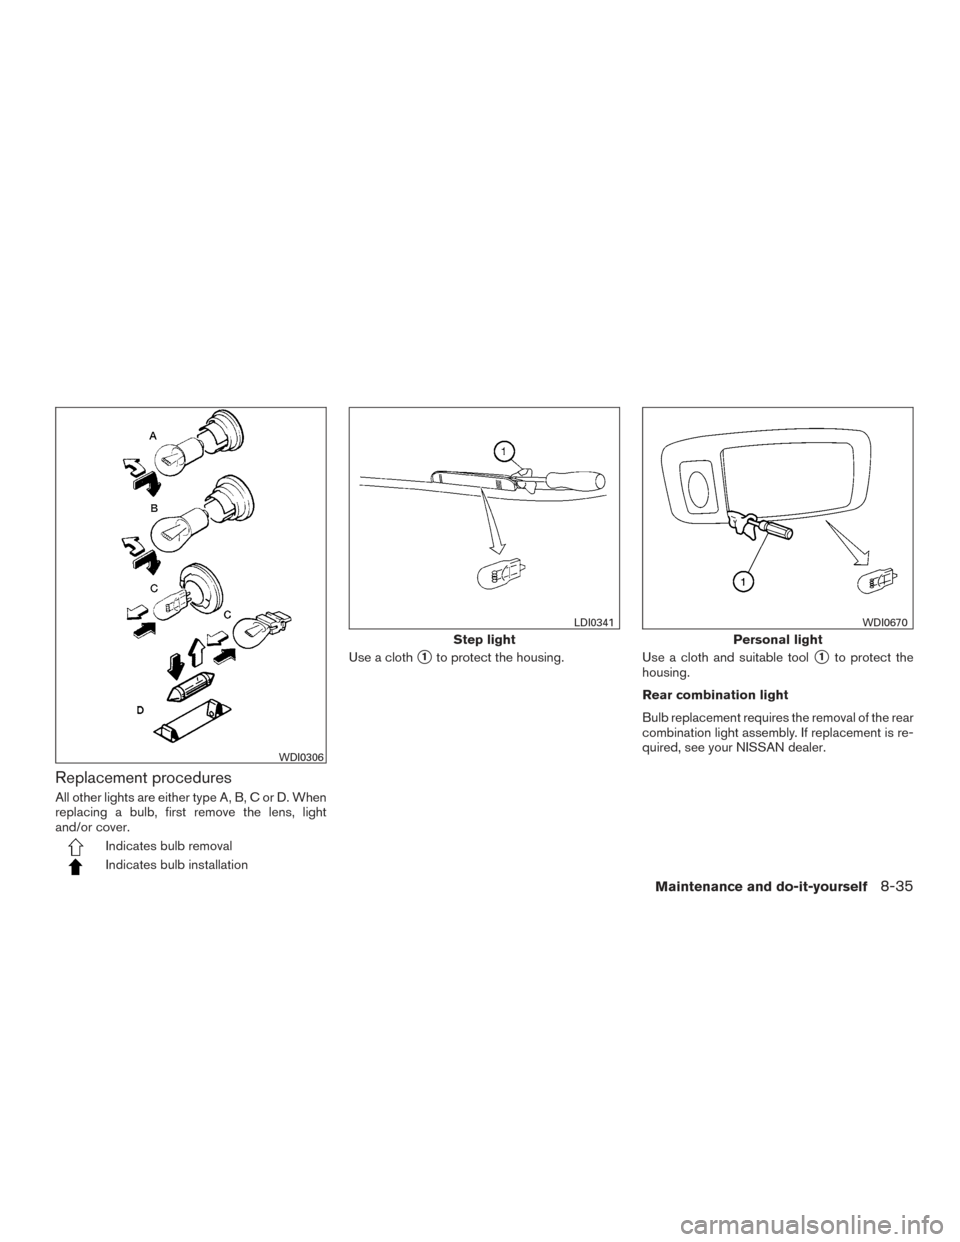
Replacement procedures
All other lights are either type A, B, C or D. When
replacing a bulb, first remove the lens, light
and/or cover.
Indicates bulb removal
Indicates bulb installationUse a cloth
�1to protect the housing.
Use a cloth and suitable tool�1to protect the
housing.
Rear combination light
Bulb replacement requires the removal of the rear
combination light assembly. If replacement is re-
quired, see your NISSAN dealer.
WDI0306
Step light
LDI0341
Personal light
WDI0670
Maintenance and do-it-yourself8-35

Bulb No.*
Headlight assembly * Low (Halogen) 55H11
Low (Xenon) 35D2S
High 65H9
Side marker 5W5W
Door mirror turn signal light (if so equipped) * ——
Park")
/Day timerunning light (Canada only)
5. Step light
6. Door mirror turn signal light
(if so equipped)
7. P")