2015 NISSAN ALTIMA check engine
[x] Cancel search: check enginePage 98 of 441
Overdrive OFF indicator light(if so equipped)
QR25DE:
The overdrive off indicator light illuminates when
the overdrive off mode is selected.
VQ35DE:
This light illuminates and then turns off when the
ignition switch is placed to the ON position.
QR25DE and VQ35DE:
For additional information, refer to “Continuously
Variable Transmission (CVT)” in the “Starting and
driving” section of this manual.
Security indicator light
This light blinks when the ignition switch is
placed in the OFF, LOCK or ACC position.
The blinking security indicator light indicates that
the security systems equipped on the vehicle are
operational.
For additional information, refer to “Security sys-
tems” in this section.
Side light and headlightindicator light (green)
The side light and headlight indicator light illumi-
nates when the side light or headlight position is
selected. For additional information, refer to
“Headlight and turn signal switch” in this section.
Slip indicator light
This indicator will blink when the Vehicle Dynamic
Control (VDC) system is operating, thus alerting
that the vehicle is nearing its traction limits. The
road surface may be slippery.
SPORT mode indicator light (ifso equipped)
QR25DE:
This light illuminates and then turns off when the
ignition switch is placed to the ON position, and
when the SPORT mode off is selected.
For additional information, refer to “Continuously
Variable Transmission (CVT)” in the “Starting and
driving” section of this manual.
Turn signal/hazard indicatorlights
The appropriate light flashes when the turn signal
switch is activated. Both lights flash when the hazard switch is turned
on.
Vehicle Dynamic Control
(VDC) OFF indicator light
This indicator light comes on when the Vehicle
Dynamic Control off switch is pushed to OFF.
This indicates the Vehicle Dynamic Control has
been turned off.
Push the Vehicle Dynamic Control off switch
again or restart the engine and the system will be
reactivated. For additional information, refer to
“Vehicle Dynamic Control (VDC) system” in the
“Starting and driving” section of this manual.
The Vehicle Dynamic Control light also comes on
when you push the push-button ignition switch to
the ON position. The light will turn off after about
2 seconds if the system is operational. If the light
stays on or comes on along with the
indi-
cator light while you are driving, have the Vehicle
Dynamic Control system checked by a NISSAN
dealer.
While the Vehicle Dynamic Control system is
operating, you might feel slight vibration or hear
the system working when starting the vehicle or
accelerating, but this is normal.
2-16Instruments and controls
Page 103 of 441
Body Color
The color of the vehicle that displays in the ve-
hicle information display when the ignition switch
is placed in the ON position can be changed.1. scheduled service: oil and oil filter
2. tires
3. other
Maintenance
The maintenance mode allows you to set alerts
for the reminding of maintenance intervals. To
change an item:1. Press the
button.
2. Use the
button until “Settings” is se-
lected, and press ENTER. 3. Select “Maintenance” using the
but-
ton and press ENTER.
Oil and Filter
This indicator appears when the customer set
distance comes for changing the engine oil and
filter. You can set or reset the distance for check-
ing or replacing these items. For scheduled main-
tenance items and intervals, refer to your
“NISSAN Service and Maintenance Guide.”
Tire
This indicator appears when the customer set
distance is reached for replacing tires. You can
set or reset the distance for replacing tires.
LIC2773
Instruments and controls2-21
Page 104 of 441
WARNING
The tire replacement indicator is not a
substitute for regular tire checks, includ-
ing tire pressure checks. For additional
information, refer to “Changing wheels
and tires” in the “Maintenance and do-it-
yourself” section of this manual. Many fac-
tors including tire inflation, alignment,
driving habits and road conditions affect
tire wear and when tires should be re-
placed. Setting the tire replacement indi-
cator for a certain driving distance does
not mean your tires will last that long. Use
the tire replacement indicator as a guide
only and always perform regular tire
checks. Failure to perform regular tire
checks, including tire pressure checks
could result in tire failure. Serious vehicle
damage could occur and may lead to a
collision, which could result in serious
personal injury or death.
Other
This indicator appears when the customer set
distance is reached for checking or replacing
maintenance items other than the engine oil, oil
filter and tires. Other maintenance items can in-
clude such things as air filter or tire rotation. The
distance for checking or replacing the items can
be set or reset.
Alarms
This setting allows the customer to set alarms for
outside temperature and a timer alert. 1. Press the
button.
2. Use the
button until “Settings” is se-
lected, and press ENTER.
3. Select “Alarms” using the
button and
press ENTER.
Outside Temperature
This setting allows the customer to
enable/disable the alert for low outside tempera-
ture in the vehicle information display.
1. Use the
button to select “Outside
Temperature”.
2. Press the ENTER button to turn on/off the outside temperature in the vehicle informa-
tion display.
Timer Alert
This setting allows the driver to set an alert to
notify a set time has been reached.
1. Use the
button to select “Timer Alert”.
2. Press the ENTER button.
3. To change the timer amount, use the
button and the ENTER button to save the
selected time amount. Navigation (if so equipped)
This setting allows the customer to
enable/disable the alert for navigation in the ve-
hicle information display.
1. Use the
buttons to select “Naviga-
tion”.
2. Press the ENTER button to turn ON/OFF the alert.
Language
The language of the vehicle information display
can be changed to:
● US English
● French
● Spanish
Use the
,, and the ENTER buttons to
select and change the language of the vehicle
information display. The language of the center
display/navigation can be changed indepen-
dently of the vehicle information display. For ve-
hicles not equipped with Navigation refer to
“How to use the
button” for vehicles
equipped with Navigation in the “System” in the
“Monitor, climate, audio, phone and voice recog-
nition systems” section of this manual.
2-22Instruments and controls
Page 107 of 441
12. Timer Alert – Time for a driver break?
13. Low Outside Temperature
14. Power will turn off to save the battery
15. CVT Error: See Owner’s Manual
16. Reminder: Turn OFF headlights
17. Low Oil Pressure: See Owner’s Manual
18. Key Registration Complete
19. Tire Pressure Low - Add Air
20. TPMS Error: See Owner’s Manual
21. Remote Start (if so equipped)
22. Loose Fuel Cap
23. I-Key System Error: See Owner’s Manual
No Key Detected
This warning appears when the Intelligent Key is
left outside the vehicle with the ignition switch in
the ON or ACC position. Make sure the Intelli-
gent Key is inside the vehicle.
Key ID Incorrect (if so equipped)
This warning appears when the ignition switch is
placed from the OFF position and the Intelligent
Key is not recognized by the system. You cannot
start the engine with an unregistered key.For additional information, refer to “NISSAN In-
telligent Key®” in the “Pre-driving checks and
adjustments” section of this manual.
Shift to Park
This warning illuminates when the ignition switch
is in the ACC or OFF position and the shift lever
is in any position other than P (Park) position.
Also, a chime sounds when the ignition switch is
in the OFF position.
If this warning illuminates, move the shift lever to
the P (Park) position or start the engine.
For additional information about Intelligent Key,
refer to “NISSAN Intelligent Key®” in the “Pre-
driving checks and adjustments” section.
Push ignition to OFF
After the Push ignition to OFF warning illumi-
nates, the warning will illuminate if the ignition
switch is placed in the ACC position when the
shift lever is moved to the P (Park) position.
To turn off the Push warning, place the ignition
switch in the ON position and then in the LOCK
position.
Key battery low (if so equipped)
This indicator illuminates when the Intelligent Key
battery is running out of power.
If this indicator illuminates, replace the battery
with a new one. For additional information, refer
to “Battery replacement” in the “Maintenance and
do-it-yourself” section of this manual.
Engine start operation for Intelligent Key
system
This indicator appears when the battery of the
Intelligent Key is low and when the Intelligent Key
system and the vehicle are not communicating
normally.
If this appears, touch the ignition switch with the
Intelligent Key while depressing the brake pedal.
For additional information, refer to “NISSAN In-
telligent Key® battery discharge” in the “Starting
and driving” section of this manual.
Release Parking Brake
This warning illuminates in the message area of
the vehicle information display when the parking
brake is set and the vehicle is driven.
Low Fuel
This warning illuminates when the fuel level in the
fuel tank is getting low. Refuel as soon as it is
convenient, preferably before the fuel gauge
reaches 0 (Empty) .
There will be a small re-
serve of fuel in the tank when the fuel
gauge needle reaches 0 (Empty) .
Instruments and controls2-25
Page 108 of 441
Low Washer Fluid
This warning illuminates when the windshield-
washer fluid is at a low level. Add windshield-
washer fluid as necessary. For additional informa-
tion, refer to “Windshield-washer fluid” in the
“Maintenance and do-it-yourself” section of this
manual.
Door/liftgate Open
This warning illuminates when a door has been
opened when the engine is running.
Trunk Open
This warning illuminates when the trunk has been
opened when the engine is running.
Timer Alert – Time for a driver break?
This indicator appears when the set time is
reached. The time can be set up to six hours. For
setting the timer, refer to “Timer alert” in this
section.
Low Outside Temperature
This warning appears if the outside temperature
is below 37°F (3°C) . The temperature can be
changed to display in Celsius or Fahrenheit. For
additional information, refer to “Temperature” in
this section.Power will turn off to save the battery
This warning appears in message area of the
vehicle information display after a period of time if
the shift lever has not moved from the P (Park)
position.
CVT Error: See Owner’s Manual
This warning illuminates when the there is a prob-
lem with the CVT system. If this warning comes
on, have the system checked by a NISSAN
dealer.
Reminder: Turn OFF headlights
This warning appears when the headlights are
left in the ON position when exiting the vehicle.
Place the headlight switch in the OFF or AUTO
position. For additional information, refer to
“Headlight and turn signal switch” in this section.
Low Oil Pressure: See Owner’s Manual
This warning appears in message area of the
vehicle information display if low oil pressure is
detected. This gauge is not designed to indicate
low oil level.
The low oil pressure warning is
not designed to indicate a low oil level. Use
the dipstick to check the oil level. For additional
information, refer to “Engine oil” in the “Mainte-
nance and do-it-yourself” section of this manual. Key Registration Complete
This appears when a new Intelligent Key is regis-
tered to the vehicle.
Tire Pressure Low - Add Air warning
This warning appears when the low tire pressure
warning light in the meter illuminates and low tire
pressure is detected. The warning appears each
time the ignition switch is placed in the ON
position as long as the low tire pressure warning
light remains illuminated. If this warning appears,
stop the vehicle and adjust the tire pressures of
all four tires to the recommended COLD tire
pressure shown on the Tire and Loading Informa-
tion label. For additional information, refer to
“Low tire pressure warning light” in this section
and “Tire Pressure Monitoring System (TPMS)”
in the “Starting and driving” section of this
manual.
TPMS Error: See Owner’s Manual
This warning appears when there is an error with
your TPMS. If this warning comes on, have the
system checked by a NISSAN dealer.
2-26Instruments and controls
Page 109 of 441
Push to start
This warning appears in the vehicle information
display when the vehicle has been started using
the remote start function. To start the vehicle,
apply the brake and place the ignition switch in
the ON position.
Loose Fuel Cap
This warning appears when the fuel-filler cap is
not tightened correctly after the vehicle has been
refueled. For additional information, refer to
“Fuel-filler cap” in the “Pre-driving checks and
adjustments” section of this manual.
I-Key System Error: See Owner’s Manual
(if so equipped)
After the ignition switch is pushed to the ON
position, this light comes on for about 2 seconds
and then turns off.
The I-Key System Error message warns of a
malfunction with the Intelligent Key system. If the
light comes on while the engine is stopped, it may
be impossible to start the engine.
If the light comes on while the engine is running,
you can drive the vehicle. However in these
cases, contact a NISSAN dealer for repair as
soon as possible.Your vehicle may have two types of security sys-
tems:
● Vehicle security system
● NISSAN Vehicle Immobilizer System
VEHICLE SECURITY SYSTEM
The vehicle security system provides visual and
audible alarm signals if someone opens the
doors, trunk, liftgate or the hood when the system
is armed. It is not, however, a motion detection
type system that activates when a vehicle is
moved or when a vibration occurs. The system helps deter vehicle theft but cannot
prevent it, nor can it prevent the theft of interior or
exterior vehicle components in all situations. Al-
ways secure your vehicle even if parking for a
brief period. Never leave your Intelligent Key in
the vehicle, and always lock the vehicle when
unattended. Be aware of your surroundings, and
park in secure, well-lit areas whenever possible.
Many devices offering additional protection, such
as component locks, identification markers, and
tracking systems, are available at auto supply
stores and specialty shops. A NISSAN dealer
may also offer such equipment. Check with your
insurance company to see if you may be eligible
for discounts for various theft protection features.
How to arm the vehicle security
system
1. Close all windows.
(The system can be
armed even if the windows are open.)
2. Remove the Intelligent Key from the vehicle.
3. Close all doors, hood and trunk/liftgate. Lock all doors. The doors can be locked with
the Intelligent Key, door handle request
switch (if so equipped) , power door lock
switch or mechanical key.
LIC0301
SECURITY SYSTEMS
Instruments and controls2-27
Page 119 of 441
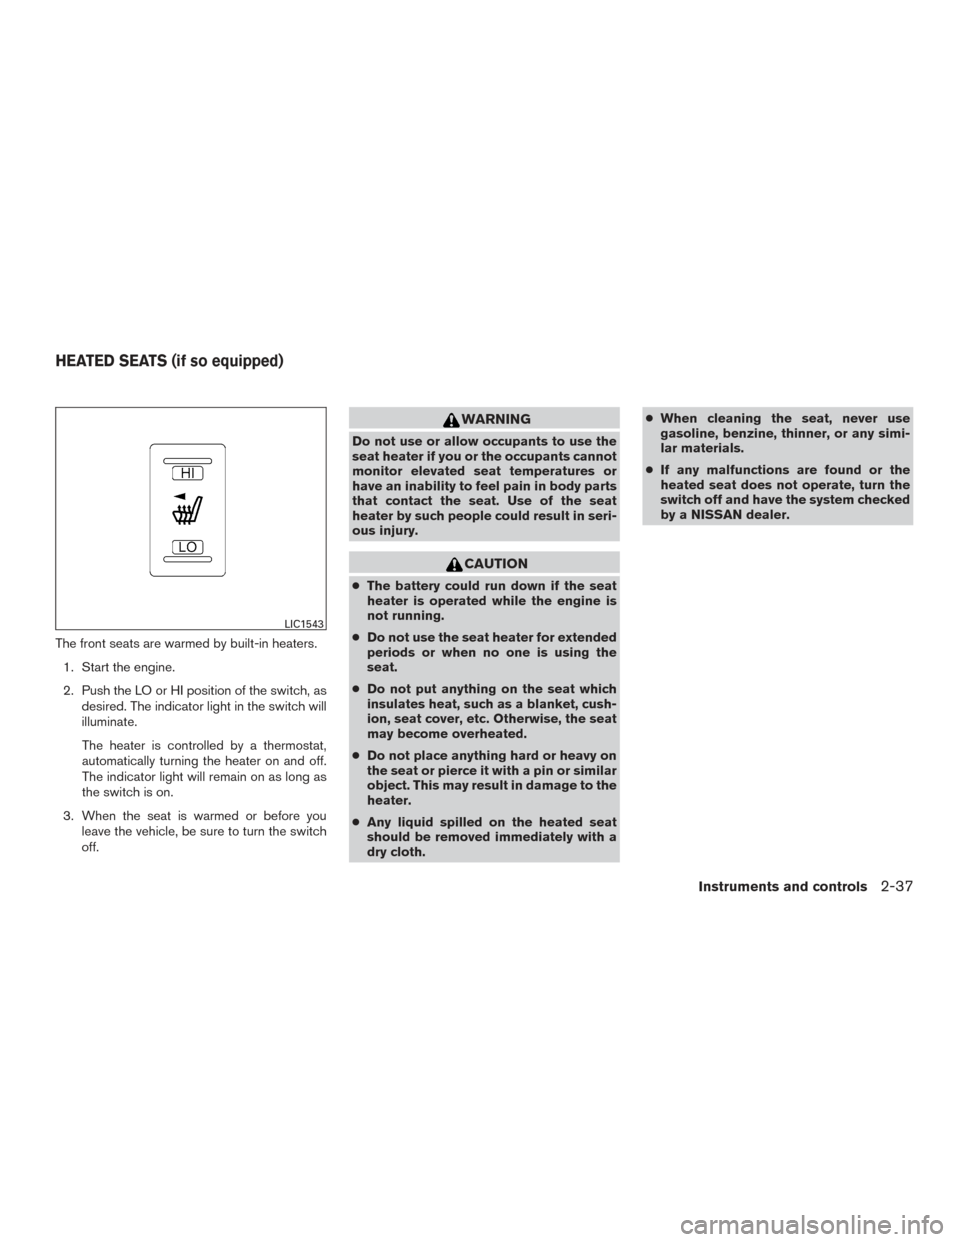
The front seats are warmed by built-in heaters.1. Start the engine.
2. Push the LO or HI position of the switch, as desired. The indicator light in the switch will
illuminate.
The heater is controlled by a thermostat,
automatically turning the heater on and off.
The indicator light will remain on as long as
the switch is on.
3. When the seat is warmed or before you leave the vehicle, be sure to turn the switch
off.
WARNING
Do not use or allow occupants to use the
seat heater if you or the occupants cannot
monitor elevated seat temperatures or
have an inability to feel pain in body parts
that contact the seat. Use of the seat
heater by such people could result in seri-
ous injury.
CAUTION
●The battery could run down if the seat
heater is operated while the engine is
not running.
● Do not use the seat heater for extended
periods or when no one is using the
seat.
● Do not put anything on the seat which
insulates heat, such as a blanket, cush-
ion, seat cover, etc. Otherwise, the seat
may become overheated.
● Do not place anything hard or heavy on
the seat or pierce it with a pin or similar
object. This may result in damage to the
heater.
● Any liquid spilled on the heated seat
should be removed immediately with a
dry cloth. ●
When cleaning the seat, never use
gasoline, benzine, thinner, or any simi-
lar materials.
● If any malfunctions are found or the
heated seat does not operate, turn the
switch off and have the system checked
by a NISSAN dealer.
LIC1543
HEATED SEATS (if so equipped)
Instruments and controls2-37
Page 137 of 441
3 Pre-driving checks and adjustments
Keys .............................................3-2NISSAN Intelligent Key® . .......................3-2
NISSAN Vehicle Immobilizer System keys .........3-4
Doors ............................................3-4
Locking with key ................................3-4
Locking with inside lock knob ....................3-5
Locking with power door lock switch . . . ..........3-6
Automatic door locks ...........................3-6
Child safety rear door lock .......................3-7
NISSAN Intelligent Key® With Door and Trunk
Request Switches .................................3-7
Operating range ................................3-9
Door locks/unlocks precaution ...................3-9
NISSAN Intelligent Key® operation ..............3-10
How to use the remote keyless entry
function ...................................... 3-13
Warning signals ............................... 3-17
Troubleshooting guide ......................... 3-18
NISSAN Intelligent Key® Without Door and Trunk
Request Switches ................................ 3-20
Operating range ............................... 3-21
How to use the remote keyless entry
function ...................................... 3-21
Warning signals ............................... 3-25Troubleshooting guide
......................... 3-25
Remote Engine Start (if so equipped) . . .............3-27
Remote engine start operating range ............3-27
Remote starting the vehicle .....................3-27
Extending engine run time ......................3-28
Canceling a remote start .......................3-28
Conditions the remote start will not work .........3-28
Hood ........................................... 3-29
Trunk lid ......................................... 3-30
Opener operation .............................. 3-30
Interior trunk lid release ........................ 3-31
Fuel-filler door ................................... 3-32
Opener operation .............................. 3-32
Fuel-filler cap ................................. 3-32
Tilt/telescopic steering ............................ 3-34
Tilt operation .................................. 3-35
Telescopic operation ........................... 3-35
Sun visors ....................................... 3-35
V anity
mirrors ................................. 3-36
Mirrors .......................................... 3-36
Rearview
mirror (if so equipped) .................3-36
Automatic anti-glare rearview mirror
(if so equipped) ............................... 3-36
Outside mirrors ............................... 3-38