Page 14 of 24

12
FIRST DRIVE FEATURES
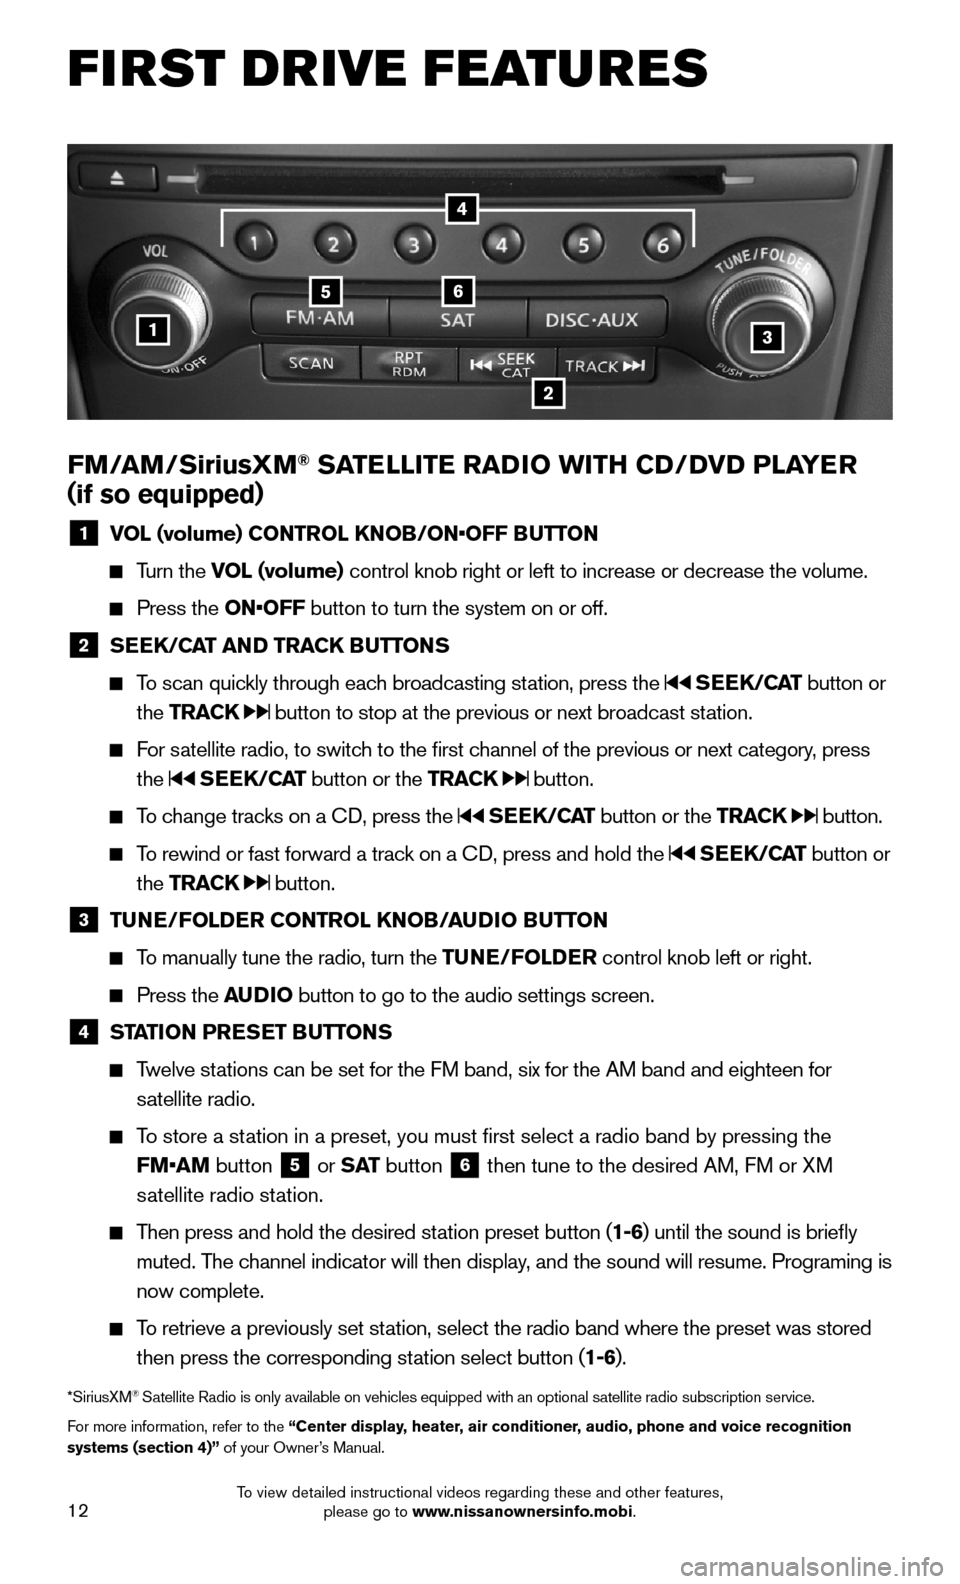
FM/AM/SiriusXM® SATELLITE RADIO WITH CD/DVD PLAYER
(if so equipped)
1 VOL (volume) CONTROL KNOB/ON•OFF BUTTON
Turn the VOL (volume) control knob right or left to increase or decrease the volume.
Press the ON•OFF button to turn the system on or off.
2 SEEK/CAT AND TRACK BUTTONS
To scan quickly through each broadcasting station, press the SEEK/CAT button or
the TRACK button to stop at the previous or next broadcast station.
For satellite radio, to switch to the first channel of the previous or next category, press
the SEEK/CAT button or the TRACK button.
To change tracks on a CD, press the SEEK/CAT button or the TRACK button.
To rewind or fast forward a track on a CD, press and hold the SEEK/CAT button or
the TRACK button.
3 TUNE/FOLDER CONTROL KNOB/AUDIO BUTTON
To manually tune the radio, turn the TUNE/FOLDER control knob left or right.
Press the AUDIO button to go to the audio settings screen.
4 STATION PRESET BUTTONS
Twelve stations can be set for the FM band, six for the AM band and eighteen for
satellite radio.
To store a station in a preset, you must first select a radio band by pressing the
FM•AM button 5 or S AT button 6 then tune to the desired AM, FM or XM
satellite radio station.
Then press and hold the desired station preset button (1-6) until the sound is briefly
muted. The channel indicator will then display, and the sound will resume. Programing is
now complete.
To retrieve a previously set station, select the radio band where the preset was stored
then press the corresponding station select button (1-6).
*SiriusXM® Satellite Radio is only available on vehicles equipped with an optional s\
atellite radio subscription service.
For more information, refer to the “Center display, heater, air conditioner, audio, phone and voice recognition systems (section 4)” of your Owner’s Manual.
1
56
2
3
4
To view detailed instructional videos regarding these and other features, please go to www.nissanownersinfo.mobi.
Page 21 of 24

19
1 Touch-screen display.
2 S TAT U S – Press multiple times to display audio information with either the air
conditioner status, fuel economy or navigation directions.
3 Destination (DEST) – Press to enter a destination.
4 ZOOM OUT – Press to zoom out the map.
5 ROUTE – Press to access guidance control functions (guidance cancellation, route
priority, waypoint setting on the route, etc.).
6 Information (INFO) – Press to display the vehicle, traffic (if so equipped), weather
(if so equipped) or voice recognition information.
7 – Press to switch between the day screen (bright) and the night screen (dark).
Press and hold the button to turn the display off. Press again to turn the display on.
8 Multi-Function Controller
• ENTER – Press to select the highlighted item on the screen. If this button is pushed
while a map is displayed, the map menu screen is displayed.
• Main directional buttons – Press to move across the map, highlight an item on the
screen or adjust a setting.
• Additional directional buttons – Press to move across the map or highlight an item
on the character input screen.
• Center Dial – Turn the dial to highlight an item on the screen, adjust a setting or
adjust the map scale.
9 ZOOM IN – Press to zoom in the map.
10 MAP – Press to display the map. While following a programed route, press multiple
times to change the type of route information.
11 SETTING – Press to access the system settings.
12 BACK – Press to return to the previous screen. In a settings screen, this button
can also be used to apply the setting. In a character input screen, this button can
also delete the characters that have been entered.
13 VOICE – Press to hear the current voice guidance for a programed route.
For more information, refer to the “Navigation (section 2)” of your Multi Function Display Owner’s Manual.
To view detailed instructional videos regarding these and other features, please go to www.nissanownersinfo.mobi.
Page 22 of 24

20
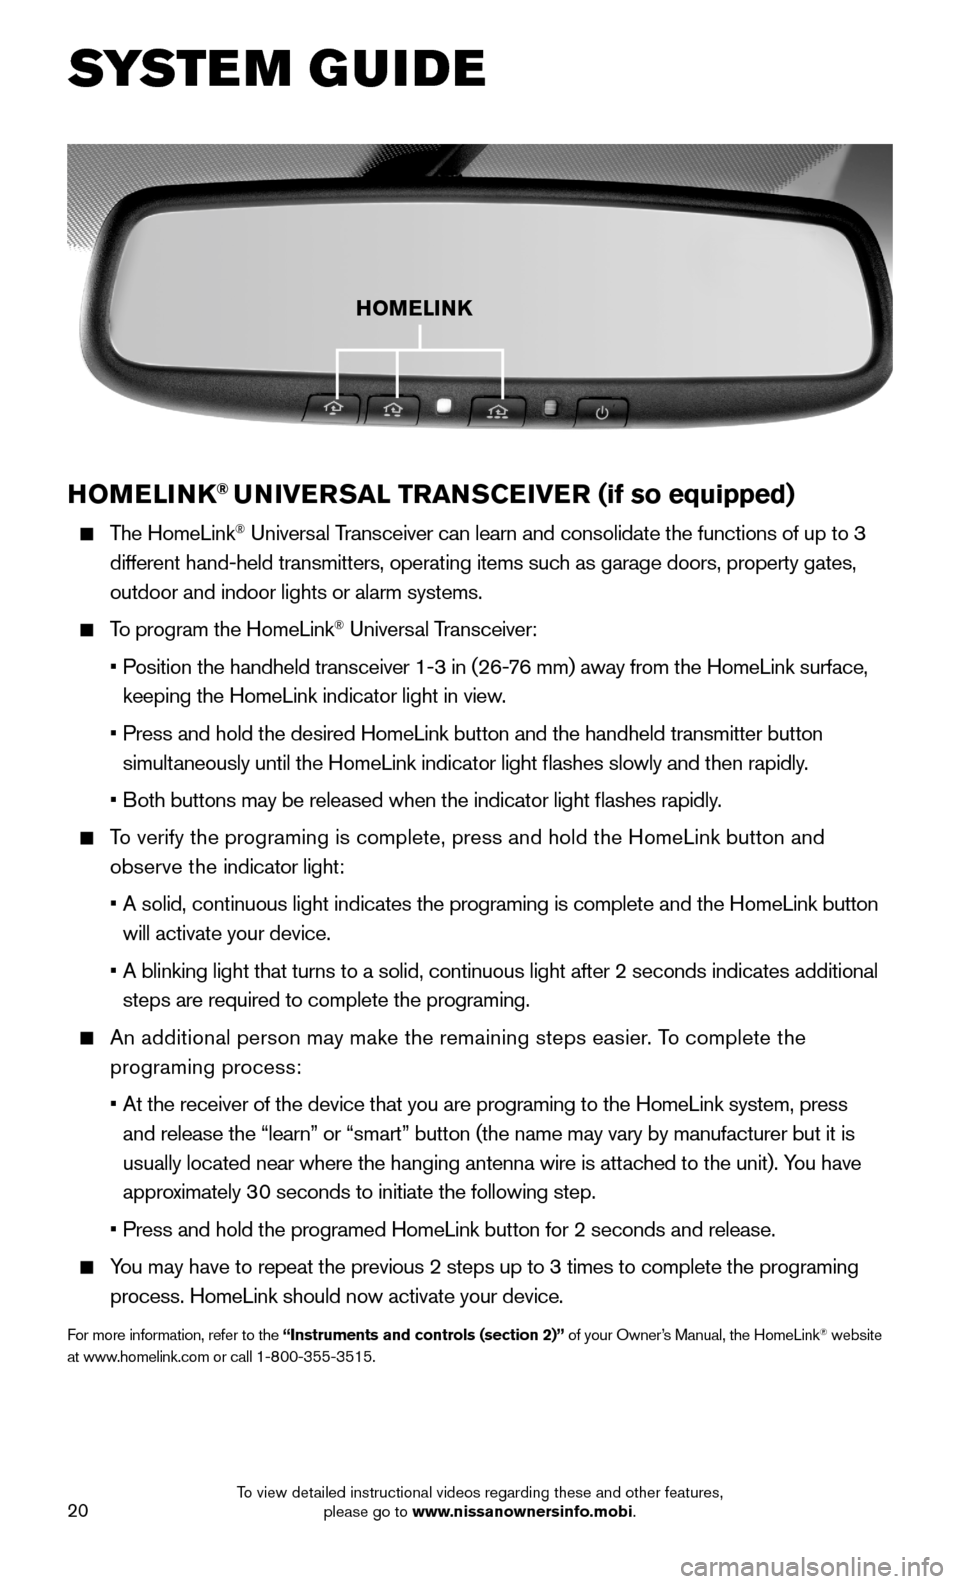
HOMELINK® UNIVERSAL TRANSCEIVER (if so equipped)
The HomeLink® Universal Transceiver can learn and consolidate the functions of up to 3
different hand-held transmitters, operating items such as garage doors, property gates,
outdoor and indoor lights or alarm systems.
To program the HomeLink® Universal Transceiver:
• Position the handheld transceiver 1-3 in (26-76 mm) away from the HomeLink surface,
keeping the HomeLink indicator light in view.
• Press and hold the desired HomeLink button and the handheld transmitter \
button
simultaneously until the HomeLink indicator light flashes slowly and then ra\
pidly.
• Both buttons may be released when the indicator light flashes rapidly.
To verify the programing is complete, press and hold the HomeLink button \
and
observe the indicator light:
• A solid, continuous light indicates the programing is complete and the H\
omeLink button
will activate your device.
• A blinking light that turns to a solid, continuous light after 2 seconds\
indicates additional
steps are required to complete the programing.
An additional person may make the remaining steps easier. To complete the
programing process:
• At the receiver of the device that you are programing to the HomeLink sy\
stem, press
and release the “learn” or “smart” button (the name may var\
y by manufacturer but it is
usually located near where the hanging antenna wire is attached to the unit). You have
approximately 30 seconds to initiate the following step.
• Press and hold the programed HomeLink button for 2 seconds and release.
You may have to repeat the previous 2 steps up to 3 times to complete the programing
process. HomeLink should now activate your device.
For more information, refer to the “Instruments and controls (section 2)” of your Owner’s Manual, the HomeLink® website at www.homelink.com or call 1-800-355-3515.
HOMELINK
SYSTEM GUIDE
To view detailed instructional videos regarding these and other features, please go to www.nissanownersinfo.mobi.