2015 MITSUBISHI OUTLANDER SPORT check engine
[x] Cancel search: check enginePage 239 of 384
Parking 6-6 Driving safety
6
cially when the brakes
are wet, to confirm
they work normally. A film of water can be formed on the brake discs and prevent normal braking after driv-ing in heavy rain or
through large puddles, or
after the vehicle is wash
ed. If this occurs, dry
the brakes out by driving slowly while lightlydepressing the brake pedal. On snowy roads, ice can form on the braking system, making the brakes less effective.While driving in such
conditions, pay close
attention to preceding and following vehicles and to the condition of
the road surface. From
time to time, lightly depress the brake pedal and check how effective the brakes are. It is important to take advantage of the engine braking by downshifting while driving on steep downhill roads in order to prevent thebrakes from overheating.
N00629600304
When parking on a hill, set the parking brake,and turn the front wheels toward the curb on adownhill, or away from the curb on an uphill. If necessary, apply chocks to wheels. Place the gearshift lever into the “R” (Reverse) position when parking on a down-hill slope, into the 1st position when parking on an uphill slope. Be sure that the parking brake is firmly set when parked and that the selector lever is inthe “P” (PARK) position. When parking on a hill, it is important to set the parking brake before moving the selectorlever to the “P” (PARK) position. This pre- vents loading the parking brake against the
transaxle. When this happens, it is difficult to move the selector lever out of the “P” (PARK) position. Never leave the engine running while you take a short sleep or rest. Also, never leavethe engine running in a closed or poorly ven-tilated place. Your front bumper can be damaged if you scrape it over curbs or parking stop blocks. Be careful when traveling up or down steepslopes where your bumper can scrape the road.
When driving in cold weather When driving downhill
Parking Parking on a hill For vehicles equipped with man- ual transaxle For vehicles equipped with contin- uously variable transmission (CVT)
Parking with the engine run- ning
WA R N I N G Leaving the engine running risks injury or death from accidentally moving the gear- shift lever (manual transaxle) or the selec- tor lever (CVT) or from the accumulationof toxic exhaust fumes in the passenger compartment.
Where you park
BK0206700US.bo
ok 6 ページ 2014年3月25日 火曜日 午後4時42分
Page 253 of 384
Manual air conditioning-T
ype 1 (if so equipped)
7-6 Comfort controls
7
N00702101067
You can change the following functions to match your preference. Enable automatic air control: When the air conditioning operates, theair selection switch will be automatically controlled. Disable automatic air control: Even when the air conditioning operates,the air selection switch will not be auto- matically controlled. Changing the settings Press the air selection switch for about 10seconds or longer. When the setting has changed, the system will beep and the indicator light will flash.• When the setting has changed from enabled to disabled, the system will beep three times and the indicator will flashthree times.
• When the setting has changed from dis- abled to enabled, the system will beep two times and the indicator light will flash three times.
N00731000377
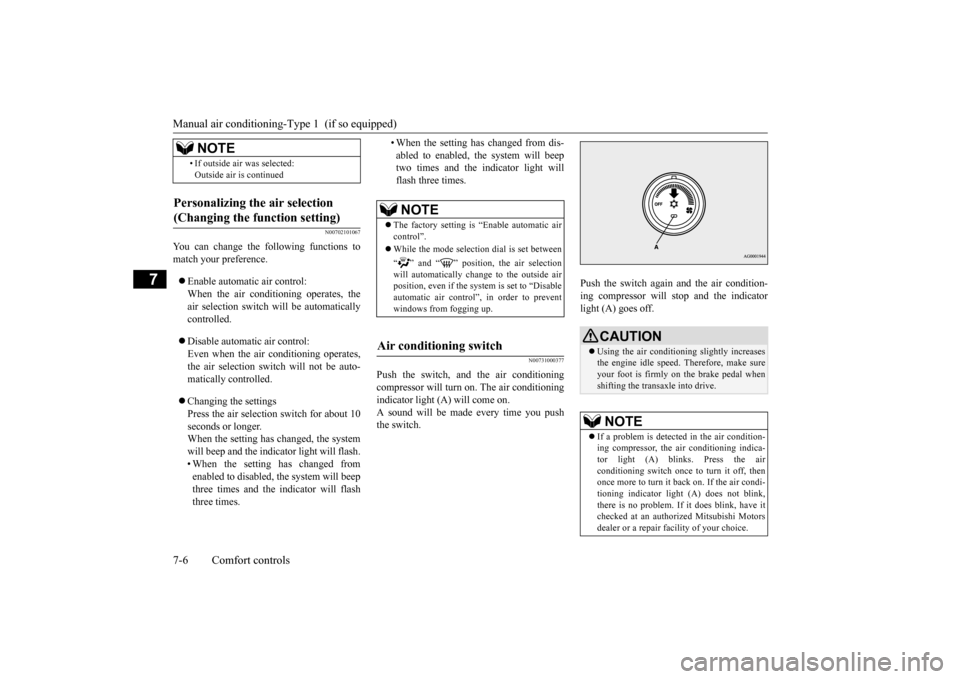
Push the switch, and the air conditioning compressor will turn
on. The air conditioning
indicator light (A) will come on.A sound will be made every time you push the switch.
Push the switch again and the air condition- ing compressor will stop and the indicator light (A) goes off.
• If outside air was selected: Outside air is continued
Personalizing the air selection (Changing the function setting)
NOTE
NOTE
The factory setting is “Enable automatic air control”. While the mode selection dial is set between “ ” and “ ” position, the air selection will automatically change to the outside air position, even if the sy
stem is set to “Disable
automatic air control”, in order to prevent windows from fogging up.
Air conditioning switch
CAUTION Using the air conditioning slightly increases the engine idle speed. Therefore, make sureyour foot is firmly on the brake pedal when shifting the transaxle into drive.NOTE
If a problem is detected in the air condition- ing compressor, the air conditioning indica- tor light (A) blinks. Press the air conditioning switch once to turn it off, thenonce more to turn it b
ack on. If the air condi-
tioning indicator light (A) does not blink, there is no problem. If it does blink, have itchecked at an authorized Mitsubishi Motors dealer or a repair facility of your choice.
BK0206700US.bo
ok 6 ページ 2014年3月25日 火曜日 午後4時42分
Page 259 of 384
Manual air conditioning-T
ype 2 (if so equipped)
7-12 Comfort controls
7
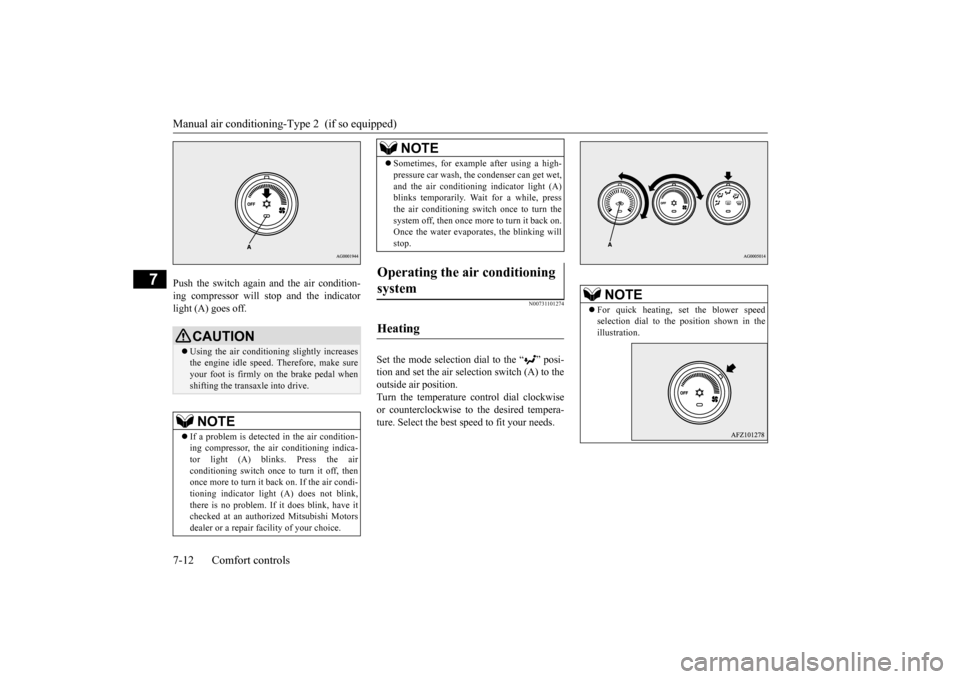
Push the switch again and the air condition- ing compressor will stop and the indicator light (A) goes off.
N00731101274
Set the mode selection dial to the “ ” posi-tion and set the air selection switch (A) to theoutside air position. Turn the temperature control dial clockwise or counterclockwise to the desired tempera-ture. Select the best speed to fit your needs.
CAUTION Using the air conditioning slightly increases the engine idle speed. Therefore, make sureyour foot is firmly on the brake pedal when shifting the transaxle into drive.NOTE
If a problem is detected in the air condition- ing compressor, the air conditioning indica- tor light (A) blinks. Press the air conditioning switch once to turn it off, thenonce more to turn it back on. If the air condi- tioning indicator light (A) does not blink, there is no problem. If it does blink, have itchecked at an authorized Mitsubishi Motors dealer or a repair facility of your choice.
Sometimes, for example after using a high- pressure car wash, the condenser can get wet, and the air conditioning indicator light (A) blinks temporarily. Wait for a while, press the air conditioning switch once to turn thesystem off, then once more to turn it back on. Once the water evaporates, the blinking will stop.
Operating the air conditioning system
Heating
NOTE
NOTE
For quick heating, set the blower speed selection dial to the position shown in the illustration.
BK0206700US.bo
ok 12 ページ 2014年3月25日 火曜日 午後4時42分
Page 264 of 384
Automatic air conditioning-Type1 (if so equipped)
Comfort controls 7-17
7
Disable automatic air control: Even when the mode selection dial or the blower speed selection dial is set to the “AUTO” position, the air selection switchwill not be automatically controlled. Changing the settings Press the air selection switch for about 10 seconds or longer.When the setting has changed, the system will beep and the indicator light will flash. • When the setting has changed fromenabled to disabled, the system will beepthree times and the indicator will flash three times. • When the setting has changed from dis-abled to enabled, the system will beep two times and the indicator light will flash three times.
N00737300200
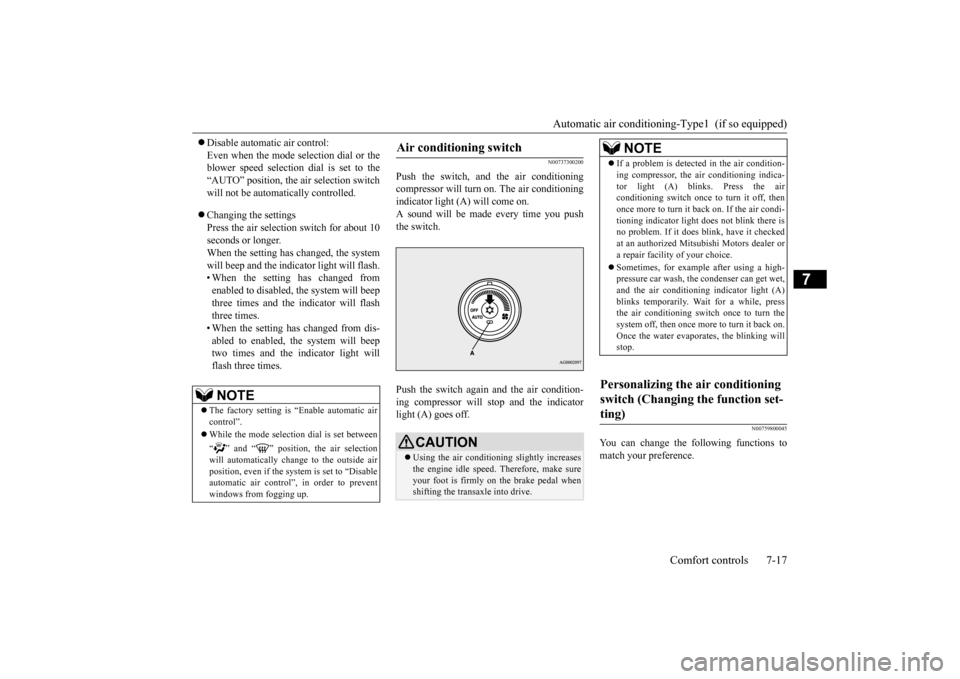
Push the switch, and the air conditioningcompressor will turn
on. The air conditioning
indicator light (A) will come on. A sound will be made every time you push the switch. Push the switch again and the air condition- ing compressor will stop and the indicator light (A) goes off.
N00759800045
You can change the following functions to match your preference.
NOTE
The factory setting is “Enable automatic air control”. While the mode selection dial is set between “ ” and “ ” position, the air selection will automatically change to the outside air position, even if the sy
stem is set to “Disable
automatic air control”, in order to prevent windows from fogging up.
Air conditioning switch
CAUTION Using the air conditioning slightly increases the engine idle speed. Therefore, make sureyour foot is firmly on the brake pedal when shifting the transaxle into drive.
NOTE
If a problem is detect
ed in the air condition-
ing compressor, the air conditioning indica- tor light (A) blinks. Press the air conditioning switch once to turn it off, then once more to turn it back on. If the air condi-tioning indicator light
does not blink there is
no problem. If it does blink, have it checked at an authorized Mitsubishi Motors dealer ora repair facility of your choice. Sometimes, for example after using a high- pressure car wash, the condenser can get wet, and the air conditioning indicator light (A) blinks temporarily. Wait for a while, pressthe air conditioning switch once to turn the system off, then once more to turn it back on. Once the water evaporates, the blinking willstop.
Personalizing the air conditioning switch (Changing the function set- ting)
BK0206700US.bo
ok 17 ページ 2014年3月25日 火曜日 午後4時42分
Page 269 of 384
Automatic air conditioning
-Type2 (if so equipped)
7-22 Comfort controls
7
N00760000021
You can change the following functions to match your preference. Enable automatic air control: When the mode selection dial or the blower speed selection dial is set to the “AUTO” position, the air selection switchwill also be automatically controlled. Disable automatic air control: Even when the mode selection dial or the blower speed selection dial is set to the“AUTO” position, the air selection switch will not be automatically controlled. Changing the settings Press the air selection switch for about 10seconds or longer. When the setting has changed, the system will beep and the indicator light will flash.• When the setting has changed from enabled to disabled, the system will beep three times and theindicator will flash three times.
• When the setting has changed from dis- abled to enabled, the system will beep two times and the indicator light will flash three times.
N00737300239
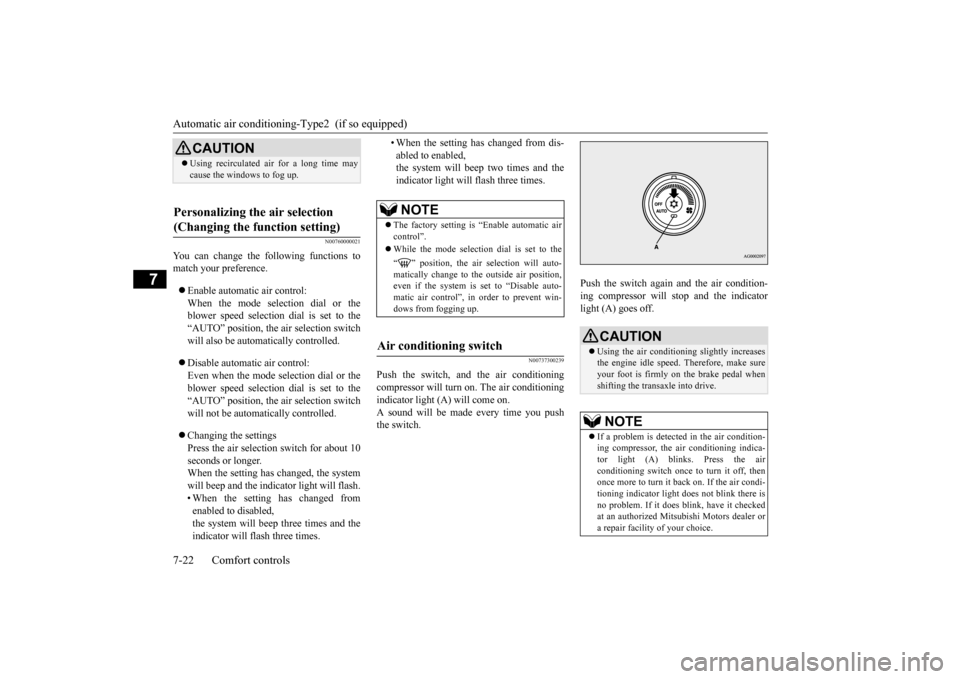
Push the switch, and the air conditioning compressor will turn
on. The air conditioning
indicator light (A) will come on.A sound will be made every time you push the switch.
Push the switch again and the air condition- ing compressor will stop and the indicator light (A) goes off.
CAUTION Using recirculated air for a long time may cause the windows to fog up.
Personalizing the air selection (Changing the function setting)
NOTE
The factory setting is “Enable automatic air control”. While the mode selection dial is set to the “ ” position, the air selection will auto- matically change to the outside air position, even if the system is set to “Disable auto-matic air control”, in order to prevent win- dows from fogging up.
Air conditioning switch
CAUTION Using the air conditioning slightly increases the engine idle speed. Therefore, make sureyour foot is firmly on the brake pedal when shifting the transaxle into drive.NOTE
If a problem is detected in the air condition- ing compressor, the air conditioning indica- tor light (A) blinks. Press the air conditioning switch once to turn it off, thenonce more to turn it b
ack on. If the air condi-
tioning indicator light does not blink there is no problem. If it does blink, have it checkedat an authorized Mitsubishi Motors dealer or a repair facility of your choice.
BK0206700US.bo
ok 22 ページ 2014年3月25日 火曜日 午後4時42分
Page 273 of 384
AM/FM radio/CD player (if so equipped) 7-26 Comfort controls
7
N00734302115
The audio system can only be used when the ignition switch or the operation mode is in ON or ACC.
N00715000021
This product supports audio playback from iPod/iPhone devices, however dif- fering versions mean that playback cannot be guaranteed.
Please be aware that depending on the iPod/iPhone model or version, operation may differ.
N00715200023
If the product becomes dirty, wipe with a soft cloth. If very dirty, use a soft cloth dipped in neutral detergent diluted in water, andthen wrung out. Do not use benzene, thin- ners, or other chemical wipes. This may harm the surface.
N00715300040
Product names and other proper names are the trademarks or registered trade-marks of their respective owners.
AM/FM radio/CD player
(if
so equipped)
NOTE
To listen to the audio system while the engine is not running, turn the ignition switch to the “ACC” position or put the oper- ation mode in ACC.If the ignition switch or the operation mode is left in ACC, the accessory power will automatically turn off after a certain periodof time and you will no longer be able to use the audio system. The accessory power comes on again if the ignition switch or theengine switch is operated with it in the “ACC” position. Refer to “ACC power auto- cutout function” on page 5-17 and 5-45. If a cellular phone is used inside the vehicle, it may create noise in the audio equipment.This does not mean that anything is wrong with your audio equipment. In such a case, use the cellular phone at a place as far away as possible from the audio equipment.
If foreign objects or water get into the audio equipment, or if sm
oke or a strange odor
comes from it, immediately turn off the audio system and have it checked at an authorized Mitsubishi Motors dealer or arepair facility of your choice. Never try to repair it yourself. Avoid using the audio sys- tem until it is inspected by a qualified per-son. If the audio system is damaged by foreign objects, water, or fire, have the system checked by a qualified Mitsubishi Motors technician. The audio amplifier (if so equipped) is located under the front right seat.Do not subject the amplifier to a strong impact. It could damage the amplifier or malfunc-tioning could result.
Important Points on Usage
iPod/iPhone Playback Function
(if
so equipped)
NOTE
How to Clean
Trademarks
BK0206700US.bo
ok 26 ページ 2014年3月25日 火曜日 午後4時42分
Page 309 of 384
If the vehicle breaks down 8-2 For emergencies
8
N00836300187
If your vehicle breaks down on the road, move to the shoulder and turn on the hazardwarning flashers. If there is no shoulder, or the shoulder is not safe, drive in the right lane slowly, with the hazard lights flashing, untilyou come to a safe stopping place. Keep the flashers flashing. If the engine stops, there will be no power assist to the steering and brakes, making these difficult to use. The brake booster will not work, so the brakes will not grip well. The brake pedalwill be harder to press than usual. Since there is no power steering assist, the steering wheel will be hard to turn.
Get help from your passengers, bystanders, etc. to push the vehicl
e and move it to a safe
zone.
N00836401781
If the engine cannot be started because the battery is weak or dead, you can start it withthe battery from another vehicle using jumper cables. 1. Take off any metal jewelry such as watch bands or bracelets that might make an accidental electrical contact.
2. Position the vehicles close enough together so that the jumper cables can reach, but be sure the vehicles aren’t touching each other. 3. You could be injured if the vehicles move. Set the parking brake firmly on each vehi- cle. Put an automatic transaxle or CVT in “P” (PARK) or a manual transaxle in “N”(Neutral). 4. Turn the ignition switch to the “OFF” position or put the operation mode inOFF.
If the vehicle breaks down If the engine stops/fails When the engine fails at the intersection
Jump-starting the engine
WA R N I N G When using jumper cables to start a vehi- cle, follow the procedures and be very cau- tious. If the electrolyte fluid looks frozen, DO NOT ATTEMPT JUMP STARTING!! The battery might split open or explode ifthe temperature is below the freezing point.CAUTION Do not try to start your vehicle by pushing or towing. Vehicles with automatic transaxles cannot be started this way. Also, there is more risk of an accident when a vehicle isbeing pushed or towed.
CAUTION Check the other vehicle. It must have a 12- volt battery. If the other system isn’t 12-volt, both systems can be damaged.WA R N I N G Perform step 4 on both vehicles before- hand. Make sure that the cables or your clothes cannot be ca
ught by the fan or
drive belt. Personal injury could result.NOTE
Turn off all lights, heater, and other electrical loads. This will avoid sparks and help save both batteries.
BK0206700US.bo
ok 2 ページ 2014年3月25日 火曜日 午後4時42分
Page 310 of 384
Jump-starting the engine For emergencies 8-3
8
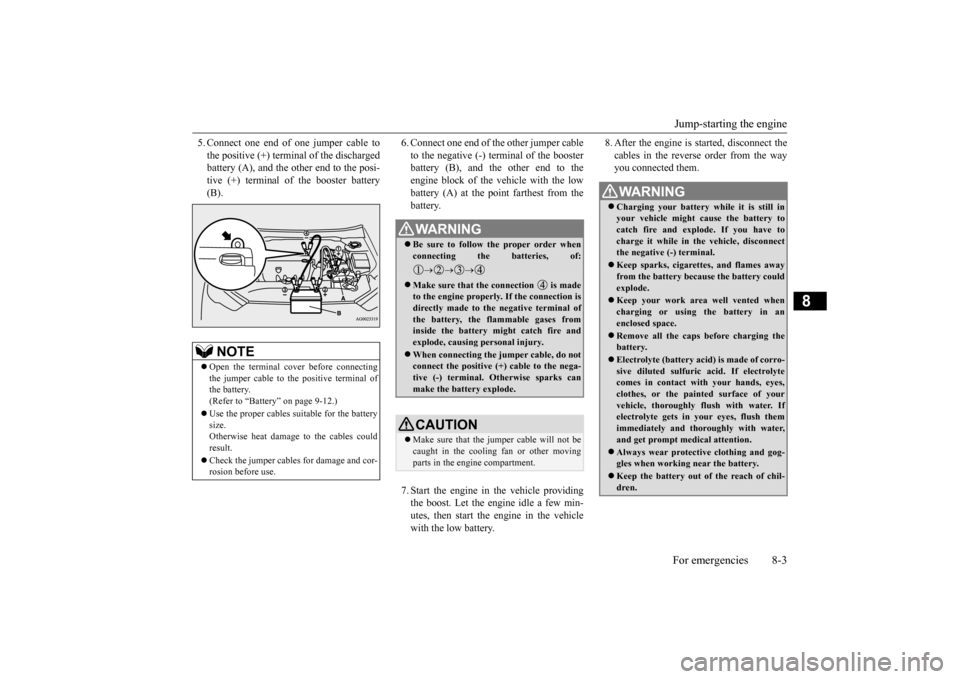
5. Connect one end of one jumper cable to the positive (+) terminal of the discharged battery (A), and the other end to the posi- tive (+) terminal of the booster battery(B).
6. Connect one end of the other jumper cable to the negative (-) terminal of the booster battery (B), and the other end to the engine block of the vehicle with the lowbattery (A) at the point farthest from the battery. 7. Start the engine in the vehicle providing the boost. Let the engine idle a few min-utes, then start the engine in the vehicle with the low battery.
8. After the engine is started, disconnect the cables in the reverse order from the way you connected them.
NOTE
Open the terminal cover before connecting the jumper cable to the positive terminal ofthe battery. (Refer to “Battery” on page 9-12.) Use the proper cables suitable for the battery size. Otherwise heat damage to the cables couldresult. Check the jumper cables for damage and cor- rosion before use.
WA R N I N G Be sure to follow the proper order when connecting the batteries, of:
Make sure that the connection is made to the engine properly. If the connection isdirectly made to the negative terminal of the battery, the flammable gases from inside the battery might catch fire andexplode, causing personal injury. When connecting the jumper cable, do not connect the positive (+) cable to the nega- tive (-) terminal. Otherwise sparks can make the battery explode.CAUTION Make sure that the jumper cable will not be caught in the cooling fan or other moving parts in the engine compartment.
WA R N I N G Charging your battery while it is still in your vehicle might cause the battery to catch fire and explode. If you have tocharge it while in the vehicle, disconnect the negative (-) terminal. Keep sparks, cigarettes, and flames away from the battery because the battery could explode. Keep your work area well vented when charging or using the battery in anenclosed space. Remove all the caps before charging the battery. Electrolyte (battery acid) is made of corro- sive diluted sulfuric acid. If electrolyte comes in contact with your hands, eyes, clothes, or the painted surface of yourvehicle, thoroughly flush with water. If electrolyte gets in your eyes, flush them immediately and thoroughly with water,and get prompt medical attention. Always wear protective clothing and gog- gles when working near the battery. Keep the battery out of the reach of chil- dren.
BK0206700US.bo
ok 3 ページ 2014年3月25日 火曜日 午後4時42分