Page 34 of 231

▷LEDs pulse or LED flashes: system is armed.▷One LED flashes at short intervals: the
doors, hood, or tailgate is not properly
closed.
Even if these are not closed fully, the re‐
maining items are locked and the LEDs
pulse after approx. 10 seconds for approx.
16 minutes; afterwards, one LED flashes.
The interior motion sensor is not activated.▷The LEDs go out after the vehicle is un‐
locked: the vehicle has not been tampered
with in the meantime.▷The LEDs flash after the vehicle is unlocked
until the remote control is inserted in the
ignition, but for no longer than approx.
5 minutes: the vehicle has been tampered
with in the meantime.
Panic mode
You can trigger the alarm system if you find
yourself in a dangerous situation.
Press the button on the remote control
for at least two seconds.
To switch off the alarm: press any button on the
remote control.
Tilt alarm sensor
The tilt of the vehicle is monitored.
The alarm system responds in situations such as
attempts to steal a wheel or tow the car.
Interior motion sensor
MINI Coupe
For the interior motion sensor to function prop‐
erly, the windows must be closed.
MINI Convertible, MINI RoadsterThe interior of the car is monitored up to the
height of the seat cushions. Thus the alarm sys‐
tem is armed together with the interior motion
sensor even if the convertible top is open. An
alarm can be triggered unintentionally by fall‐
ing objects such as leaves, refer to Avoiding un‐
intentional alarms.
Avoiding unintentional alarms
The tilt alarm sensor and interior motion sensor
can be switched off together, such as in the fol‐
lowing situations:▷In duplex garages.▷During transport on car-carrying trains, at
sea or on a trailer.▷When animals are to remain in the vehicle.
Switching off the tilt alarm sensor and
interior motion sensor
▷ Press the button on the remote
control twice in succession.▷Lock the vehicle twice with the integrated
key.
The LEDs flash in short succession for approx.
2 seconds. The tilt alarm sensor and interior
motion sensor remain switched off until the ve‐
hicle is unlocked and locked again.
Seite 32CONTROLSOpening and closing32
Online Edition for Part no. 01 40 2 961 029 - II/15
Page 121 of 231

available cargo and luggage load capacity
calculated in Step 4.6.If your vehicle will be towing a trailer, load
from your trailer will be transfered to your
vehicle. Consult the manual for transporting
a trailer to determine how this may reduce
the available cargo and luggage load ca‐
pacity of your vehicle.
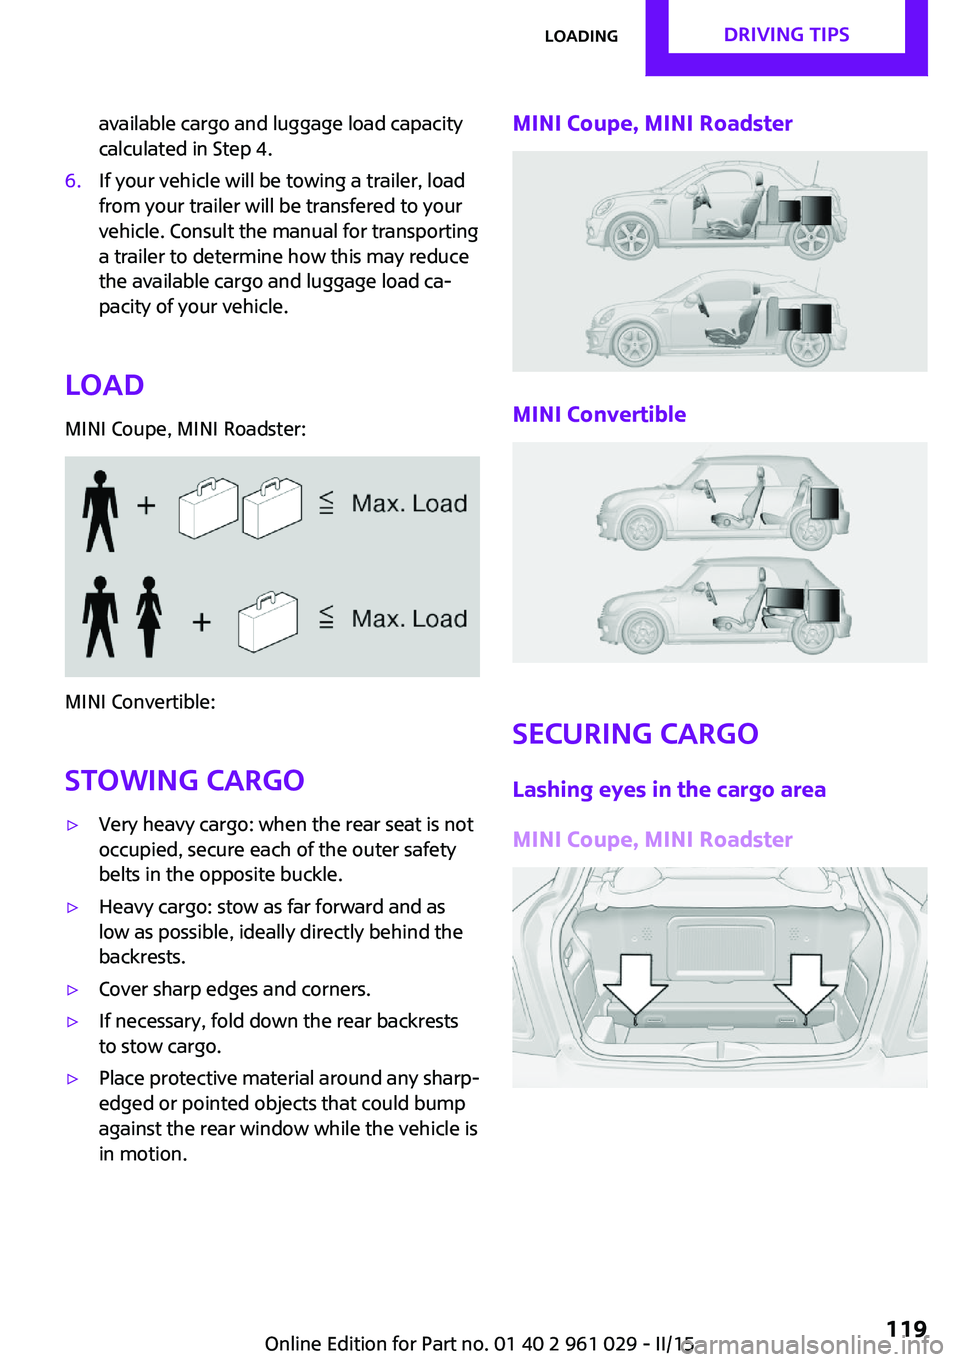
Load
MINI Coupe, MINI Roadster:
MINI Convertible:
Stowing cargo
▷Very heavy cargo: when the rear seat is not
occupied, secure each of the outer safety
belts in the opposite buckle.▷Heavy cargo: stow as far forward and as
low as possible, ideally directly behind the
backrests.▷Cover sharp edges and corners.▷If necessary, fold down the rear backrests
to stow cargo.▷Place protective material around any sharp-
edged or pointed objects that could bump
against the rear window while the vehicle is
in motion.MINI Coupe, MINI Roadster
MINI Convertible
Securing cargo
Lashing eyes in the cargo area
MINI Coupe, MINI Roadster
Seite 119LoadingDRIVING TIPS119
Online Edition for Part no. 01 40 2 961 029 - II/15
Page 122 of 231

MINI Convertible
Securing cargo
▷Secure smaller and lighter pieces with tight‐
ening belts or straps.▷Secure larger and heavier pieces with cargo
straps.
Adhere to the information included with
the cargo straps.▷Four lashing eyes are available for fastening
the cargo straps. Two of them are located
on the inside wall of the cargo area.
Securing cargo
Stow and secure the cargo as described
above; otherwise it may present a danger to
the occupants, for instance during braking and
avoidance maneuvers.
Do not stow any heavy and hard objects in the
passenger compartment without securing
them; otherwise, they may present a danger to
occupants, for instance during braking and
avoidance maneuvers.
Never exceed either the approved gross vehicle
weight or either of the approved axle loads, as
excessive loads can pose a safety hazard, and
may also place you in violation of traffic safety
laws.
Do not secure cargo using the upper LATCH
mounting points, refer to page 53; otherwise,
these may become damaged. ◀
Rear luggage rack
Notes A special rear rack is available as an optional
accessory. It does not require a trailer hitch.
Follow the installation instructions for the rear
rack.
Anchorage points
The anchorage points are under the covers in
the bumper.
Push out the covers on the corresponding cut‐
outs.
Loading
When loading the vehicle, ensure that the ap‐
proved gross vehicle weight and the axle loads
are not exceeded. Adhere to the weight specifi‐
cations in the technical data.
Seite 120DRIVING TIPSLoading120
Online Edition for Part no. 01 40 2 961 029 - II/15