2015 MERCEDES-BENZ SLS AMG GT ROADSTER tow bar
[x] Cancel search: tow barPage 16 of 290
Cup holders ..................................
.202
Glove box ....................................... 200
Important safety information ......... 200
Parce lnet ...................................... 201
Rea rwall. ....................................... 201
Summer opening
see Convenience opening feature
Summer tires ..................................... 252
Sun visor ............................................ 202
Surround lighting (on-board com-
puter) ................................................. .158
Suspensio ntuning
AMG adaptive sport suspension
system .......................................... .140
Switchin gair-recirculation mode
on/off ................................................. 113
Switchin goff the alarm (ATA) ............ 58T
Tachometer ........................................ 150
Tail lamps Display message ............................ 175
Tail lamps (Display message) ........... 175
Tank content Fuel gauge ....................................... 27
Technical data
Notes ............................................. 280
Tires/wheels ................................. 275
TELEAID
Call priority ................................... .208
Display message ............................ 173
Downloading destinations
(COMAND) ..................................... 208
Emergency call .............................. 205
General notes ................................ 204
Locating astole nvehicle .............. .209
MB info call button ........................ 207
Remote vehicle locking .................. 209
Roadside Assistance button .......... 207
Search &Send ............................... 209
Self-test ......................................... 205
System .......................................... 205
Telephone
Accepting acall ............................ .156
Menu (on-board computer) ............ 155
Number from the phone book ....... .156 Redialing ........................................ 156
Rejecting/ending
acall ................. 156
Temperature
Coolant (on-board computer) ......... 160
Engine oil ....................................... 150
Engine oil (on-board computer) ...... 160
Outside temperature ..................... .150
Theft deterren tsystems
ATA (Anti-Theft Alarm system) ......... 58
Immobilize r...................................... 58
Tow-awa yalarm ............................... 59
Time
see separate operating instructions
Timing (RACETIMER) ......................... 161
TIREFIT kit .......................................... 235
Tire pressure Calling up (on-board computer) ..... 256
Checking manually ........................ 256
Display message ............................ 182
Maximum ....................................... 256
Notes ............................................. 255
Not reached (TIREFIT) .................... 237
Reached (TIREFIT) .......................... 237
Recommended ............................... 253
Tire pressure monitoring system
Checking the tire pressure elec-
tronically ........................................ 258
Function/notes ............................ .256
Restarting ...................................... 259
Warning lamp ................................. 197
Warning message .......................... 259
Tires
Aspect ratio (definition) ................. 269
Averag eweight of the vehicle
occupants (definition) .................... 268
Bar (definition) ............................... 268
Characteristics .............................. 268
Checking ........................................ 251
Curb weight (definition) ................. 269
Definition of terms ......................... 268
Direction of rotatio n..................... .270
Display message ............................ 182
Distributio nofthe vehicle occu-
pants (definition) ............................ 270
DOT, Tire Identification Number
(TIN) ............................................... 267 14
Index
Page 147 of 290
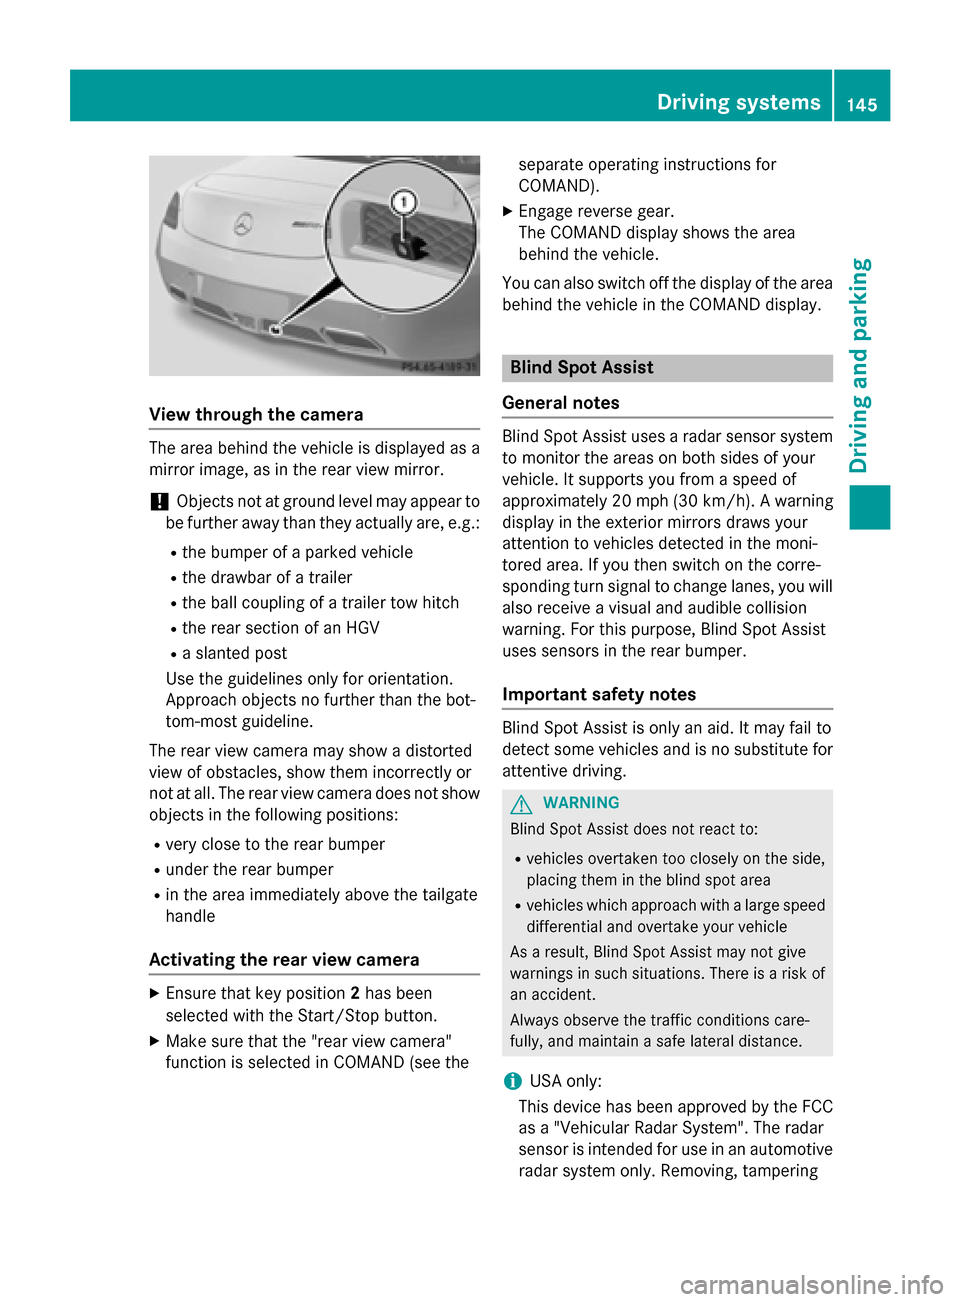
Vie
wthroug hthe camera The area behind the vehicl
eisdisplayed as a
mirror image, as in the rea rviewm irror.
! Objects not at ground level ma
yappea rto
be further away tha nthey actually are, e.g.:
R the bumpe rofaparked vehicle
R the drawbar of atrailer
R the ball coupling of atraile rtow hitch
R the rea rsection of an HGV
R as lante dpost
Use the guideline sonlyf or orientation.
Approach objects no further tha nthe bot-
tom-most guideline.
The rea rviewc amera ma yshowad istorted
vie wofo bstacles, sho wthem incorrectly or
not at all. The rea rviewc amera does not show
objects in the following positions:
R very close to the rea rbum per
R under the rea rbum per
R in the area immediatel yabove the tailgate
handle
Activatin gthe rear view camera X
Ensure tha tkey position 2ha sb een
selecte dwitht he Start/Sto pbutton.
X Make sure tha tthe "rea rviewc amera"
functio niss electe dinCOMAND (se ethe separate operating instructions for
COMAND).
X Engage reverse gear.
The COMAND display shows the area
behind the vehicle.
Yo uc an also switch off the display of the area
behind the vehicl einthe COMAND display. Blind Spo
tAssist
General notes Blind Spo
tAssist uses aradar sensor system
to monitor the area sonboths ides of your
vehicle. It supports yo ufrom aspeed of
approximatel y20m ph (30 km/h). Awarning
display in the exterio rmirrors draws your
attentio ntovehicles detected in the moni-
tore darea. If youthen switch on the corre-
sponding turn signa ltochange lanes, yo uwill
also receive avisua land audibl ecollision
warning .For thi spurpose, Blind Spo tAssist
uses sensors in the rea rbum per.
Important safety notes Blind Spo
tAssist is onl yanaid.Itm ayfailto
detect som evehicles and is no substitute for
attentive driving. G
WARNING
Blind Spo tAssist does not react to:
R vehicles overtake ntoo closel yonthe side,
placing them in the blind spo tarea
R vehicles which approach with alarge speed
differential and overtake your vehicle
As aresult, Blind Spo tAssist ma ynot give
warning sinsuchs ituations. There is ariskof
an accident.
Alway sobserve the traffic conditions care-
fully ,and maintain asafel atera ldistance.
i USA only:
Thi sd evice ha sbeena pproved by the FCC
as a"Vehicular Rada rSystem" .The radar
sensor is intende dfor us einana utomotive
rada rsystem only. Removing, tampering Driving systems
145Driving andparking Z
Page 237 of 290
X
Remove th ejackf romt heleft-han dstow-
age spac einthetrunk to allow th estowage
compartmen ttobeopened.
X Turn fastener 0044in th edirection of the
arrow.
X Ope nstowage compartment 0043.
X Remove th eTIREFI Tkit,w hee lchock ,align-
men tbolt and gloves. Flat tire
Preparing th
evehicle
Your vehicl eisequipped wit haTIREFI Tkit.
X Stop th evehicl eons olid, non-slipper yand
level ground ,asfar away as possibl efrom
traffic.
X Switc hont hehazard warnin glamps.
X Apply th eelectric parkin gbrak em anually
(Y page 133).
X Brin gthe fron twheels into th estraight-
ahead position.
X Shift th etransmission to Pwit hthe button
in th ecenter console.
X Switc hoff th eengine.
X Remove th eSmartKey from th eignition
lock.
X Allo ccupant smustg et out of th evehicle.
Mak esuret hatthe ya re no tend angered as
they do so.
X Mak esuret hatnoo neis near th edanger
area while awhee lisb eingchanged. Any-
on ew ho is no tdirectl yassistin ginthe
whee lcha ng es hould, for example, stand
behind th ebarrier.
X Get out of th evehicle. Pay attention to traf-
fic condition swhen doin gso.
X Clos ethe driver's door. TIREFIT kit
Usin gthe TIREFIT kit TIREFI
Tisat ires ealant.
You can use TIREFI Ttoseal punctures of up to
0.16 in (4 mm), particularly those in th etire
tread. You can use TIREFI Tatoutside tem-
peratures down to 00F84‡(00F820 †). G
WARNING
In th efollowin gsituations, th etires ealant is
unable to provid esufficien tbreakdown assis-
tance ,asitisu nable to seal th etirep roperly:
R there are cut sorpunctures in th etirel arger
than those mentioned above.
R thew hee lrim is damaged.
R you hav edriven at ver ylow tire pressures or
on aflat tire.
There is ariskofana ccident.
Do no tdrive th evehicle. Contac taqualified
specialist workshop. G
WARNING
The tire sealant is harmful and causes irrita-
tion .Itm ustn otcome into contact wit hyour
skin ,eyes or clothin gorbeswallowed .Donot
inhale TIREFI Tfumes. Kee ptires ealant away
from children .There is ariskofi njury.
If you come into contact wit hthe tire sealant,
observ ethe following:
R Rinse off th etires ealant from your skin
immediately wit hwater.
R If th etires ealant comes into contact with
your eyes ,immediately rinse them thor-
oughly wit hclean water.
R If tire sealant is swallowed ,immediately
rinse your mout hout thoroughl yand drink
plenty of water. Do no tind ucev omiting,
and see kmedica lattention immediately.
R Immediately chang eout of clothin gwhich
has come into contact wit htires ealant.
R If an allergic reaction occurs, see kmedical
attention immediately. Flat ti
re
235Breakdo wn assis tance Z
Page 240 of 290
X
Stow the TIREFIT kit in asafea nd accessi-
bl ep lace in the vehicle.
X Pul lawa yimmediately.
The maximum speed for atire seale dwitht ire
sealant is 50 mph (80 km/h). The uppe rpart
of the TIREFIT sticke rmustb ea ffixe dtot he
instrument cluster in the driver' sfield of
vision.
! After use, exces
sTIREFIT may run ou tof
the fille rhose. Thi scould cause stains.
X Stop afte rdriving for approximatel yten
minutes and check the tire pressure with
the tire inflation compressor.
The tire pressure mus tnow be at least
130 kPa (1.3 bar/19 psi).
i On tire
stha tare equipped with atire pres-
sure sensor (tire pressure monitor) ,the use
of sealant can lead to malfunction mes-
sages and incorrect displays. Therefore,
us ep ressure gauge 0084in the TIREFIT kit to
check and correct the tire pressure. G
WARNING
If the required tire pressure is not reached
afte rdriving for ashort period, the tire is too
badl ydam aged .The tire sealant canno trepair
the tire in this instance. Damaged tire sand a
tire pressure tha tist oo lo wcan significantly
impai rthe vehicle's braking and driving char-
acteristics. There is ariskofa ccident.
Do not continu edriving .Contact aquali fied
specialist workshop.
X Correct the tire pressure if it is stil latleast
130 kPa (1.3 bar/20 psi )(fort he values,
see the Tire and Loading Information plac-
ard on the driver' ssideB -pillar or tire pres-
sure table on the fue lfille rflap).
To increase the tire pressure: switch on
the tire inflation compressor.
To reduc ethe tire pressure: openrelease
screw 006B.
! The manufacturer doe
snot guarantee
tha talltire damag ecan be repaired using
the TIREFIT kit, particularly in the cas eofcuts and puncture
swithad iameter of more
tha nfou rm illimeters or on the sidewall. The
manufacturer is not responsible for dam-
ag ec aused by inappropriate us eofthe
TIREFIT kit.
X Drive to the neares tworksho pand have the
tire changed there.
X Hav ethe tire sealant bottl ereplaced as
soo naspossible at aquali fied specialist
workshop, e.g. at an authorized Mercedes- Benz Center. H
Environmental note
Hav ethe used tire sealant bottl edisposed of
professionally ,e.g. at an authorized
Mercedes-Benz Center.
X Hav ethe TIREFIT kit replaced every four
years at aquali fied specialist workshop,
e.g. an authorized Mercedes-Benz Center. Battery (vehicle)
Important safety notes
Specia ltool sand expert knowledge are
required when working on the battery ,e.g.
removal and installing .You shoul dtherefore
have al lworki nvolving the battery carrie dout
at aq uali fied specialist workshop. G
WARNING
Wor kcarrie doutincorrectl yonthe battery
can lead ,for example, to ashort circuit and
thu sdam aget he vehicl eelectronics. Thi scan
lead to function restrictions applying to
safety-relevant systems ,e.g. the lighting sys-
tem, ABS (anti-lock braking system) or ESP ®
(Electronic Stability Program). The operating
safety of your vehicl emay be restricted. You
could lose contro lofthe vehicle, for example:
R braking
R in the event of abrup tsteering maneuver
and/or when the vehicle's speed is not
adapted to the roa dconditions
There is ariskofana ccident. 238
Battery (vehicle)Breakdown assistance
Page 246 of 290
X
First, remove the jumper cable sfrom earth point 0085and negative terminal 0087,then from
positiv eclamp 0043and positiv eterminal 0044.Each time beginning with your vehicle' sbattery.
X Slide cover 0083of the positiv eterminal in the opposite directio ntothe arrow.
X Have the battery checke dataqualified specialist workshop.
i Jump-starting is not considered to be
anorma loperating condition.
i Jumpe
rcable sand further information regarding jump-starting can be obtained at any
qualified specialist workshop. Towing and tow-starting
Important safety notes
G
WARNING
The rea raxlel ocks when:
R the engine is not running
R the engine stalls while the vehicle is being
towed
R there is amalfunction in the power supply
or the vehicle' selectrica lsystem
There is ariskofana ccident.
In the event of abreakdown, yo ushould
always hav ethe vehicle transported. G
WARNING
If the brake system or power steering is mal-
functioning and your vehicle is then towed
away ,significantly more effort may be
required to stee rand brake than is normally
required .There is ariskofana ccident.
In such cases, use atow bar. Befor etowing,
make sur ethat the steering move sfreely. G
WARNING
If the weigh tofthe vehicle to be towe dortow-
starte disgreater than the permissible gross
weigh tofyourv ehicle:
R the towing ey ecould detach itself
R the vehicle/trailer combinatio ncould roll-
over.
There is ariskofana ccident.
Whe ntowing or tow-starting another vehicle,
its weigh tshoul dnot be greater than the per-
missible gros sweigh tofy ourv ehicle. !
Use the SmartKe
yinstead of the Start/
Stop button whe ntowing the vehicle.
Start the engine and keep it running. Turn
the SmartKe ytoposition 2in the ignition.
Set the transmission to Nusing the E-
SELECT lever. Make sure that yo uthen
leave the SmartKe yinposition 2.
Check the transmission positio ninthe
instrument cluster.
! Make sure that the electric parking brake
is released .Ifthe electric parking brake is
faulty ,visit aquali fied specialist workshop.
Mercedes-Benz recommends that yo uuse
an authorized Mercedes-Benz Center for
this purpose.
! Whe
ntowing, pull away slowl yand
smoothly .Ifthe tractive power is too high,
the vehicles could be damaged.
! Only secure the tow rope or tow ba
ratthe
towing eyes. Otherwise, the vehicle could
be damaged.
! Do not us
ethe towing eyes for recovery
purposes as this could damag ethe vehicle.
If in doubt, recover the vehicle with acrane.
! The vehicle can be towe
damaximum of
30 miles (50km). The towing speed of
30 mph (50 km/h )mustn ot be exceeded.
If the vehicle ha stobetowedmore than
30 miles (50km), the entire vehicle mus tbe
raised and transported.
! Do not tow with sling-typ
eequipment.
Thi scould damag ethe vehicle. 244
Towinga
nd tow-startingBreakdow nassistance
Page 247 of 290
!
Tow-starting the vehicle is not permitted.
The transmission may otherwise be dam-
aged.
If the vehicle can no longer be driven because of an accident or breakdown, you have the
following options:
R transportingt he vehicle
As arule, you should have the vehicle trans-
ported.
R towing the vehicle with the rear axle raised
Only tow the vehicle with the rear axle
raised in exceptional cases.
R towing the vehicle with atow rope or tow
bar
Only tow the vehicle in exceptional cases.
The engine must be running if you tow the
vehicle with atow rope or tow bar. Observe
the following notes.
Also observe the following notes:
R If the engine does not start, try jump-start-
ing it (Y page 242). Tow-starting the vehicle
is not permitted.
R If it is not possibletoj ump-start the vehicle,
have it transported to the nearest qualified specialist workshop, e.g. an authorized
Mercedes-Benz Center.
R If the vehicle has transmission damage,
have it transported to aqualified specialist
workshop. Observe the displaym essages
in the instrument cluster. Installing/removing the towing eye
Installingt he towing eye X
Take the towing eye and the wheel wrench 4
out of the wheel-change tool kit
(Y page 234).
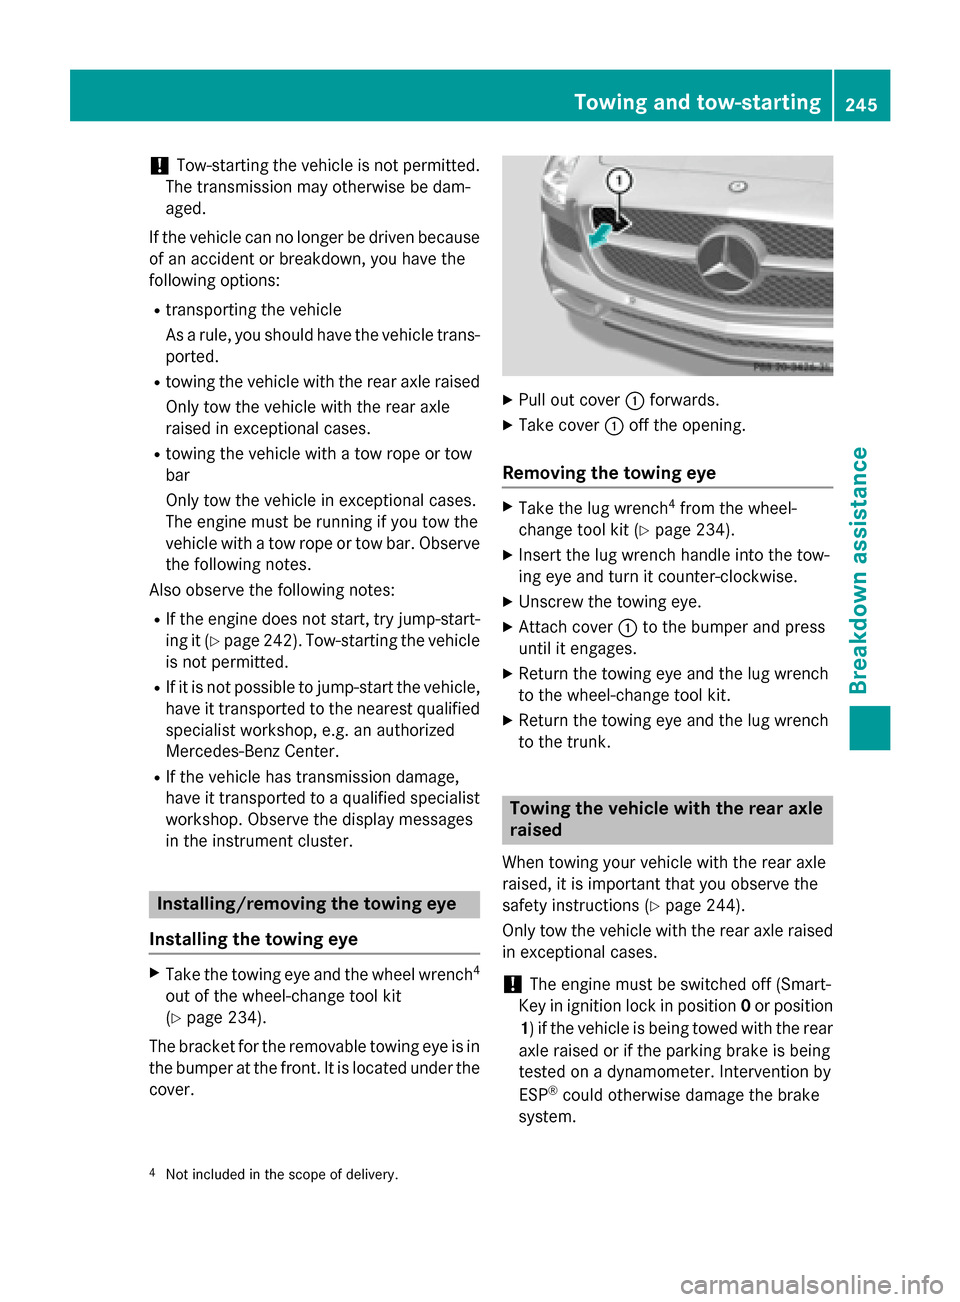
The bracket for the removable towing eye is in
the bumper at the front.Itisl ocated under the
cover. X
Pull out cover 0043forwards.
X Take cover 0043off the opening.
Removing the towing eye X
Take the lug wrench 4
from the wheel-
change tool kit (Y page 234).
X Insert the lug wrench handle into the tow-
ing eye and turn it counter-clockwise.
X Unscrew the towing eye.
X Attach cover 0043to the bumper and press
until it engages.
X Return the towing eye and the lug wrench
to the wheel-change tool kit.
X Return the towing eye and the lug wrench
to the trunk. Towing the vehiclew
ith the rear axle
raised
When towing your vehicle with the rear axle
raised, it is important that you observe the
safety instructions (Y page 244).
Only tow the vehicle with the rear axle raised in exceptional cases.
! The engine must be switched off (Smart-
Key in ignition lock in position 0or position
1)ift he vehicle is being towed with the rear
axle raised or if the parking brake is being
tested on adynamometer. Intervention by
ESP ®
could otherwise damage the brake
system.
4 Not included in the scope of delivery. Towing and tow-starting
245Breakdown assistance Z