2015 MERCEDES-BENZ SLK-CLASS ROADSTER open hood
[x] Cancel search: open hoodPage 12 of 358
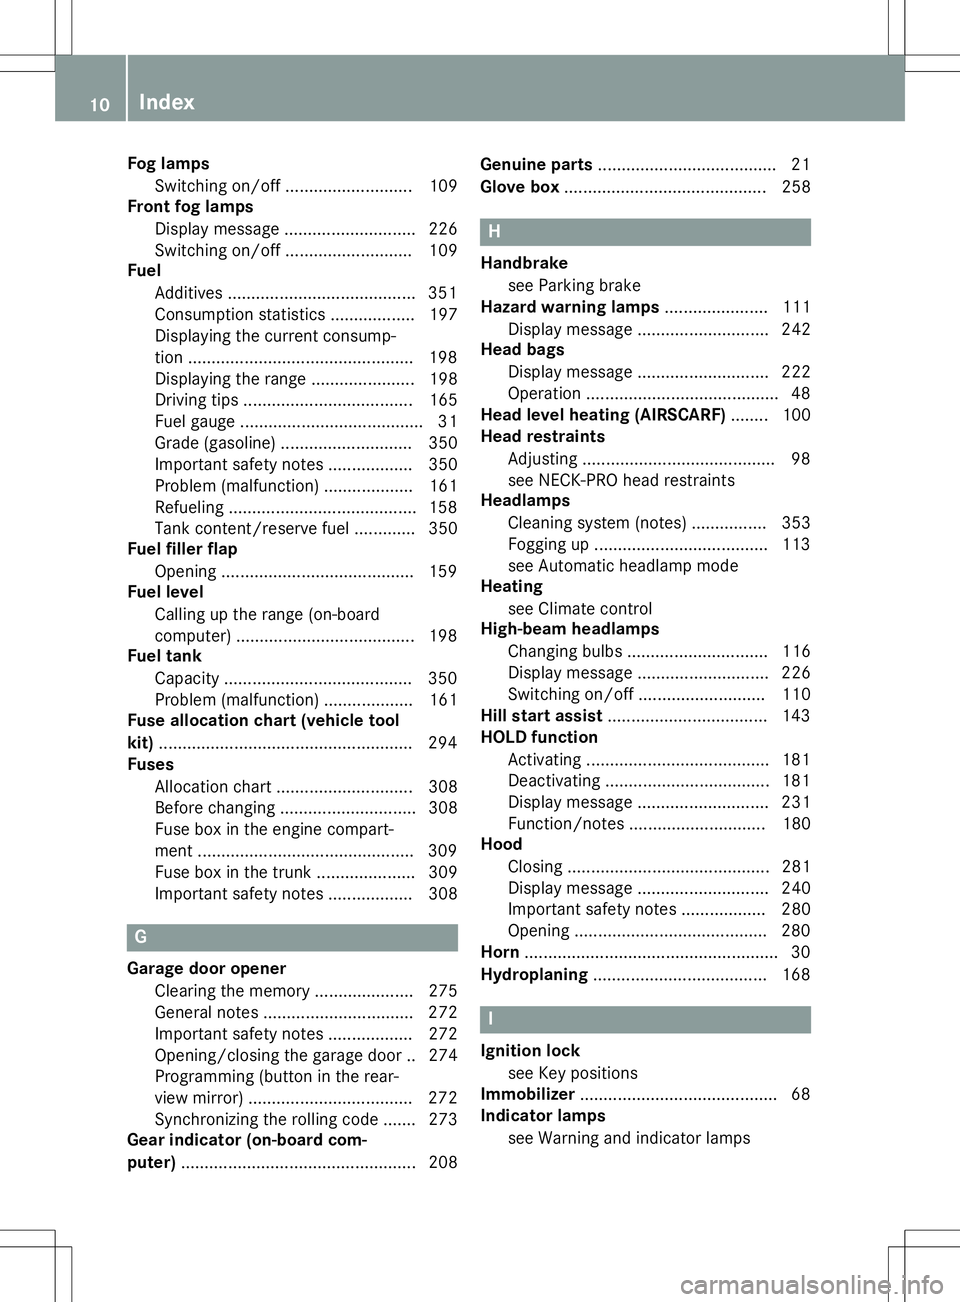
Fog lampsSwitching on/off .......................... .109
Front fog lamps
Display message ............................ 226
Switching on/off ........................... 109
Fuel
Additives ........................................ 351
Consumption statistics .................. 197
Displaying the current consump-
tion ................................................ 198
Displaying the range ..................... .198
Driving tips ................................... .165
Fuel gauge ....................................... 31
Grade (gasoline) ............................ 350
Important safety notes .................. 350
Problem (malfunction) ................... 161
Refueling ........................................ 158
Tank content/reserve fuel ............. 350
Fuel filler flap
Opening ......................................... 159
Fuel level
Calling up the range (on-board
computer) ...................................... 198
Fuel tank
Capacity ........................................ 350
Problem (malfunction) ................... 161
Fuse allocation chart (vehicle tool kit) ...................................................... 294
Fuses
Allocation chart ............................ .308
Before changing ............................ .308
Fuse box in the engine compart-
ment .............................................. 309
Fuse box in the trunk ..................... 309
Important safety notes .................. 308
G
Garage door opener
Clearing the memory ..................... 275
General notes ................................ 272
Important safety notes .................. 272
Opening/closing the garage door .. 274
Programming (button in the rear-
view mirror) ................................... 272
Synchronizing the rolling code ....... 273
Gear indicator (on-board com- puter) ................................................. .208 Genuine parts
...................................... 21
Glove box .......................................... .258
H
Handbrake
see Parking brake
Hazard warning lamps ......................111
Display message ............................ 242
Head bags
Display message ............................ 222
Operation ......................................... 48
Head level heating (AIRSCARF) ........100
Head restraints
Adjusting ......................................... 98
see NECK-PRO head restraints
Headlamps
Cleaning system (notes) ................ 353
Fogging up ..................................... 113
see Automatic headlamp mode
Heating
see Climate control
High-beam headlamps
Changing bulbs .............................. 116
Display message ............................ 226
Switching on/off ........................... 110
Hill start assist .................................. 143
HOLD function
Activating ....................................... 181
Deactivating ................................... 181
Display message ............................ 231
Function/notes ............................ .180
Hood
Closing .......................................... .281
Display message ............................ 240
Important safety notes .................. 280
Opening ......................................... 280
Horn ...................................................... 30
Hydroplaning ..................................... 168
I
Ignition lock
see Key positions
Immobilizer .......................................... 68
Indicator lamps
see Warning and indicator lamps
10Index
Page 32 of 358
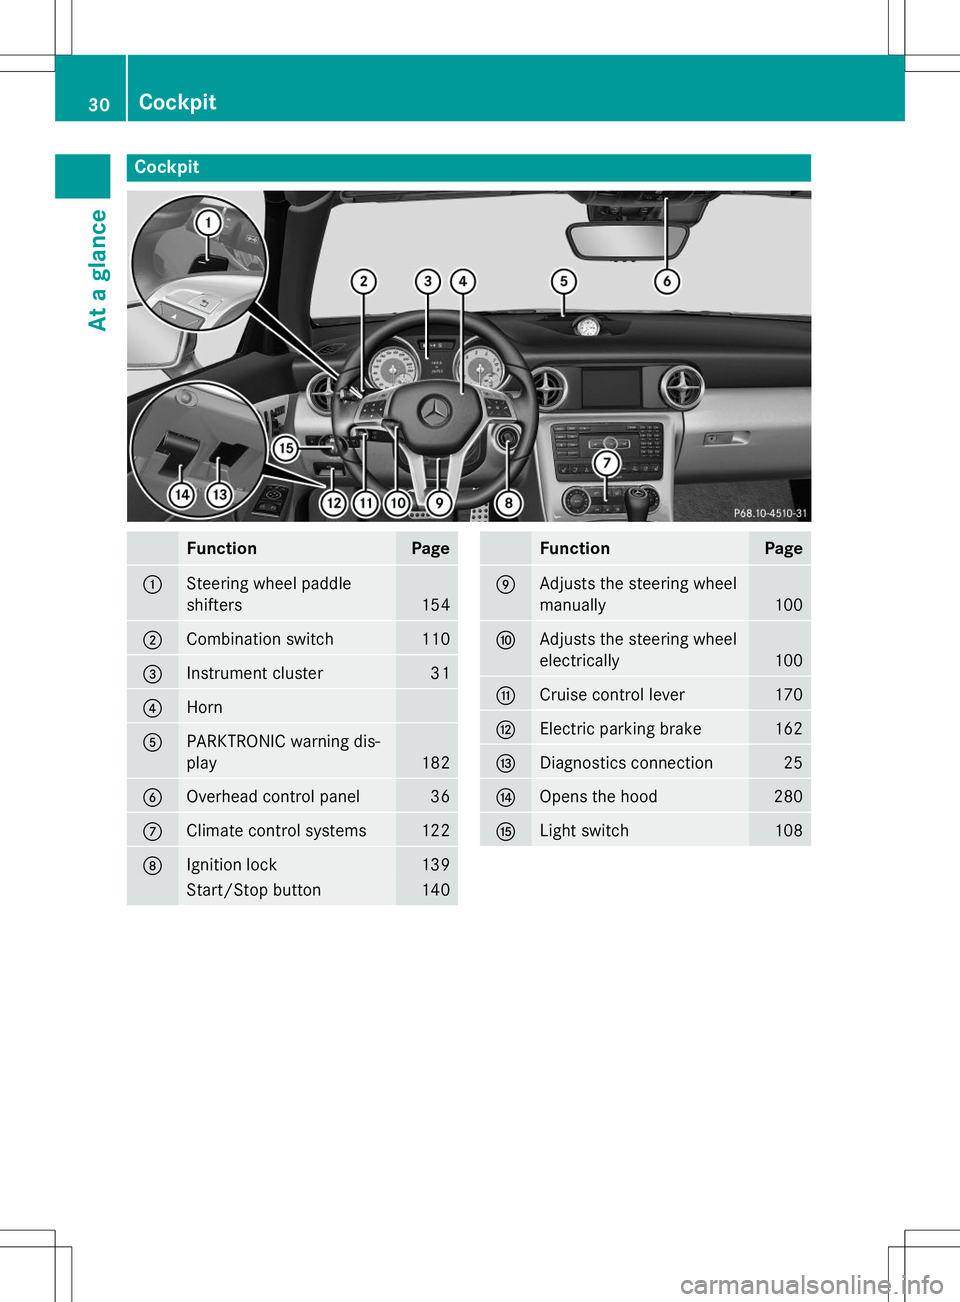
Cockpit
FunctionPage
:Steering wheel paddle
shifters
154
;Combination switch110
=Instrument cluster31
?Horn
APARKTRONIC warning dis- play
182
BOverhead control panel36
CClimate control systems122
DIgnition lock139
Start/Stop button140
FunctionPage
EAdjusts the steering wheel
manually
100
FAdjusts the steering wheel
electrically
100
GCruise control lever170
HElectric parking brake162
IDiagnostics connection25
JOpens the hood280
KLight switch108
30Cockpit
At a glance
Page 71 of 358
When leaving the vehicle, always take the
SmartKey with you and lock the vehicle. The
engine can be started by anyone with a valid
SmartKey that is left inside the vehicle.
iThe immobilizer is always deactivated
when you start the engine.
In the event that the engine cannot be star-
ted (yet the vehicle's battery is charged),
the system is not operational. Contact an
authorized Mercedes-Benz Center or call
1-800-FOR-MERCedes (in the USA) or
1-800-387-0100 (in Canada).
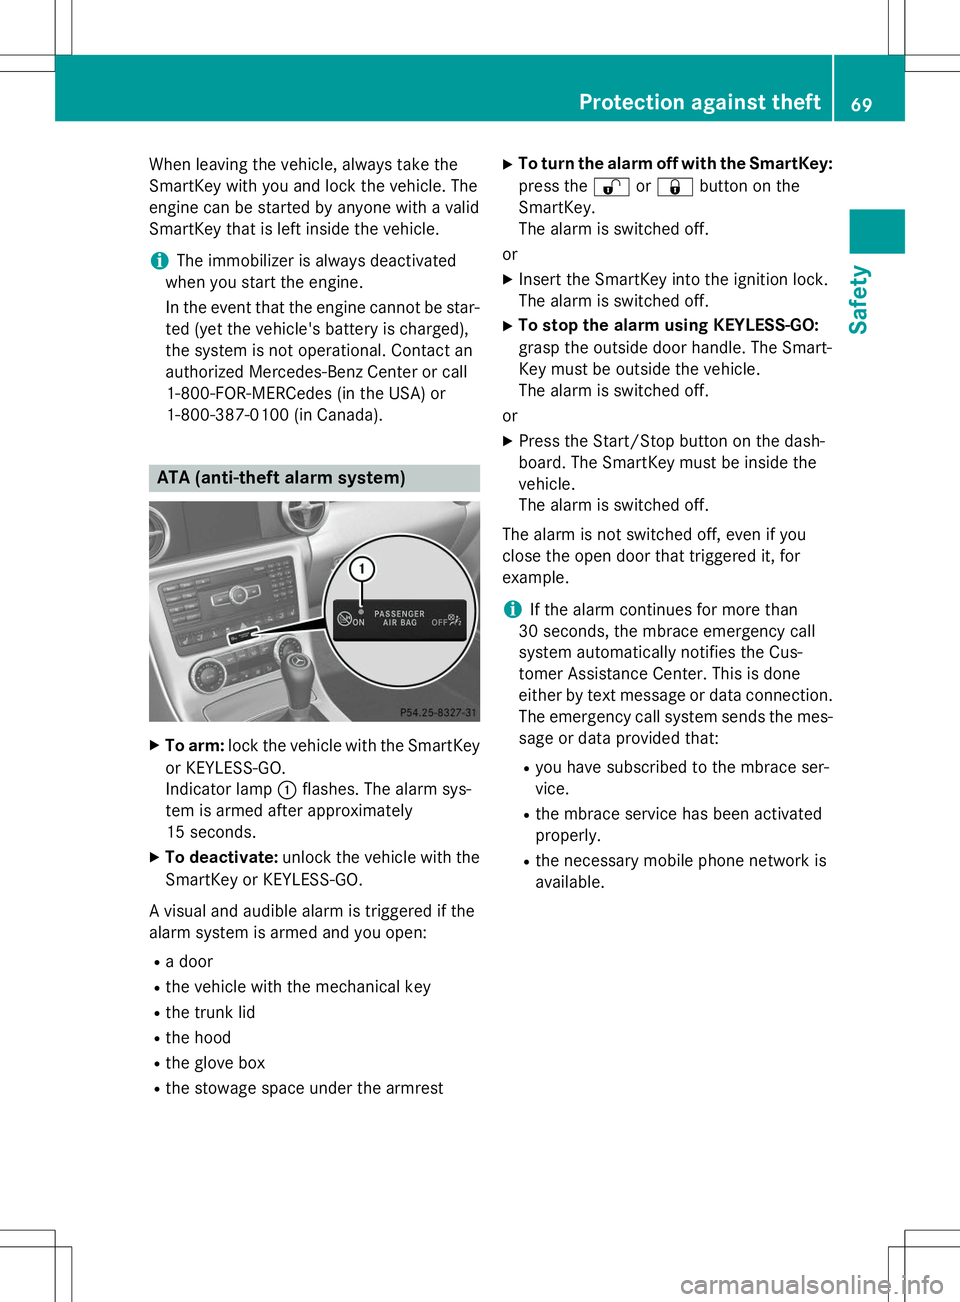
ATA (anti-theft alarm system)
X To arm: lock the vehicle with the SmartKey
or KEYLESS-GO.
Indicator lamp :flashes. The alarm sys-
tem is armed after approximately
15 seconds.
X To deactivate: unlock the vehicle with the
SmartKey or KEYLESS-GO.
A visual and audible alarm is triggered if the
alarm system is armed and you open: R a door
R the vehicle with the mechanical key
R the trunk lid
R the hood
R the glove box
R the stowage space under the armrest X
To turn the alarm off with the SmartKey:
press the %or& button on the
SmartKey.
The alarm is switched off.
or X Insert the SmartKey into the ignition lock.
The alarm is switched off.
X To stop the alarm using KEYLESS-GO:
grasp the outside door handle. The Smart-
Key must be outside the vehicle.
The alarm is switched off.
or X Press the Start/Stop button on the dash-
board. The SmartKey must be inside thevehicle.
The alarm is switched off.
The alarm is not switched off, even if you
close the open door that triggered it, forexample.
iIf the alarm continues for more than
30 seconds, the mbrace emergency call
system automatically notifies the Cus-
tomer Assistance Center. This is done
either by text message or data connection.
The emergency call system sends the mes- sage or data provided that:
R you have subscribed to the mbrace ser-vice.
R the mbrace service has been activatedproperly.
R the necessary mobile phone network isavailable.
Protection against theft69
Safety
Z
Page 118 of 358
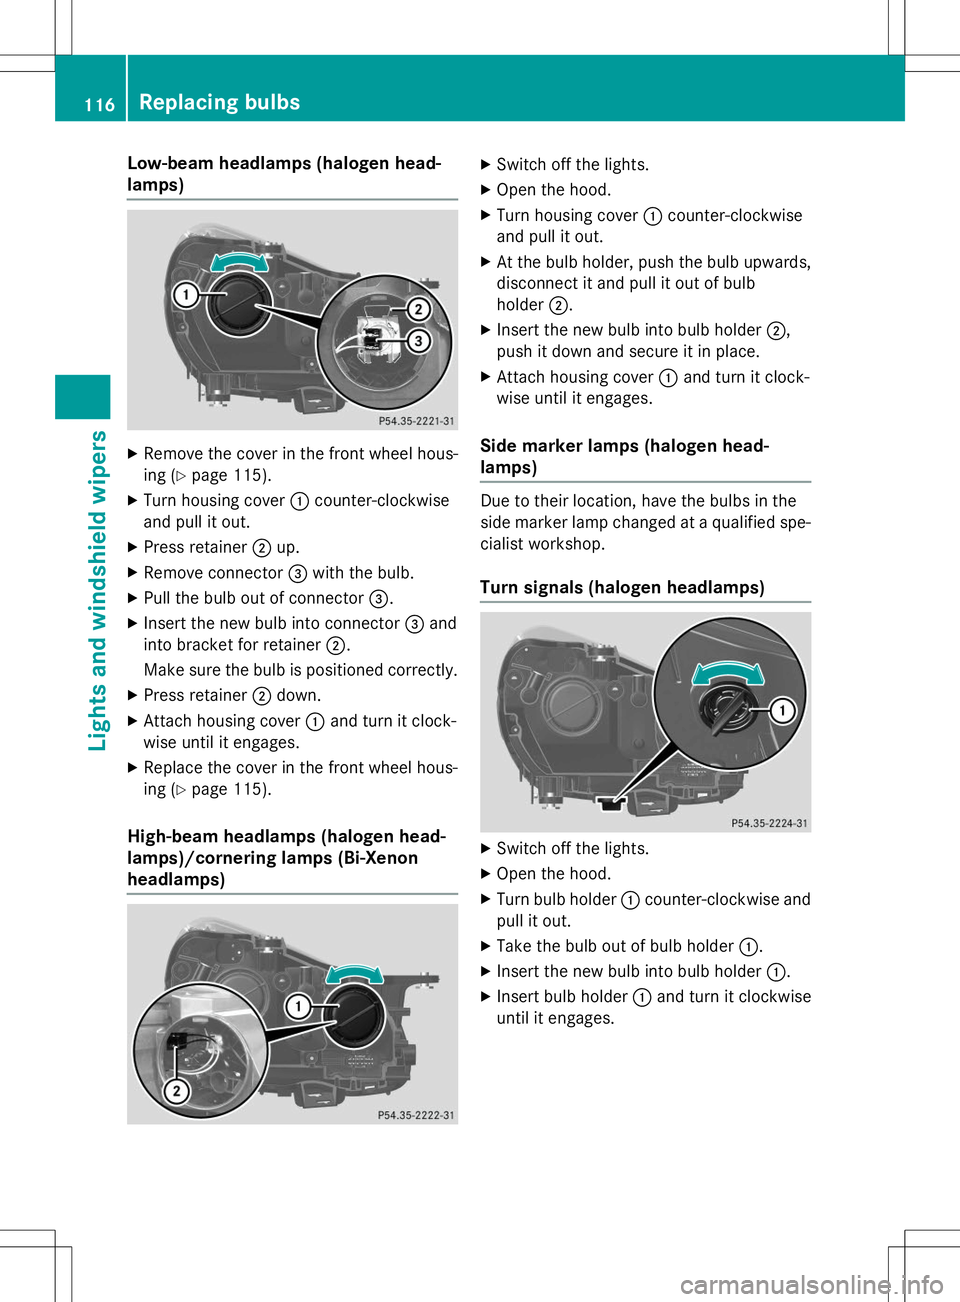
Low-beam headlamps (halogen head-
lamps)
XRemove the cover in the front wheel hous-
ing ( Ypage 115).
X Turn housing cover :counter-clockwise
and pull it out.
X Press retainer ;up.
X Remove connector =with the bulb.
X Pull the bulb out of connector =.
X Insert the new bulb into connector =and
into bracket for retainer ;.
Make sure the bulb is positioned correctly.
X Press retainer ;down.
X Attach housing cover :and turn it clock-
wise until it engages.
X Replace the cover in the front wheel hous-
ing ( Ypage 115).
High-beam headlamps (halogen head-
lamps)/cornering lamps (Bi-Xenon
headlamps)
X
Switch off the lights.
X Open the hood.
X Turn housing cover :counter-clockwise
and pull it out.
X At the bulb holder, push the bulb upwards,
disconnect it and pull it out of bulb
holder ;.
X Insert the new bulb into bulb holder ;,
push it down and secure it in place.
X Attach housing cover :and turn it clock-
wise until it engages.
Side marker lamps (halogen head-
lamps)
Due to their location, have the bulbs in the
side marker lamp changed at a qualified spe-
cialist workshop.
Turn signals (halogen headlamps)
X Switch off the lights.
X Open the hood.
X Turn bulb holder :counter-clockwise and
pull it out.
X Take the bulb out of bulb holder :.
X Insert the new bulb into bulb holder :.
X Insert bulb holder :and turn it clockwise
until it engages.
116Replacing bulbs
Lights and windshield wipers
Page 120 of 358
3ÅIntermittent wipe, high (rain sensor
set to high sensitivity)
4° Continuous wipe, slow
5¯Continuous wipe, fast
BíSingle wipe/ îWipes the wind-
shield using washer fluid
X Switch on the ignition.
X Turn the combination switch to the corre-
sponding position.
In the ÄorÅ position, the appropriate
wiping frequency is set automatically accord-
ing to the intensity of the rain. In the Å
position, the rain sensor is more sensitive
than in the Äposition, causing the wind-
shield wiper to wipe more frequently.
If the wiper blades are worn, the windshield
will no longer be wiped properly. This could
prevent you from observing the traffic condi-tions.
Replacing the wiper blades
Important safety notes
GWARNING
If the windshield wipers begin to move while
you are changing the wiper blades, you could be trapped by the wiper arm. There is a risk of
injury.
Always switch off the windshield wipers and
ignition before changing the wiper blades.
!To avoid damaging the wiper blades,
make sure that you touch only the wiper
arm of the wiper.
!Never open the hood if a windshield wiper
arm has been folded away from the wind-
shield.
Never fold a windshield wiper arm without a
wiper blade back onto the windshield.
Hold the windshield wiper arm firmly when
you change the wiper blade. If you release
the windshield wiper arm without a wiper
blade and it falls onto the windshield, the windshield may be damaged by the force of
the impact.
Mercedes-Benz recommends that you have the wiper blades changed at a qualified
specialist workshop.
!Always position the windshield wiper
arms vertically before folding them away
from the windshield. By doing so, you will
avoid damage to the hood.
Replacing the wiper blades
Removing the wiper blades
X Turn the SmartKey to position 1or 2in the
ignition lock ( Ypage 139).
X Set the windshield wiper to position °.
X When the wiper arms have reached the ver-
tical position, turn the SmartKey to position0 and remove it from the ignition lock
( Y page 139).
X Fold the windshield wiper arms away from
the windshield.
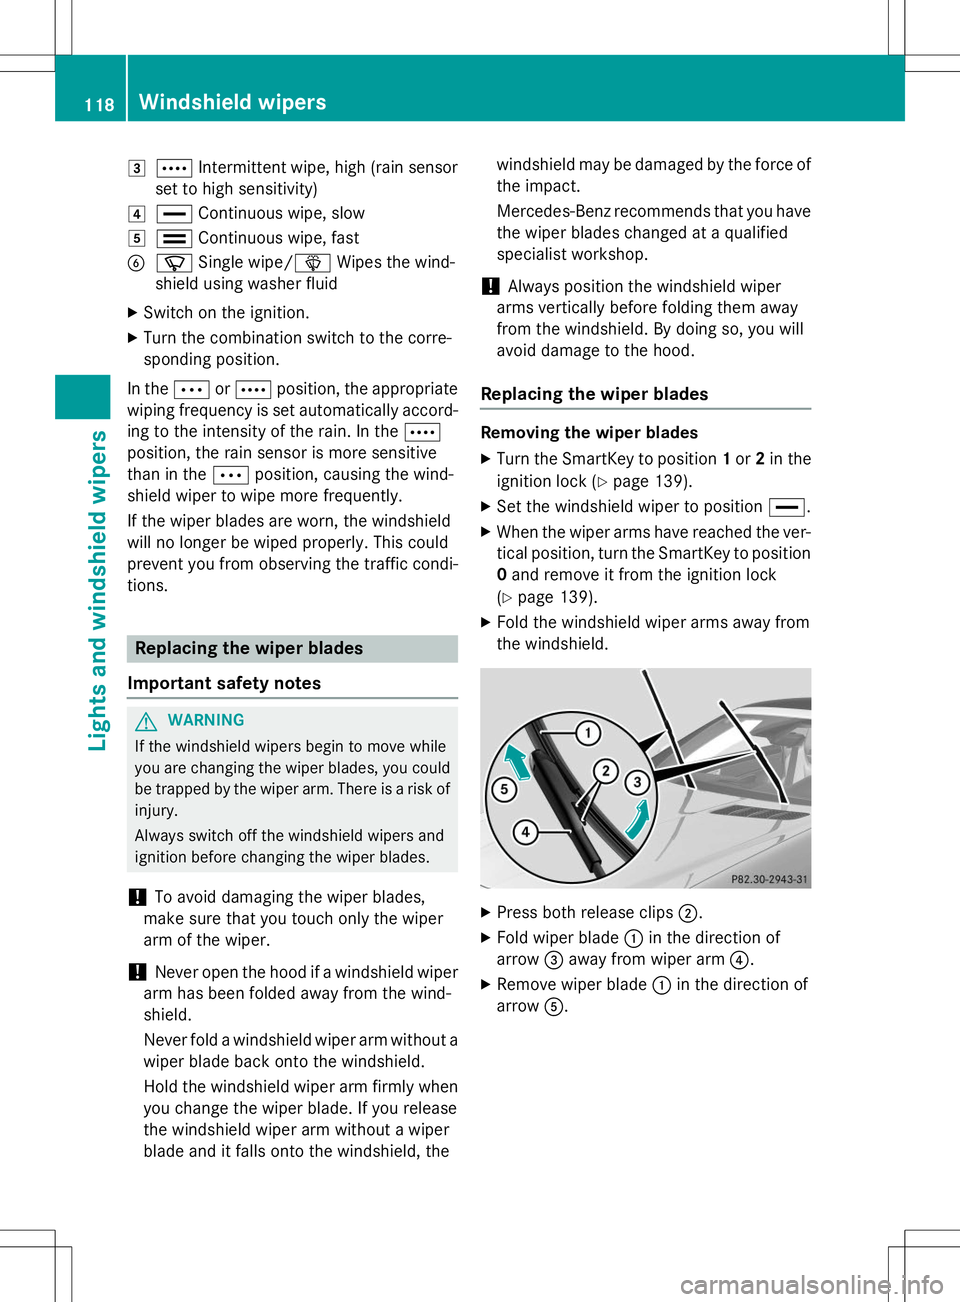
XPress both release clips ;.
X Fold wiper blade :in the direction of
arrow =away from wiper arm ?.
X Remove wiper blade :in the direction of
arrow A.
118Windshield wipers
Lights and windshield wipers
Page 136 of 358
Switching on/off
XTurn the SmartKey to position 0in the igni-
tion lock or remove it ( Ypage 139).
X To activate: press theÌorÁ but-
ton.
The indicator lamp in the ÌorÁ
button lights up.
iThe blower will run at a low speed regard-
less of the airflow setting.
iIf you activate the residual heat function
at high temperatures, only the ventilation
will be activated. The blower runs at
medium speed.
X To deactivate: press theÌorÁ
button.
The indicator lamp in the ÌorÁ
button goes out.
Residual heat is deactivated automatically: R after approximately 30 minutes
R when the ignition is switched on
R if the battery voltage drops
Setting the air vents
Important safety notes
GWARNING
Very hot or very cold air can flow from the air
vents. This could result in burns or frostbite in the immediate vicinity of the air vents. There
is a risk of injury.
Make sure that all vehicle occupants always
maintain a sufficient distance to the air out-
lets. If necessary, redirect the airflow to
another area of the vehicle interior.
GWARNING
When AIRSCARF is switched on, very hot air
can flow from the vents in the head restraints. This could result in burns in the immediate
vicinity of the air vents. There is a risk of injury.
Reduce the heater output before it becomes
too hot. In order to ensure the direct flow of fresh air
through the air vents into the vehicle interior,
please observe the following notes:
R keep the air inlet grille on the hood and in
the engine compartment on the front-
passenger side free of blockages, such as
ice, snow or leaves.
R never cover the air vents or air intake grilles
in the vehicle interior.
iYou can move the adjusters for the air
vents vertically or horizontally to set the
direction of the airflow.
iFor optimal climate control in the vehicle,
open the air vents completely and set the
adjusters to the central position.
Setting the center air vents
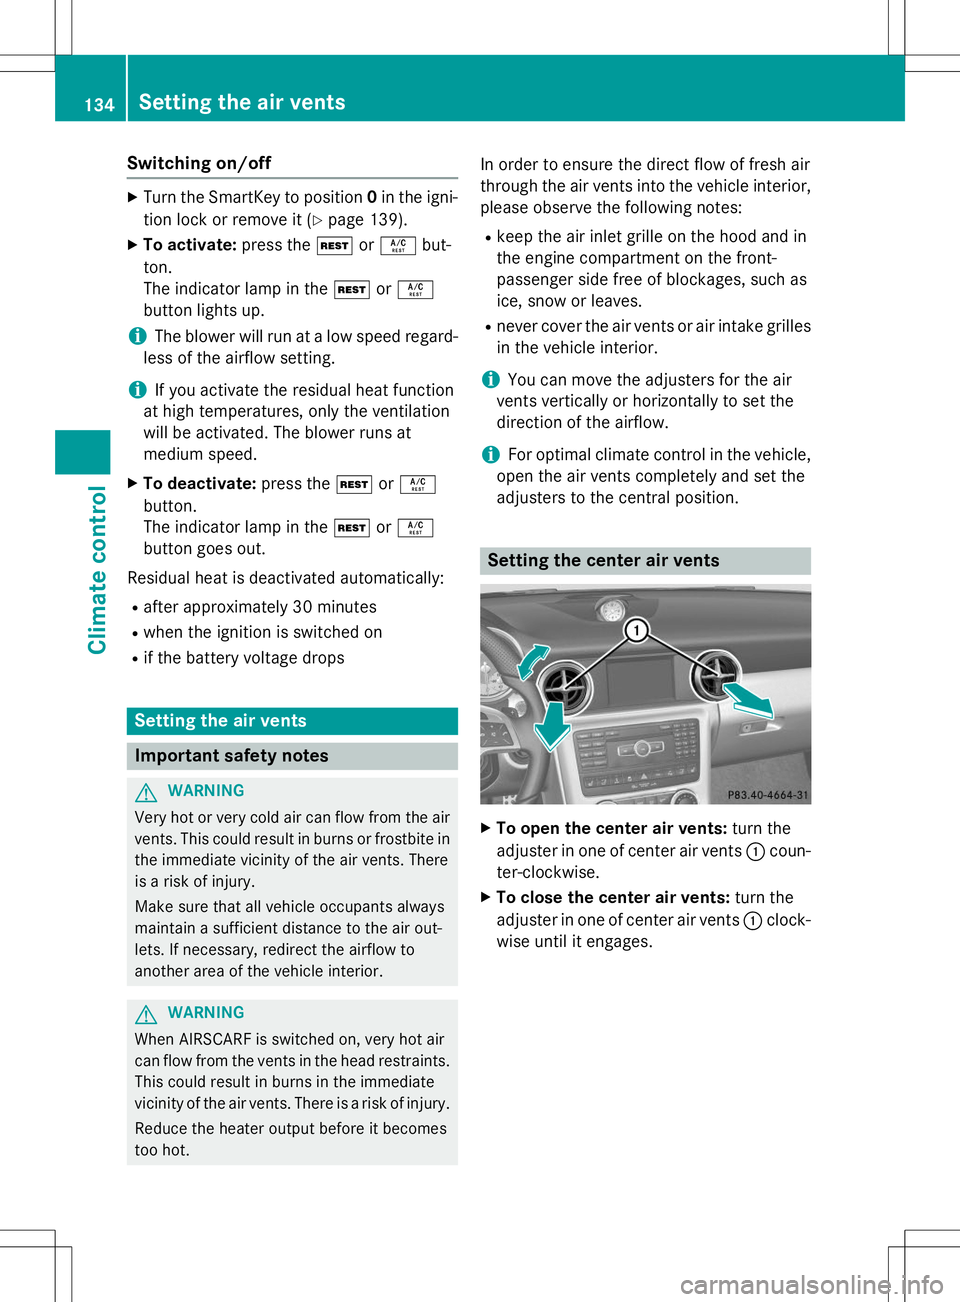
X To open the center air vents: turn the
adjuster in one of center air vents :coun-
ter-clockwise.
X To close the center air vents: turn the
adjuster in one of center air vents :clock-
wise until it engages.
134Setting the air vents
Climate control
Page 148 of 358
stop phase. When you depress the accel-
erator pedal, the engine starts automati-
cally and the braking effect of the HOLD
function is deactivated.
SLK 55 AMG
If the vehicle is braked to a standstill in Dor N,
the ECO start/stop function switches off the engine automatically.
The ECO start/stop function is operational
and the èECO symbol is displayed in
green in the multifunction display, if:
R the indicator lamp in the ECO button is litgreen.
R the outside temperature is within the range
that is suitable for the system.
R the engine is at normal operating temper-ature.
R the set temperature for the vehicle interior
has been reached.
R the battery is sufficiently charged.
R the system detects that the windshield is
not fogged up when the air-conditioning
system is switched on.
R the hood is closed.
R the driver's door is closed and the driver's
seat belt is fastened.
If the conditions for automatic engine switch-
off are not all fulfilled, the èECO symbol is
lit yellow.
iAll of the vehicle's systems remain active
when the engine is stopped automatically.
iThe engine can be automatically switched
off an unlimited number of times.
iThe HOLD function can be activated if the
engine has been switched off automati-
cally. It is then not necessary to continue
applying the brakes during the automatic
stop phase. When you depress the accel-
erator pedal, the engine starts automati-
cally and the braking effect of the HOLD
function is deactivated.
Automatic engine start
Operation (SLK 250)
The engine starts automatically if:
R you switch off the ECO start/stop function
by pressing the ECO button.
R you engage reverse gear R.
R you unfasten your seat belt or open the
driver's door.
R the vehicle starts to roll.
R the brake system requires this.
R the temperature in the vehicle interior devi-
ates from the set range.
R the system detects moisture on the wind-
shield when the air-conditioning system is
switched on.
R the battery's condition of charge is too low.
Vehicles with manual transmission (SLK250)
!Only engage gear when the clutch pedal is
depressed.
The engine is started automatically if you: R fully depress the clutch pedal.
R depress the accelerator pedal.
Vehicles with automatic transmission
(SLK 250)
The engine is started automatically if you: R release the brake pedal in transmission position Dor Nwhen the HOLD function is
not active.
R depress the accelerator pedal.
R move the transmission out of position P.
iShifting the transmission to position P
does not start the engine.
iIf you shift the transmission from Rto D,
the ECO start/stop function is available
again once the èECO symbol reap-
pears in green in the multifunction display.
146Driving
Driving and parking
Page 177 of 358
If DISTRONIC PLUS detects that there is a riskof a collision, you will be warned visually and
acoustically. DISTRONIC PLUS cannot pre-
vent a collision without your intervention. An
intermittent warning tone will then sound and the distance warning lamp will light up in the
instrument cluster. Brake immediately in
order to increase the distance from the vehi-
cle in front, or take evasive action, provided it
is safe to do so.
If DISTRONIC PLUS detects a faster-moving
vehicle in front, it increases the driving speed. However, the vehicle is only accelerated up to
the speed you have stored.
Changing lanes
If you wish to change to the passing lane (in
countries where traffic drives on the right, the passing lane is the left-hand lane),
DISTRONIC PLUS supports you if:
R you are driving faster than 40 mph
(60 km/h)
R DISTRONIC PLUS is maintaining the dis-
tance to a vehicle in front
R you have switched on the corresponding
turn signal
R DISTRONIC PLUS does not detect a danger
of collision
If these conditions are fulfilled, your vehicle is
accelerated. Acceleration will be interrupted
if changing lanes takes too long or if the dis-
tance between your vehicle and the vehicle in front becomes too small. Stopping
GWARNING
When leaving the vehicle, even if it is braked
only by DISTRONIC PLUS, it could roll away if:
R there is a malfunction in the system or in
the voltage supply.
R DISTRONIC PLUS has been deactivated
with the cruise control lever, e.g. by a vehi-
cle occupant or from outside the vehicle.
R the electrical system in the engine com-
partment, the battery or the fuses have
been tampered with.
R the battery is disconnected.
R the accelerator pedal has been depressed,
e.g. by a vehicle occupant.
There is a risk of an accident.
If you wish to exit the vehicle, always turn off
DISTRONIC PLUS and secure the vehicle
against rolling away.
Deactivating DISTRONIC PLUS ( Ypage 178).
If DISTRONIC PLUS detects that the vehicle in front is stopping, it brakes your vehicle until it
is stationary.
Once your vehicle is stationary, it remains
stationary and you do not need to depress the
brake. After a time, the electric parking brake
secures the vehicle and relieves the servicebrake.
Depending on the specified minimum dis-
tance, your vehicle will come to a standstill at a sufficient distance behind the vehicle in
front. The specified minimum distance is set
using the control on the cruise control lever.
The electric parking brake automatically
secures the vehicle if DISTRONIC PLUS is
activated and: R the driver's door is open and the driver's
seat belt is unfastened.
R the engine is switched off, unless it is auto-
matically switched off by the ECO start/
stop function.
R the hood is opened.
R a system malfunction occurs.
R the power supply is not sufficient.
If there is a malfunction in the vehicle elec-
tronics, a warning message may also appear
in the multifunction display.
Brake Immediately
X Immediately depress the brake firmly until
the warning message in the multifunction
display goes out. DISTRONIC PLUS is deac-
tivated.
Driving systems175
Driving and parking
Z