2015 MERCEDES-BENZ SLK-Class torque
[x] Cancel search: torquePage 21 of 358

Trunk partition
Display message ............................ 241
General notes .................................. 89
Opening/closing .............................. 90
Turn signals
Changing bulbs (front) ................... 116
Display message ............................ 225
Switching on/off ........................... 110
Type identification plate
see Vehicle identification plate U
Unlocking Emergency unlocking ....................... 80
From inside the vehicle (central
unlocking button) ............................. 79 V
Vanity mirror (in the sun visor) ........ 260
Vehicle Correct use ...................................... 26
Data acquisition ............................... 27
Display message ............................ 238
Equipment ....................................... 22
Individual settings .......................... 204
Limited Warranty ............................. 27
Loading .......................................... 322
Locking (in an emergency) ............... 80
Locking (SmartKey) .......................... 72
Lowering ........................................ 336
Maintenance .................................... 23
Parking for a long period ................ 164
Pulling away ................................... 142
Raising ........................................... 334
Reporting problems ......................... 26
Securing from rolling away ............ 333
Towing away .................................. 303
Tow-starting ................................... 303
Transporting .................................. 305
Unlocking (in an emergency) ........... 80
Unlocking (SmartKey) ...................... 72
Vehicle data ................................... 353
Vehicle battery
see Battery (vehicle)
Vehicle data ....................................... 353
Vehicle dimensions ........................... 353 Vehicle emergency locking
................ 80
Vehicle identification number see VIN
Vehicle identification plate .............. 346
Vehicle tool kit .................................. 292
Video Operating the DVD ........................ .201
VIN ...................................................... 346 W
Warning and indicator lamps ABS ................................................ 245
Brakes .......................................... .245
Check Engine ................................. 251
Coolant .......................................... 251
Distance warning ........................... 253
DISTRONIC PLUS ........................... 253
ESP ®
.............................................. 247
ESP ®
OFF ....................................... 248
Overview .......................................... 32
PASSENGER AIR BAG OFF .............. .41
Reserve fuel .................................. .251
Restraint system ............................ 250
Seat belt ........................................ 244
SPORT handling mode ................... 248
Tire pressure monitor .................... 254
Warranty .............................................. 22
Washer fluid Display message ............................ 242
Wheel and tire combination
see Tires
Wheel bolt tightening torque ........... 336
Wheel chock ...................................... 333
Wheels Changing a wheel .......................... 332
Checking ........................................ 311
Cleaning ......................................... 286
Cleaning (warning) ......................... 333
Emergency spare wheel ................. 341
Important safety notes .................. 310
Interchanging/changing ................ 332
Mounting a new wheel ................... 336
Mounting a wheel .......................... 333
Overview ........................................ 310
Removing a wheel .......................... 335
Storing .......................................... .332 Index
19
Page 22 of 358

Tightening torque ........................... 336
Wheel size/tire size ....................... 337
Windows
see Side windows
Wind screen
Inserting and removing .................... 90
Preparing for installation .................. 90
see AIRGUIDE
Windshield
Defrosting ...................................... 131
Windshield washer fluid
see Windshield washer system
Windshield washer system
Adding washer fluid ....................... 281
Notes ............................................. 352
Windshield wipers
Display message ............................2 42
Problem (malfunction) ................... 120
Replacing the wiper blades ............ 118
Switching on/off ........................... 117
Winter driving
Important safety notes .................. 312
Slippery road surfaces ................... 169
Snow chains .................................. 313
Winter operation
Overview ........................................ 312
Winter tires
M+S tires ....................................... 312
Wiper blades
Cleaning ......................................... 286
Important safety notes .................. 118
Replacing ....................................... 118
Wooden trim (cleaning instruc-
tions) ................................................. .288
Workshop see Qualified specialist workshop Z
ZONE function Switching on/off ........................... 130 20
Index
Page 65 of 358

Recognition by the radar sensor system is
also impaired in the event of:
R dirt on the sensors or anything else cover-
ing the sensors
R there is interference by other radar sources
R there are strong radar reflections, for
example in parking garages
R a narrow vehicle traveling in front, e.g. a
motorbike
R a vehicle traveling in front on a different line
relative to the center of your vehicle
Following damage to the front end of the vehi-
cle, have the configuration and operation of
the radar sensors checked at a qualified spe-
cialist workshop. This also applies to colli-
sions at low speeds where there is no visible
damage to the front of the vehicle.
Function To avoid a collision, BAS PLUS calculates the
brake force necessary if:
R you approach an obstacle, and
R BAS PLUS has detected a risk of collision
When driving at a speed under 20 mph
(30 km/h) : if you depress the brake pedal,
BAS PLUS is activated. The increase in brake pressure will be carried out at the last possi-
ble moment.
When driving at a speed above 20 mph
(30 km/h) : if you depress the brake pedal
sharply, BAS PLUS automatically raises the
brake pressure to a value adapted to the traf-
fic situation.
BAS PLUS provides braking assistance in haz- ardous situations with vehicles in front within
a speed range between 4 mph (7 km/h) and
155 mph (250 km/h).
At speeds of up to approximately 40 mph
(70 km/ h), BAS PLUS can also react to sta-
tionary objects. Examples of stationary
objects are stopped or parked vehicles.
i If BAS PLUS demands particularly high
braking force, preventative passenger pro- tection measures (PRE-SAFE
®
) are activa-
ted simultaneously.
X Keep the brake pedal depressed until the
emergency braking situation is over.
ABS prevents the wheels from locking.
BAS PLUS is deactivated and the brakes func-
tion as usual again, if:
R you release the brake pedal.
R there is no longer a risk of collision.
R no obstacle is detected in front of your
vehicle.
R you depress the accelerator pedal.
R you activate kickdown. ESP
®
(Electronic Stability Program)
General notes i
Observe the "Important safety notes" sec-
tion (Y page 61).
ESP ®
monitors driving stability and traction,
i.e. power transmission between the tires and
the road surface.
If ESP ®
detects that the vehicle is deviating
from the direction desired by the driver, one
or more wheels are braked to stabilize the
vehicle. The engine output is also modified to keep the vehicle on the desired course within
physical limits. ESP ®
assists the driver when
pulling away on wet or slippery roads. ESP ®
can also stabilize the vehicle during braking.
ETS (Electronic Traction System) i
Observe the "Important safety notes" sec-
tion (Y page 61).
ETS traction control is part of ESP ®
.
ETS brakes the drive wheels individually if
they spin. This enables you to pull away and
accelerate on slippery surfaces, for example
if the road surface is slippery on one side. In
addition, more drive torque is transferred to
the wheel or wheels with traction. Driving safety systems
63Safety Z
Page 67 of 358

It may be best to deactivate ESP
®
in the fol-
lowing situations:
R when using snow chains
R in deep snow
R on sand or gravel
i Activate ESP ®
as soon as the situations
described above no longer apply. ESP ®
will
otherwise not be able to stabilize the vehi-
cle if the vehicle starts to skid or a wheel
starts to spin.
! Avoid spinning the driven wheels for an
extended period with ESP ®
deactivated.
You could otherwise damage the drivetrain.
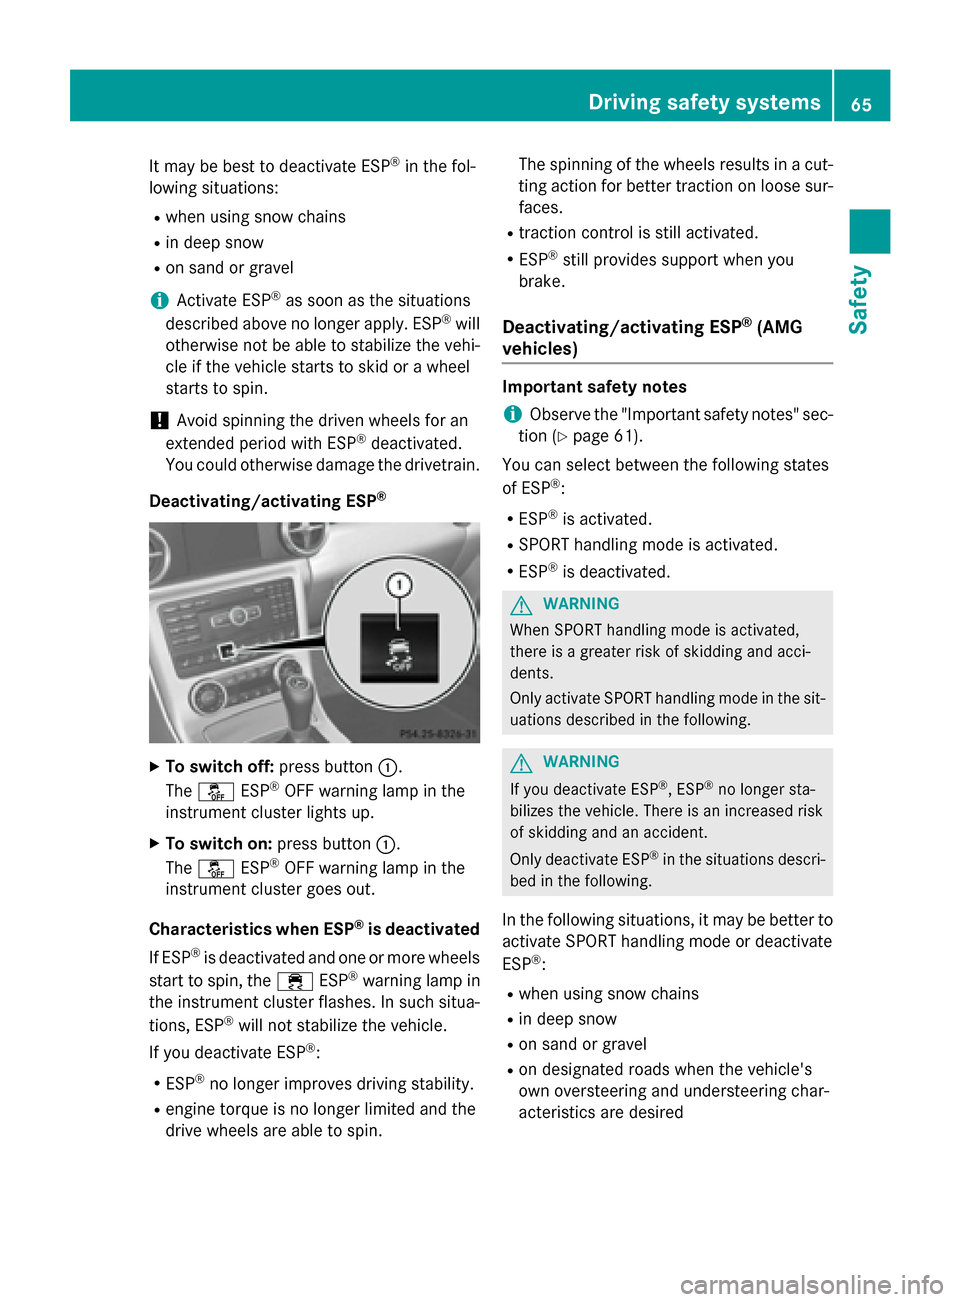
Deactivating/activating ESP ®X
To switch off: press button0043.
The 00BB ESP®
OFF warning lamp in the
instrument cluster lights up.
X To switch on: press button0043.
The 00BB ESP®
OFF warning lamp in the
instrument cluster goes out.
Characteristics when ESP ®
is deactivated
If ESP ®
is deactivated and one or more wheels
start to spin, the 00E5ESP®
warning lamp in
the instrument cluster flashes. In such situa-
tions, ESP ®
will not stabilize the vehicle.
If you deactivate ESP ®
:
R ESP ®
no longer improves driving stability.
R engine torque is no longer limited and the
drive wheels are able to spin. The spinning of the wheels results in a cut-
ting action for better traction on loose sur- faces.
R traction control is still activated.
R ESP ®
still provides support when you
brake.
Deactivating/activating ESP ®
(AMG
vehicles) Important safety notes
i Observe the "Important safety notes" sec-
tion (Y page 61).
You can select between the following states
of ESP ®
:
R ESP ®
is activated.
R SPORT handling mode is activated.
R ESP ®
is deactivated. G
WARNING
When SPORT handling mode is activated,
there is a greater risk of skidding and acci-
dents.
Only activate SPORT handling mode in the sit- uations described in the following. G
WARNING
If you deactivate ESP ®
, ESP ®
no longer sta-
bilizes the vehicle. There is an increased risk
of skidding and an accident.
Only deactivate ESP ®
in the situations descri-
bed in the following.
In the following situations, it may be better to activate SPORT handling mode or deactivate
ESP ®
:
R when using snow chains
R in deep snow
R on sand or gravel
R on designated roads when the vehicle's
own oversteering and understeering char-
acteristics are desired Driving safety systems
65Safety Z
Page 68 of 358

Driving in SPORT handling mode or without
ESP ®
requires an extremely qualified and
experienced driver.
i Activate ESP ®
as soon as the situations
described above no longer apply. ESP ®
will
otherwise not be able to stabilize the vehi-
cle if the vehicle starts to skid or a wheel
starts to spin.
! Avoid spinning the driven wheels for an
extended period with ESP ®
deactivated.
You could otherwise damage the drivetrain.
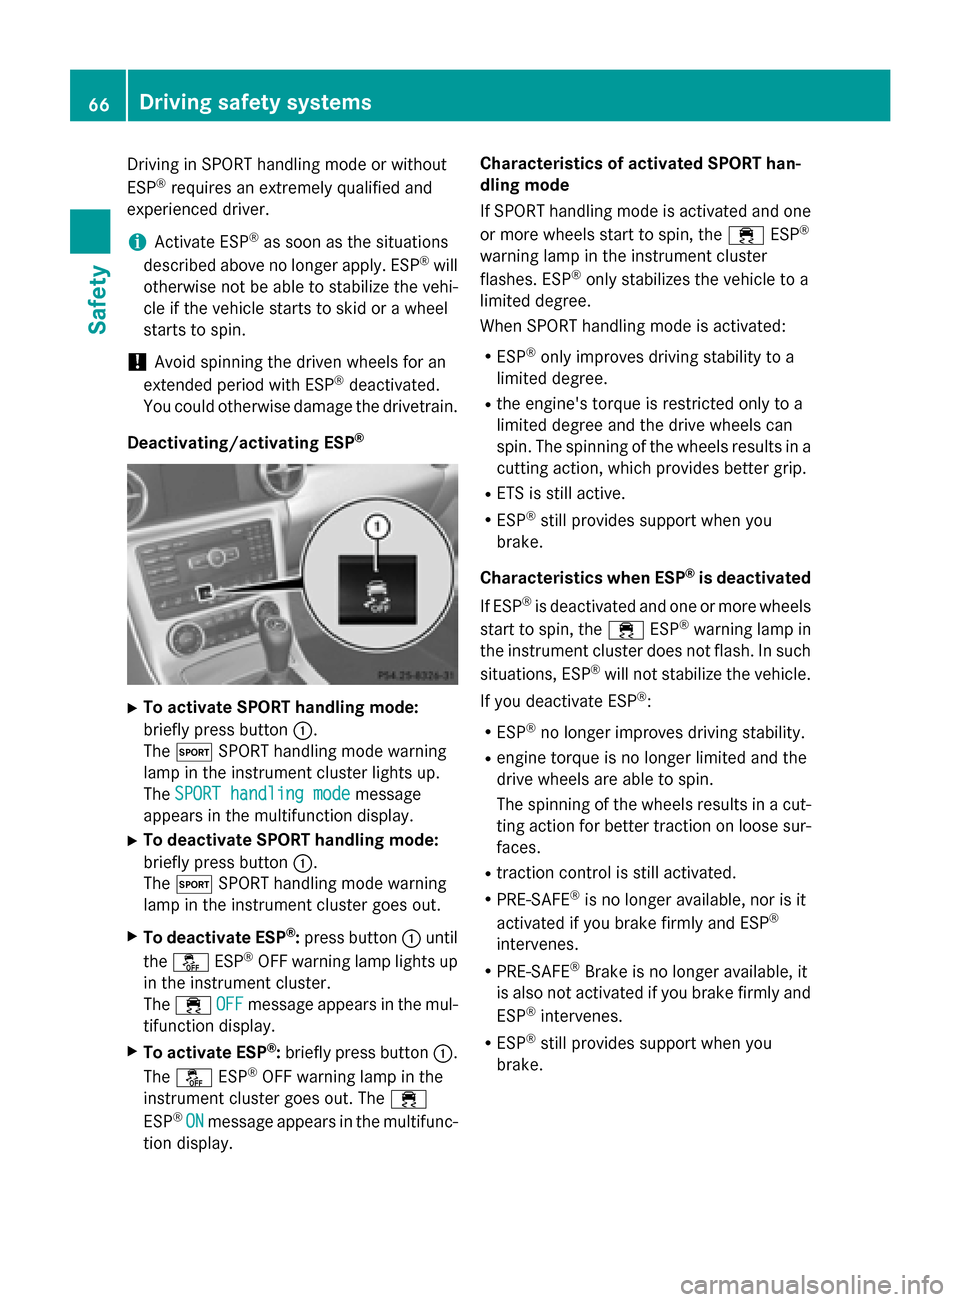
Deactivating/activating ESP ®X
To activate SPORT handling mode:
briefly press button 0043.
The 0074 SPORT handling mode warning
lamp in the instrument cluster lights up.
The SPORT handling mode
SPORT handling mode message
appears in the multifunction display.
X To deactivate SPORT handling mode:
briefly press button 0043.
The 0074 SPORT handling mode warning
lamp in the instrument cluster goes out.
X To deactivate ESP ®
:press button 0043until
the 00BB ESP®
OFF warning lamp lights up
in the instrument cluster.
The 00E5 OFF
OFF message appears in the mul-
tifunction display.
X To activate ESP ®
:briefly press button 0043.
The 00BB ESP®
OFF warning lamp in the
instrument cluster goes out. The 00E5
ESP ®
ON
ON message appears in the multifunc-
tion display. Characteristics of activated SPORT han-
dling mode
If SPORT handling mode is activated and one
or more wheels start to spin, the 00E5ESP®
warning lamp in the instrument cluster
flashes. ESP ®
only stabilizes the vehicle to a
limited degree.
When SPORT handling mode is activated:
R ESP ®
only improves driving stability to a
limited degree.
R the engine's torque is restricted only to a
limited degree and the drive wheels can
spin. The spinning of the wheels results in a
cutting action, which provides better grip.
R ETS is still active.
R ESP ®
still provides support when you
brake.
Characteristics when ESP ®
is deactivated
If ESP ®
is deactivated and one or more wheels
start to spin, the 00E5ESP®
warning lamp in
the instrument cluster does not flash. In such
situations, ESP ®
will not stabilize the vehicle.
If you deactivate ESP ®
:
R ESP ®
no longer improves driving stability.
R engine torque is no longer limited and the
drive wheels are able to spin.
The spinning of the wheels results in a cut-
ting action for better traction on loose sur- faces.
R traction control is still activated.
R PRE-SAFE ®
is no longer available, nor is it
activated if you brake firmly and ESP ®
intervenes.
R PRE-SAFE ®
Brake is no longer available, it
is also not activated if you brake firmly and
ESP ®
intervenes.
R ESP ®
still provides support when you
brake. 66
Driving safety systemsSafety
Page 338 of 358

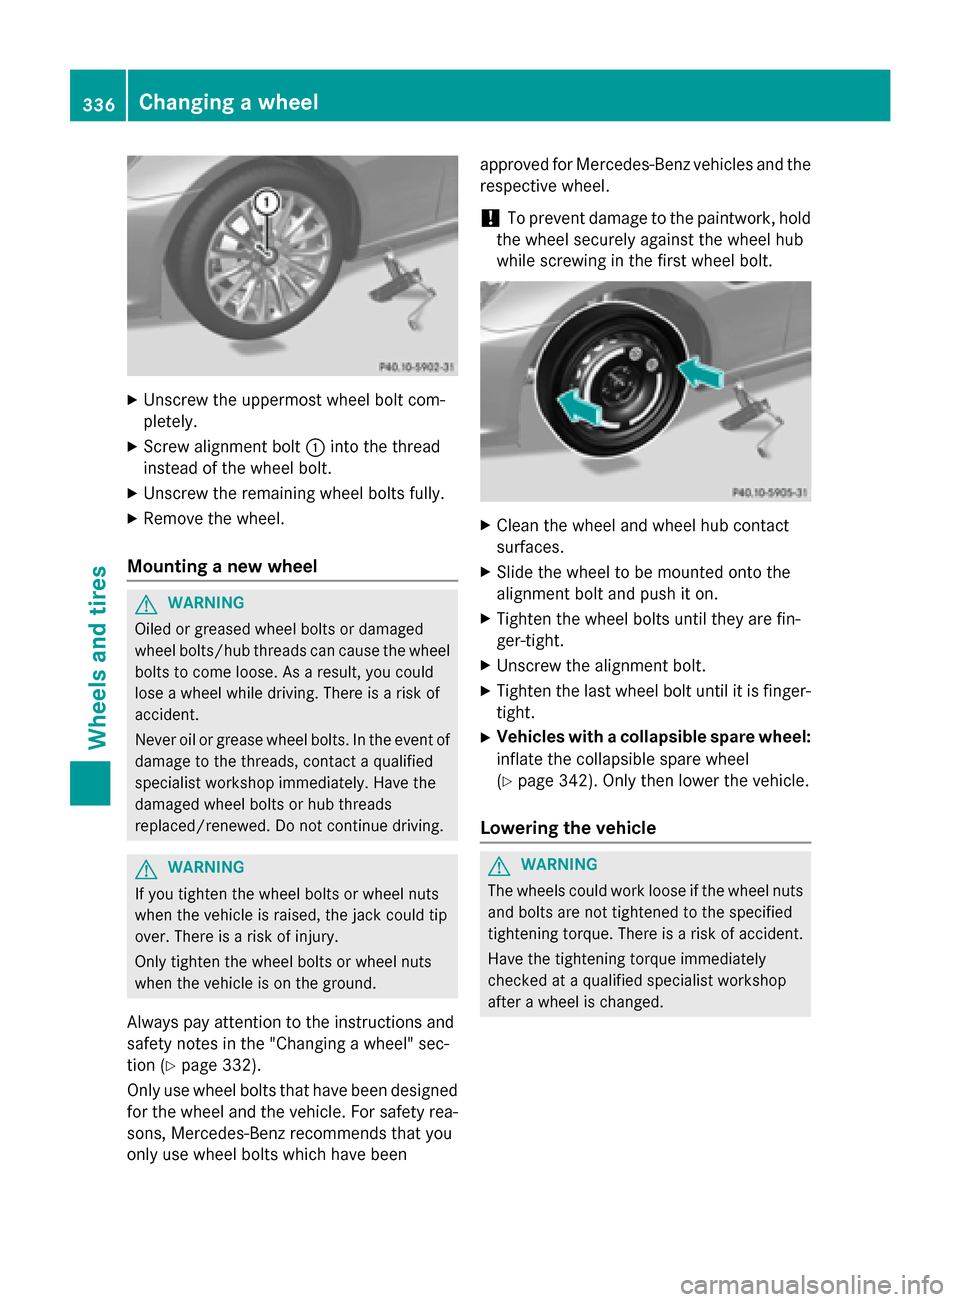
X
Unscrew the uppermost wheel bolt com-
pletely.
X Screw alignment bolt 0043into the thread
instead of the wheel bolt.
X Unscrew the remaining wheel bolts fully.
X Remove the wheel.
Mounting a new wheel G
WARNING
Oiled or greased wheel bolts or damaged
wheel bolts/hub threads can cause the wheel bolts to come loose. As a result, you could
lose a wheel while driving. There is a risk of
accident.
Never oil or grease wheel bolts. In the event ofdamage to the threads, contact a qualified
specialist workshop immediately. Have the
damaged wheel bolts or hub threads
replaced/renewed. Do not continue driving. G
WARNING
If you tighten the wheel bolts or wheel nuts
when the vehicle is raised, the jack could tip
over. There is a risk of injury.
Only tighten the wheel bolts or wheel nuts
when the vehicle is on the ground.
Always pay attention to the instructions and
safety notes in the "Changing a wheel" sec-
tion (Y page 332).
Only use wheel bolts that have been designed for the wheel and the vehicle. For safety rea-
sons, Mercedes-Benz recommends that you
only use wheel bolts which have been approved for Mercedes-Benz vehicles and the
respective wheel.
! To prevent damage to the paintwork, hold
the wheel securely against the wheel hub
while screwing in the first wheel bolt. X
Clean the wheel and wheel hub contact
surfaces.
X Slide the wheel to be mounted onto the
alignment bolt and push it on.
X Tighten the wheel bolts until they are fin-
ger-tight.
X Unscrew the alignment bolt.
X Tighten the last wheel bolt until it is finger-
tight.
X Vehicles with a collapsible spare wheel:
inflate the collapsible spare wheel
(Y page 342). Only then lower the vehicle.
Lowering the vehicle G
WARNING
The wheels could work loose if the wheel nuts and bolts are not tightened to the specified
tightening torque. There is a risk of accident.
Have the tightening torque immediately
checked at a qualified specialist workshop
after a wheel is changed. 336
Changing a wheelWheels and tires
Page 339 of 358

X
Turn the crank of the jack counter-clock-
wise until the vehicle is once again standing
firmly on the ground.
X Place the jack to one side.
X Tighten the wheel bolts evenly in a cross-
wise pattern in the sequence indicated ( 0043
to 0083). The specified tightening torque is
96 lb-ft (130 Nm).
X Turn the jack back to its initial position.
X Stow the jack and the rest of the vehicle
tools in the trunk again.
X AMG vehicles and vehicles with AMG
equipment: insert the cover into the outer
sill.
X Check the tire pressure of the newly moun-
ted wheel and adjust it if necessary.
Observe the recommended tire pressure
(Y page 314).
i When you are driving with the collapsible
spare wheel mounted, the tire pressure
loss warning system or the tire pressure
monitor cannot function reliably. Only
restart the tire pressure loss warning sys-
tem/the tire pressure monitor when the
damaged wheel has been replaced with a
new wheel.
Vehicles with a tire pressure control
system: all installed wheels must be equip-
ped with functioning sensors. Wheel and tire combinations
General notes
! For safety reasons, Mercedes-Benz rec-
ommends that you only use tires and
wheels which have been approved by
Mercedes-Benz specifically for your vehi-
cle.
These tires have been specially adapted for use with the control systems, such as ABS
or ESP ®
, and are marked as follows:
R MO = Mercedes-Benz Original
R MOE = Mercedes-Benz Original Extended
(tires featuring run-flat characteristics)
R MO1 = Mercedes-Benz Original (only cer-
tain AMG tires)
Mercedes-Benz Original Extended tires
may only be used on wheels that have been
specifically approved by Mercedes-Benz.
Only use tires, wheels or accessories tes-
ted and approved by Mercedes-Benz. Cer-
tain characteristics, e.g. handling, vehicle
noise emissions or fuel consumption, may
otherwise be adversely affected. In addi-
tion, when driving with a load, tire dimen-
sion variations could cause the tires to
come into contact with the bodywork and
axle components. This could result in dam- age to the tires or the vehicle.
Mercedes-Benz accepts no liability for
damage resulting from the use of tires,
wheels or accessories other than those tes-
ted and approved.
Information on tires, wheels and approved
combinations can be obtained from any
qualified specialist workshop.
! Retreaded tires are neither tested nor rec-
ommended by Mercedes-Benz, since pre-
vious damage cannot always be detected
on retreaded tires. As a result, Mercedes-
Benz cannot guarantee vehicle safety if
retreaded tires are mounted. Do not mount used tires if you have no information about
their previous usage. Wheel and tire combinations
337Wheels and tires Z