2015 MERCEDES-BENZ SLK-Class center console
[x] Cancel search: center consolePage 81 of 358
X
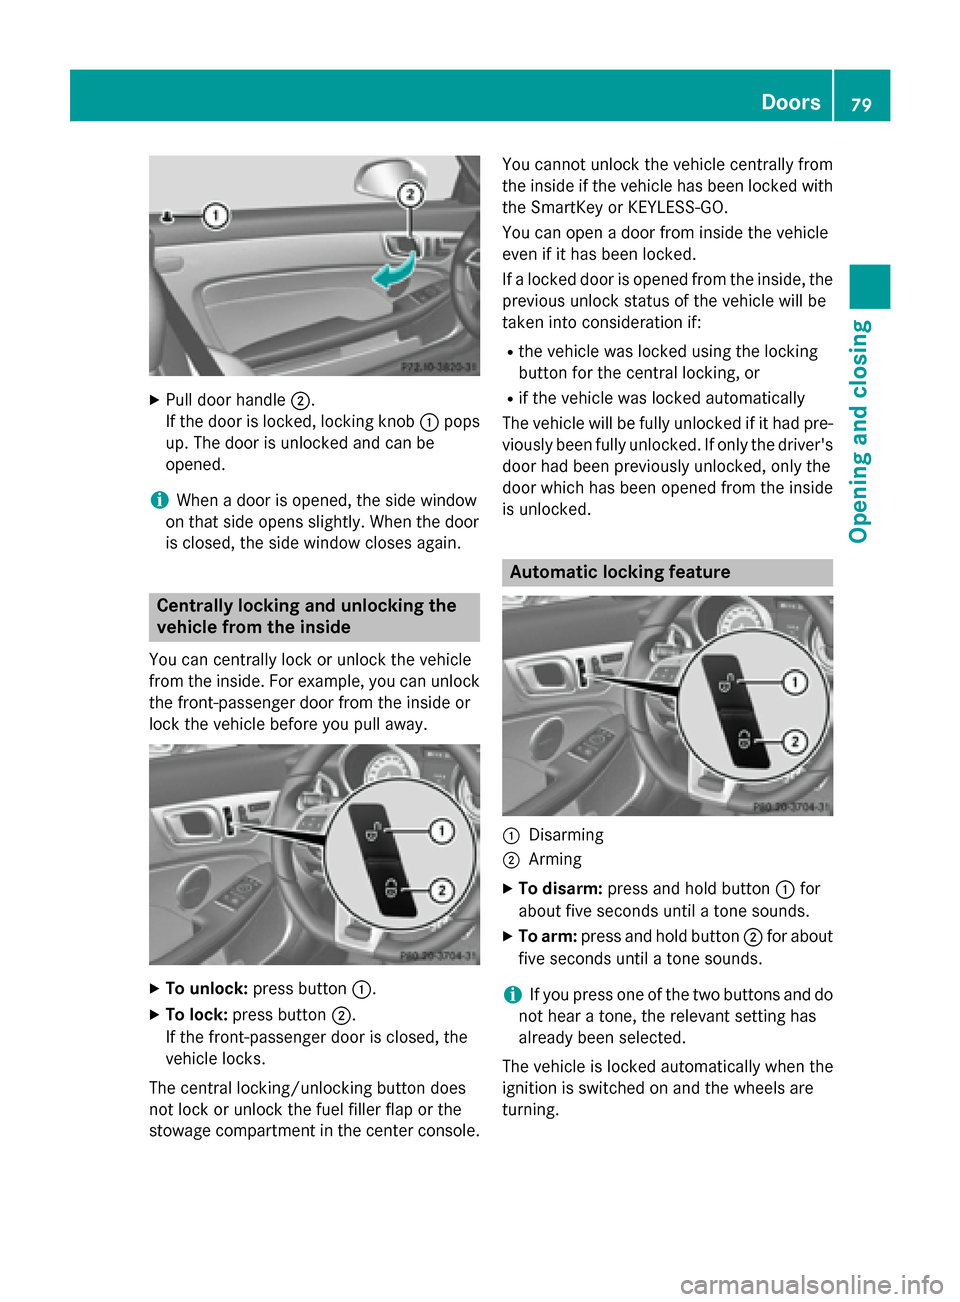
Pull door handle 0044.
If the door is locked, locking knob 0043pops
up. The door is unlocked and can be
opened.
i When a door is opened, the side window
on that side opens slightly. When the door
is closed, the side window closes again. Centrally locking and unlocking the
vehicle from the inside
You can centrally lock or unlock the vehicle
from the inside. For example, you can unlock
the front-passenger door from the inside or
lock the vehicle before you pull away. X
To unlock: press button 0043.
X To lock: press button 0044.
If the front-passenger door is closed, the
vehicle locks.
The central locking/unlocking button does
not lock or unlock the fuel filler flap or the
stowage compartment in the center console. You cannot unlock the vehicle centrally from
the inside if the vehicle has been locked with
the SmartKey or KEYLESS-GO.
You can open a door from inside the vehicle
even if it has been locked.
If a locked door is opened from the inside, the
previous unlock status of the vehicle will be
taken into consideration if:
R the vehicle was locked using the locking
button for the central locking, or
R if the vehicle was locked automatically
The vehicle will be fully unlocked if it had pre- viously been fully unlocked. If only the driver's
door had been previously unlocked, only the
door which has been opened from the inside
is unlocked. Automatic locking feature
0043
Disarming
0044 Arming
X To disarm: press and hold button 0043for
about five seconds until a tone sounds.
X To arm: press and hold button 0044for about
five seconds until a tone sounds.
i If you press one of the two buttons and do
not hear a tone, the relevant setting has
already been selected.
The vehicle is locked automatically when the
ignition is switched on and the wheels are
turning. Doors
79Opening and closing Z
Page 86 of 358

dows from traveling upwards during the auto-
matic closing process, the side window opens again automatically. During the manual clos-
ing process, the side window only opens
again automatically after the corresponding
switch is released. However, the automatic
reversing feature is only an aid and does not
relieve you of the responsibility of paying
attention when closing a side window. G
WARNING
The reversing feature does not react:
R to soft, light and thin objects, e.g. small fin-
gers
R while resetting
This means that the reversing feature cannot
prevent someone being trapped in these sit-
uations. There is a risk of injury.
Make sure that no body parts are in close
proximity during the closing procedure. If
someone becomes trapped, press the switch
to open the side window again. Opening and closing the side win-
dows in the front
The switches for the front side windows are
located on the driver's door. There is also a
switch for the front-passenger side window
on the front-passenger door.
The switches on the driver's door take prec-
edence. 0043
Left
0044 Right X
Turn the SmartKey to position 1or 2in the
ignition lock.
X To open manually: press and hold the cor-
responding button.
X To open fully: press the button beyond the
point of resistance and release it.
Automatic closing is started.
X To close manually: pull the corresponding
button and hold it.
X To close fully: pull the button beyond the
point of resistance and release it.
Automatic closing is started.
X To interrupt automatic operation: press
or pull the corresponding switch again.
i You can continue to operate the side win-
dows after you switch off the engine. This
function is available for up to five minutes
or until the driver's or front-passenger door
is opened. Opening and closing all side windows
Using the switch on the center console You can use the switch on the center console
to close all side windows simultaneously.
X Open the cover in the lower center console.
The switch for all side windows is under the cover. 84
Side windowsOpening and closing
Page 87 of 358

X
To open all side windows: press
switch 0043to the point of resistance.
X To open all side windows fully: press
switch 0043beyond the point of resistance.
All side windows open simultaneously.
i If, after opening the windows, you then
close a side window using the switch on the door control panel, the other side windows
will remain open. To close the other side
windows, you must pull the switch on the
center console and hold it. The front side
window will close first, then the rear side
windows.
X To close all side windows: pull switch0043.
The rear side windows close after the front
side windows.
X Make sure that all the side windows are
fully closed.
i When the roof is open, only the two front
side windows can be operated using the
switch on the center console.
Using the SmartKey G
WARNING
When using the convenience closing feature,
parts of the body could be trapped in the clos- ing area when a side window is being closed. There is a risk of injury.
Observe the complete closing procedure
when the convenience closing feature is oper-
ating. Make sure that no body parts are in
close proximity during the closing procedure.
If someone is trapped: X Release the 0037button immediately.
X Press and hold the 0036button until the
side windows open again.
You can use the SmartKey to open or close all
side windows simultaneously.
X Close the roof (Y page 88).
X Open the trunk partition (Y page 89).
X Point the tip of the SmartKey at the driver's
door handle. X
To open all side windows: press the0036
button on the SmartKey until the side win-
dows are fully opened.
X To interrupt the opening procedure:
release the 0036button.
X To close all side windows: press the
0037 button on the SmartKey until the side
windows are fully closed.
X To interrupt the closing procedure:
release the 0037button.
Convenience closing with KEYLESS-GO G
WARNING
When using the convenience closing feature,
parts of the body could be trapped in the clos- ing area when a side window is being closed. There is a risk of injury.
Observe the complete closing procedure
when the convenience closing feature is oper-
ating. Make sure that no body parts are in
close proximity during the closing procedure.
If someone is trapped: X Release the recessed sensor surface on the
door handle immediately.
X Pull the door handle immediately and hold
it until the side windows open again.
With KEYLESS-GO you can close all side win-
dows simultaneously. The KEYLESS-GO key
must be outside the vehicle. All the doors
must be closed. Side windows
85Opening and closing Z
Page 90 of 358
R
there is sufficient clearance, as the roof
swings upwards.
R there is sufficient clearance behind the
vehicle, as the trunk lid swings back-
wards beyond the bumper.
R the trunk is only loaded to below the
trunk partition.
R the trunk partition is not pushed up by
the load.
R the trunk partition is closed.
R the trunk lid is closed.
R the outside temperature is above 5 ‡
(00F815 †).
You could otherwise damage the roof,
trunk and other parts of the vehicle.
i Vehicle dimensions when opening/clos-
ing the roof (Y page 353).
i Make sure that the roof and rear window
are clean and dry before opening the roof.
Otherwise, water or dirt could enter the
vehicle interior or trunk. Opening and closing using the roof
switch
Important safety notes G
WARNING
When opening or closing the roof, body parts could be trapped by, for example, the roof
mechanism, trunk lid or side windows. There
is a risk of injury.
When raising or lowering the roof, make sure
that no body parts are in the vicinity of moving
components. If someone becomes trapped,
release the button. Opening and closing X
Secure the vehicle against rolling away
(Y page 161).
X Close the trunk partition (Y page 90).
X Close the trunk lid.
X Turn the SmartKey to position 2in the igni-
tion lock.
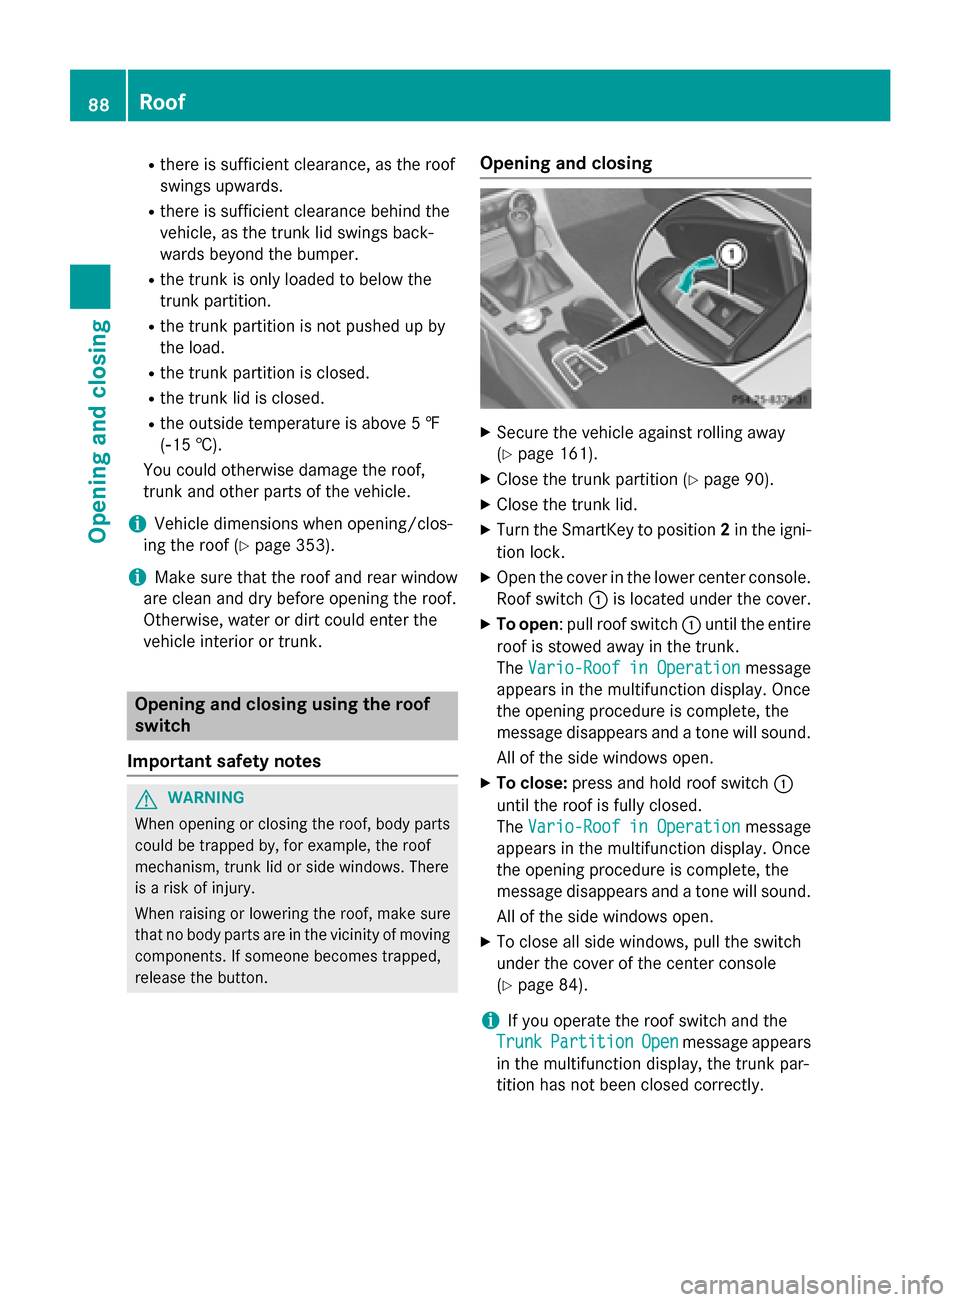
X Open the cover in the lower center console.
Roof switch 0043is located under the cover.
X To open: pull roof switch 0043until the entire
roof is stowed away in the trunk.
The Vario-Roof in Operation
Vario-Roof in Operation message
appears in the multifunction display. Once
the opening procedure is complete, the
message disappears and a tone will sound.
All of the side windows open.
X To close: press and hold roof switch 0043
until the roof is fully closed.
The Vario-Roof in Operation Vario-Roof in Operation message
appears in the multifunction display. Once
the opening procedure is complete, the
message disappears and a tone will sound.
All of the side windows open.
X To close all side windows, pull the switch
under the cover of the center console
(Y page 84).
i If you operate the roof switch and the
Trunk
Trunk Partition Partition Open
Openmessage appears
in the multifunction display, the trunk par-
tition has not been closed correctly. 88
RoofOpening and closing
Page 160 of 358
Problems with the transmission
Problem
Possible causes/consequences and
0050
0050Solutions The transmission has
problems shifting gear. The transmission is losing oil.
X Have the transmission checked at a qualified specialist work-
shop immediately. The acceleration ability
is deteriorating.
The transmission no
longer changes gear. The transmission is in emergency mode.
It is only possible to shift into
secondgear and reverse gear.
X Stop the vehicle.
X Shift the transmission to position P.
X Switch off the engine.
X Wait at least ten seconds before restarting the engine.
X Shift the transmission to position Dor R.
If D is selected, the transmission shifts into secondgear; ifRis
selected, the transmission shifts into reverse gear.
X Have the transmission checked at a qualified specialist work-
shop, e.g. an authorized Mercedes-Benz Center, immediately. Releasing the parking lock manually
! Do not use any sharp-edged objects to
remove the selector lever gaiter from the
center console. This could damage the
selector lever gaiter. X
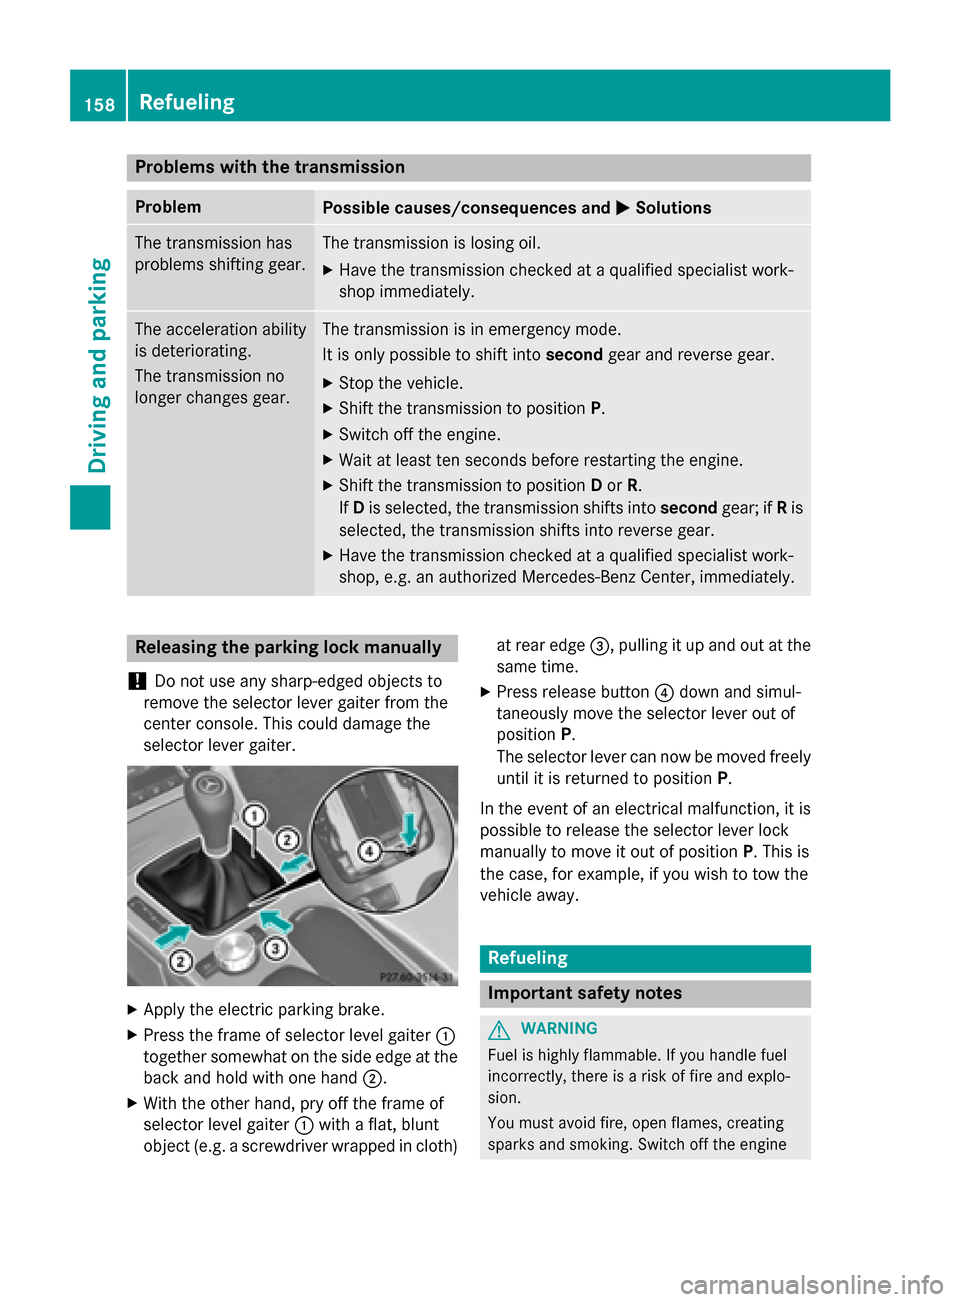
Apply the electric parking brake.
X Press the frame of selector level gaiter 0043
together somewhat on the side edge at the back and hold with one hand 0044.
X With the other hand, pry off the frame of
selector level gaiter 0043with a flat, blunt
object (e.g. a screwdriver wrapped in cloth) at rear edge
0087, pulling it up and out at the
same time.
X Press release button 0085down and simul-
taneously move the selector lever out of
position P.
The selector lever can now be moved freely
until it is returned to position P.
In the event of an electrical malfunction, it is
possible to release the selector lever lock
manually to move it out of position P. This is
the case, for example, if you wish to tow the
vehicle away. Refueling
Important safety notes
G
WARNING
Fuel is highly flammable. If you handle fuel
incorrectly, there is a risk of fire and explo-
sion.
You must avoid fire, open flames, creating
sparks and smoking. Switch off the engine 158
RefuelingDriving and parking
Page 225 of 358
Display messages
Possible causes/consequences and
0050
0050Solutions Front-Passenger
Front-Passenger
Airbag Disabled Airbag Disabled
See See
Operator's
Operator's Man‐
Man‐
ual
ual The front-passenger air bag and front-passenger knee bag are
deactivated during the journey, although:
R an adult
or
R a person larger than a certain size is occupying the front-
passenger seat
If additional forces are applied to the seat, the system may inter-
pret the occupant's weight as lower than it actually is.
G WARNING
The front-passenger front air bag and front passenger knee bag
may not be triggered in the event of an accident.
There is an increased risk of injury.
X Pull over and stop the vehicle safely as soon as possible, paying
attention to road and traffic conditions.
X Secure the vehicle against rolling away (Y page 161).
X Switch the ignition off.
X Have the occupant get out of the vehicle.
X Keep the seat unoccupied, close the front-passenger door and
switch on the ignition.
X Observe the PASSENGER AIR BAG OFF indicator lamp in the
center console and the multifunction display and check the fol-
lowing:
Seat unoccupied and ignition switched on:
R the PASSENGER AIR BAG OFF indicator lamp must light up
and remain lit. If the indicator lamp is on, OCS has deactivated
the front-passenger air bag and front-passenger knee bag
(Y page 49).
R the Front
Front Passenger Passenger Airbag
AirbagEnabled
Enabled See
See Operator's
Operator's
Manual
Manual orFront
Front Passenger
Passenger Airbag
AirbagDisabled
Disabled See
SeeOper‐
Oper‐
ator's Manual
ator's Manual display messages must not be shown in the
multifunction display.
X Wait for a period of at least 60 seconds until the necessary sys-
tem checks have been completed.
X Make sure that the display messages do not appear in the mul-
tifunction display.
If these conditions are fulfilled, the front-passenger seat can be
occupied again. Whether the PASSENGER AIR BAG OFF indicator
lamp remains lit or goes out depends on how OCS classifies the
occupant.
If the conditions are not fulfilled, the system is not operating cor- rectly. Display
messages
223On-board computer and displays Z
Page 226 of 358
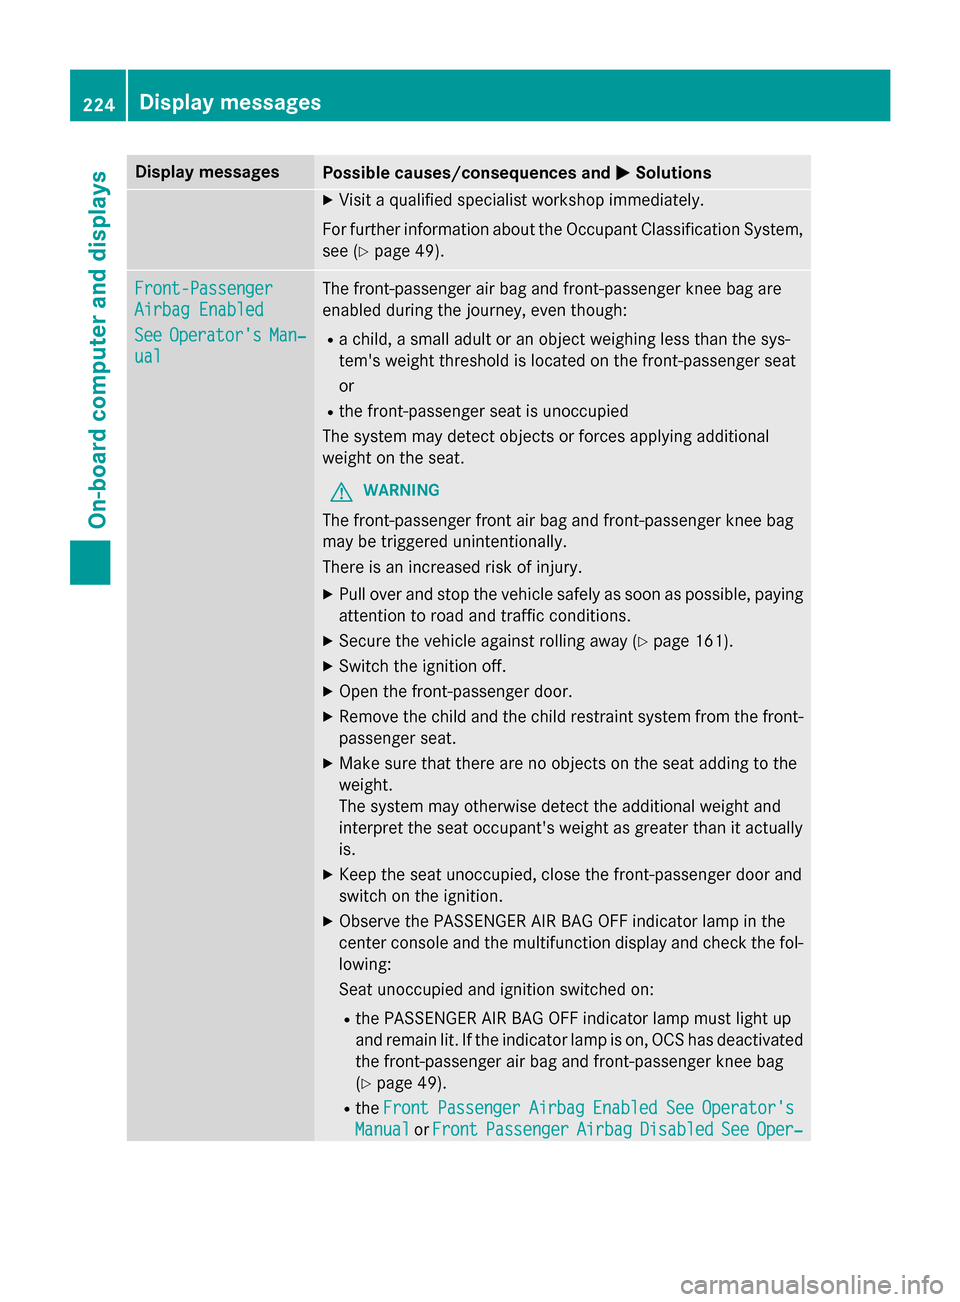
Display messages
Possible causes/consequences and
0050
0050Solutions X
Visit a qualified specialist workshop immediately.
For further information about the Occupant Classification System, see (Y page 49). Front-Passenger
Front-Passenger
Airbag Enabled Airbag Enabled
See See
Operator's
Operator's Man‐
Man‐
ual
ual The front-passenger air bag and front-passenger knee bag are
enabled during the journey, even though:
R a child, a small adult or an object weighing less than the sys-
tem's weight threshold is located on the front-passenger seat
or
R the front-passenger seat is unoccupied
The system may detect objects or forces applying additional
weight on the seat.
G WARNING
The front-passenger front air bag and front-passenger knee bag
may be triggered unintentionally.
There is an increased risk of injury. X Pull over and stop the vehicle safely as soon as possible, paying
attention to road and traffic conditions.
X Secure the vehicle against rolling away (Y page 161).
X Switch the ignition off.
X Open the front-passenger door.
X Remove the child and the child restraint system from the front-
passenger seat.
X Make sure that there are no objects on the seat adding to the
weight.
The system may otherwise detect the additional weight and
interpret the seat occupant's weight as greater than it actually
is.
X Keep the seat unoccupied, close the front-passenger door and
switch on the ignition.
X Observe the PASSENGER AIR BAG OFF indicator lamp in the
center console and the multifunction display and check the fol-
lowing:
Seat unoccupied and ignition switched on:
R the PASSENGER AIR BAG OFF indicator lamp must light up
and remain lit. If the indicator lamp is on, OCS has deactivated
the front-passenger air bag and front-passenger knee bag
(Y page 49).
R the Front
Front Passenger Passenger Airbag
AirbagEnabled
Enabled See
SeeOperator's
Operator's
Manual
Manual orFront
Front Passenger
Passenger Airbag
AirbagDisabled
Disabled See
SeeOper‐
Oper‐ 224
Display
messagesOn-board computer and displays
Page 259 of 358

Stowage compartment/telephone
compartment under the armrest
X
To open: push button 0043up and raise arm-
rest 0044.
The stowage compartment can be locked and
unlocked centrally using the SmartKey
(Y page 72).
i Depending on the vehicle equipment, a
12 V power socket, USB port or a Media
Interface is installed in the stowage com-
partment. A Media Interface is a universal
interface for mobile audio equipment, e.g.
for an iPod ®
or MP3 player (see the sepa-
rate COMAND Operating Instructions).
Eyeglasses compartment X
To open: press marking 0043.
Make sure that the eyeglasses compartment
is always closed while the vehicle is in motion. Stowage compartment in the center
console
X
To open: briefly press the lower section of
cover 0043.
X To remove the insert: pull the left-hand
side of the insert up and out.
X To install the insert: press the insert into
the housing.
Depending on the vehicle equipment, there
may be an ashtray in the center console
instead of a storage compartment.
Stowage compartment in the doors In the door trim, there is a ruffled pocket
0044
with storage slot 0043.
Stowage box in the rear wall between
the seats A ruffled pocket is located on the rear wall
between the seats. Stowage areas
257Stowage and features Z